HowardH
Member
- Joined
- Jan 23, 2007
- Messages
- 1,572
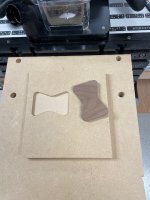
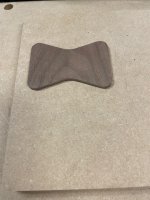
I got the machine about a week ago (early Christmas present to myself) and already have been learning things. One of the things I wanted to try out first was the inlay functionality. They have a butterfly inlay file ready to go so that's what I used. It really is as easy as they say it is. There are few rules you need follow, ie. don't set the depth of cut deeper than the diameter of the bit, figuring out whether you need to cut inside the line, outside the line or on the line. That will come with more familiarity. These are my first attempt at doing an inlay. I purposely left the pocket shallow so I could get the inlay piece in and out easily.
View attachment 1
View attachment 2
The real issue, at least for me, how to get familiar and at least capable with Affinity Designer. For example, I have a longhorn logo I want to convert to an outline the SO can recognize so I can use it for an inlay. It's probably not hard but I have to figure that out somehow. I will say the machine performs as described and the fun factor is pegged. I have a number of templates I want to make for cutting/cheese board designs.