Gothic Garden Bench

Ajax

Member
Joined
May 24, 2013
Messages
206
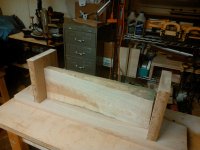
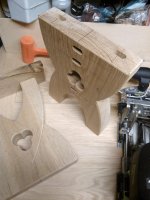
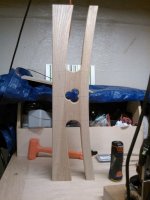
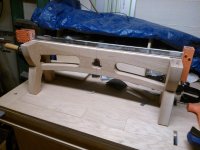
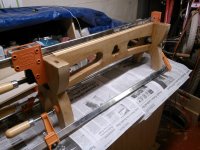
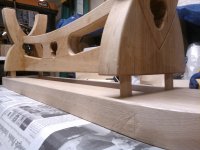
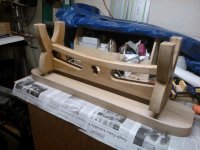
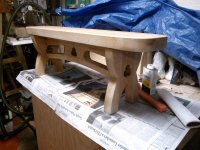
This is a project I completed last Spring.  I thought I would give Peter's Gothic Garden Bench a try using my new Domino XL700.  My build process was different than Peter's. 


Whereas Peter used Festool's OF1400, Carvex, and Rotex 150 to get the seat, legs, and trestle to form and then used long screws to connect everything, I used the following:

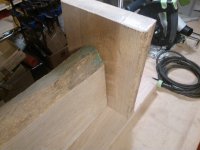
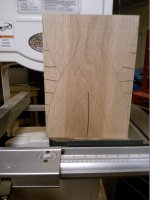
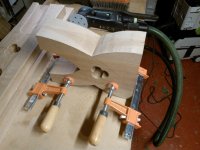
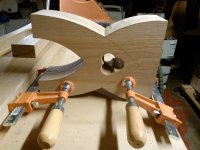
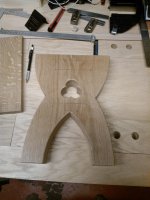
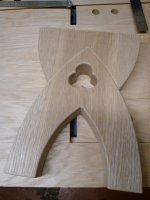
1) Festool TS55 to rough cut the various pieces (seat, legs, and trestle); I started with a single piece of white oak
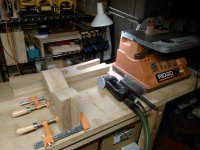
2) Ridgid jointer and Makita planer to dimension the pieces
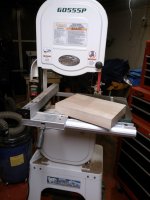
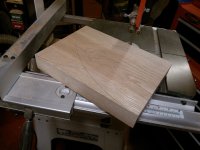
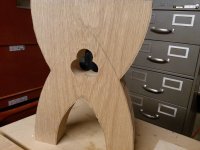
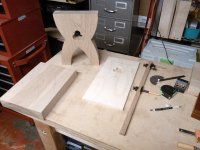
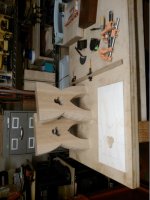
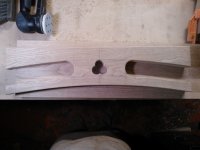
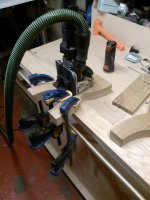
3) Grizzly Bandsaw and Bosch router (w/circle jig) for more intricate cuts
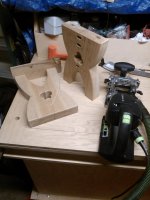
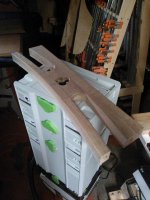
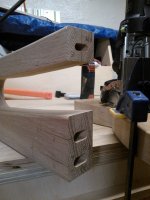
4) Domino 500 and Domino XL700 for ALL joinery (I opted for epoxy rather than Titebond III and I used cut-to-length domino stock, not Sipo)
5) Rotex 90 and 150 for final sanding
6) General Finishes water-based sealer


Attachments

  • WP_001294.jpg
    WP_001294.jpg
    308.9 KB · Views: 328
  • WP_001296.jpg
    WP_001296.jpg
    328.5 KB · Views: 301
  • WP_001303.jpg
    WP_001303.jpg
    263.4 KB · Views: 311
  • WP_001305.jpg
    WP_001305.jpg
    287.4 KB · Views: 315
  • WP_001306.jpg
    WP_001306.jpg
    254.5 KB · Views: 297
There are not many cuts in this project.  They key is accurate layout.  I took screen shots of Peter's Youtube and scaled everything based on a known size.  I made my bench 3:4 of Peter's.  I did this because a) my stock was not wide enough to fit Peter's specs, b) the bench is for my 4 year old daughter.
 

Attachments

  • WP_001301.jpg
    WP_001301.jpg
    346.2 KB · Views: 284
  • WP_001300.jpg
    WP_001300.jpg
    1.1 MB · Views: 291
  • WP_001299.jpg
    WP_001299.jpg
    1.1 MB · Views: 264
Now that the legs are cut, it's time for clean-up.  Rotex 90 put to work.


Attachments

  • WP_001309.jpg
    WP_001309.jpg
    261.3 KB · Views: 289
  • WP_001311.jpg
    WP_001311.jpg
    340.6 KB · Views: 271
  • WP_001315.jpg
    WP_001315.jpg
    358.6 KB · Views: 291
Same approach for the trestle: bandsaw for cuts, drill using 3-hole template, clean-up using Rotex 90, Ridgid sander, and hand sanding.  All edges then cleaned up with a 1/8" roundover.
 

Attachments

  • WP_001314.jpg
    WP_001314.jpg
    405.1 KB · Views: 276
  • WP_001316.jpg
    WP_001316.jpg
    316.1 KB · Views: 284
  • WP_001312.jpg
    WP_001312.jpg
    904.8 KB · Views: 283
Time for some Domino work....the legs...


Attachments

  • WP_001361.jpg
    WP_001361.jpg
    307.6 KB · Views: 279
  • WP_001362.jpg
    WP_001362.jpg
    282.8 KB · Views: 249
  • WP_001364.jpg
    WP_001364.jpg
    281.6 KB · Views: 257
Each leg gets 5 mortises....2 for connecting the top, 3 for connecting the trestle.  Again, layout and smooth slow plunging is everything.  The 500 and 700 are accurate if you go slow and don't try to force things.


Attachments

  • WP_001373.jpg
    WP_001373.jpg
    282.8 KB · Views: 262
  • WP_001374.jpg
    WP_001374.jpg
    336.2 KB · Views: 270
Now for the trestle...again, layout is everything...then smooth slow plunging with the 700...


Attachments

  • WP_001365.jpg
    WP_001365.jpg
    390.3 KB · Views: 268
  • WP_001366.jpg
    WP_001366.jpg
    295.4 KB · Views: 277
  • WP_001368.jpg
    WP_001368.jpg
    259.1 KB · Views: 271
  • WP_001369.jpg
    WP_001369.jpg
    239.5 KB · Views: 262
The moment of truth...dry fit the legs to the trestle...cross fingers, insert sanded-down dominoes, and pound away with the deadblow hammer.  Use clamps for final fit. 

SUCCESS. 

Now take apart, get out the epoxy, and put it together.


Attachments

  • WP_001375.jpg
    WP_001375.jpg
    286.1 KB · Views: 300
  • WP_001376.jpg
    WP_001376.jpg
    353.8 KB · Views: 283
Give it a day to dry and then go for the top. 

Again, layout is key (I don't have pics of the layout marks on the top).  Then make smooth plunges with the 700 into the top.  I forgot to take pictures of that process, but the trick was to go slow and to secure the 700 as much as possible to the flat workpiece because it tended to slide a little as it started to cut.  One thing I did was to clamp down blocks around the fence of the 700 to prevent it from "walking" as I made my 4 vertical plunges into the the underside of the bench top.

SUCCESS

After dry fit I got out the epoxy and connected the base to the top.

I then spent some time cleaning up the bench with the Rotex 90 and 150 and some hand sanding.  I used a General Finishes' Exterior 450 Clear Water Based Topcoat.  I was less impressed with this finish.  Peter used his beloved Osmo finish on his bench.  I couldn't find this Osmo product state-side.
 

Attachments

  • WP_001379.jpg
    WP_001379.jpg
    294.7 KB · Views: 302
  • WP_001378.jpg
    WP_001378.jpg
    291.1 KB · Views: 270
  • WP_001381.jpg
    WP_001381.jpg
    378.1 KB · Views: 322
Excellent piece of work and I feel flattered that you have kept to the overall design. What an interesting coincidence - my bench was made for my daughter too.

The key difference is that you have used some lovely lumps of oak - mine all came from the skip at the timber yard and cost me nothing. At one stage I nearly cut the pieces up for firewood but I realised that I could bring it to life.

Super piece of work and I know one 4 year old young lady is going to love her daddy.

Peter

[attachimg=1]
 

Attachments

  • Gothic Bench 2.jpg
    Gothic Bench 2.jpg
    407.7 KB · Views: 1,147
Thanks Peter and Ajax.  I am going to have to build one of these Gothic Garden Benches.

Bought the wood for my MFT cart this weekend.  The weather here in Atlanta is starting to get cooler, so I'm looking forward to cranking up the woodworking projects.

Don't have a planer yet or the room for it, so looks like I'm going to have to buy a Rotex 150.    ;D
 
GREAT JOB! And thanks for the detailed documentation on it.

You should consider printing it out - perhaps in book form - and giving it to your daughter as a keepsake?
 
Peter Parfitt said:
Excellent piece of work and I feel flattered that you have kept to the overall design. What an interesting coincidence - my bench was made for my daughter too.

The key difference is that you have used some lovely lumps of oak - mine all came from the skip at the timber yard and cost me nothing. At one stage I nearly cut the pieces up for firewood but I realised that I could bring it to life.

Super piece of work and I know one 4 year old young lady is going to love her daddy.

Peter

Thanks Peter.  It's a fun project: just 4 pieces but a variety of ways that it can be done.  In the end you have a beautiful but sturdy bench that everybody can enjoy.

BTW: you do a great service to the woodworking community with your videos.  I like how you present your material and you always leave me inspired to do more with woodworking.
 
Back
Top