Help with beveled plywood assembly please

StevoWevo

Member
Joined
Dec 21, 2019
Messages
47
Hi guys,
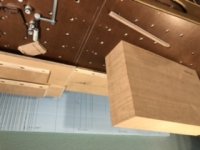
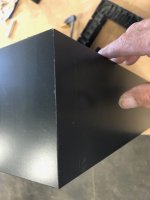
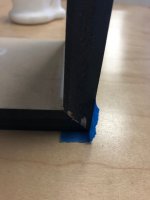
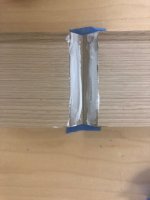
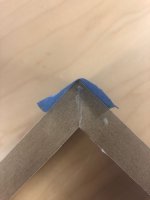
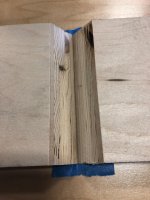
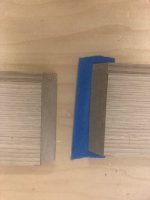
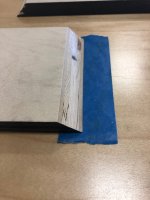
I’m trying to figure out the best way to glue up some shelf boxes without getting glue all over the face surfaces. I’m usually a little messy with the glue so I’m a bit concerned. It’s cedar ply and will get shellac over a minwax stain. Well that’s the finish plan as of right now.

My other question is if I should/can use some inside corner cleats with glue and brads to help tighten the corners.

I’m obviously new to this kind of project so anything to get me pointed in the right direction is a big help. Thanks 😊
 

Attachments

  • D7D8A2FD-3A8C-484E-BD02-C5E72E086349.jpeg
    D7D8A2FD-3A8C-484E-BD02-C5E72E086349.jpeg
    24 KB · Views: 449
I tape the borders of the boards right to the edge of the glue joint with clear packing tape. I tape both the inside and outside of the boards. After the glued joints have dried for a while, I carefully peel off the tape. The squeeze out glue comes off with the tape. I find masking tape doesn’t work as it just glues itself to the joint.

When I peel off the packing tape, I angle the tape off to the side. That way, the wood fibers don’t get pulled out.

I always run a spline down the joint. The spline keeps the joint perfectly aligned and also gives the joint greater strength.
 
Thanks guys! I’ve tried all kinds of painting tape and had mostly poor results. I might try finishing  the parts first like Bert says and then go ahead with tape and glue.
No splines Birdhunter but there’s some dominoes. I would of liked to try this project with real lumber but hardwood is scarce at times here and I’m without a jointer and planer until I get a bigger space
 
If you can, put a small groove in the edges of the boards. This gives the glue someplace to go.

To get a tight joint and alleviate some of the glue issue, do a tape fold. You'll need to pull the corner tight with another piece of tape streched across the pieces or use a glue gun to "seam" the back of the joint. (sorry I don't have a picture of this step)

I do this often on seams up to 10' long.

Tom
 

Attachments

  • IMG_1791 (1).jpg
    IMG_1791 (1).jpg
    188.1 KB · Views: 374
  • IMG_1790 (1).jpg
    IMG_1790 (1).jpg
    175 KB · Views: 340
  • IMG_1785.jpg
    IMG_1785.jpg
    198.5 KB · Views: 329
  • IMG_1786.jpg
    IMG_1786.jpg
    162.4 KB · Views: 329
  • IMG_1789 (1).jpg
    IMG_1789 (1).jpg
    149.6 KB · Views: 339
  • IMG_1783.jpg
    IMG_1783.jpg
    176 KB · Views: 309
  • IMG_1788 (1).jpg
    IMG_1788 (1).jpg
    252.3 KB · Views: 346
  • IMG_1782.jpg
    IMG_1782.jpg
    164.1 KB · Views: 337
  • IMG_1781.jpg
    IMG_1781.jpg
    164.7 KB · Views: 346
Clear packing tape works well. Masking tape and blue painter’s tape create a mess. Packing tape also does a great job of doing the “folding sides” trick.

Peter Parffet, New Brit Workshop, shows a neat trick on doing drawers using the folding sides technique.
 
Birdhunter said:
Clear packing tape works well. Masking tape and blue painter’s tape create a mess. Packing tape also does a great job of doing the “folding sides” trick.

Peter Parffet, New Brit Workshop, shows a neat trick on doing drawers using the folding sides technique.

Never had a "mess" issue with masking tape. The last photo shows the corner with the tape removed, no clean up or wipe down.

I do have packing tape, I'll give it a try.

Tom
 
I always use the tape method with beveled parts.

One clean layer of wide blue tape stretched a little to seal the joint (protect the wood from glue) and sometimes a couple of pieces of longer heavy duty packing tape for strength, especially if there is some bend to the boards.

End grain absorbs more glue. A small difference compared to Tom’s pics is that I put the glue right into the bottom of the valley, then close the joints slowly which spreads the glue to the top of the joint. Open it back up and let it sit for a minute to see how much more glue to add (to the bottom of valley again).

If the beveled ends of the boards are fuzzy and likely to swell when glue is added, I rough sand the middle of the bevel to remove some of the fuzz and make a pocket for excess glue. This helps keep the visible part of the joint tight and reduces glue cleanup.
 
My method is apply blue tape and wait till squeeze out is skinned over but not hardened.  Then I scrape out excess glue with a hard plastic razor blade (sold in auto refinishing channels)  Key is to scrape the glue at just right time and it will peel free in stringy bands - scrape too soon and it will be liquid and smear all over, wait too long and it will be too hard.  Never had trouble with the tape using this method.
(razor has be the hard plastic type, found some soft ones at Ace last year and they don't work nearly as well)

[attachimg=1]
 

Attachments

  • IMG_4877 (1).jpeg
    IMG_4877 (1).jpeg
    140.1 KB · Views: 554
Highland Woodworking sells the good type of plastic razors. I think they have 3 different types.
 
Update:
First I want to thank everyone for helping me along. You guys that take the time to post pictures and links to the helpful products really makes this place awesome!
So because my skull is so dense, or maybe the parts were slightly bowed I was having a hard time fitting my pieces up dry using the tape. I cut everything with the track saw and grid. First test on my new work surface. So I reverted  back to using as many clamps as I could get on this thing. The results were ok. Not super professional but I hope I can clean it up with a tiny amount of filler. I’d really like to be able to throw that stuff in the trash bin one day
I’m definitely going to need more advice to get to the finish line so I hope some of you guys will stay tuned


Attachments

  • 220DDD0E-702E-407D-95A9-AA02254E8178.jpeg
    220DDD0E-702E-407D-95A9-AA02254E8178.jpeg
    29.5 KB · Views: 274
I’ve been doing woodworking for about 40 years. My major accomplishments include keeping all 10 fingers intact and making every possible woodworking mistake.

Until I bought a jointer, planer, and a high quality table saw; I couldn’t consistently make totally closed and perfect miters. Even now, I use splines on my boxes. I have both Domino machines and a DDF40 Doweler and still find a spline works best to keep box sides lined up perfectly.

The pages of this site contain many stories of woodworkers struggling to get glue ready joints using a track saw. Not easy..

You might want to look at using a shooting board and a shooting plane. With practice, you can make perfect miters.
 
When using the track saw for these types of cuts the support surface must be perfectly flat. Any dip and it becomes times 2 when you go to make up the joint.

Tom
 
Birdhunter said:
Snip.

Until I bought a jointer, planer, and a high quality table saw; I couldn’t consistently make totally closed and perfect miters. Even now, I use splines on my boxes. I have both Domino machines and a DDF40 Doweler and still find a spline works best to keep box sides lined up perfectly.

The pages of this site contain many stories of woodworkers struggling to get glue ready joints using a track saw. Not easy..

You might want to look at using a shooting board and a shooting plane. With practice, you can make perfect miters.

Yes, well-tuned machines are important for precision cuts and results. For smaller mitre joints. either use a well-built jig with a table saw or a finely-tuned mitre saw (doesn't need to be a Kapex, but the Kapex suits that kind of task well).

Another way to put splines on a mitred edge -- more easily -- is to place them on the outside as a decorative element. I cut the slots with the DF500.
 

Attachments

  • DF500.jpg
    DF500.jpg
    642.2 KB · Views: 270
StevoWevo said:
Not bad at all given the saw you used, and the limited no. of times you tried a mitre joint like this. I recall watching a mitred, tall mahogany cabinet video by Tage Frid who cut the long mitres on the table saw, and he finished the assembly with the help of his grandson(?).
 
Thanks for the compliment Chuck, of course I want everything just perfect, but I’m also becoming aware of the limitations from lack of experience as well. I’m just going to keep at it and hopefully some of the good advice I’m getting will sink in.
 
Back
Top