Grasshopper
Member
- Joined
- Oct 6, 2014
- Messages
- 595
I unboxed my UG set today and got right to work.
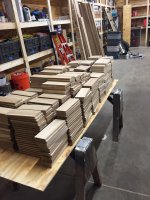
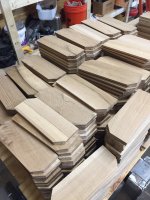
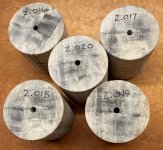
I am making several plinth blocks from 5/4" stock that are 8" tall. I was really excited to see the Kapex flag stops in action, but didn't realize that they really don't help with making cuts as small as 8" repeated.
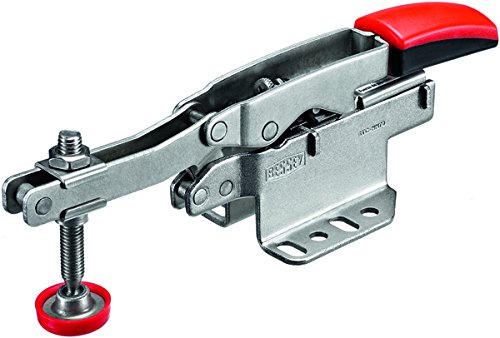
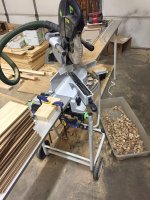
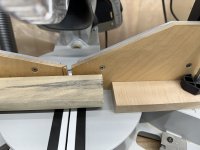
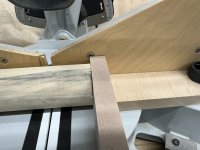
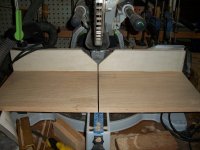
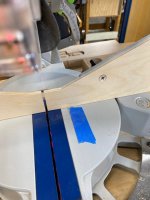
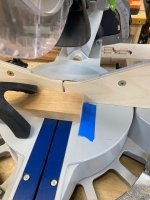
So what I ended up doing, was putting the extension wing on the left, and clamping down some scrap as a makeshift stop. Doing this, i could run the stock from right to left and it would butt into my stop and cut 8" pieces very quickly and repeatably. As I did this, I used the Hold Down Clamp on the right side to hold the stock down, and it rested into the stop block.
As I did this, i wanted to know if this operation was safe. See the picture below and let me know if you think it looks safe.
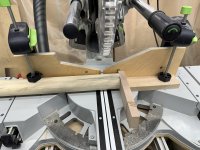
I know that clamping both sides of what you are cutting on a miter saw is a huge no-no, and is a way to get into trouble if the saw binds, etc.
It got me thinking if using a "clamped" stop block to the left and the hold down clamp to the right poses similar risks. (I am hoping not, because the stock just butts up to the stop block in a similar way the flag stop would work, and I can't think of a better way to make repetitive shorter cuts on the Kapex).
I figured this was worth posing to the FOG. And if you have better ways to make repeated cuts on the Kapex that are too small for the flag stop to be an option, I'd love to hear them.
See my setup below:
[attachimg=1]
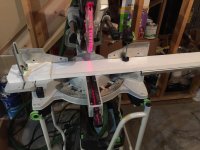
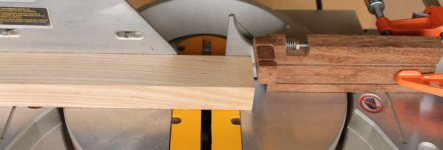
I am making several plinth blocks from 5/4" stock that are 8" tall. I was really excited to see the Kapex flag stops in action, but didn't realize that they really don't help with making cuts as small as 8" repeated.
So what I ended up doing, was putting the extension wing on the left, and clamping down some scrap as a makeshift stop. Doing this, i could run the stock from right to left and it would butt into my stop and cut 8" pieces very quickly and repeatably. As I did this, I used the Hold Down Clamp on the right side to hold the stock down, and it rested into the stop block.
As I did this, i wanted to know if this operation was safe. See the picture below and let me know if you think it looks safe.
I know that clamping both sides of what you are cutting on a miter saw is a huge no-no, and is a way to get into trouble if the saw binds, etc.
It got me thinking if using a "clamped" stop block to the left and the hold down clamp to the right poses similar risks. (I am hoping not, because the stock just butts up to the stop block in a similar way the flag stop would work, and I can't think of a better way to make repetitive shorter cuts on the Kapex).
I figured this was worth posing to the FOG. And if you have better ways to make repeated cuts on the Kapex that are too small for the flag stop to be an option, I'd love to hear them.
See my setup below:
[attachimg=1]