Packard said:
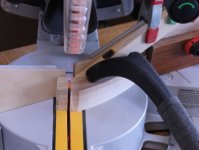
This resembles my DeWalt chop saw. Mine does not have a zero clearance insert and even if it did, it would not prevent tear out at the rear of the cut. When I need clean, repetitive cuts, I make a sacrificial zero clearance fence. And if it is repeated cuts, I build in a stop, usually screwed in place.
By making a zero clearance fence, I can get clean cutoffs on both sides of the blade.
I’ve tried Fastcap’s zero clearance tape, but it gradually opens up. I don’t know why. I checked for run-out on the blade and I am not seeing any.
I once ranted about SCMS and Zero Clearance Inserts
here.
1) There is almost never any tear-out on the bottom of a SCMS cut, just like there's almost never any tear-out on the top of a tablesaw cut. If you stand on your head, the geometry of the cut is the same. On miter saws, there is some cutting geometry differences between the chop action and the sliding action that affects tear-out. Basically, any time the teeth exit the workpiece without support you can get tear out, but never on entry into the workpiece. Supporting the workpiece right up to the kerf can greatly reduce tear-out on teeth exits.
2) As is noted by others, the back fence is where tear-out often occurs, yet there are very few commercial solutions (Coliflower cube is one) for this. I think people tend to focus on the bottom insert due to all the tablesaw inserts that do work, but again, the geometry is different.
3) As to why a ZCI or t ape would open up, as I said in the linked post, the only mechanisms I can see are: 1)Flex in the supporting arm and structure, and 2)Blade deflection, especially in thick cuts or cutting too quickly. But, I've learned to stop worrying about that, since there's no tear-out even with the stock wide insert openings. However, flex is not good for cut accuracy, so now I worry about that.
4) On my Bosch SCMS, there's apparently no adjustment for "crabbing." This is where the sliding action isn't perfectly parallel to the blade. This can affect accuracy if your cut is a combination of chop and slide, but if only chop the slide doesn't matter, and if only slide then it mostly adds a tiny vertical curve (and I do mean tiny), but also can affect tear out.