How I make beaded face frames

festnoob

Member
Joined
Jun 13, 2010
Messages
376
Spent the latter part of my birthday making this. Hope you guys like it.

 
Thanks for sharing.

Excellent explanation with good  variety of close and medium shots.

Congratulations.
 
Well edited & i like the choice & use of music.
With regards to the beaded edge, i normally run the bead onto my frames & joint rather than cutting separate beads & nailing on.  I also never measure those types of beads with a tape measure.  I always offer the bead up to the gap & mark the hard size.
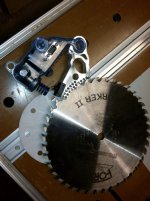
It seems to work good for you though as the end product looks good.
The editing is really good but the camera seems to be struggling to focus ?

Good job, better than i could have done.
 
Hey thanks. Yeah I've thought of switching over to that method and the router has the sliding table feature so it wouldn't be a hard transition. I was using a macro lens on a canon slr. The focusing sucked.
 
Good job that's a clever looking push stick must admit not seen one that looks like I also don't measure the beads just mitre an end then offer them up and mark the hard size but looks good anyway
 
wrightwoodwork said:
Good job that's a clever looking push stick must admit not seen one that looks like I also don't measure the beads just mitre an end then offer them up and mark the hard size but looks good anyway

Yeah doing it that way is good also, but I always end up going back to the miter saw to shave off just a tiny bit. If all goes well during assembly and the distances between your stiles are all the same, you can just measure once and set up a stop block for the rest, which is probably what I should've done.  [blink]
 
wrightwoodwork said:
Good job that's a clever looking push stick must admit not seen one that looks like I also don't measure the beads just mitre an end then offer them up and mark the hard size but looks good anyway

That push block is called a GRR-Ripper.  They have a non-slip material to grip the wood, and are extremely adjustable, with different width legs.  The concept is that you adjust them to have a channel that travels over the blade, so it is not exposed. They are also sold as a discounted "2-pack" so you can do hand-over-hand advancing of the material.

I recently bought the company's new push block for my jointer.  It rides on top of the wood for middle of the board pushes, or "gravity drops" a little plastic lip if it is over the end of the wood.

I am not an employee of the company, although I sounds like one! I had a table saw accident over a year ago, and bought these immediately after.  Next purchase might be a SawStop like the OP, elimetech12, to be doubly safe.
 
Seen the saw stop on videos I'd be frightened to trust it and also I'd be frightened if someone who uses it went to use a saw without it was too lack a dazicle and not watch what there doing. All for push sticks etc
 
wrightwoodwork said:
Seen the saw stop on videos I'd be frightened to trust it and also I'd be frightened if someone who uses it went to use a saw without it was too lack a dazicle and not watch what there doing. All for push sticks etc

I have the kreg stop setup on my crosscut sled and blade nicked it once and tripped the brake. My Forrest woodworker II was hurt. Accidents happen.
 

Attachments

  • image.jpg
    image.jpg
    977.2 KB · Views: 897
Good job!  And you are definitely more handy with a tape than I am! 

Never had much luck using a tape.  Cut the first end then mark the opposite end on the stick itself.  Then cut a bit long and trim and test till it fits.  Then I'll go ahead and use the first piece as a story stick for all the rest of that length, cutting them a bit long so I can do the trim and test thing.

The first time I get a kitchen with beaded frames I'm going to buy that Kreg jig for the router table.

I've had a set of the GRR-Rippers for years.  Great tool.  With one in each hand it's sort of like a man powered power feeder.  Works great on the router table too.
 
Back
Top