Grasshopper
Member
- Joined
- Oct 6, 2014
- Messages
- 595
I am putting my kitchen back together in preparation for my island build. All the perimeter cabinets are production grade (lots of veneered particle board…sigh), and will be painted white.
I tore out a 39" base cabinet so I can replace it with a 12" cabinet and freestanding drawer for a desk area. Last year, I had ordered a replacement, which was the same brand as my perimeter cabinets. I'm not impressed with the quality, but oh well.
Installing the 12" base cabinet is pretty straightforward, my question is how do I install the drawer (the top will be a 40" x 25" slab of granite). I've tried to search the web and don't see any descriptions, instructions, or tutorials for how to do this.
The 12" base will be to the left, and there is a wall that will snug up on the right side of the drawer.
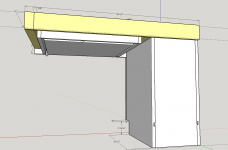
I was thinking of installing a 2x4 cleat behind the base cabinet and drawer, and on the right side along the wall (to support the granite slab). I have no idea how to mount the drawer on the right and left side, and especially to support granite (I'd obviously screw into the 1/2" ply on the back into studs). Another thought was to place a 1/2" sheet of plywood 24"x39" on top of the cleat (and resting on the base cabinet, with the drawer mounted to it from below, for the slab to sit on top of.
Advice appreciated.
Here are some pix:
Help me turn-
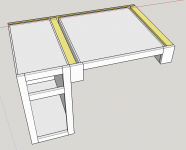
(Picture of desk unit unassembled)
[attachimg=1]
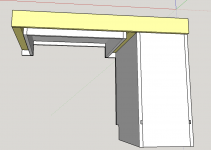
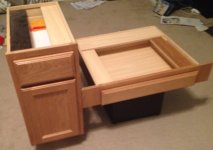
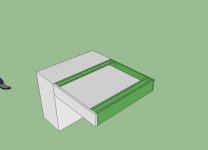
(closeup of drawer unit)
[attachimg=2]
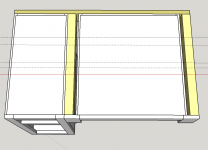
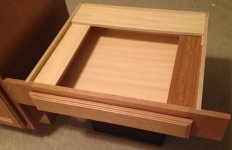
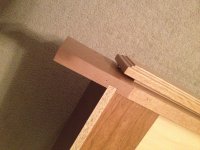
(closeup of drawer face frame)
[attachimg=3]
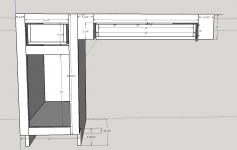
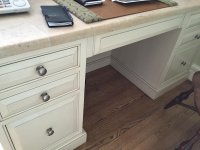
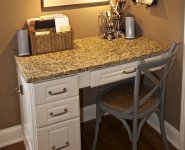
(Desired result)
[attachimg=4]
I appreciate your feedback.
I tore out a 39" base cabinet so I can replace it with a 12" cabinet and freestanding drawer for a desk area. Last year, I had ordered a replacement, which was the same brand as my perimeter cabinets. I'm not impressed with the quality, but oh well.
Installing the 12" base cabinet is pretty straightforward, my question is how do I install the drawer (the top will be a 40" x 25" slab of granite). I've tried to search the web and don't see any descriptions, instructions, or tutorials for how to do this.
The 12" base will be to the left, and there is a wall that will snug up on the right side of the drawer.
I was thinking of installing a 2x4 cleat behind the base cabinet and drawer, and on the right side along the wall (to support the granite slab). I have no idea how to mount the drawer on the right and left side, and especially to support granite (I'd obviously screw into the 1/2" ply on the back into studs). Another thought was to place a 1/2" sheet of plywood 24"x39" on top of the cleat (and resting on the base cabinet, with the drawer mounted to it from below, for the slab to sit on top of.
Advice appreciated.
Here are some pix:
Help me turn-
(Picture of desk unit unassembled)
[attachimg=1]
(closeup of drawer unit)
[attachimg=2]
(closeup of drawer face frame)
[attachimg=3]
(Desired result)
[attachimg=4]
I appreciate your feedback.
") ".
".