Grasshopper
Member
- Joined
- Oct 6, 2014
- Messages
- 595
FOGers.
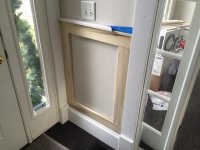
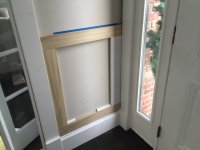
How would you create a wainscot look like the pictures below, using an existing baseboard (vs. milling everything).
I like how the vertical members run flush into the baseboard, even though the base has a small detail. (it almost looks like a cope and stick cabinet door in the way it runs flush together).
If I were milling this from scratch, I'd assume that I could approach it the way cabinet panels come together. Since I am working with an existing 7 1/4" baseboard, how can I join the vertical members in a way that it runs flush into the baseboard with a profile (keeping the baseboard in the same plane as the wainscot so it isn't proud of the door casing).
Any help would be appreciated.
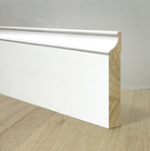
Existing baseboard:
[attachimg=5]
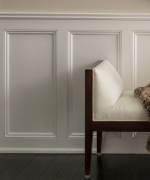
Example 1 of the look I am trying to achieve:
[attachimg=2]
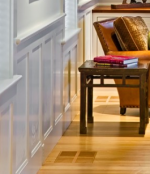
Example 2:
[attachimg=4]
Thanks in advance.
(I edited the initial attachment to show the actual baseboard)
How would you create a wainscot look like the pictures below, using an existing baseboard (vs. milling everything).
I like how the vertical members run flush into the baseboard, even though the base has a small detail. (it almost looks like a cope and stick cabinet door in the way it runs flush together).
If I were milling this from scratch, I'd assume that I could approach it the way cabinet panels come together. Since I am working with an existing 7 1/4" baseboard, how can I join the vertical members in a way that it runs flush into the baseboard with a profile (keeping the baseboard in the same plane as the wainscot so it isn't proud of the door casing).
Any help would be appreciated.
Existing baseboard:
[attachimg=5]
Example 1 of the look I am trying to achieve:
[attachimg=2]
Example 2:
[attachimg=4]
Thanks in advance.
(I edited the initial attachment to show the actual baseboard)