ear3
Member
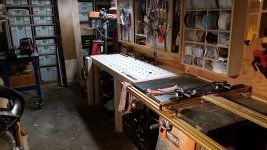
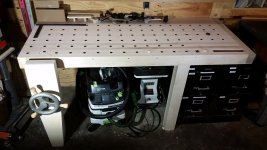
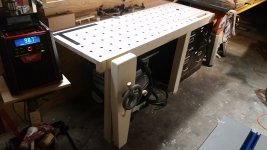
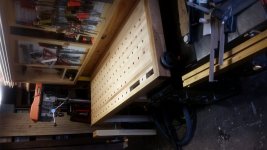
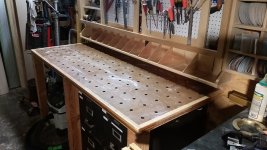
So after only a little more than a year of service, I decided to ditch my previous workbench, which I had constructed basically as a larger version of an MFT:
View attachment 1
and construct a heftier one in its place. The main reason for the reconfiguration has been my growing use of hand tools, which require more in-line clamping options and a sturdier base than my current setup. I didn't do that much designing or research in advance, but the end result was more or less dictated by the following parameters:
1) I wanted it to be serviceable for both hand and power tool work, with a nearly complete grid of holes so that I could carry over the full range of clamping options from my MFT style bench (e.g., it would be kind of hard to clamp down from underneath the MFS on a solid top workbench with just one line of dog holes)
2) My shop being what it is -- half of a two car garage -- the bench has to butt up against the center wall, leaving space on the left for the drill press, and on the right for the table saw to roll in to clear the garage door, but also have space underneath for storage
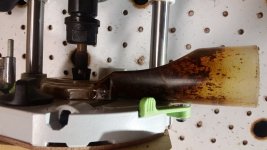
3) Whatever the design, I wanted to integrate both the Glide/Crisscross leg vise and the wagon style tail vise made from Benchcrafted -- the latter one being particularly useful since it did not require any additional space to the right of the bench.
So what I settled on was an 1 1/2" thick top, made from hard maple in butcher block style so I could expose the more durable edge grain. This is thick enough for pretty serious hand tool work, but thin enough to easily accommodate underneath clamping. As far as the base goes, I neither needed nor could spare the space for something monstrous -- just a 2x along the wall for the back of the bench to rest on, and then two solid legs in the front.
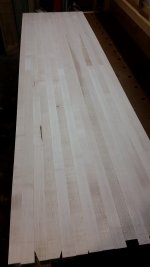
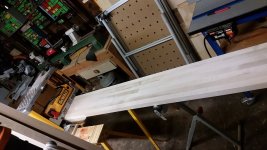
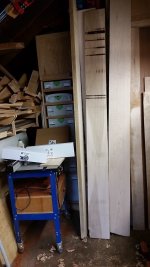
I got most of the material in late October, a mix of 8/4 and 6/4 maple from Rosenzweig lumber in the Bronx:
View attachment 2
View attachment 3
and have been working bit by bit since then to bring it to completion, and finally finished up this past weekend.
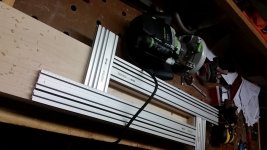
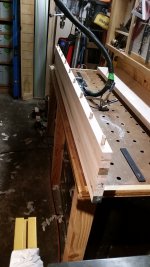
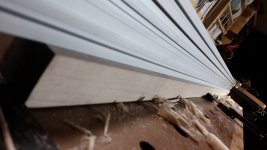
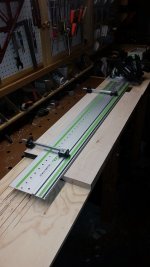
I cut the 6/4 maple into 1 3/4" strips with the TSC55 -- since I was doing a lot of the work at night, I couldn't use the table saw out in the driveway, and so went instead with the track saw, using the LR32 edge guides to make repeatable thin strips
View attachment 4
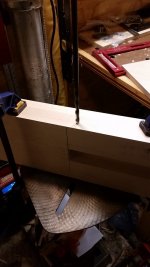
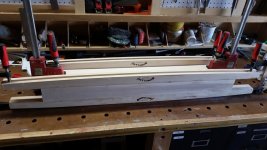
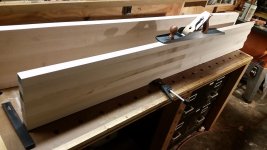
I decided to form the top out of three smaller sections so that I could pass each one through my thickness planer first and minimize the flattening I would have to do once the full top was assembled. To make the most of the material, I staggered full 72" lines with 2 36" pieces from the offcuts of the 9 or 10 ft. boards. Predictably, some of the strips bowed once they had been cut off from the main board, so I decided to use 5mm dominoes to ensure alignment (and also stagger the bowing in consecutive pieces so that it would cancel out), and make it so that I wouldn't have to send it through the planer too many times to get a flat face. The bow clamps also helped to keep it relatively straight for the glue up:
View attachment 5
The length turned out to be really straight:
View attachment 8
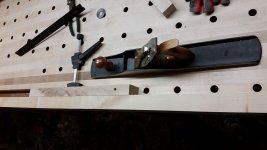
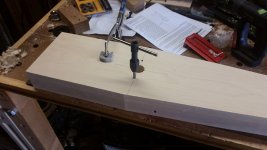
But despite the bow clamps the depth was not quite an even plane (I probably should have added another one in the middle of the panel), so I hit one side with the jointer plane:
View attachment 6
And then sent it through the planer to finish the other side:
View attachment 7
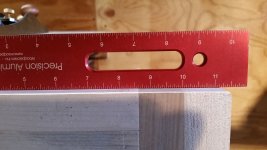
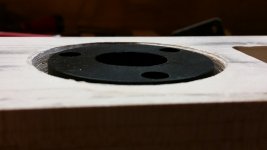
With three of them completed, I prepped them for edge joining with 10mm dominoes. Unfortunately, I discovered that the 2700 holey rail I was using to joint the edges is bowed -- I don't know if it's been that way from the beginning, since I normally use the 3000mm for long rip cuts. The resulting gap when the boards are laid out edge to edge is not huge, but it's a little more than I would use for a spring joint:
View attachment 9
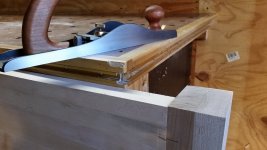
But that's why God made jointer planes:
View attachment 10
View attachment 11
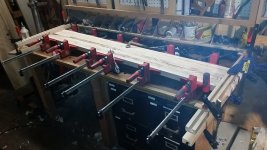
Added in the dominoes, and glued up the entire top, this time with a bow clamp in the middle.
View attachment 12 View attachment 13
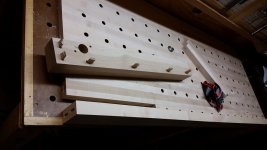
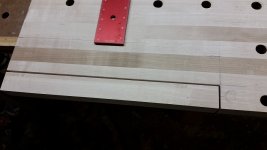
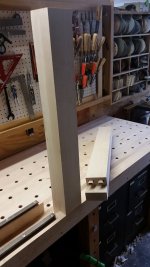
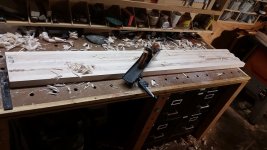
Because I was careful in the preliminary steps, the top didn't require all that much flattening after the glue up -- jointer plane was again sufficient to level everything out. Trimmed the entire top to length, and began thinking about the cap, laminate and leg dimensions to accommodate the vises:
View attachment 14
To be continued in another post...
View attachment 1
and construct a heftier one in its place. The main reason for the reconfiguration has been my growing use of hand tools, which require more in-line clamping options and a sturdier base than my current setup. I didn't do that much designing or research in advance, but the end result was more or less dictated by the following parameters:
1) I wanted it to be serviceable for both hand and power tool work, with a nearly complete grid of holes so that I could carry over the full range of clamping options from my MFT style bench (e.g., it would be kind of hard to clamp down from underneath the MFS on a solid top workbench with just one line of dog holes)
2) My shop being what it is -- half of a two car garage -- the bench has to butt up against the center wall, leaving space on the left for the drill press, and on the right for the table saw to roll in to clear the garage door, but also have space underneath for storage
3) Whatever the design, I wanted to integrate both the Glide/Crisscross leg vise and the wagon style tail vise made from Benchcrafted -- the latter one being particularly useful since it did not require any additional space to the right of the bench.
So what I settled on was an 1 1/2" thick top, made from hard maple in butcher block style so I could expose the more durable edge grain. This is thick enough for pretty serious hand tool work, but thin enough to easily accommodate underneath clamping. As far as the base goes, I neither needed nor could spare the space for something monstrous -- just a 2x along the wall for the back of the bench to rest on, and then two solid legs in the front.
I got most of the material in late October, a mix of 8/4 and 6/4 maple from Rosenzweig lumber in the Bronx:
View attachment 2
View attachment 3
and have been working bit by bit since then to bring it to completion, and finally finished up this past weekend.
I cut the 6/4 maple into 1 3/4" strips with the TSC55 -- since I was doing a lot of the work at night, I couldn't use the table saw out in the driveway, and so went instead with the track saw, using the LR32 edge guides to make repeatable thin strips
View attachment 4
I decided to form the top out of three smaller sections so that I could pass each one through my thickness planer first and minimize the flattening I would have to do once the full top was assembled. To make the most of the material, I staggered full 72" lines with 2 36" pieces from the offcuts of the 9 or 10 ft. boards. Predictably, some of the strips bowed once they had been cut off from the main board, so I decided to use 5mm dominoes to ensure alignment (and also stagger the bowing in consecutive pieces so that it would cancel out), and make it so that I wouldn't have to send it through the planer too many times to get a flat face. The bow clamps also helped to keep it relatively straight for the glue up:
View attachment 5
The length turned out to be really straight:
View attachment 8
But despite the bow clamps the depth was not quite an even plane (I probably should have added another one in the middle of the panel), so I hit one side with the jointer plane:
View attachment 6
And then sent it through the planer to finish the other side:
View attachment 7
With three of them completed, I prepped them for edge joining with 10mm dominoes. Unfortunately, I discovered that the 2700 holey rail I was using to joint the edges is bowed -- I don't know if it's been that way from the beginning, since I normally use the 3000mm for long rip cuts. The resulting gap when the boards are laid out edge to edge is not huge, but it's a little more than I would use for a spring joint:
View attachment 9
But that's why God made jointer planes:
View attachment 10
View attachment 11
Added in the dominoes, and glued up the entire top, this time with a bow clamp in the middle.
View attachment 12 View attachment 13
Because I was careful in the preliminary steps, the top didn't require all that much flattening after the glue up -- jointer plane was again sufficient to level everything out. Trimmed the entire top to length, and began thinking about the cap, laminate and leg dimensions to accommodate the vises:
View attachment 14
To be continued in another post...
Attachments
-
 20161128_205757.jpg183.6 KB · Views: 2,614
 -
 20161130_231711.jpg130.8 KB · Views: 715
 -
 20161129_215758.jpg176.3 KB · Views: 626
 -
 20161129_193214.jpg174.4 KB · Views: 678
 -
 20161129_190717.jpg95.5 KB · Views: 511
 -
 20161129_190320.jpg133.2 KB · Views: 652
 -
 20161129_185627.jpg101.2 KB · Views: 632
 -
 20161127_181755.jpg113.1 KB · Views: 596
 -
 20161128_191759.jpg171.8 KB · Views: 535
 -
 20161105_164556.jpg150.8 KB · Views: 1,005
 -
 20161105_164603.jpg108.2 KB · Views: 684
 -
 20161125_191554.jpg152.7 KB · Views: 1,033
 -
 20161125_165303.jpg168.1 KB · Views: 784
 -
 20161127_181101.jpg167.3 KB · Views: 660