arso_bg
Member
- Joined
- Jan 6, 2008
- Messages
- 178
After some research I decided to buy an Incra I-box jig. For me this is one of the best box-joint jigs that you can buy. Here is a short list of the features that are most important for me:
• You can work with a board of an unlimited width. You can work with any board that you can handle on a router table.
• You don’t have to mess up with any templates
• You do not have to work with some predefined thicknesses of the boards. You can take any board between ¼ and 1 inch thick
• You don’t have to use some special predefined router bits. You can use any metric or imperial router bit between 1/8 and ¾
• You can fine tune the fit of the joint
• Last but not least – everything that I have from Incra is top quality.
So if I have to sum it up with just a few words – with the Incra I-box jig you can pick up any board and router bit that you have (between the min. and max. specified above of course) and you could make a perfect box-joint (if you work carefully enough of course)
A small problem for me was that I wanted to use the Incra I-box jig on my Festool router table. I could not find any information on the Internet about someone who already did it. Even on the contrary – most of the information on the Internet says that the Incra I-box should probably not work with the Festool router table. But I had a plan and decided to take the risk and to buy the jig!") The jig arrived two days ago and now I can confirm that the Incra I-box jig fits perfectly on the Festool router table.
The jig arrived two days ago and now I can confirm that the Incra I-box jig fits perfectly on the Festool router table.
Here is how I did it:
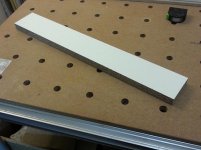
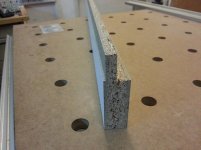
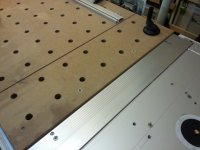
I took a piece of scrap particle board 1 inch thick and measuring approximately 200 by 650 mm. I did cut it in two pieces measuring approximately 95 by 650 mm. (pic. 1)
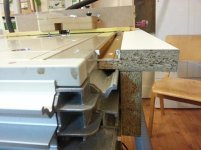
On one of the boards I made a shallow rabbet – 1.85 mm deep so that the board could be placed beside the router table and could be flush with the surface of the router table. On the opposite side I made a ½ deep rabbet. The board you can see on picture 2.
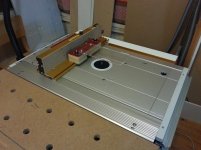
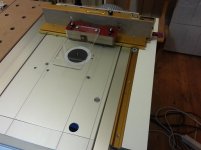
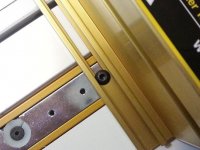
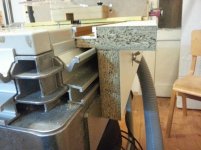
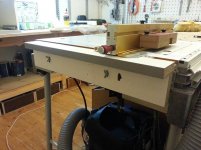
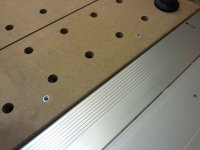
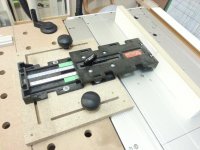
In the ½ rabbet I installed an Incra miter slot that I bought separately, than I attached the second board with some dowels and the whole construction I attached with two Festool T-nuts+ two M6 bolts and 2 wing nuts to the side of the router table. You can see the whole construction on pictures 3, 4, 5, 7 and 8.
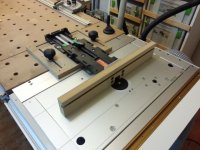
When you center the Incra I-box over the router collet on the Festool router table it fits perfectly over the miter bar that is supplied with the jig. There is no need to make any changes or alter the jig somehow. (pic. 6)
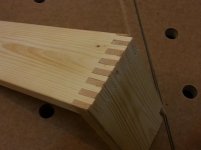
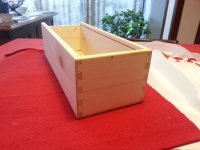
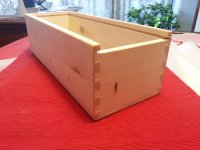
My first attempt with my new Incra I-box jig (out of the box so to say) you can see on pic. 9. The joint looks well I think. It is maybe just a little bit loose but this is something that I can correct.
• You can work with a board of an unlimited width. You can work with any board that you can handle on a router table.
• You don’t have to mess up with any templates
• You do not have to work with some predefined thicknesses of the boards. You can take any board between ¼ and 1 inch thick
• You don’t have to use some special predefined router bits. You can use any metric or imperial router bit between 1/8 and ¾
• You can fine tune the fit of the joint
• Last but not least – everything that I have from Incra is top quality.
So if I have to sum it up with just a few words – with the Incra I-box jig you can pick up any board and router bit that you have (between the min. and max. specified above of course) and you could make a perfect box-joint (if you work carefully enough of course)
A small problem for me was that I wanted to use the Incra I-box jig on my Festool router table. I could not find any information on the Internet about someone who already did it. Even on the contrary – most of the information on the Internet says that the Incra I-box should probably not work with the Festool router table. But I had a plan and decided to take the risk and to buy the jig!
The jig arrived two days ago and now I can confirm that the Incra I-box jig fits perfectly on the Festool router table.Here is how I did it:
I took a piece of scrap particle board 1 inch thick and measuring approximately 200 by 650 mm. I did cut it in two pieces measuring approximately 95 by 650 mm. (pic. 1)
On one of the boards I made a shallow rabbet – 1.85 mm deep so that the board could be placed beside the router table and could be flush with the surface of the router table. On the opposite side I made a ½ deep rabbet. The board you can see on picture 2.
In the ½ rabbet I installed an Incra miter slot that I bought separately, than I attached the second board with some dowels and the whole construction I attached with two Festool T-nuts+ two M6 bolts and 2 wing nuts to the side of the router table. You can see the whole construction on pictures 3, 4, 5, 7 and 8.
When you center the Incra I-box over the router collet on the Festool router table it fits perfectly over the miter bar that is supplied with the jig. There is no need to make any changes or alter the jig somehow. (pic. 6)
My first attempt with my new Incra I-box jig (out of the box so to say) you can see on pic. 9. The joint looks well I think. It is maybe just a little bit loose but this is something that I can correct.