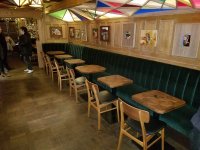
A really fine piece of work. It fits in with the architecture of the rest of the room. It will be great advertisement for you, I am sure.
I do have a question. I recently did a couple of lazy susans with pie shaped pieces to look like a pizza. I glued all to a ply wood backer. The solid wood pie pieces were about 3/8 inch thick and the plywood backer was 1/4 inch. After the whole structure sat around in the shop for less than a week, it started to cup, or dish. The pie pieces were scraps that had been piled in a waste container for a long time.
The dishing was probably caused by uneven moisture content between the solid wood pieces and the plywood backer. Eventually, they settled somewhat but a slight dishing remained. I have not added the spinner to the bottom of one. That proved interesting as it will spin on its own without the spinner.
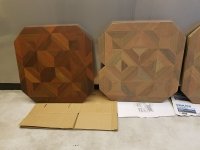
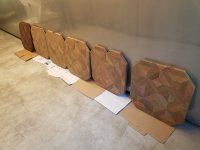
The question: Did you find any cupping on your tables with using so many pieces in your design against plywood backer? It appears, in the pics, that all tops were stable and remained very flat.
Tinker

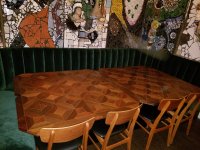
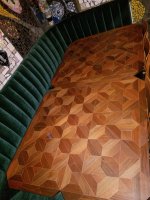
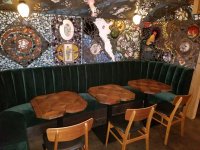
 the 3 dimensionality of the tables. You’ve ratcheted it up another notch. I still remember the first light project...that was the beginning. You keep bumping up the bar a peg at a time. Kudos to you