stvrowe
Member
- Joined
- Jan 27, 2007
- Messages
- 811
This is my new shopbuilt mitersaw stand. Material is 19mm double sided melamine with PB core. Edgebanding was done using the Conturo with both 3mm and 2mm banding. The trimming was done using the MFK700. I used the Lamello Zeta-P with Clamex P-14G fasteners. Drawer slides are the SYS-AZ and the extension tables are Aigner with the rails attached to the stand using EZ-Loc threaded inserts. There is insufficient space left in the front to use another SYS-AZ drawer with a systainer so I will either install another shelf or build an inset drawer to fill the void. The assembly went together and fit like a glove and is quite rigid.
I normally would not have used RTA fasteners on a small project like this but wanted to test and work out any bugs before building cabinets. I am going with RTA as I don't have the storage space in my shop or garage to assemble/store even a small sized cabinet job. I plan on putting this through some shop abuse to make sure the RTA fasteners hold up and remain structurally sound before fully committing to this method of assembly.
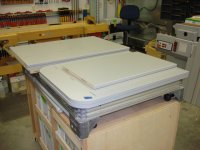
These are the piece parts awaiting assembly:
[attachimg=9]
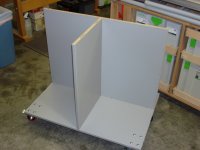
Casters, bottom shelf, back, and center divider assembled:
[attachimg=1]
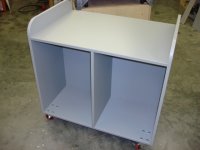
Top shelf, and side pieces assembled:
[attachimg=2]
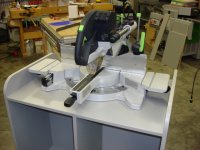
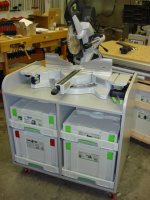
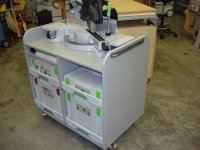
Kapex installed. Note the saw is positioned to the rear for easy access to the clamp kit knobs from the back. With crown stop extensions installed, there is about 4mm clearance on each side.
[attachimg=3]
[attachimg=4]
Front view with SYS-AZ drawers installed. For the slide screws in the center divider, I used 10mm system screws instead of the 13mm screws provided. A shelf with otherwise wasted space is used to store spare blades.
[attachimg=5]
That 190mm deep recess in the back is not wasted space. A shelf with some inexpensive cookie jars purchased at the Dollar store provides storage.
[attachimg=6]
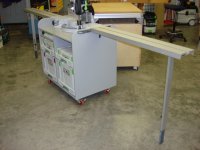
Aigner rails and extension tables attached for support when required.
[attachimg=7]
[attachimg=8]
I normally would not have used RTA fasteners on a small project like this but wanted to test and work out any bugs before building cabinets. I am going with RTA as I don't have the storage space in my shop or garage to assemble/store even a small sized cabinet job. I plan on putting this through some shop abuse to make sure the RTA fasteners hold up and remain structurally sound before fully committing to this method of assembly.
These are the piece parts awaiting assembly:
[attachimg=9]
Casters, bottom shelf, back, and center divider assembled:
[attachimg=1]
Top shelf, and side pieces assembled:
[attachimg=2]
Kapex installed. Note the saw is positioned to the rear for easy access to the clamp kit knobs from the back. With crown stop extensions installed, there is about 4mm clearance on each side.
[attachimg=3]
[attachimg=4]
Front view with SYS-AZ drawers installed. For the slide screws in the center divider, I used 10mm system screws instead of the 13mm screws provided. A shelf with otherwise wasted space is used to store spare blades.
[attachimg=5]
That 190mm deep recess in the back is not wasted space. A shelf with some inexpensive cookie jars purchased at the Dollar store provides storage.
[attachimg=6]
Aigner rails and extension tables attached for support when required.
[attachimg=7]
[attachimg=8]
Attachments
-
 DSC02511.JPG153.1 KB · Views: 3,325
 -
 DSC02513.JPG142.3 KB · Views: 3,300
 -
 DSC02514.JPG141.1 KB · Views: 3,570
 -
 DSC02515.JPG157.2 KB · Views: 3,345
 -
 DSC02517.JPG171 KB · Views: 4,714
 -
 DSC02518.JPG152.6 KB · Views: 3,266
 -
 DSC02519.JPG157.7 KB · Views: 3,282
 -
 DSC02520.JPG149.9 KB · Views: 3,885
 -
 DSC02505.JPG155.2 KB · Views: 3,336