Kitchen cabinets using pre finished plywood?

Carpe Diem

Member
Joined
Mar 18, 2016
Messages
16
I have been visiting this site for a while but just registered today. I am considering making my own kitchen cabinets using ¾" pre finished maple (domestic) for all components except the back. For the back I was intending on using ½" pre finished maple. Locally (Toronto, Ontario) I can't seem to find ¼" or 5mm pre finished maple to use for the back.

To fit the back I was intending on routing a ¼" (6mm) deep groove equal to the thickness of the 1/2" (12.7mm) pre finished plywood on the sides, bottom, and top. The groove would be set in a ½" in from the back edges of the sides, top, and bottom to allow a ½" thick nailer behind the back.

Has anyone used this method? I know Eric from the poplarshop used essentially the same method (theoretically) but with a 5mm back. Frankly, he unknowingly has inspired me to build my own kitchen cabinets using Festool tools. I was struggling with the idea of how I could manage full size sheets by myself in my shop using conventional woodworking equipment. I don't have a sliding table saw or panel saw. Currently I do not own any Festool tools but hopefully it will be money well spent.

Thanks for the help In advance.
 
The lamello Zeta P2 does Clampex, and it also does 5-mm grooving for their divario, but that groove could be for a slot.
A router also works.
What you outlined makes sense.
 
Welcome to the forum.  Sounds like you have just the project for a tracksaw.  If money and rail storage are not issues, I would suggest getting the 3000mm track for ripping the full sheets.  Parallel guides might also be a good investment for something like cabinet work.  If you check out the top thread in the Festool Jigs and Enhancement subforum, you'll see a list of various aftermarket tool accessory manufacturers, among which are several that make parallel guides (Seneca, Rip Dog, Precision Dog)

Carpe Diem said:
I have been visiting this site for a while but just registered today. I am considering making my own kitchen cabinets using ¾" pre finished maple (domestic) for all components except the back. For the back I was intending on using ½" pre finished maple. Locally (Toronto, Ontario) I can't seem to find ¼" or 5mm pre finished maple to use for the back.

To fit the back I was intending on routing a ¼" (6mm) deep groove equal to the thickness of the 1/2" (12.7mm) pre finished plywood on the sides, bottom, and top. The groove would be set in a ½" in from the back edges of the sides, top, and bottom to allow a ½" thick nailer behind the back.

Has anyone used this method? I know Eric from the poplarshop used essentially the same method (theoretically) but with a 5mm back. Frankly, he unknowingly has inspired me to build my own kitchen cabinets using Festool tools. I was struggling with the idea of how I could manage full size sheets by myself in my shop using conventional woodworking equipment. I don't have a sliding table saw or panel saw. Currently I do not own any Festool tools but hopefully it will be money well spent.

Thanks for the help In advance.
 
Edward has some good points.

I would suggest you do up a cutting list with each piece.
I have a different track saw, but this is ideal tracksaw territory.
Your other options include having the shop cut the pieces to the size. They often have a big sliding table saw.

You will also need some other work to make the panels from the sheets into cabinets... So a router and/or router table, lamello, kreg, are all options to aid in the joining.

 
Welcome to FOG -

Your kitchen plan sounds reasonable with refinished ply and a 1/2" back.  I usually do 5mm or 1/4" backs but 1/2" will work.  You could purchase unfinished 1/4" ply and easily roll on water based poly and get a nice finish.  You can do two coats in a day on a few pieces and likely save some money and get to the smaller size that you desired. 

Since it's the back, you won't see it unless you are down on your knees and it won't be getting any wear or damage from leakage, etc.  Just a thought.

I think a track saw is ideal for this project and Eric's videos are a great place to start.  I'd recommend the Seneca guides for cross cutting consistent widths with the guide rails.  You didn't say if you are doing frameless or face frame cabinets.  Frameless are probably easier if you don't have a tablesaw for cutting face frame rails and stiles. 

For your upper cabinets, you'll likely want a 3/4" plywood nailer top and bottom to carry the weight.  I don't think I'd use 1/2".

A track saw, router, kreg jig, and a hole drilling jig will get you well along on making the cabinet.  A domino would be a nice to have but you can make cabinets with routing dado's, using dowels, or just a Kreg jig if you are watching your budget.

You will need a dust extractor, whether Festool or another brand.  Not sure if you are thinking about an MFT or similar table, but they are really handy for cabinet cross cutting and construction.

Look forward to following your project.  Feel free to ask questions!
 
Welcome  [welcome] to the fog.  A great group to help support you with the festool addiction and excellent knowledge of woodworking!

What you are suggesting is very common and an easy way to go. I did exactly what you are suggesting prior to my festool addiction and thus when saying there was an easier way, I discovered the track saw  [eek]

After doing this project I offer the following lessons learned for consideration.

1. Plan out ALL cabinets and develop a cut list. I did not do that and it cost me lots of time in setup and parts not being all the same. Plan the work and work the plan.
2. As mentioned above, purchase the track saw, rails and guides.  This will allow you to break down sheet goods quickly and safely by yourself if required. 
3. Since you are using pre finished plywood, if using frameless cabinets, ensure you use pre finished edge banding.  It will match perfect and much easier.
4. There are many discussions on the forum about how to join the pieces to make the cabinet.  I would use a domino pocket hole combo, however if you do not have a domino use biscuit joints at least for alignment purposes.  This combo will help with assembly of the cabinets.
5. The factory finish is great.  Once you have assembled the cabinet, you are done and ready to install.  No need for finishing except the doors which will be added after the cabinets are installed.  Keep in mind though, the finish is very good but you still have to treat the wood kindly or you will mark up the finish.  It is hard to match the factory finish.
6. If you are demoing an existing kitchen, ensure you have your cabinets built prior.  I know this sounds like a given but I only had half built. This meant I had to put in temp measures for sinks, ovens etc.  I did not score too many brownie points withe boss.  [scared]

Overall this is a great project to tackle. Lots of knowledge on this forum to help out and if you have more questions or get stuck during the process, just post your question. Pics also help considerably. Good luck!
 
The beauty of building your own cabinets is you can plan it out optimising space and using very few or small filler pieces etc

My advise is to save your self money, price out shop birch ply. Once finished it will give the apprearance of maple. Also go with 6mm maple ply for the backs.

Water base finish like enduro can be brushed on, dries quick and will save you a few bucks over the cost of pre finish ply.

The TS 55, MFT , a extra 1400 guide rail, rail connectors and a few of their clamps and essentials will about do ya, I'm assuming you have a router if not the 1010 with a edge guide should do ya...
 
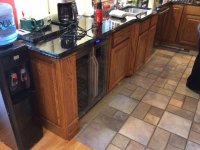
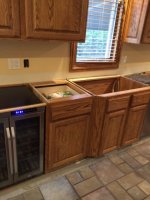
Consider making the uppers 13-14" deep and the bases 25" deep especially on the sink wall. Does not sound like much but it can make a world of difference. The faucets are very crowded in a 24" deep base, then add a soap dispenser, filtered water spigot, an Insta hot spigot, things just don't fit well.

The sink base pictured is 27" deep. (Not my heat gun on the new granite)

Tom
 

Attachments

  • IMG_3923.jpg
    IMG_3923.jpg
    44.9 KB · Views: 929
  • IMG_3957.jpg
    IMG_3957.jpg
    50.6 KB · Views: 925
Thanks to all who responded. I have started a list of Festool tools to purchase to build these cabinets and for future use. I will buy tools in packages (to ease the financial burden) as I progress though the project. First TS55 (55 rail swapped for LR32 rail), 3000mm guide rail, MFT/3, clamps. I have access to a CT48 for a short while. Second purchase will be an extra MFT and 500 Domino. Third purchase will be OF 1010 and CT36. I may combine my second and third purchase.

I will defiantly complete a cut list.

I posted to get advice on the construction method. Speciffically using a ½" back (captured in a groove top, sides and bottom) with 1/2" nailers. Does the hanging strength for upper cabinets come from using a ½" back or is it from the nailers? Is it better to use a ¾" nailer inconjunction with either a ¼", ½", or ¾" back

I was trying to avoid using a ¾" back if at all possible.

Thanks,

Budge
 
Carpe Diem said:
Does the hanging strength for upper cabinets come from using a ½" back or is it from the nailers? Is it better to use a " nailer inconjunction with either a ¼", ½", or ¾" back

My default is 1/4" back set into a groove not a rabbet with 3/4" french cleat on the top and a spacer on the back bottom. The hanging strength comes from the nailer, side wall and cabint top with support from the bottom nailer.
I don't use a 1/2" nailer.
I like 1/2" backs and will use them in larger cabinets for structural and aesthetics.
Tim
 
I agree with what Tim has stated. Do not use 1/2" as your nailer strip.  I tend to use two strips, one top and bottom.  Also make sure they are attached to the sides of the cabinet. 
 
My default is 1/4" back set into a groove not a rabbet with 3/4" french cleat on the top and a spacer on the back bottom. The hanging strength comes from the nailer, side wall and cabint top with support from the bottom nailer.
I don't use a 1/2" nailer.
I like 1/2" backs and will use them in larger cabinets for structural and aesthetics.
Tim
[/quote]

Hi Tim,

Where do you buy your ¼" backs from? Are they prefinished maple?
 
Carpe Diem said:
Hi Tim,
Where do you buy your ¼" backs from? Are they prefinished maple?

I use 1/4" or 5mm melamine backed MDF melamine for melamine uppers. I usually use 13mm backs for base cabinets.

Sorry but I don't use prefinished maple. If I ever need to make cabinets with prefinished ply, I would spray some 1/4" or 3mm thick panels.
Tim
 
Back
Top