ear3
Member
- Joined
- Jul 24, 2014
- Messages
- 4,341
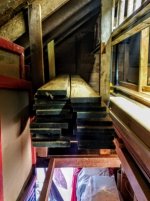
A while back I posted about this wood I had found at Boards and Beams in Fairfield, NJ:http://festoolownersgroup.com/building-materials/kosso-wood!/
It turns out that this West African wood has now been listed as a CITES species, so I am doubly happy that I managed to build up a stockpile, as I will likely never come across it again short of going on the black market.
I've been holding off on building anything substantial with it -- save for a small bathroom shelving unit for my wife -- in part so as not to fritter away my stock, but mainly because I stupidly only picked up one 8' board of 8/4. That mains I basically only have one shot to do a piece furniture that calls for thicker legs. The rest of my stockpile is generously roughsawn 4/4, which averages around 1 1/16" in thickness. In principle I could double up the 4/4 to create thicker boards, but because of the wild grain, doing so would be more noticeable than, say, laminating straight-grained white oak where no one is the wiser.
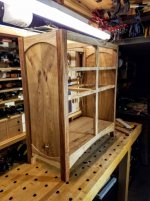
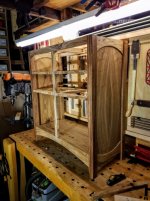
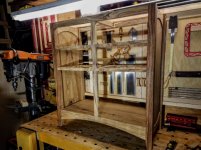
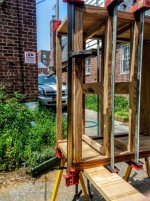
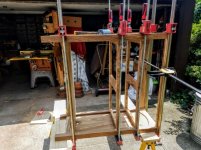
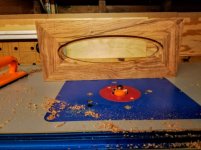
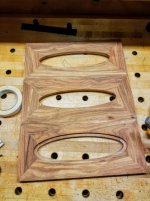
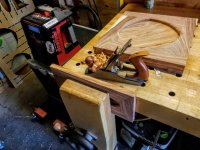
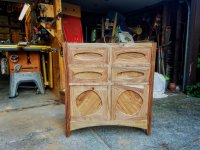
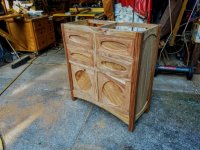
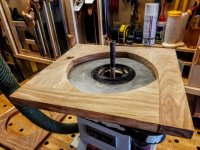
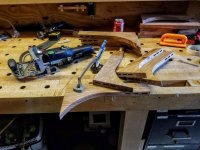
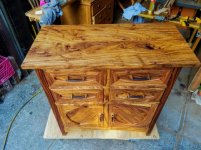
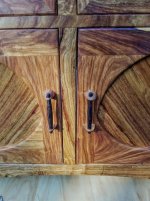
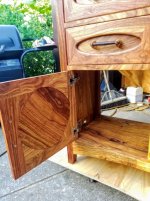
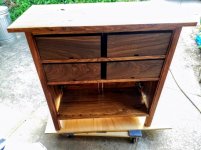
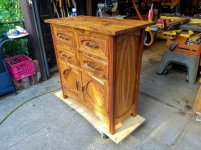
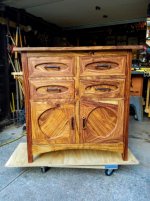
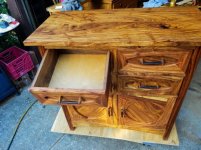
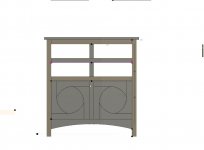
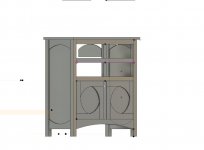
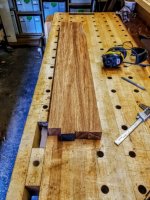
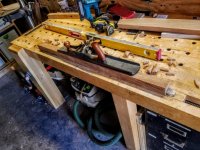
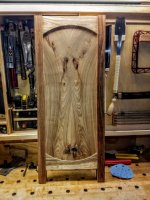
So I've finally decided to go ahead and take a substantial bite into the stock to build what I'm calling a telephone table since it will be used as a base for my home electronics (printer, modem/router, etc.), but which in reality is constructed more like a sideboard. Other than the Kosso wood, it's mainly a vehicle for this shape I've had kicking around my head for a couple of years, but haven't really attempted to make, which you can see featured on the doors in the Fusion 360 rendering I did of the basic framework that's appended to this post.
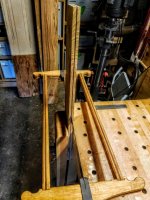
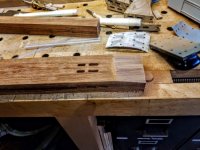
I don't normally make models of the pieces I do, but since there are a number of components that will require Shaper Origin made templates -- other than the door frame members, the arched rail on the front and sides, and the arched side panels -- I had to at least build the framework of the piece. A lot of things are still up for grabs, like the drawer fronts and the interior spacing/shelving of the lower portion, but I figure that I will work those out as I go along.
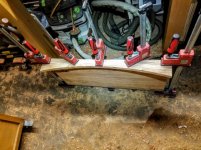
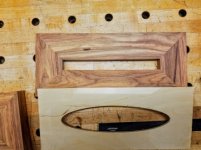
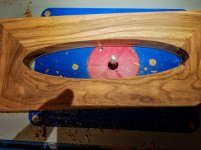
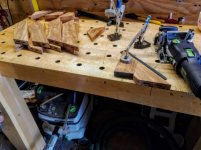
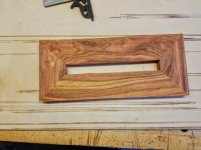
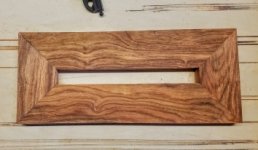
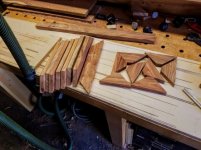
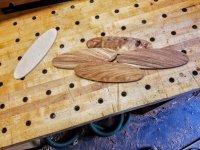
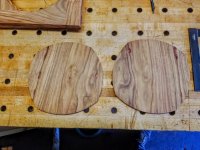
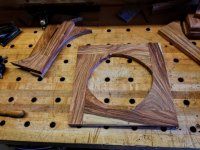
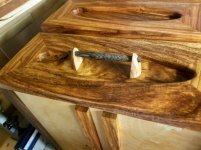
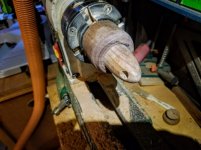
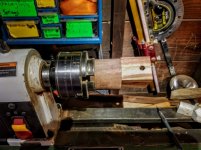
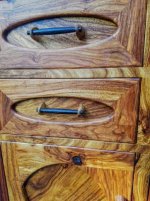
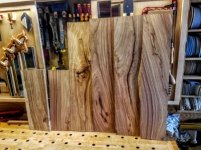
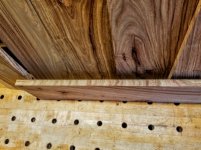
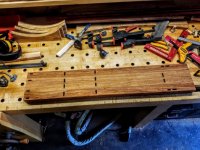
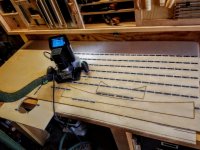
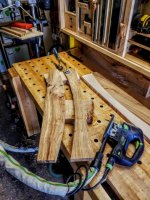
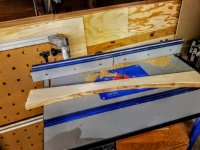
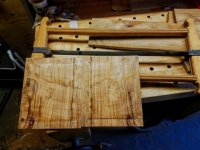
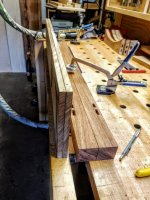
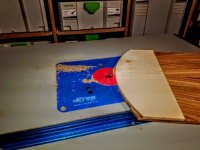
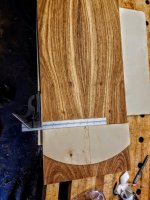
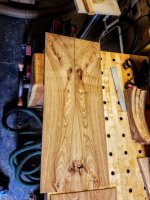
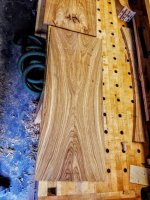
I've already made substantial progress on the build, and so will be posting more about it, but for now I'll just show an example of the cool and varied grain patterns you get with Kosso:
[attachimg=3] [attachimg=4]
Lots of knots that concentrate an almost blood red sap, and grain that reflects the bending/arching of the tree.
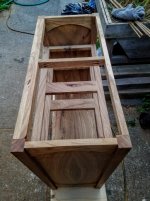
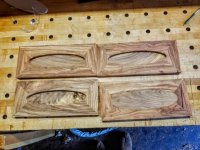
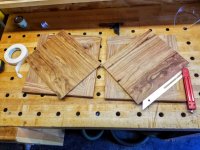
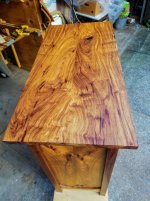
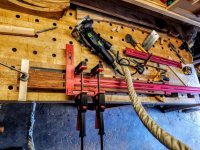
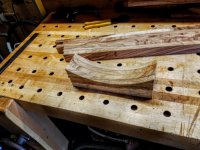
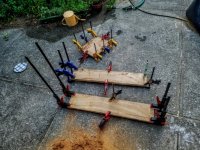
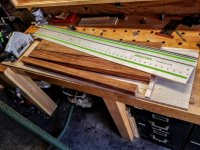
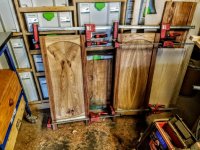
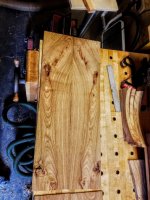
Here's what's left of my stockpile after sourcing all the boards for the casing of the table. The top will eat up another board from there:
[attachimg=5]
It turns out that this West African wood has now been listed as a CITES species, so I am doubly happy that I managed to build up a stockpile, as I will likely never come across it again short of going on the black market.
I've been holding off on building anything substantial with it -- save for a small bathroom shelving unit for my wife -- in part so as not to fritter away my stock, but mainly because I stupidly only picked up one 8' board of 8/4. That mains I basically only have one shot to do a piece furniture that calls for thicker legs. The rest of my stockpile is generously roughsawn 4/4, which averages around 1 1/16" in thickness. In principle I could double up the 4/4 to create thicker boards, but because of the wild grain, doing so would be more noticeable than, say, laminating straight-grained white oak where no one is the wiser.
So I've finally decided to go ahead and take a substantial bite into the stock to build what I'm calling a telephone table since it will be used as a base for my home electronics (printer, modem/router, etc.), but which in reality is constructed more like a sideboard. Other than the Kosso wood, it's mainly a vehicle for this shape I've had kicking around my head for a couple of years, but haven't really attempted to make, which you can see featured on the doors in the Fusion 360 rendering I did of the basic framework that's appended to this post.
I don't normally make models of the pieces I do, but since there are a number of components that will require Shaper Origin made templates -- other than the door frame members, the arched rail on the front and sides, and the arched side panels -- I had to at least build the framework of the piece. A lot of things are still up for grabs, like the drawer fronts and the interior spacing/shelving of the lower portion, but I figure that I will work those out as I go along.
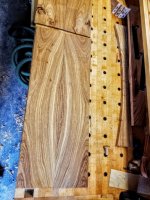
I've already made substantial progress on the build, and so will be posting more about it, but for now I'll just show an example of the cool and varied grain patterns you get with Kosso:
[attachimg=3] [attachimg=4]
Lots of knots that concentrate an almost blood red sap, and grain that reflects the bending/arching of the tree.
Here's what's left of my stockpile after sourcing all the boards for the casing of the table. The top will eat up another board from there:
[attachimg=5]


")