KS120 - Modify to shadow light?

FestitaMakool

Member
Joined
Oct 12, 2019
Messages
1,491
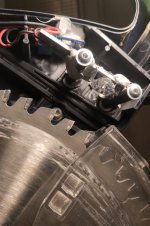
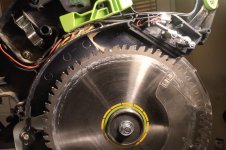
I just watched this video - And have been tinkering with the thought of opening my saw to see what may be possible.
Anyone else who have had the thought or seen the inside where the laser is?
=PivzyDiaWDB4fWUZ
 
I feel like the laser should be fairly accessible through the lens that can be removed and cleaned.  Maybe not to the point where you can remove the module, but its location is pretty open and available.
 
I would love to either replace the LASERs with LEDs or add LEDs to my KS120. Here are two videos showing the placement of the LASERs in the KS120:


Removing the LASER assemblies appears to provide enough space to fit several LEDs, but it might be possible to attach low-profile LEDs to the clear plastic lens cover shown in the second video.
 
Last edited:
Didn't someone share a video in the forum on how he changed the laser to shadows on his Kapex 120?
 
[member=75217]squall_line[/member] That's the post I had in mind. Thx.
 
I remember the thread [member=80937]Stefan Kawalec[/member] posted, and thought it was a good project.  It's a shame the photo gallery is missing, but Stefan's description of his process is clear enough for me to follow without the photos. However, one step missing is the adjustment of the MT3608 variable regulator.

I found this description on Reddit using the same LED and regulator for a Makita modification:
https://www.reddit.com/r/Makita/comments/16zt7xo/retrofitting_led_worklightshadow_line_to/

"Adjust the potentiometer on the DC-DC voltage converter. You will need to turn it counterclockwise. It will take 20+ turns before the LED comes on. Keep turning until the brightness maxes out, then back off to get the lowest voltage to maintain that brightness level. If you're metering the voltage, this should be between 11 and 12V."

The Makita LED module and the MT3608 appear to be inexpensive parts, and I think someone with a 3D printer could make a housing for them to fit in the same location as the existing LASER modules.  Otherwise, Stefan's method of securing the LED module to the existing posts for the LASERs should be good enough.
 
I must confess that the idea of replacing the laser lines on the Kapex120 with shadow lines was quite appealing when I first learned of it and the subsequent information of how people went about doing it. But after some thoughts, I decided that it isn't for me unless it's done by Festool or done in the form of a conversion kit supplied by Festool for these reasons:

1) It's too complicated for me to do the switch by myself (I'm good at woodworking, but not at everything! [tongue]), and I'm concerned that I could screw up the change job and also couldn't get the laser back to its factory performance (which I'm happy with) if I needed to go back
2) Shadow lines seem to be better than laser lines (no actual experience with shadow lines, so I'm trusting those who said they are better in good faith), but they still don't provide the same kind of precision as a stop block or aligning the cutline with the blade tooth. In other words, the shadow lines can't meet the high standards that may be required for certain joinery work.

For those of you who are capable of making the change on your own, more power to you.

 
[member=70363]MikeGE[/member]
Thanks for mentioning me.
Sorry for the lack of photos. I've been cleaning my google account and I didn't realise that I also removed photos that were shared in this post.
There are numerous ways to mount that Makita LED, I've chosen the fastest one despite it cannot be adjusted, but there is no need for that.
I think it's worth trying and everyone could do it. If there's any problem you could always stay with the original laser. And extra parts are so cheap that there is almost no money loss.
I will try to reupload the pictures, because I might have sent it to someone on WhatsApp. If that person still has them, I will let you know here.
 
ChuckS said:
I must confess that the idea of replacing the laser lines on the Kapex120 with shadow lines was quite appealing when I first learned of it and the subsequent information of how people went about doing it. But after some thoughts, I decided that it isn't for me unless it's done by Festool or done in the form of a conversion kit supplied by Festool for these reasons:

1) It's too complicated for me to do the switch by myself (I'm good at woodworking, but not at everything! [tongue] ), and I'm concerned that I could screw up the change job and also couldn't get the laser back to its factory performance (which I'm happy with) if I needed to go back

Fair enough.  I'm not bashful about modifying my tools and equipment as needed, even if I mess it up horribly and have to replace it. (been there, done that).

ChuckS said:
2) Shadow lines seem to be better than laser lines (no actual experience with shadow lines, so I'm trusting those who said they are better in good faith), but they still don't provide the same kind of precision as a stop block or aligning the cutline with the blade tooth. In other words, the shadow lines can't meet the high standards that may be required for certain joinery work.
As someone who has used both, I prefer the LED shadow line, and only the superior dust collection of the Kapex tipped the balance for me.  Please don't be so quick to dismiss the accuracy and ease of use of a sharp and well defined shadow line.  I compare the shadow line and LASER line to a knife line and a grease pencil. Those who have used the shadow line will likely agree.  I don't use the LASER on my Kapex as my stop block is accurate.  However, when I don't use the stop block, I tap the blade into the wood to identify where it will cut.  This method is slower than the shadow line, but can accomplish the same thing.

ChuckS said:
For those of you who are capable of making the change on your own, more power to you.

If I had access to a 3D printer, and knew how to use it, I would not hesitate to churn out aftermarket modules that would replace the two LASERs.
 
Stefan Kawalec said:
[member=70363]MikeGE[/member]
Thanks for mentioning me.
Sorry for the lack of photos. I've been cleaning my google account and I didn't realise that I also removed photos that were shared in this post.
There are numerous ways to mount that Makita LED, I've chosen the fastest one despite it cannot be adjusted, but there is no need for that.
I think it's worth trying and everyone could do it. If there's any problem you could always stay with the original laser. And extra parts are so cheap that there is almost no money loss.
I will try to reupload the pictures, because I might have sent it to someone on WhatsApp. If that person still has them, I will let you know here.

I hoped mentioning you would get your attention!  I hope you can find the photos and add them to the thread.
 
[member=70363]MikeGE[/member]
A added pictures and a video link to the original post.
Just in case I'm adding it here as well:
 

Attachments

  • 01.jpg
    01.jpg
    178.4 KB · Views: 89
  • 02.jpg
    02.jpg
    188.5 KB · Views: 85
[member=80937]Stefan Kawalec[/member]
When I looked up the part number for the Makita LED, the picture I see online displays the LED module attached to the wires. There wasn’t a PCB. Can you comment if the PCB does in fact come with the Makita part # that you provided?

 
[member=66966]jonnyrocket[/member]
No there's no voltage regulator. You need to buy one of those: DC/DC STEP-UP converter MT3608. It cost around 1 Euro/1 USD.
Solder the LED module wires to it and solder other side to KAPEX output wires (those behind the switch). After that turn the knob of the converter counter-clockwise until the LED shines bright.
 
jonnyrocket said:
[member=80937]Stefan Kawalec[/member]
When I looked up the part number for the Makita LED, the picture I see online displays the LED module attached to the wires. There wasn’t a PCB. Can you comment if the PCB does in fact come with the Makita part # that you provided?
I attached an image I grabbed from a UK vendor showing the components of the LED printed circuit board (PCB) that Stefan wrote about. Hopefully, this is similar to the LED module you saw.

Makita-620F05-6.png
 
Last edited:
Thanks to both of you.

The first search I did, displayed an LED directly attached to a pair of short wires and a connector on the end. Going back and searching again, I realized that the picture I was being shown, was the wrong part number!!
Making sure that the results from my search matched the actual part number, I do see the correct part with LED attached to the printed circuit board as MikeGE has shown.
 
MikeGE said:
Snip.
If I had access to a 3D printer, and knew how to use it, I would not hesitate to churn out aftermarket modules that would replace the two LASERs.

Anyone with the necessary equipment willing to pursue this further?
 
I am happy to help draw the part in CAD and my company can produce the parts using industrial 3D printers so we will have great materials and pricing.

Sadly, I don't own a KS120 so I will need to work with someone to get the appropriate dimensions etc.
Anyone interested?
 
[member=66966]jonnyrocket[/member]
Oh, you meant Makita PCB, I thought you were asking about voltage regulator.
Original Makita LED module comes with it's own PCB with two LEDs mounted on it.
Picture provided by [member=70363]MikeGE[/member] shows that perfectly.
[member=57948]ChuckS[/member] [member=76192]woodwise[/member]
I think that there's no need for 3D printing anything.
If you are willing to do so, a bracket/frame for Makita module is the only required thing. That bracket should needs two yokes/protruding through holes at each end so it can be mounted on two original laser mounting rods.
 
Back
Top