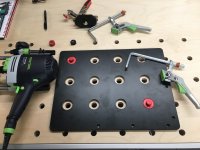
I received the Woodpeckers MFT Jig and decided to use it to route 20mm holes in 19mm thick Baltic birch using the recommended Whiteside 1/2" router bit.
The first 32 holes:
I worked on this top outside on a large teak table (roughly 250#) that will seat 12 people so it's rather sturdy, however it will still sway a little bit, much like an MFT. Not a lot of sway but it's there. The hole making was difficult and after the initial plunge, the router still had to be moved in a circular pattern 8-10 times for each hole. It was slow going. The hole diameters averaged 20.20mm with a std deviation of .2mm. Time needed was 2 hours. [mad]
The second 32 holes:
It started raining so I moved the project downstairs to the work bench. This bench is solid with no movement what so ever, it probably weighs in around 600-700#. The hole making was much easier because of the sturdiness of the bench, however the router still needed to be moved in a circular pattern 4-5 times for each hole. The hole diameters averaged 20.15mm with a std deviation of .05mm. A definite improvement. Time needed was 1-1/4 hours. [sad]
At this point I decided to halt the project and just think about the next step. I had now produced 64 holes that averaged 20.20mm to 20.15mm in diameter. However the actual range of hole sizes was 19.92mm to 20.54mm. [eek] This was pretty much out of control for precision positioning with existing commercial dogs.
Woodpeckers dogs = 19.90mm
Veritas dogs = 19.80mm
What I had was a top that could be used for clamping but certainly not for locating pieces precisely.
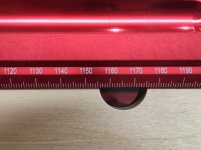
After more measuring I realized the hole location accuracy for this jig was spot on. After routing 12 holes, the distance from the leading edge of the 1st hole to the leading edge of the 12th hole measured 1055.50mm versus a perfect dimension of 1056.00mm. Not quite up to CNC tolerances but extremely accurate for this type of fixture.
What I really needed to control was the final hole diameter if I wanted to use this for precision registration of parts. Uniform hole diameter is what I was after. Once I achieved that, I could then make custom sized dogs that fit the holes or purchase the adjustable dogs from UJK.
With this in mind, I decided the next step would be to purchase the Festool 20mm hinge boring bit and use it with the Woodpeckers jig. The Festool bit would give me a consistently round hole and a consistently sized hole.
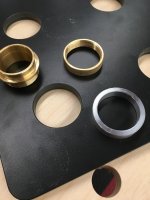
I just needed to machine an aluminum adapter ring with a snug ID to fit the Woodpeckers brass guide bushing and a snug OD to fit inside the Woodpeckers template. The final 32 holes were routed with this combination.
The third 32 holes:
The project was again moved outside and placed on the teak table. The OF 1400 speed was set to 4 and that seemed like a sweet spot. The holes were incredibly easy to produce because the only motion needed was to plunge the boring bit into the ply. No extra circular motion needed. The holes came out to 20.10mm with a std deviation that's nil. Time needed was 15-20 minutes. [big grin] [big grin]
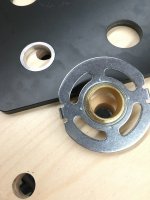
Photo 1. The aluminum adapter bushing.
Photo 2. The aluminum bushing along with the Woodpeckers guide bushing.
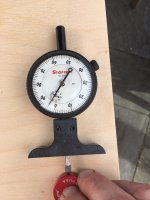
Photo 3. The average play between a dog and the first 32 holes, .016-.017".
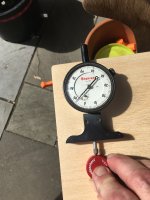
Photo 4. The average play between a dog and the second 32 holes, .007-.008".
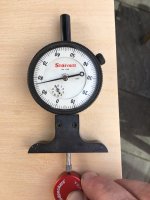
Photo 5. The average play between a dog and the third 32 holes, .005".
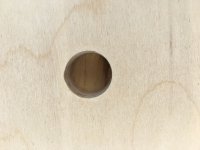
Photo 6. A typical hole routed with the 1/2" router bit and the circular motion needed to clean up the hole.
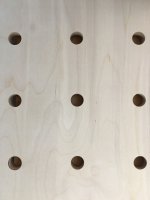
Photo 7. A look at several of the holes routed with the 1/2" router bit. Almost all of them appear to be irregular and a little out of round.
Photo 8. A look at several of the holes routed with the Festool hinge boring bit. Uniform in size and round.
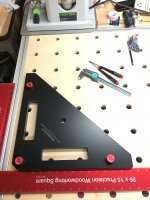
Photo 9. The MFT layout square.


 Start your own thread.