Layered drywall wainscotting using vinyl trim

Saskataper

Member
Joined
Jan 27, 2013
Messages
278
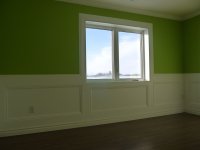
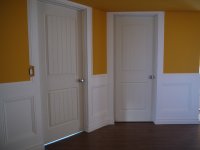
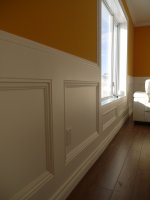
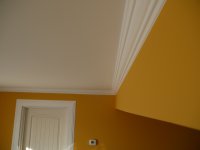
Finally got to start installing the vinyl trim on my first big decorative drywall project. The trim was two weeks late getting here so I'm going to have to bust my ass to get it done so I can start taping a couple big houses next week.
The trim is a trim-tex product, they are a manufacturer of vinyl drywall corner bead in Chicago where I went last fall to take a course to become a factory trained installer of there products.
I was loving getting to put my kapex to work, it was a dream to use. Really easy to flip back and forth between 45s, the double laser was a huge help getting my cuts perfect, the hold down clamp was quick and easy (probably getting a second one tomorrow), and the dust collection was incredible.
I will update my progress as I go, this basement will be stunning when I'm done with it.
 
so does it have a staple flange and then you float it when you're done?
 
Yup, staples and then a couple coats of mud. I guess its a blend of the finish carpentry and drywall finishing trades. It's a really nice change for me, and a really good excuse to buy more tools.
 
Got to start mudding my trim today, it's a tedious job but really rewarding because you really start to see how everything is going to look in the end and the homeowner loves it.
I am so happy I bought the kapex, it made this job so much nicer. This stuff likes to be cut laying down so I had to make alot of bevel cuts which was a dream with this saw, its easy to cut to the millimetre with the lasers, and there wasn't plastic dust all over the basement.
 
Here is the finished product. I just recently was able to go see it all painted up.
 

Attachments

  • P1100913.jpg
    P1100913.jpg
    961.8 KB · Views: 419
  • P1100921.jpg
    P1100921.jpg
    999.8 KB · Views: 381
  • P1100927.jpg
    P1100927.jpg
    911.5 KB · Views: 358
  • P1100933.jpg
    P1100933.jpg
    707 KB · Views: 445
  • P1100940.jpg
    P1100940.jpg
    425 KB · Views: 363
Thanks a lot. I was starting to wonder if I did something wrong, no one was saying anything.
 
Nice job there, Is this a new product where you live? It has been used here in the states to my knowleadge since 1997. The contractor back then even installed a wallboard panel that looked like wood. Stained up from 40 feet it looked ok. However with any of the drywall type products crisp details have left the room. No reflection on you tho. Be well my canadian friend [smile]
 
Not sure how long it's been available here, But I know there isn't much of it getting done, it's all special order for me.
 
Wow, very nice work!

I see that the trimtex is fastened with staples. Do you use the trimtex spray adhesive as well as staples (#847 I think)?

Do you use any caulking at the edges or mitres?  Do you use drywall or mdf for the panels?

Any other details you can share much appreciated!

Mike
 
This job I just used staples, recommended installation is with the 847 spray adhesive and staples. The spray glue doesn't have a very long working time so you have to install your pieces perfectly if you want everything to line up. I've since started using the spray glue as I am getting quicker at the install.
 
Surely someone can move that light switch! Nice end result though. Does this work out cheaper than wood/ mdf trim?
 
Yeah those light switches were a pain. I wanted to move them but there were tele-posts and framing in the way.
Cutting those little slivers of vinyl trim for the returns and getting them glued in was tough.
The framing on this house was a joke, this was a walkout basement and the wall with the windows was out of plumb by 3/4" from top to bottom.
The big window in the orange room was plumb so where the bottom was flush with the drywall the top was 5/8" proud of the drywall. Casing these windows the traditional way would have been tough.

The long walls were like snakes, I'm pretty sure the framer didn't own a chalk line or level. Oh and the concrete floor varied at least an inch. It was a total mess, really difficult to find my height for the chair rail. I ended up borrowing a 2 line laser level to get it all nice and straight.
 
Back
Top