waho6o9 said:
afish said:
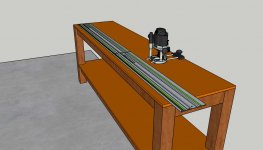
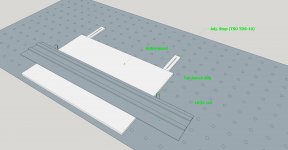
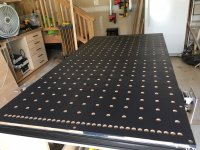
I like my LR32 system but it does have some issues. First I hate those setback bars or whatever they are called. They are a pain putting on/off all the time. So I came up with a different method. I have a 4x8 mft style bench I made with the parf guide system. Then I made a a couple adjustable plywood stops (very similar to the TSO TDS-10) Now I just use the Festool setback bars to set set the first row and use a set of tall bench dogs to bump the LR32 rail upto and set the plywood stops to the side of the cabinet gable. Now you can batch them out twice as fast. Most of my stuff is custom depth so the adjustable plywood stops allows any width.
Pictures please and welcome to the FOG
Thanks, unfortunately I tried posting pics before but I couldn't get it to work for some reason. Im also neck deep in other unrelated projects so it will be awhile before I could get some pics and the bench is buried at this point. I will try to explain better.
1. First use the Festool setback bars as usual to get your LR32 rail onto your gable panel in the correct location (Dont clamp the rail to the work piece) and dont remove the bars yet.
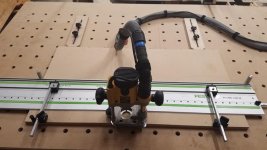
2. Position the the workpiece and rail onto the mft or mft style workbench in a comfortable position for routing the holes. Typically you will be standing facing the long edge of the table and long edge of the gable panel with the rubber edge of the rail closest to you.
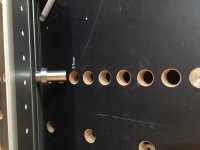
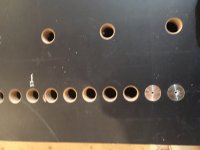
3. You will then insert a TALL (the bench dogs need to be taller than the gable since the rail will be butting up to them) bench dog in the closest 20mm holes on the left and right side of the gable and to the BACK side of the LR32 rail which typically would be the short sides or the top and bottom of the gable. It wont matter if there is some play side to side but you dont want to leave extra empty holes.
4. now carfully slide the gable and LR32 rail so the ends of the rail that over hang the panel touch the tall bench dogs being careful not to bump the rail off the correct setback. Your Festool setback rods should still be on.
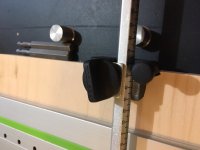
5. Now you just need to put some type of stops (you need two near the rear corners of the gable) against the back edge of the gable. I made a plywood version of the TSO TDS-10 but used the parf anchor dogs so I could simply route a slot instead of mortising out for the top of the dog and bought some cheap 8mm knobs from amazon. You could even use scraps of wood and just some clamps that fit in the 20mm holes. You just need a way to create a stop for the gable panel so it cant move back or away from you.
6. so at this point you should have your gable panel with 2 stops along the back edge that prevent the panel from being moved back but the gable panel still has some movement left to right between the tall bench dogs but that doesnt matter since the Festool end stops in the LR32 rail will lock that in place and the hard edge (non rubber edge) of the LR32 rail should be touching the tall bench dogs where the LR32 rail overhangs the gable on the left and right.
7. now you can remove the setback rails and route the holes. Note that there is nothing preventing the Gable or rail from sliding toward you the stops for both the gable and rail only prevent rearward movement. So I just apply slight pressure back as I move the router along the rail. I have never had any problems with either moving between the rearward pressure and the anti slip rubber on the rails keeps everything in place. You can throw a clamp on the gable through a 20mm hole of your choosing for a little extra insurance but I dont even bother with that anymore.
8. The only slop you need to watch for is the left to right movement since everything can still slide left to right (but remember the end stops lock the rail to the panel. If you route left to right then make sure you start with the gable touching the tall dog on the right.
I know it sounds harder than it is it only takes 30 seconds once you have the system down. The best part is you can batch out all gables that have the same depth without using the setback rails and there is no complicated setup and the gable panels can be swapped out in seconds. A pic would be much better and I will try but it will be awhile before I can do it since my bench is buried at the moment.