Making Butcher-Block Counter Tops

Joined
Jan 15, 2007
Messages
2,619
Hi Everyone,
I'm in the process of building and installing a couple of butcher-block tops in my kitchen, and I wonder if anyone  can offer some advice.

There will be two tops, each about 30" wide x 30" deep.  I plan to face glue 1.5"-wide maple strips to create the top.

Here are my questions:
1. I've heard of people installing long bolts through butcher-block tops.  Is this necessary?
2. What would you use to finish the tops?

Any other comments or suggestions are welcomed!

Thanks,
Matthew

 
The biggest challenge can be keeping the glue from failing due to moisture seeping in and weakening the joints, so I would think a waterproof glue is in order. One of the most knowledgeable guys I know of on this issue is Bob Smalser who has had a very long thread on SMC: "Are your glue joints repairable?" or something like that. I would start by reading through his contributions. He is a boatbuilder, amongst other things and is well written to boot. You will learn things may be useful beyond your cutting boards. I also think this would be a great project to apply a Domino. Improve alignment and reinforce your glue lines at the same time.
 
I made a smaller (14" x 24") butcher block top a couple of months ago.  I used Titebond 3 to glue the strips and General Finishes Salad Bowl Finish.  I've frequently heard that a good glue joint is stronger than the wood so I don't think a bolt would be necessary to keep the top together.  I glued up small sections and ran them through the planer then glued up the sections to minimize sanding.  You could always use the Domino or biscuits for more strength or help alignment.  If you are going to cut on the tops you could finish with butcher block oil.  Tom.
 
Greg and Tom,
Thanks for your suggestions.  I definitely will use waterproof glue.  I've been happy with Titebond II or Titebond III in the past and will likely use it again here.

I'm definitely going to glue up just a section at a time, the glue those sections to each other.

I don't plan to do chopping on the top, so butcher block oil sounds like a good choice.

I had the feeling that bolts are not necessary, as I have done fairly large face-grain glue-ups without them in the past.  But I wasn't sure if I was overlooking something here.

Using the Domino...
 
I made a butcherblock table several years ago; didn't use bolts.  I did put a brass strip around the edges (it was oval).  Found that the table shrunk over the years, and I had to keep readjusting the belly band.  A nice touch, even though it didn't turn out to be functional.

What I found was that it was very hard to run end grain wood through the planer. It worked, but the machine complained alot.  Luckily, this was at a night school class I was taking, so the school's planer.

Then, it was very hard to sand the end grain wood smooth, so plan on plenty of time for the sanding steps.

Good luck, they are beautiful and functional.

Mike
 
Hey Matt,
Sounds like a fun project.  I wouldn't run the end grain top through the planer though.  It will be very tough on the knives and may cause tearout or even kickback. DAMHIKT ;D

An alternative is to make a simple sled that is elevated a little bit higher than the highest part of your stock, and then run a router with a straight bit over it, move the stock, run the router, etc until the panel is flat.  Then some light sanding will do the trick.

I agree with the others that the bolts aren't needed.

Don't forget to post a pic!
 
Ned,

DAMHIKT = Don't Ask Me How I Know This

I didn't know either. I did a Google search. ::)
 
Matt,

I've done several of these from hard maple.  Bolts are not necesssary.  I usually use about 2" wide strips and glue up the entire top at one time. If it is wider than my planer, I then cut the top into sections that will fit the planer - marking both sides of each rip.  When I am thru planing, I glue the panel back together being careful to match up the original cuts.  A wide belt sander is best for the next strips.

As for finish, mineral oil is probably best.  Some people also use a combination of mineral oil and parfin wax.

Burt
 
Matt,

I have made several butcher block tops, in each case using standard Titebond glue for joinder of the strips, without any problems.  No cross bolts.  (I have made at least 100 cutting boards using strips of hard maple, and sometimes mixing them with walnut and cherry likewise glued with Titebond without any problems, save those who insist on putting their cutting boards repeatedly in a dishwasher, and even those generally do not fully delaminate, but rather show some distress at the joint lines!)  The butcher block top I made was intended for dual service - for food preparation and as a daily informal dining table.  It was mounted on a set of base cabinets that served as a divider between a very small kitchen and adjoining dining room.  It was approximately 32" X 60", the bulk of it being from strips of hard maple approximately slightly over 1" thick, and a perimeter of approximately 2" X 2" cherry, to match the rest of the kitchen cabinets I made.  The lengthwise edges were joined by routing a T&G  joint so the cherry would be flush with the top side and overhang the bottom side, giving the impression of a much thicker top without the extra wood and weight.  The end pieces were also cherry, fitted like traditional bread board table ends, with a tongue integrally routed into the ends of the laminated maple top after the cherry side rails were fitted.  The tongues on the ends were much longer than the tongues along the sides.  In each of the end tongues, about 2 inches from each end I routed a short slot to accept a through dowel pin and to allow widthwise movement of the laminated top without splitting.  I intentionally offset the position of the slots relative to the holes in the breadboard ends for the dowels. A complementary groove was routed (dadoed) into each cherry breadboard end.  Each bread board end piece was attached with glue only in the center (of the widthwise dimension) for about 6  - 8 inches, the rest was free of glue and restrained by the dowel pins.  I first soaked the completed top with danish oil (wiping up the excess per usual procedure).  After that oil dried, I applied PU varnish.  I finished both the topside and the underside of the table top.  After > 10 years, no problems whatsoever.  Of course, in NE Ohio, there is a seasonal change in ambient moisture level, so the width of the laminated section and the breadboard ends only match perfectly part of the year.  Beware that the seasonal movement of laminated hard (sugar) maple, even when essentially equivalent to quarter sawn, is still quite significant - approximately 1/4 inch total at each edge joint of the main laminated section relative to the bread board end.  Minor dings and major scratches have not been a problem to touch up or refinish.  However, due to the natural photoreactive color change of cherry (darkening with exposure to light), you may find yourself sanding a greater area when repairing a deep scratch.

Dave R.
 
Matt, I've been making counter tops recently out of 8/4 mahogany. I don't bother with any type of mechanical fasteners. Just glue and pipe clamps. I prefer the pipe clamps on something like this because there are more joints to compress and IME the pipe clamps are better than Besseys or Jorgies, etc. for this task. My glue of choice has been Titebond III.

I do the glue-ups in sections. I've got a 15" planer, so all the sections are 15" or less. After a section has dried, I run them across my jointer (10" with the guard removed. so I can go up to the 15" with no problem) and then the planer to make sure they are squared up well. Then I take my time and use cauls to make sure that everything lines up well when I glue the sections together. Usually just a few passes with a cabinet scraper , followed by the rotex or the 150/3 is all I need. On the job I'm on now, the tops are 28" deep.

As to the finish, I've been using the WB poly from Target coatings. I'm really pleased with the way they have come out.
 
Everyone,
Wow!  Thanks so much for the time you took to help out here.  Even though I've done large cutting boards and portable butcher blocks many times, for some reason this project made me pause.  After all, this will become the kitchen counter top, so I need to make sure there are no hidden details I'm missing.  You have all helped me feel more confident with the main steps and procedures.

Listening to all of you, it seems that the general consensus is that bolts or other mechanical fasteners are not necessary, especially when doing 1.5" face-grain glue-ups.  But again, it was good to hear from people who have done this, so I can be sure.

The one area where there is still a lot of variation is in finishing.  But that's all right, since it seems that all of the options mentioned here can work well.

Lou,
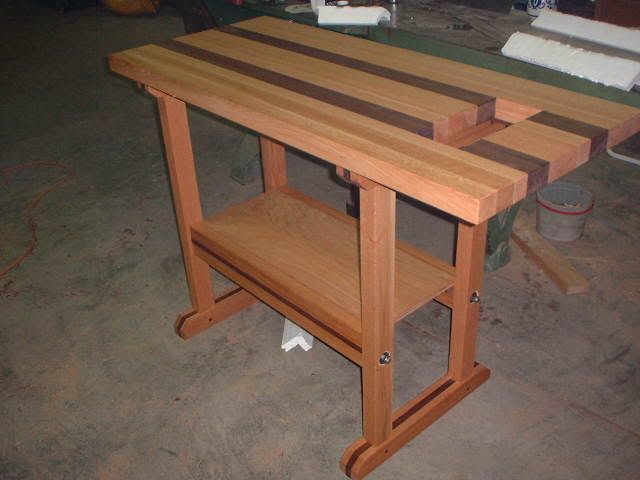
I ended up getting 8/4 hard maple from my local wood dealer.  Spent about two hours picking out the right slabs and in the end got what I needed.  I only have a 6" jointer and a 13" planer, but the basic process you describe will work in my situation!  For sure, I'll be using my Rotex for this job.  Funny you mention the Besseys and Jorgensens, because I have slowly been changing all my clamps over to pipe versions.  Like a lot of learning woodworkers, I went through stages where I tried all sorts of clamps.  In the end, I came back to the "simpler is better" mode in this area of woodworking.  I've purchased numerous lengths of pipe from Home Depot, and have something like 12 or 14 Pony pipe-clamp mechanisms (the kind you don't need to screw the pipe into).  So much better!  When doing glue-ups on cauls, I went back to the simple C-clamps (large ones) or those other simple clamps whose name I now forget that are essentially pipe clamps with rubber heads.

Dave,
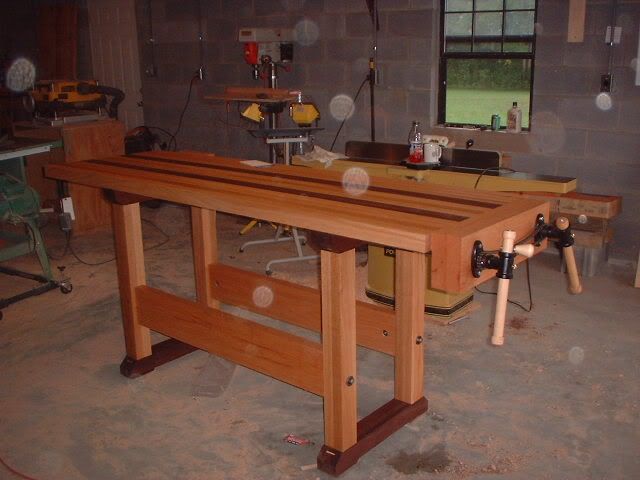
Finishing was going to be my next question, but you covered that!  Some other people mentioned finishing techniques, but for some reason I am partial to your suggestion to use Danish oil and polyurethane to finish the butcher-block counter top.  You really got me thinking about all the possible edging options, and it didn't take me long to start imagining all the great ideas I could employ here, as mentioned in your post!  However, my wife likes the plain-edge look of the glued-up blocks, so I'll go with that.  But I've got several other projects to do in other areas of the kitchen and the house, so I will revisit your edging suggestions again in the future.  In the meantime, your ideas should certainly be helpful to other people doing similar projects, so I'm glad they are recorded here.

Jesse,
I've long wanted to build some kind of router sled that could do planing the way you describe.  I've mentioned this in the old Yahoo forum.  I've seen jigs that help with this, but my interest would be to create something using Festool items.  I've sometimes wondered whether the MFS might somehow be an element to a system like this.  With the size and weight of the butcher-block tops, it does seem like the perfect project to address this idea.

Mike,
Thanks for adding your voice to the "don't need bolts" view.  I'm glad to hear it, since I would rather not have to do that!  And I hear what you're saying about the planer.  When I plane smaller end-grain cutting boards, I usually take off very slight amounts with each pass, or I run them through the planer at an angle, or both.  What a nightmare it would be to get tearout in something like this!!  I'm hoping that with the Rotex, I can reduce the amount of planing necessary for the sections of butcher block.  Unfortunately, I don't have access to a school planer, so my own planer (a Dewalt 13") would have to do all the suffering!

Burt,
Thanks for sharing your skill as a woodworker, which I know is considerable.  I don't have a wide-belt sander, though I've been considering one for some time.  This is a big project, and will make a huge improvement to one of the main rooms in the house.  It's also the room where my wife, who's a serious cook, has a lot of fun and pride entertaining our guests.  So perhaps this is the project to make my case for a new major machine like a wide-belt sander!

Again, thanks to everyone for your time and energy helping out here.

Stay in touch,
Matthew Schenker
 
Matt,

Just to clarify, I don't generally prefer pipe clamps over the parallel clamps. IMO, for certain purposes, the pipe clamps are best. I prefer the other style of clamp most of the time though. By far, my favorite are the Jorgensens. I've got a whole bunch of K-bodys and Cabinet Masters, but the Jorgys are the first ones I reach for every time. 
 
Hi Mat
I love butcher block tops
shoptable022.jpg

this is in the house
shoppics012.jpg

this ones in the shop
I think Per has the right combo for finishing a counter top. His bar would be the right finish
to take care of your water worries.
As far as wide, I would eighter rent some time on a wide belt sander or amke it in halves and finish each half. then glue the halves together and if there is a mismatch it will only be in one spot and a scrapper would take care of that in a zip
Tour
 
As far as mismatch between glued up sections goes, this is the one place where the Domino would really help to insure good alignment, keeping the sanding to a minimum. You could also shoot the end grain with a plane on a simple shooting board, or trim with a saw and guiderail and then shoot if necessary.
 
mystry tour,
I saw that table in the "I'd like to see your projects" discussion and I was taking a close look at it.  Seems like the blocks you glued up are close to the size I'm going to want for my counter top.  Nice work!

If you have them, please post more photos of these kinds of projects.

Thanks,
Matthew
 
Back
Top