MFT 3 needs stabilisers.

Tekton Kid

Member
Joined
Oct 16, 2014
Messages
3
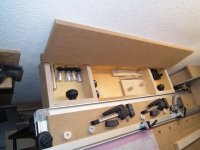
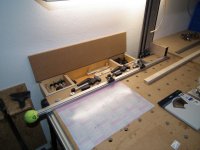
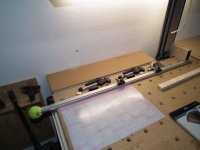
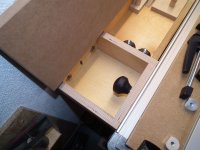
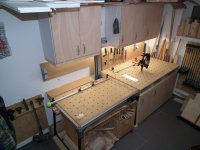
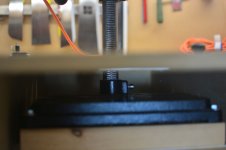
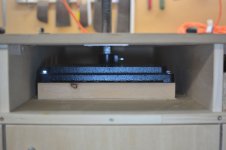
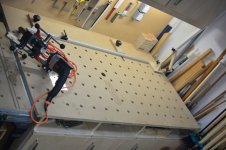
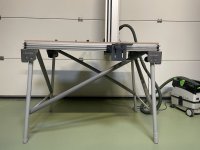
>:( hey everyone, is it just me or do you find that the MFT is prone to shake a little too much when im completing simple operations such as planing with the ratchet clamps and admittedly there were a few knots but I find it to be unstable considering the cost. I mean with the power tools its all smooth as silk and solid, square but now I find myself thinking about the cost of the struts as to use an improvised device may void warranty blah blah. Am I expecting too much? I collect my festool bench clamps tomorrow and hope to get more use out of the table with the added stability of being central to the workpiece. Even the rapid clamp for the track seems like a waste of money as it has to be used with an 1800 mm track or a short workpiece. I have the standard track and a 1400 mm so I can always buy the connectors but for the price...

Forgive me. My question is, should I focus my use of the MFT for my TS, 2200 router and the 850 planer and use hand tools on a traditional bench or do the struts significantly strengthen the MFT? Thanks.
 
The cross members do make the table a LOT sturdier. But even with that, it's still not an idea workstation, particularly for hand-planing boards; the table just doesn't have enough mass to keep it from moving (sliding) around. I don't have a proper hand tool workbench, so I wind up using my MFT for those tasks, and I often find myself contorted into somewhat awkward positions so that I can use my foot or knee to hold the MFT in place.
 
I have a dual MFT with cross stabilizers on both tables. Until I added an extension for a heavy duty woodworking vise, the tables wobbled. Now, I can plane and saw with zero movement of the tables.
 
You really need a much more stable and firm surface for hand planing. The MFT just isn't solid enough for that kind of work. I doubt Festool ever intended it for use with a hand plane.
 
I'm happy with the stabilizers, but wouldn't expect that table to stay put if planing with hand planes either. It's ok for fine tuning stuff with a block plane or a smoother, but I wouldn't expect it to stay put if you are attempting to flatten a face with a jack plane. It will wobble and most likely the whole table will slide on the floor if you put enough power into your plane.

The stabilizers mainly stabilize the end-to-end flexing so don't expect the table to sway sideways significantly less with them.

If I'd try to hand plane on an MFT/3 I would probably try to butt it against a wall or even somehow attach it to a wall (I think I've seen someones build here on FOG where the MFT was attached to a wall).
 
I can hand plane, cross saw, etc with zero wobble with the extension I added. The table is rock solid!
 
Birdhunter said:
I have a dual MFT with cross stabilizers on both tables. Until I added an extension for a heavy duty woodworking vise, the tables wobbled. Now, I can plane and saw with zero movement of the tables.

Would you mind posting a picture of your set up for hand planing?  I am particularly interested in the extension for the vice. Thanks!
 
The MFT is great when used for its designed purpose, and hand tool use or as a workshop bench isn't it. While as a workshop bench it can be made to work it isn't where the MFT shines, just look and you will see that many workshop benches don't use the MFT legs.

YMMV
 
If you are interested, I ordered the steel leg set from Amazon. It is heavy duty steel. I had to drill a couple of bolt holes to get the exact height I needed. Other than drilling the holes, The leg set worked out of the box.

The MFT is now rock solid. It's even more steady than the home build work bench I made years ago.
 
Well thanks for all of the replies and particularly for the solution posted by Bird Hunter. I was using my 850 planer last night for the first time and as per usual the MFT combination made it just a pleasure to use. Im actually a site carpenter so the Festool range I have predominantly stays in the workshop (unless the task is in a finished property where the CTL 26 would be more appropriate.) and despite hating working after a long day I can actually relax when performing joinery tasks with such a high grade finish on thick oak that would ordinarily be covered in burn marks from the skil saw blade. I bought the panther blade for ripping down 40 mm oak and it genuinely produces factory grade edges after being cut and I wasnt even using the zero clearance splinter guard. Love it. Rotex is next on the list
 
I agree planing on the MFT isn't ideal, its more suitable for cutting & clamping. I think i seen a video from festool a long time ago when i was researching for myself before purchasing, where it showed a demonstration on planing but the table wasn't erected just folded & on the ground. This was for stability but i wouldn't fancy or be happy myself bent down & working close to the floor but that was what it showed. But besides that it a great work station & easy to pick up & carry around, light,stable compact & quick. I think its great for me personally on the go all the time but if I wanted a more robust stronger platform i would make 1 myself
 
Obviously a common issue with MFT owners.

There's a nice description by Heiko Rech about stabilizing an MFT by mounting it to a wall.

Even though it is in german I think the pictures on his website explain the idea of it.
Stabilising the MFT

I adapted his idea in my workshop in a different way. The MFT is not directly fixed to the wall.
This is for two reasons.

- I still can use the guard rail
- the screws for connecting the MFT can easily be reached from the top if you want to move it

There are some small boxes in between where I store clamps, bench dogs, bits and pieces...

Now it is fixed to the wall it is extremly stable. I never tried planning but I think this no problem.

Gerald


Attachments

  • Wand-Befestigung MFT 2.jpg
    Wand-Befestigung MFT 2.jpg
    202.1 KB · Views: 1,334
  • Wand-Befestigung MFT 3.jpg
    Wand-Befestigung MFT 3.jpg
    177.7 KB · Views: 1,375
  • Wand-Befestigung MFT 4.jpg
    Wand-Befestigung MFT 4.jpg
    184.6 KB · Views: 1,382
  • Wand-Befestigung MFT 1.jpg
    Wand-Befestigung MFT 1.jpg
    171.7 KB · Views: 1,082
  • Werkbank komplett1.jpg
    Werkbank komplett1.jpg
    143.9 KB · Views: 3,502
Hi Gerald,

Nice workshop. I love seeing small workshop layouts as I'm not overly blessed with space in my own half of a standard garage.

By the way, also loving the "catch" to stop the rail falling down...  [wink]

That looks like a Wabeco drill stand in the middle of the right hand bench in the last photo. I'm sure it's not permanently mounted there, so would you mind sharing how you have fastened it and how it is removed to make use of the full bench surface area? Photos would be great  [smile]

I've been struggling to figure out where to position my bench drill in my very small workshop and a Wabeco stand that could be mounted when required but stored when not would be a fantastic solution.

Regards,

Garry
 
Gerald said:
Obviously a common issue with MFT owners.

There's a nice description by Heiko Rech about stabilizing an MFT by mounting it to a wall.

Even though it is in german I think the pictures on his website explain the idea of it.
Stabilising the MFT

I adapted his idea in my workshop in a different way. The MFT is not directly fixed to the wall.
This is for two reasons.

- I still can use the guard rail
- the screws for connecting the MFT can easily be reached from the top if you want to move it

There are some small boxes in between where I store clamps, bench dogs, bits and pieces...

Now it is fixed to the wall it is extremly stable. I never tried planning but I think this no problem.

Gerald

This is right on!
It's hard to express what a huge difference a shear panel between a free-standing (wobbly) table and a wall makes. A simple scrap of plywood attached to the bottom slot of an MFT and screwed to a cleat fastened to the wall and you've eliminated movement in 2 axis. The existing legs do a good enough job of limiting Z axis movement so hand planing is possible with a suitable clamping strategy.
 
Hi Garry,

thanks. Took some time to find out how to build my new workshop but finally I'm very content with the result.
Like you Garry I very keen to see pictures of other workshops and collect and adapt ideas for myself.

Of course the drill stand is removable. [wink]

The current setup is not ideal. For stability reasons and since I didn't wanted to lose to much height, I put the stand on an 1 1/2" solid wood. I still can reach the screw, but it is really hard.
Probably I will replace the 1 1/2" with something smaller to get easier access to the screw. Even if I lose some height for drilling.
Another possibility would have been to move the stand to the very left... Hindsight is easier than foresight.

I made a cutout to the bench to be able to replace the part that will be drilled. It is longer than wide so I can adjust the position of the drill. Not the complete range but most of it. The metal plate has some wholes so you can push from underneath to remove it.

For more details I attached some photos.

I had a "catch" before. I put a small block of wood between the stop rail and the guide rail. Was also working but not as nice and handy as the new one.

Gerald
 

Attachments

  • Bohrständer 7.jpg
    Bohrständer 7.jpg
    79.5 KB · Views: 662
  • Bohrständer 6.jpg
    Bohrständer 6.jpg
    65.3 KB · Views: 742
  • Bohrständer 1.jpg
    Bohrständer 1.jpg
    89.6 KB · Views: 660
  • Bohrständer 5.jpg
    Bohrständer 5.jpg
    69.4 KB · Views: 693
  • Bohrständer 8.jpg
    Bohrständer 8.jpg
    85.8 KB · Views: 743
  • Bohrständer 2.jpg
    Bohrständer 2.jpg
    130.1 KB · Views: 802
  • Bohrständer 3.jpg
    Bohrständer 3.jpg
    133.5 KB · Views: 1,298
Hi Gerald,

Thanks for the reply and detailed photos. That's given me some good ideas.

Perhaps time to sell the bench drill and get hold of a Wabeco stand...

Regards,

Garry
 
I've used 4 PVC sanitary tubes to stabilise my MFT 3. Works just fine!!
 

Attachments

  • IMG_MFT.jpeg
    IMG_MFT.jpeg
    573.5 KB · Views: 370
I did the PVC pipe system as well.  For my purposes I cut the long pipes so that the distance from the bottom of the slot that fits on the cross piece to the flat end was 47 15/16 inches.  This gave the needed stability without. Putting too much pressure on the leg assembly.  It is pretty easy to break the solid connection between the legs and the pivot assembly that attaches to the table frame.
My used table came with 3 of the 4 leg connections loose.  I drilled holes at the two dimples using a #7 bit and then used a 1/4 x 20 tap.  I tapped the hole from one side only so the threads lined up on both sides.  I added the bolt and tightened it.  Then I added the nut on the other side and tongued that down as well.  The connection does not wobble at all.  I will do the shorter tubes soon.
 

Attachments

  • mft2.jpg
    mft2.jpg
    294.3 KB · Views: 78
Back
Top