MFT Hole Jigs

Svar said:
DynaGlide said:
1. Cut a sheet larger than needed for final top perfectly square.
Here is your challenge #1.
BTW, this is how I did it, but without LR32. Equal spacing is easy and can be done with a simple jig. Perpendicular alignment is tricky.

Actually, you only need one corner to be perfect. Then you work off of the two edges with the perfect 90° angle between them.
 
Thanks Dynaglide....funny I'd seen another video where the fellow used a wooden spacer....never thought about the rail being a spacer ..lots of good comments and ideas here on this subject, thanks everyone for chiming in.
Greg
 
gnlman said:
Thanks Dynaglide....funny I'd seen another video where the fellow used a wooden spacer....never thought about the rail being a spacer ..lots of good comments and ideas here on this subject, thanks everyone for chiming in.
Greg

Given that svar's time of 5 minutes per hole is accurate, and Cheese's times of 6 to 8 minutes per hole, more represented the real time, also that you need a level of skill and dedication that is difficult to maintain or achieve for the time needed just for 1 MFT sized top. It is clear that any kind of pattern bit routing is a poor choice needing between 6 and 10 hours for 1 top.

So using a plunge 20mm bit for the holes is the only sensible option.

So having established that there are some options.
1) make your own (say) 30mm hole template full size.
2) make your own (say) 30mm hole template wide but short.
3) buy a 30mm hole template.
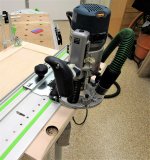
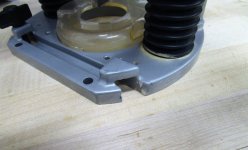
4) use the LR 32 directly with no template
5) use the Parf Guide 1 or the new Parf guide 2

Arguments for the above.

1) I did that so am either experienced (or biased you choose). It takes quite a long time to make and needs really close attention to detail. You don't really know if it's perfect or off by a mm or two until after it's made and used (DAMHIKT). If perfect then it is with out question the fastest way to make several (more than 3) tops even if over a long time. It is quite limiting in that smaller tops are not so easy. It avoids any miss alignment of the copy ring problems if you keep the same orientation (not difficult to do)

2) has almost all the advantages above while being more versatile, easier and faster to make, providing fewer opportunities for miss alignment in making. It takes longer than 1) to make a large top and gives its own chances of miss alignment when repositioning.

3) perfect accuracy of holes in the template, small so smaller tops are easily made, if your copy ring is correctly aligned is (without any question at all) the fastest way for larger sized tops if you make less than 4or 5. The problems of copy ring alignment are mentioned in other posts. My jig is in customs now and I have to make a 300 km trip to get it so will report later when I've got it.

4) certainly a reasonable choice if you are only making 1 and you have ( or want an excuse to get) an LR32. There is no alignment (centring of the bit) issue, you have to be really careful as a mistake will make any time saving over a template irrelevant as you will need to remake the complete top

5) (versions 1 & 2 are functionally the same.) Advantages: for any size of top you can decide at any time that you need 20mm holes in any of the grid positions, your only requirement is that you drill the 3mm holes for the complete grid first if you want to position 20mm holes perfectly anywhere anytime. (For example You could make a cutting station for the 5 meter rail in less than 20 minutes. No other system comes close to doing that, if they can do it at all.) The option to just drill the 3mm grid and add 20mm holes later is amazingly versatile and makes using surfaces never designed for the 20mm grid an option you can use after designs and made. You can make 20mm x 96mm grids on different patterns permitting some unusual clamping and cutting options.

Disadvantages: if you need a large size complete grid it is slow, much faster than a pattern bit, much slower than a template. The repositioning of the guide takes more time than you think it will.

The Parf guide IMNSHO shines in making a smaller number of (perfectly aligned to the grid) holes that can be widely separated, adding holes to surfaces you didn't think of originally, making a single row in a narrow board.

My opinion:
I made the big jig and would not have done so if I knew then what I know now, it was good practice and education.

I have the Parf Guide 1 and am finding new uses for it, it is as accurate as suggested, not much skill needed (but certainly imagination). An incidental benefit is 2x1 meter straight edges

I need some complete grid surfaces so have The Dominofix MFT jig on the way in customs now so will update later
 
Sometimewoodworker said:
Given that svar's time of 5 minutes per hole is accurate
No, it's grossly inaccurate. It is not at all what I wrote.  [big grin]
 
What am I missing? I have watched the videos of the different jigs to drill the 20mm grid of holes.
The jig are expensive & it takes a lot of time to drill a large grid of 20mm holes.

Why not buy a replacement MFT top & a 20mm bit. Clamp the top to the the surface that the 20mm hole grid will be drilled in.
Then use the holes in the replacement top as a guide for the new grid. By doing this, a lot of 20mm holes can be drilled without moving the replacement top template.
Or better yet if someone already has a MFT, remove the top & use it as the template. 
 
Svar said:
Sometimewoodworker said:
Given that svar's time of 5 minutes per hole is accurate
No, it's grossly inaccurate. It is not at all what I wrote.  [big grin]

You said "Clearance holes for MFT size plate 5 min time."

You haven't made clear what that relates to, as total time is impossible and given that Cheese reported 7.14 minutes per hole for his first set and 5.7 for the second set my assumption of your meaning of 5 minutes per hole for you is reasonable.

But please make clear how long it did really take
 
Well just wanting to throw more gas on this fire because that’s the pyro that I am, when it comes to me stating the hole boring machining times, that included unclamping the jig, repositioning the jig, indexing the jig and then reclamping the jig before I moved on to the next hole. So if that averages out to 6 minutes per hole, actual router time was probably 3-4 minutes per hole.

This is the method I used.
Align the jig.
Bias the jig.
Clamp the jig.
Plunge the 1/2" diameter router bit.
Clean up the hole diameter.
Remove the router and inspect the hole for out of roundness conditions. See previous photos.
Reinsert the router and clean up the anomalies.
Remove the router and inspect the hole for out of roundness conditions once again.
Move onto the next hole.

That’s a tedious process...as they say in the hotel business, “bada book, bada boom”.

Translated into woodworker language that would be, chuck up a Festool 20mm boring bit and be done with it. We all have bigger fish to fry.  [big grin]

 
Sometimewoodworker said:
Svar said:
Sometimewoodworker said:
Given that svar's time of 5 minutes per hole is accurate
No, it's grossly inaccurate. It is not at all what I wrote.  [big grin]

You said "Clearance holes for MFT size plate 5 min time."

You haven't made clear what that relates to, as total time is impossible and given that Cheese reported 7.14 minutes per hole for his first set and 5.7 for the second set my assumption of your meaning of 5 minutes per hole for you is reasonable.

But please make clear how long it did really take
I was talking about 13 mm pilot holes only (for the pattern bit to go through). I clamp existing mft plate over a piece of mdf and just punch holes using a drill. It is fast, perhaps not 5 but 10 min per plate, but fast. I use a short piece of plastic pipe as a bushing to roughly center the 13 mm drill bit inside MFT's 20 mm hole. Drop the bushing, drill, repeat. No need for accuracy or any layout at this stage.
Then flip the entire thing and widen the holes from 13 mm to 20 mm with a top (end) bearing pattern bit. How long could it take to plunge and do couple circles with router to shave 3 mm of mdf?
The entire fabrication of a new MFT size top takes an hour conservatively. (Just holes, no trimming to size etc.)

Sorry for the confusion.
 
JD2720 said:
What am I missing? I have watched the videos of the different jigs to drill the 20mm grid of holes.

That there are many more used for the 20mm x 96mm pattern of holes than an MFT top, that using an MFT top doesn't work for many patterns of holes, that the MFT top template doesn't work for an offset grid, that an MFT top is not significantly less expensive than any other jig and is only possibly better value if you have or want an MFT though using the top that you will use as a jig (for anything other than pattern routing) is quite likely to enlarge its holes so not being a good option.

There are probably more but that's a quick selection
 
Cheese said:
Well just wanting to throw more gas on this fire because that’s the pyro that I am, when it comes to me stating the hole boring machining times, that included unclamping the jig, repositioning the jig, indexing the jig and then reclamping the jig before I moved on to the next hole. So if that averages out to 6 minutes per hole, actual router time was probably 3-4 minutes per hole.
[big grin]

Well a nicely fire is useful to dispose of badly made tops [eek]

All of that is essential to making the holes so the 3-4 minutes would not be a real time quote & even if it's a gross overstatement you would still be looking at a long time
 
Sometimewoodworker said:
All of that is essential to making the holes so the 3-4 minutes would not be a real time quote & even if it's a gross overstatement you would still be looking at a long time

Yes, a very long time. That’s while I’ll never go there again.  [big grin]

The older you become, the more time becomes precious. This may sound stupid but it is the truth. We will all identify with that statement at some time.  [smile]
 
Svar said:
The entire fabrication of a new MFT size top takes an hour conservatively. (Just holes, no trimming to size etc.)

At under 47 seconds per perfect hole your skills are clearly way beyond anything I could ever aspire to.

The system you use is certainly a really good one if you use patten bits and it is a great idea to use 20 mm pipe as a protective guide
 
The outer two rows of holes (your x-axis) are also made with the 20 mm bit, if you've got enough extra material it doesn't matter a lot where you put them relative to the final grid pattern on the top (you can trim when you are done to get the edge spacing that you want).

The way that Timothy Wilmot does it is to use a pair of rail dogs to index in the outer holes so that the rail becomes the y-axis when you are cutting the "real" holes. The key to the accuracy of the pattern is keeping the rail dog solidly locked down. I found the rail dogs were tedious to get in and out of their holes. The next time I do it, I'm going to think about using the LR-32 indexing stop to register the rail and use conventional dogs as rail stops. I'll have to be more careful about ensuring that the rail is against the dogs if I do that.

gnlman said:
Hi. Douglas could you explain how you used your lr32 system to achieve this. I've only seen one method that looks repeatable just using the system, and it was running 2 rows of holes parallel down the outside of the top and using the edge guide pins to locate and move the rail down those holes while plunging the 20 mm holes across the top. (hope that makes sense)...the edge guide pins appear to be 6mm so the standard bit that comes with system would not work...would need a 6mm router bit which is available from festool..it seems you would be limited in how long the top could be as I only have the shorter rail...unless there was a way to reset the system accurately. The jig to me seemed to be a simpler solution at the time...had I known about the router/bushing issues I think I would have tried the lr32 idea first..will need to break out the lr32 and do some more investigating...but still hoping for a fix to the jig as it seems faster and easier....that is if it can be made to work..and yes I find the 20mm festool bit makes fine holes for the qwas dogs I have as well....
Thanks, Greg
 
I was given the LR32 rail in error when I bought my TS55.  :-)  However, I have a bosch 1617 EVS and can't afford OF1010 (and don't need) router.  Here are my thoughts: (1) I will buy the UJK Parf Guide when I get the funds.  Seems so simple to use (2) I wish I could use my Bosch router with the LR32 rail.  Why can't festool make adapters to use with other tools... Oh well. 
 
ctvader said:
I was given the LR32 rail in error when I bought my TS55.  :-)  However, I have a bosch 1617 EVS and can't afford OF1010 (and don't need) router. 

The clamp screws on the LR32 plate that hold the router might be able to catch your router - or if not maybe you could drill some hole in the plate to pick up the baseplate holes in your router. That's the way the OF1400 attaches.
 
Douglas Urner said:
ctvader said:
I was given the LR32 rail in error when I bought my TS55.  :-)  However, I have a bosch 1617 EVS and can't afford OF1010 (and don't need) router. 

The clamp screws on the LR32 plate that hold the router might be able to catch your router - or if not maybe you could drill some hole in the plate to pick up the baseplate holes in your router. That's the way the OF1400 attaches.

The 1617 EVS fits the LR32 with a simple mod.  A search should turn up several older topics on this.

[attachimg=1]

[attachimg=2]
 

Attachments

  • IMG_5559.jpg
    IMG_5559.jpg
    458.8 KB · Views: 3,030
  • IMG_1907e (2).jpg
    IMG_1907e (2).jpg
    207.9 KB · Views: 2,221
Back
Top