I've been lurking here for some time and have had my fair share of enjoyment reading along as others build and share. Tonight I decided I'd share a few things I've been working on for some time now and apologize in advance for killing you with pictures.
I'm a huge fan of Ron Paulk's creativity. I probably spent 3 or so months trying to decide between buying a Festool MFT and building something like Ron's ultimate workbench. One day I got a wild hair and went down to the local dealer and, while walking toward the register with a grin on my face, managed to remember I had forgotten my wallet. Without much enjoyment I drove towards the house and it was on that drive that I realized it was a sign. That day I started and no activity in the shop has been the same since.
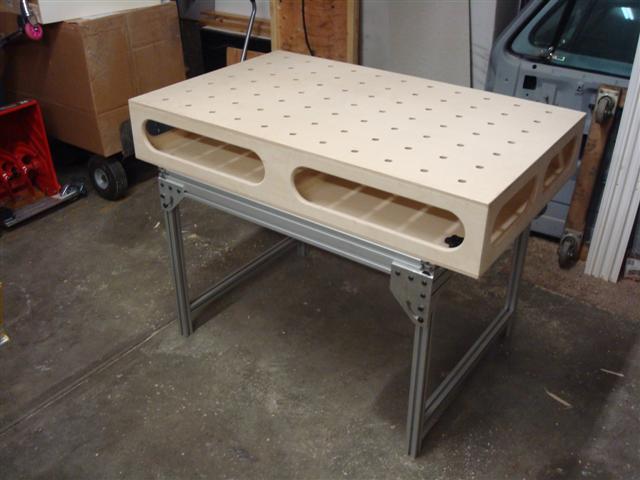
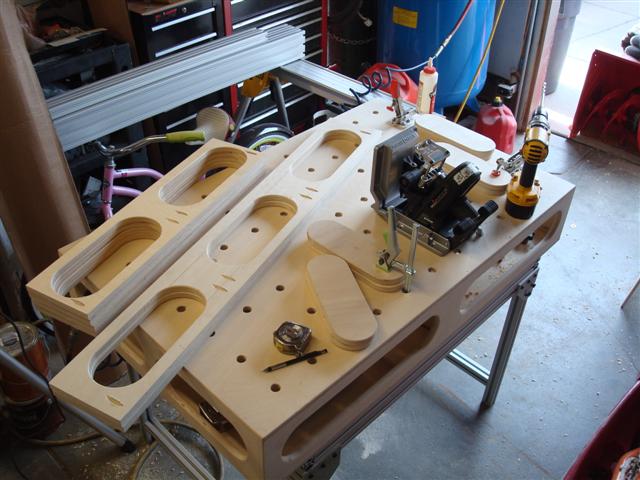
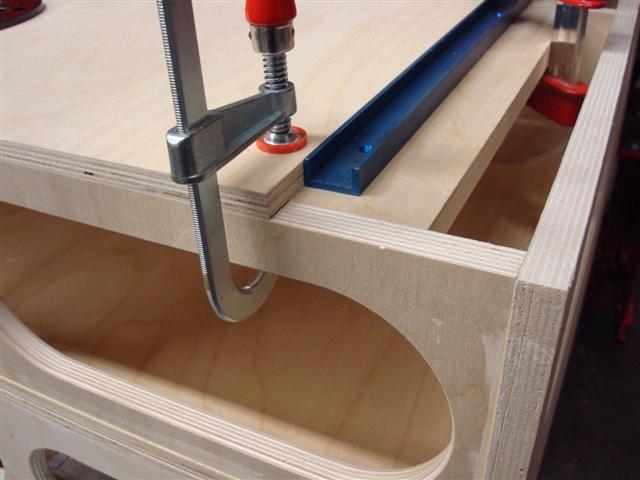
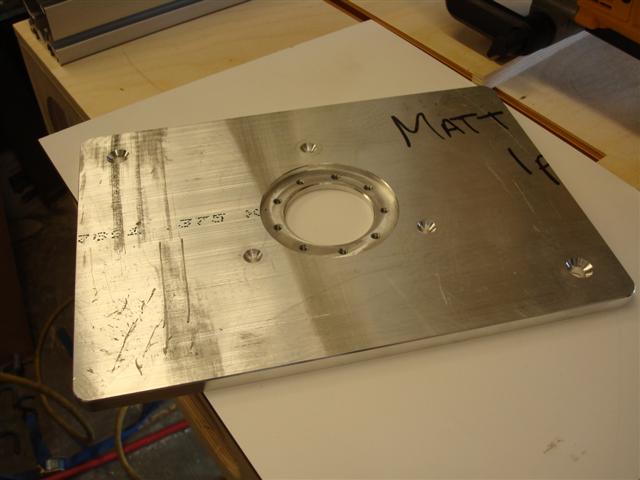
I had/have 2 MFT designs in the works both are modeled after Ron's Ultimate Workbench. I started on the smaller one (30 x 48) and have yet to start the bigger (30 x 72) one because the smaller one has been so versatile. The top itself wasn't overly complex.

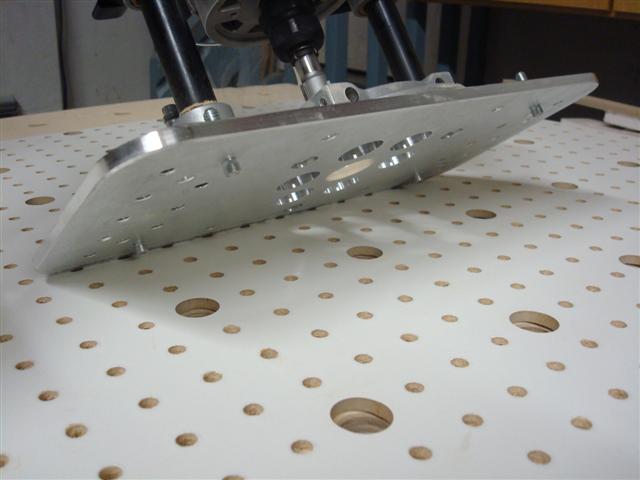
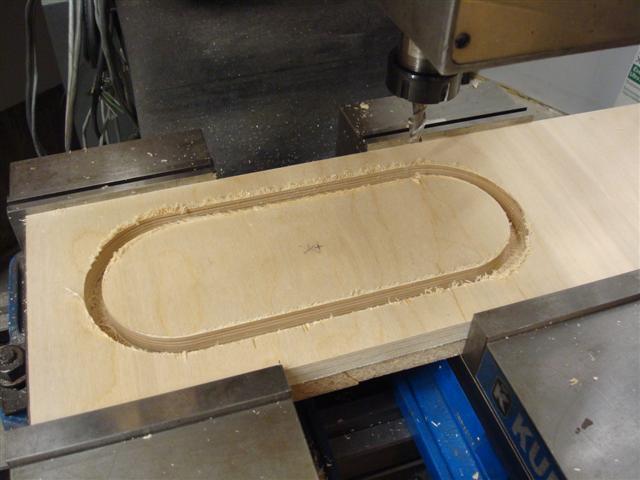
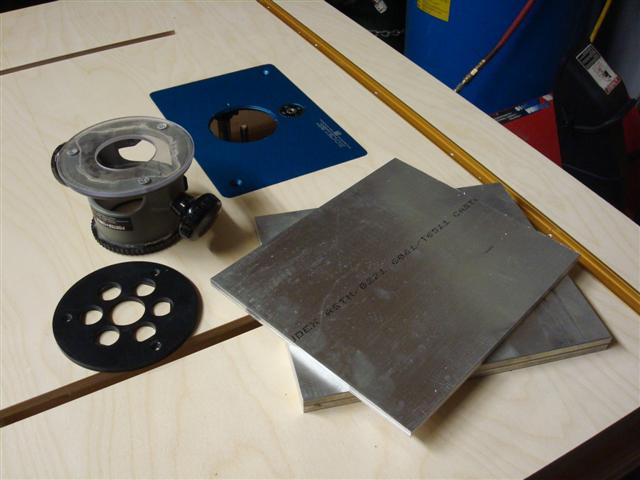
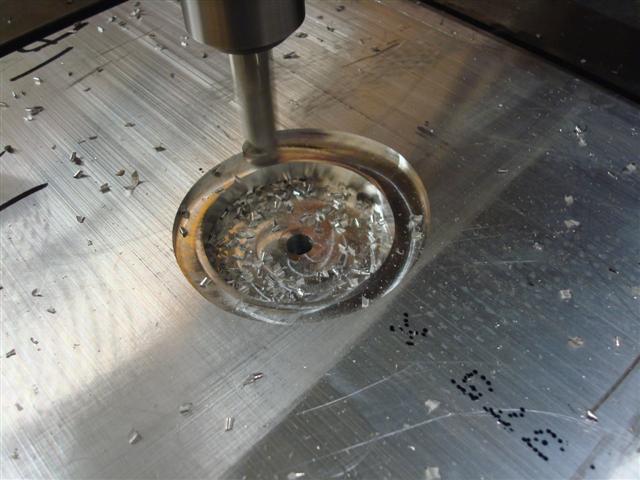
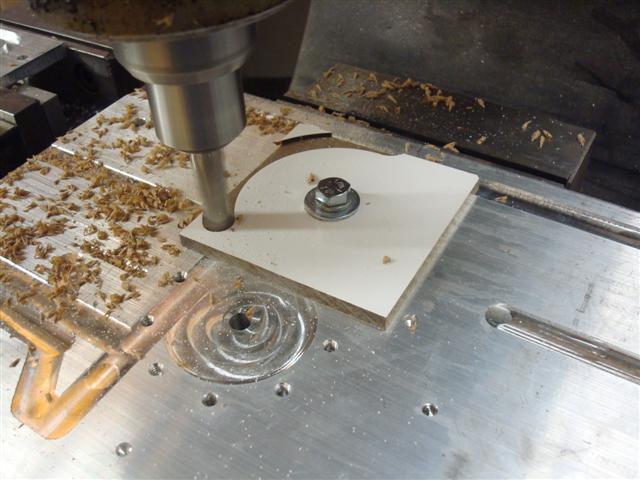
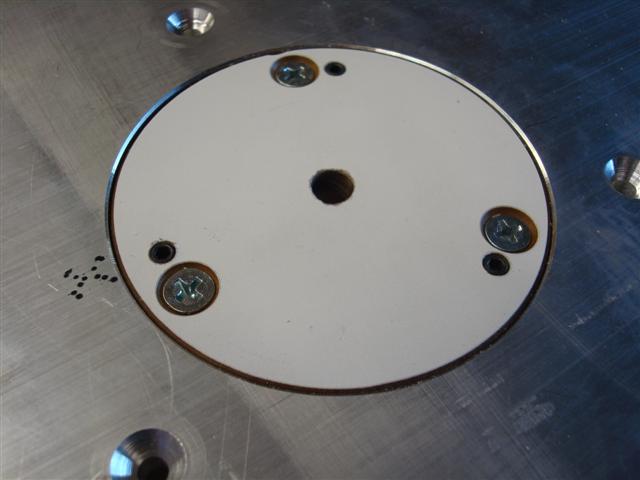
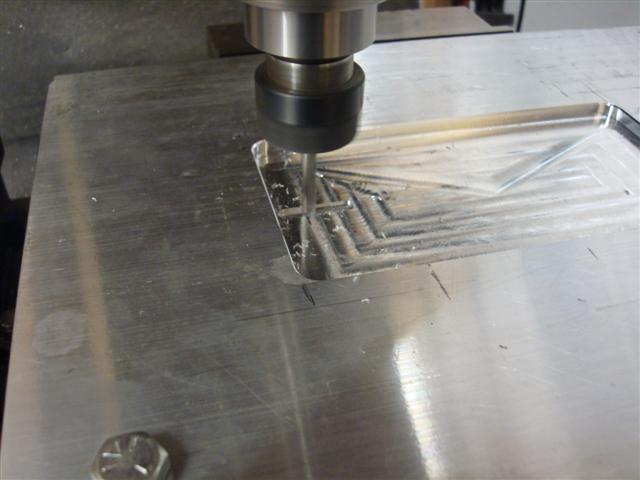
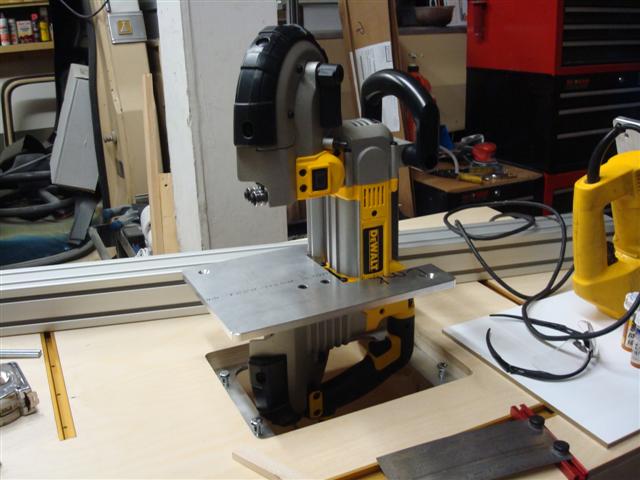
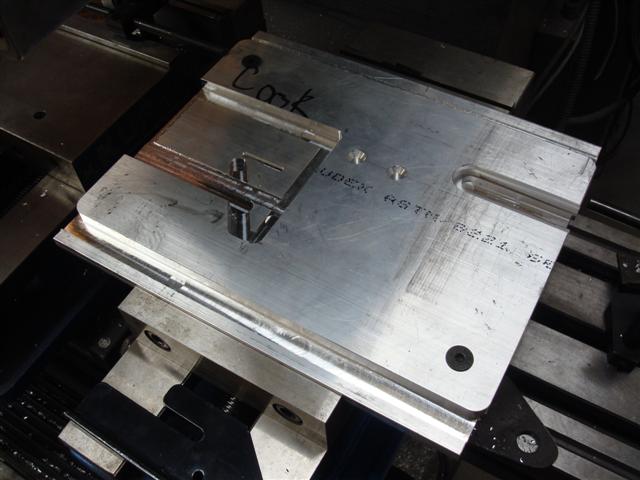
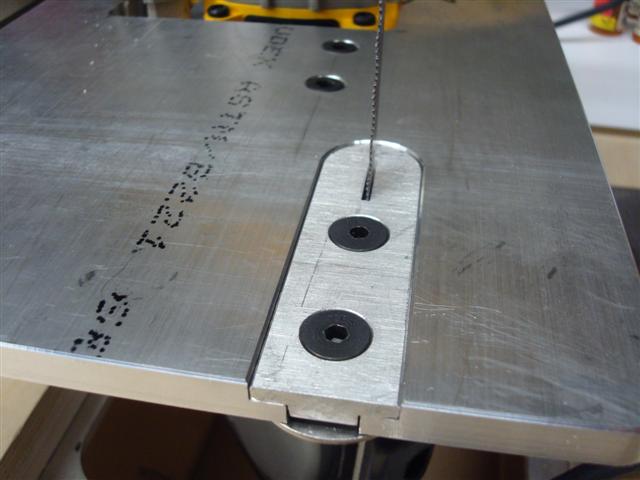
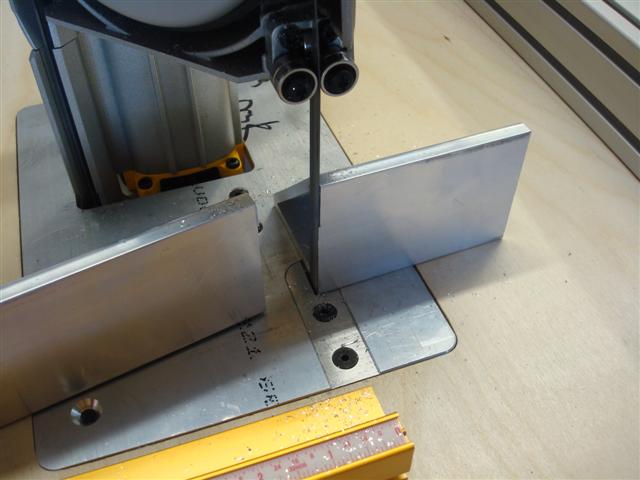
The hole spacing was accomplished by using a custom router plate I made with dowels that allowed me to set perfect spacing using peg board as the template. The pegboard's spacing is 1-inch on center so I opted for 4-inch spacing of the MFT holes. I followed Ron and made my holes 3/4-inch diameter because I had the tooling already to make them that size.
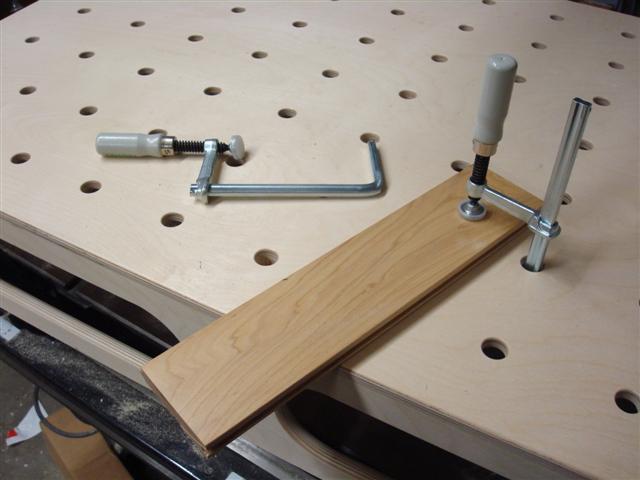
Almost immediately I started using the MFT for other projects around the garage (with no legs or base) by setting it on top of the table saw and using it there. I continued to do research and as I did, I started expanding my capabilities by making accessories. The more accessories, the more I used it. First set of accessories was the basic Festool screw clamps. Couldn't justify the ratchet clamps because they were SO expensive. [eek]
Then I saw a post where someone purchased some auto-clamps and followed suit. Since I can do the machine work myself, I made all of my own bases for the MFT. I ended up with nearly a dozen of these clamps in various styles.

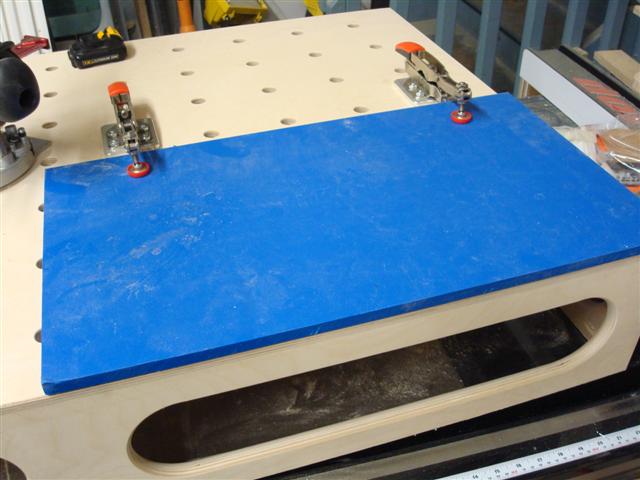
When working on another house project I found the need to give something a whack and decided that a scrap piece of HDPE (common material used in cutting boards) I had laying around served as a nice impact surface for the table when wacking was in order. Now it's dedicated to the MFT.
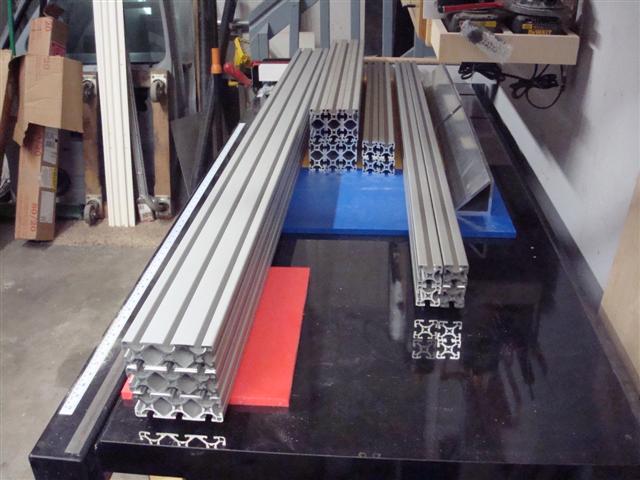
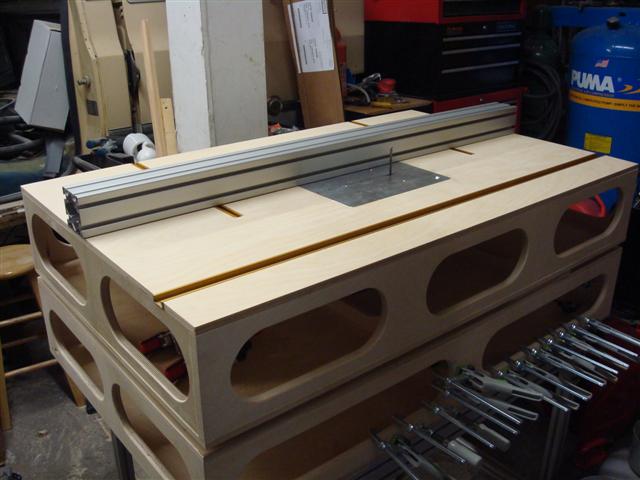
Up till now I was still using the MFT on top of the table saw but I started running into projects where the table saw needed to be used at the same time so it became time to get the frame assembled. Since the beginning I had planned on building the base/frame out of 80/20 for a variety of reasons but primarily it was because I was still lusting after the Festool MFT. The machine work began and I took my time thinking through (as much as I could) the table to fit perfectly below the MFT. Here's the raw materials shortly after the arrived.
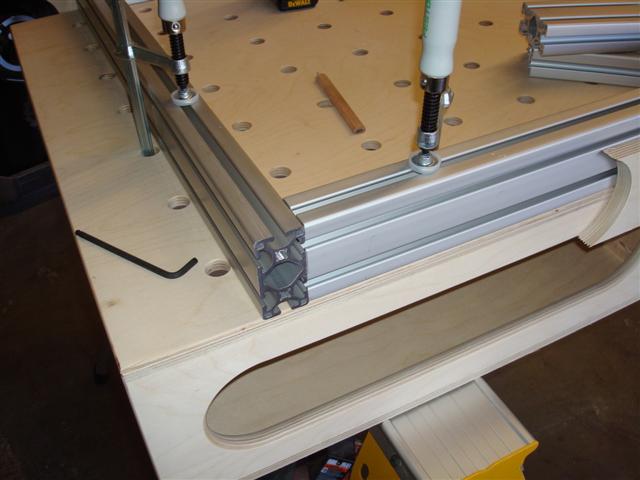
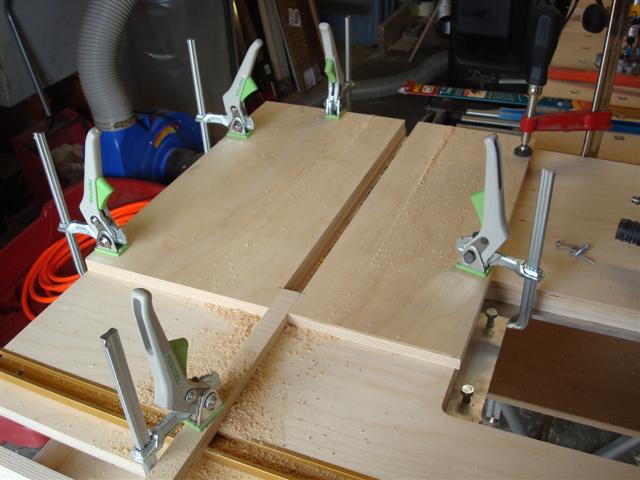
The MFT was used to assemble the frame and the screw clamps (remember I just had a pair) kept things square as each piece was added.
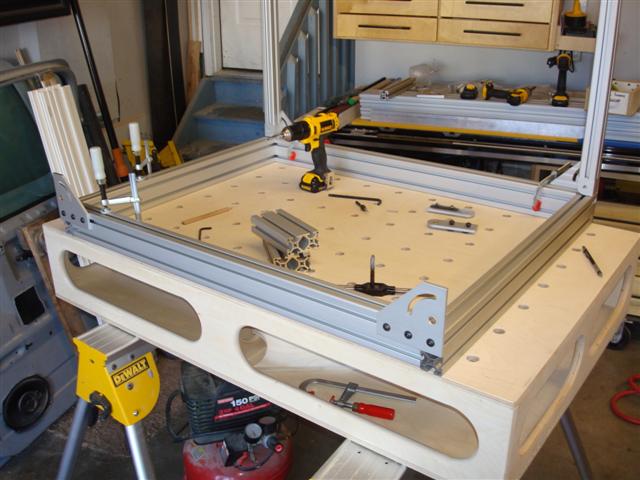
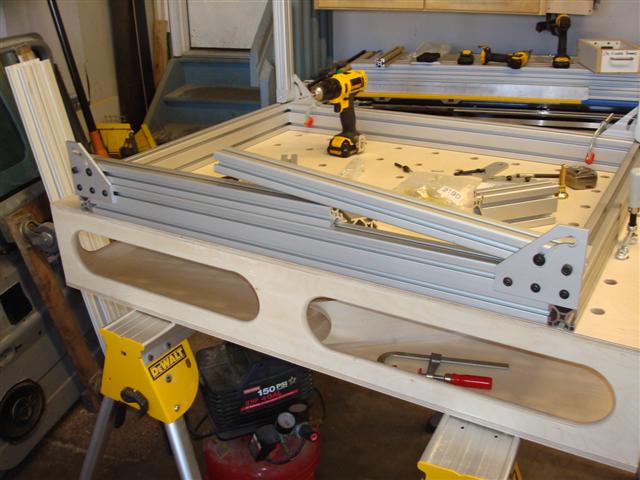
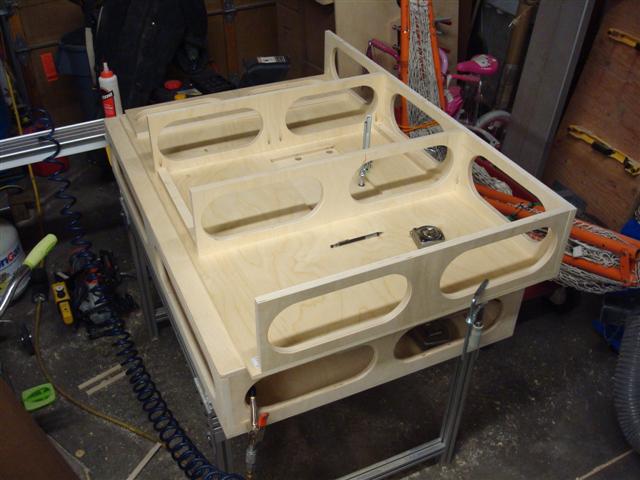
Slowing things started to take shape. First the basic shape, then brackets, then legs.
Even though I drew things out, I managed to miss the fact that at 39-inches long, two 25-inch tall legs wouldn't be able to avoid each other when folding.
So I machined my own out of some scrap 1/4-inch aluminum I had laying around.
And now the legs folded in a more reasonable way.
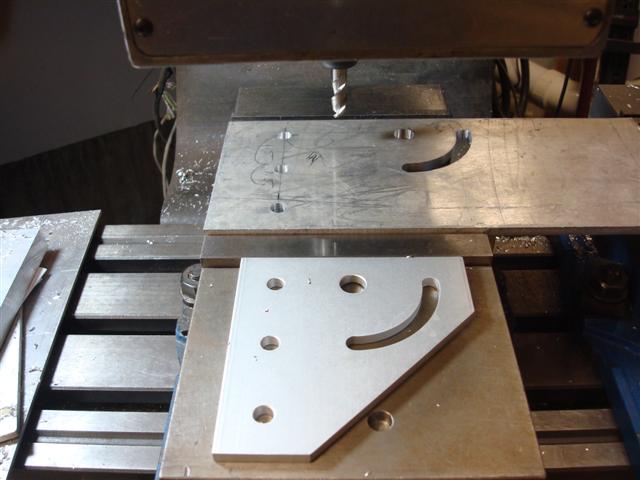
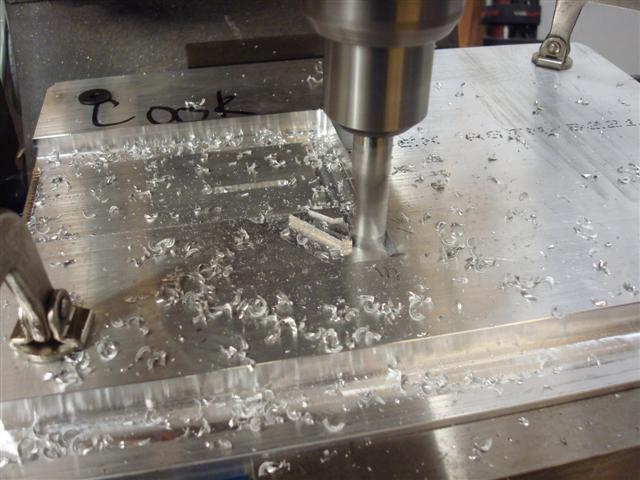
After tapping quite a few holes I decided that it would be much easier if I had a fixture to help me do the tapping. A nut was welded to some plate which could be affixed to the end of the extrusion to guide the tap into the hole. It easily tripled the tapping speed. Note this is about the time I received my first set of ratcheting clamps...figured I'd try a set.
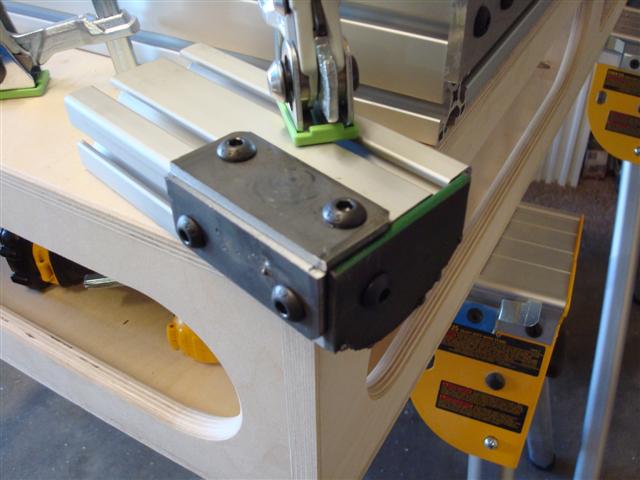
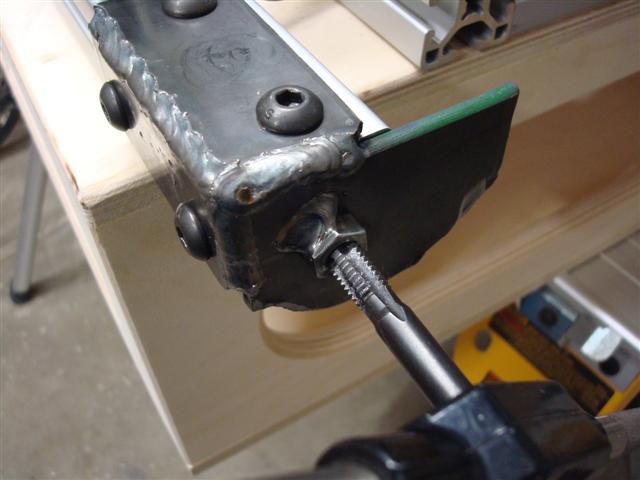
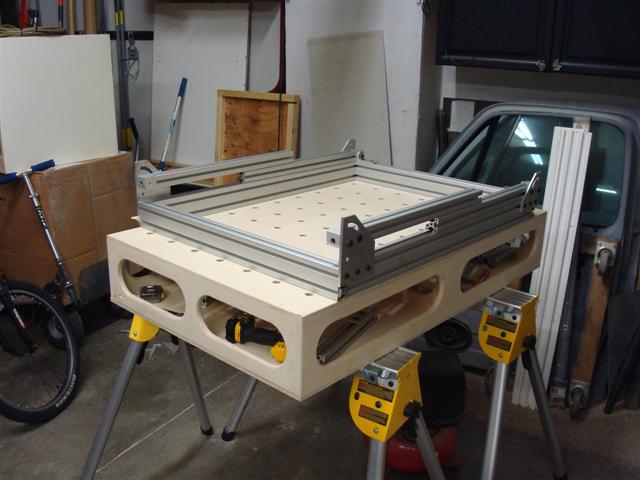
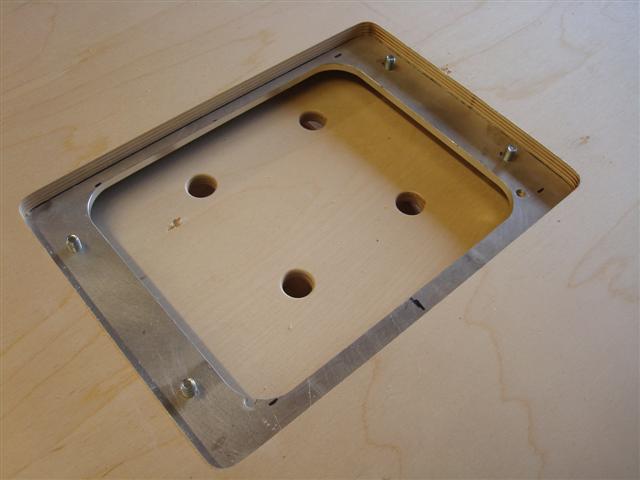
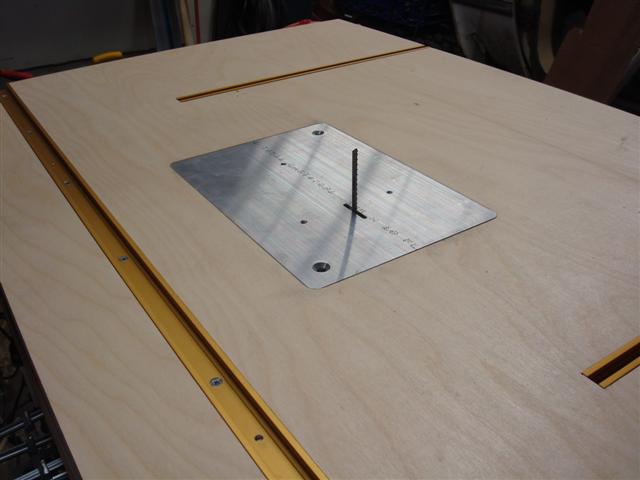
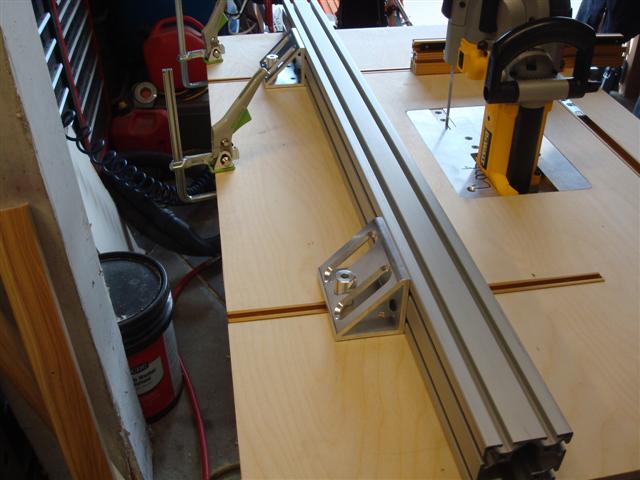
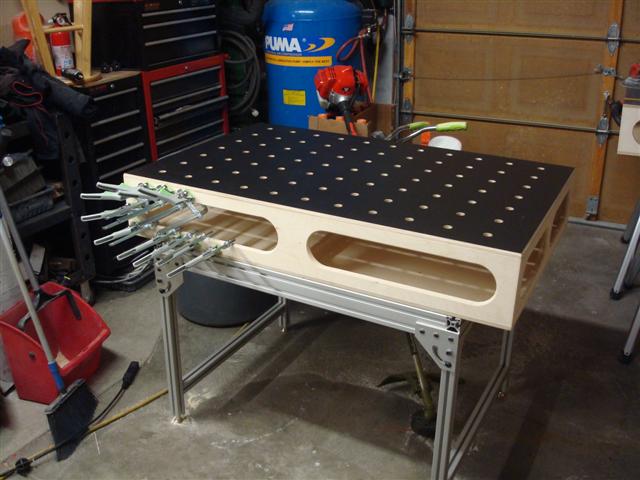
With the frame nearly complete I needed a way to attach the box to the frame. I made a couple of these angle brackets that allow me to attach to the table through the 3/4-inch holes and then drilled a matching set of 4 in the bottom.
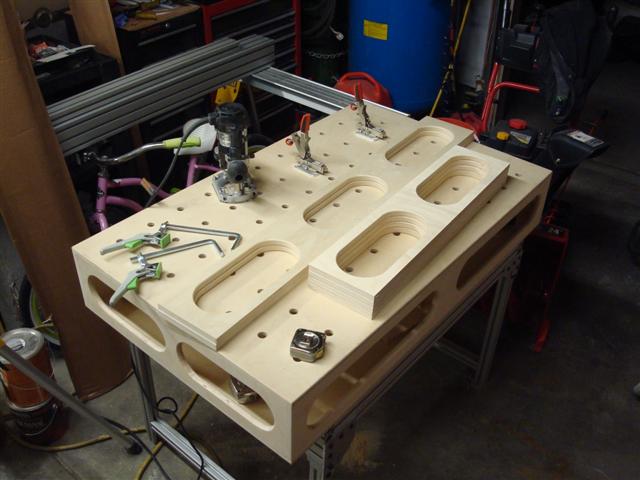
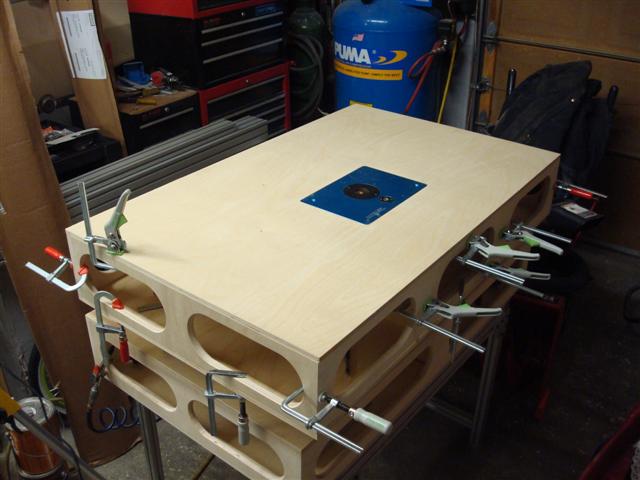
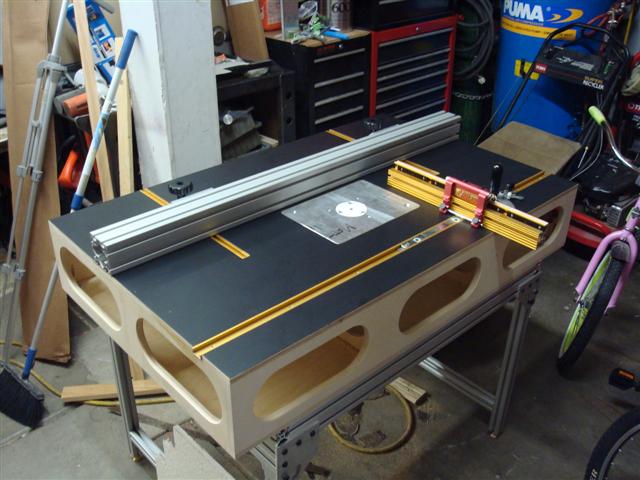
Now the table had two usable sides. First is the side with the fixture holes -
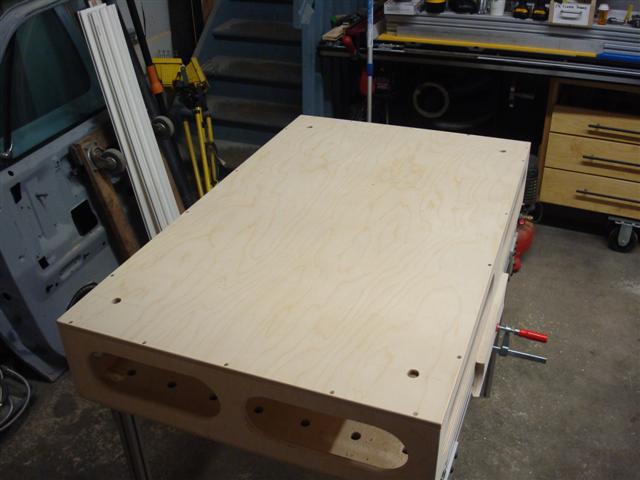
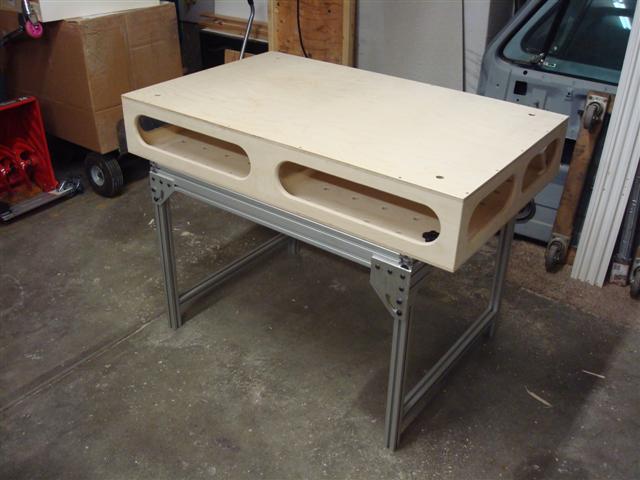
Second side has only 4 holes and can be used more as a bench which I use quite often.
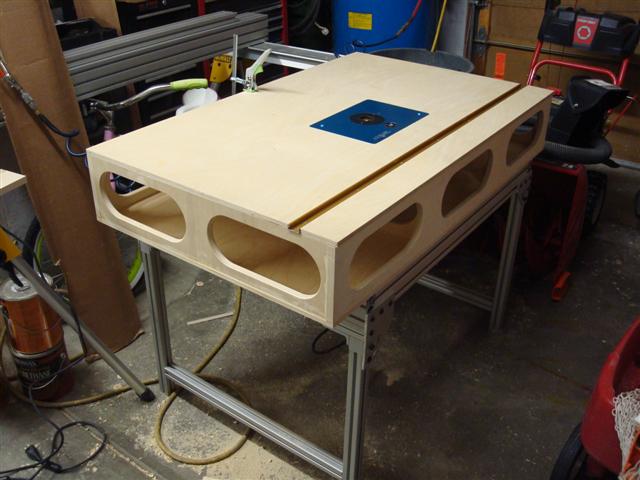
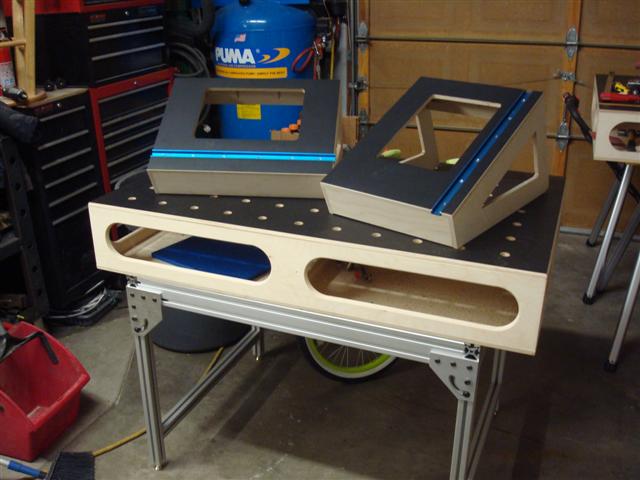
At this point the table itself is fully functioning and I started using it for a variety of projects including a kitchen remodel and a bathroom remodel and it proved to be a huge asset in the shop. The size is almost perfect for most of my projects. Both the frame and the box are light enough I can easily lift them over my head if necessary (say to put them on a shelf) and the pair would easily fit in the back of my MDX if I wanted to take them somewhere to use them.
I'm a huge fan of Ron Paulk's creativity. I probably spent 3 or so months trying to decide between buying a Festool MFT and building something like Ron's ultimate workbench. One day I got a wild hair and went down to the local dealer and, while walking toward the register with a grin on my face, managed to remember I had forgotten my wallet. Without much enjoyment I drove towards the house and it was on that drive that I realized it was a sign. That day I started and no activity in the shop has been the same since.
I had/have 2 MFT designs in the works both are modeled after Ron's Ultimate Workbench. I started on the smaller one (30 x 48) and have yet to start the bigger (30 x 72) one because the smaller one has been so versatile. The top itself wasn't overly complex.
The hole spacing was accomplished by using a custom router plate I made with dowels that allowed me to set perfect spacing using peg board as the template. The pegboard's spacing is 1-inch on center so I opted for 4-inch spacing of the MFT holes. I followed Ron and made my holes 3/4-inch diameter because I had the tooling already to make them that size.
Almost immediately I started using the MFT for other projects around the garage (with no legs or base) by setting it on top of the table saw and using it there. I continued to do research and as I did, I started expanding my capabilities by making accessories. The more accessories, the more I used it. First set of accessories was the basic Festool screw clamps. Couldn't justify the ratchet clamps because they were SO expensive. [eek]
Then I saw a post where someone purchased some auto-clamps and followed suit. Since I can do the machine work myself, I made all of my own bases for the MFT. I ended up with nearly a dozen of these clamps in various styles.
When working on another house project I found the need to give something a whack and decided that a scrap piece of HDPE (common material used in cutting boards) I had laying around served as a nice impact surface for the table when wacking was in order. Now it's dedicated to the MFT.
Up till now I was still using the MFT on top of the table saw but I started running into projects where the table saw needed to be used at the same time so it became time to get the frame assembled. Since the beginning I had planned on building the base/frame out of 80/20 for a variety of reasons but primarily it was because I was still lusting after the Festool MFT. The machine work began and I took my time thinking through (as much as I could) the table to fit perfectly below the MFT. Here's the raw materials shortly after the arrived.
The MFT was used to assemble the frame and the screw clamps (remember I just had a pair) kept things square as each piece was added.
Slowing things started to take shape. First the basic shape, then brackets, then legs.
Even though I drew things out, I managed to miss the fact that at 39-inches long, two 25-inch tall legs wouldn't be able to avoid each other when folding.
So I machined my own out of some scrap 1/4-inch aluminum I had laying around.
And now the legs folded in a more reasonable way.
After tapping quite a few holes I decided that it would be much easier if I had a fixture to help me do the tapping. A nut was welded to some plate which could be affixed to the end of the extrusion to guide the tap into the hole. It easily tripled the tapping speed. Note this is about the time I received my first set of ratcheting clamps...figured I'd try a set.
With the frame nearly complete I needed a way to attach the box to the frame. I made a couple of these angle brackets that allow me to attach to the table through the 3/4-inch holes and then drilled a matching set of 4 in the bottom.
Now the table had two usable sides. First is the side with the fixture holes -
Second side has only 4 holes and can be used more as a bench which I use quite often.
At this point the table itself is fully functioning and I started using it for a variety of projects including a kitchen remodel and a bathroom remodel and it proved to be a huge asset in the shop. The size is almost perfect for most of my projects. Both the frame and the box are light enough I can easily lift them over my head if necessary (say to put them on a shelf) and the pair would easily fit in the back of my MDX if I wanted to take them somewhere to use them.

")