smartcarpie
Member
- Joined
- Aug 26, 2011
- Messages
- 62
Found these pictures while looking for some of my old van.
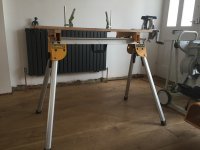
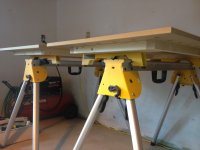
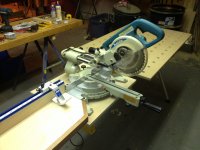
A while back I saw how member AlanM had mounted an mft top next to a Dewalt chop saw, and maybe someone else here had used the DW stand as a base for MFT tops. So I went with that.
I do own a Kapex and UG setup, and a Kapex MFT. Generally the Kapex lives in the shop mounted to a bench about 24' long with Kreg stop wings and drawers underneath. For a big enough job I will pull the bolts and put it on the UG to roll to a job. BUT, much of the time my little 7.5" Makita can do what I need and only weighs 28 lbs. even though the Kapex rolls there are many homes I work in that I refuse to roll a hand truck up finished stairs, (and I find the UG hard on my back to roll up a stair anyways)and space can be tight so I require versatility.
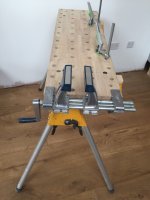
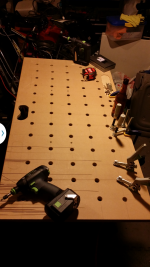
So I started with three MFT 1080 replacement tops (cause they were cheaper). I had a set of Dewalt horses and a saw stand, and bought three additional sets of mounting brackets. All three tops have the brackets installed as does the Makita saw.
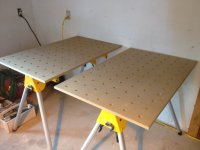
So I have two "extra" MFTs now for quick work tables. The shims underneath are ripped to make them the same height as the factory tables.
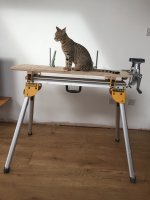
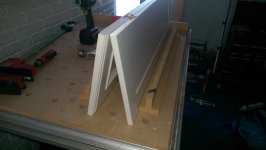
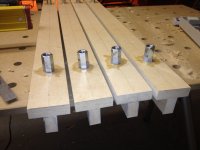
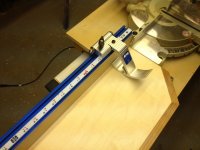
I made up some risers from MDF and threaded rod connectors (thanks Jerry Work) so that when a table top is mounted on the DW saw stand next to the Makita the risers are level with the saw deck. Great for clamping too.
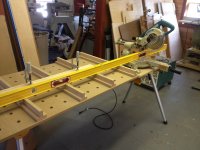
I made up a left hand wing for the saw so the MFT top can serve as right side out feed and now I have a work surface (think trimming a cabinet panel with the TS55) handy. If space is tight or stock is short I can put the saw to the right of the MFT top and just use that for support.
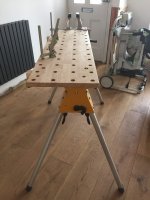
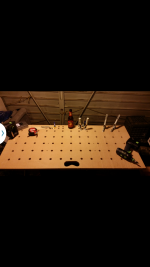
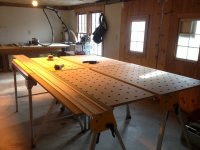
In conjunction with the two MFT 3 tables in the shop I can have a huge work surface if needed or several separate ones. (Stacking parts here, sanding here, extra tools here, actually working here...)
I find the MDF risers travel with me a lot as I can use them as a sacrificial cutting surface, and the increased height is great for my lower back.
If some one wants to try using an mft or wants a "beater" for outside work, this solution could be viable and more cost effective.
Sorry for the long write up.
[attachimg=1]
[attachimg=2]
[attachimg=3]
[attachimg=4]
[attachimg=5]
[attachimg=6]
[attachimg=7]
A while back I saw how member AlanM had mounted an mft top next to a Dewalt chop saw, and maybe someone else here had used the DW stand as a base for MFT tops. So I went with that.
I do own a Kapex and UG setup, and a Kapex MFT. Generally the Kapex lives in the shop mounted to a bench about 24' long with Kreg stop wings and drawers underneath. For a big enough job I will pull the bolts and put it on the UG to roll to a job. BUT, much of the time my little 7.5" Makita can do what I need and only weighs 28 lbs. even though the Kapex rolls there are many homes I work in that I refuse to roll a hand truck up finished stairs, (and I find the UG hard on my back to roll up a stair anyways)and space can be tight so I require versatility.
So I started with three MFT 1080 replacement tops (cause they were cheaper). I had a set of Dewalt horses and a saw stand, and bought three additional sets of mounting brackets. All three tops have the brackets installed as does the Makita saw.
So I have two "extra" MFTs now for quick work tables. The shims underneath are ripped to make them the same height as the factory tables.
I made up some risers from MDF and threaded rod connectors (thanks Jerry Work) so that when a table top is mounted on the DW saw stand next to the Makita the risers are level with the saw deck. Great for clamping too.
I made up a left hand wing for the saw so the MFT top can serve as right side out feed and now I have a work surface (think trimming a cabinet panel with the TS55) handy. If space is tight or stock is short I can put the saw to the right of the MFT top and just use that for support.
In conjunction with the two MFT 3 tables in the shop I can have a huge work surface if needed or several separate ones. (Stacking parts here, sanding here, extra tools here, actually working here...)
I find the MDF risers travel with me a lot as I can use them as a sacrificial cutting surface, and the increased height is great for my lower back.
If some one wants to try using an mft or wants a "beater" for outside work, this solution could be viable and more cost effective.
Sorry for the long write up.
[attachimg=1]
[attachimg=2]
[attachimg=3]
[attachimg=4]
[attachimg=5]
[attachimg=6]
[attachimg=7]


") Yesterday, I replaced the old top on my MFT and also built a rolling cabinet for my Dewalt miter saw. I was wondering what I was going to do with the old MFT top as well as the original Dewalt stand (which I found to be very stable). The answer was in your photos. Only problem is that I left the mounting brackets on the miter saw when I matched the height to my systainer carts to use as extensions. I guess I will find a way to raise the miter saw a couple of inches. Anyway, great post.
Yesterday, I replaced the old top on my MFT and also built a rolling cabinet for my Dewalt miter saw. I was wondering what I was going to do with the old MFT top as well as the original Dewalt stand (which I found to be very stable). The answer was in your photos. Only problem is that I left the mounting brackets on the miter saw when I matched the height to my systainer carts to use as extensions. I guess I will find a way to raise the miter saw a couple of inches. Anyway, great post.