MFTC portable workshop

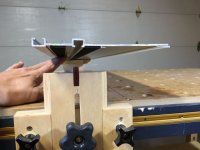
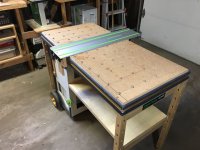
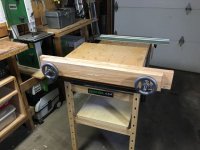
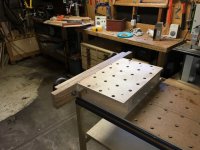
The seal is a neoprene Vacuum rubber seal for a CNC.  It works incredibly well. If you try to lift the workpiece the whole bench will lift off the floor. I use my CT24 but I've not used it extensively so I'm not sure about any heat issues. I'll get a splitter for the hose soon so I can still use the CT while using the top which should also help with any over heating and hopefully won't negatively effect the suction strength too badly.

Toby
 
Tim, I see you have quite a selection of festool tools. I assume you have multiple Mftc carts built. How did you group your tools in each MFTC?
 
pasuisaca said:
hello am member but not active i share this picture

b87dda1d570c617afb86594fdbabac95.jpg

Well now that's cool, different, and interesting.  What hardware did you use or how did you build the swing-out?

Very nice craftsmanship on all of them sir!
 
elimelech12 said:
Just out of curiosity...has anyone made one with the new festool drawers?

Hey yeah i updated my mftc and put the festool drawers in it the touch catch ones did not stay closed.

Cheers

Bryan
 
Hi,

I don't post much, but for the second time I read this full post.

Maybe my 2 cents of information if some of you guys find it usefull : the festool colors RAL codes
  • Green: RAL 6018 (Yellow Green)
  • Tools: very dark blue, RAL 5004 (Black Blue)
  • Systainers: light grey RAL 7035 (Light Grey)

... I used them to pain my cyclone dust separator on the top of my CTL26E
Oh my ... it looks great ;)

On my side, I bought the plans in 2013 and still didn't make it. No space in my tiny workshop  [crying] ... but hope is here, maybe I'll move to a house this year and have a decent workshop (plus some house work to do and therefore a full necessity for an MFTC    [big grin]
 
Here's a little teaser on my progress.

A little taller to accommodate a top drawer and wider for systainer room side to side.
[attachurl=1][attachimg=2][attachmini=1]
 

Attachments

  • image.jpeg
    image.jpeg
    1.5 MB · Views: 1,024
  • image.jpeg
    image.jpeg
    1.8 MB · Views: 30,776
Hi I'm new to the forum and really enjoy the info and different ideas I am planning on building one of the mftc I haven't purchased the plans yet but plan to, I want to use the same wheels that are on the Ug stand but can't seem to find a part # or where I can order them from any help would be greatly appreciated
 
MVReno said:
Hi I'm new to the forum and really enjoy the info and different ideas I am planning on building one of the mftc I haven't purchased the plans yet but plan to, I want to use the same wheels that are on the Ug stand but can't seem to find a part # or where I can order them from any help would be greatly appreciated

Looking on the ekat replacement parts catalog, the wheel is #496230
 
Hi all, I've been eyeing this project for awhile now and finally decided to make the festool plunge and trying to decide which dust extractor to purchase.

Which dust extractors fit under the shelf?  It appears to the be mini or the midi?
 
Achevy said:
Hi all, I've been eyeing this project for awhile now and finally decided to make the festool plunge and trying to decide which dust extractor to purchase.

Which dust extractors fit under the shelf?  It appears to the be mini or the midi?

The mini and the midi will fit underneath - not that I have ever stored mine under the workbench.  (out to the side works best for hose ergonomics)

Warning on the dust extractor purchase: if you ever want to add the CMS, the mini and midi are not compatible with the hose accessory kit - nor are they compatible with many of the other vac accessories.  I know this is not your concern right now, but I am considering the CMS and I am a little pissed that I will need to upgrade my vac to a CT 26 to make it work right...
 
I added a pair of brackets made from leftover baltic 1/2" ply and a piano hinge. So far, this works pretty well!
 

Attachments

  • Brackethinge.jpg
    Brackethinge.jpg
    31.8 KB · Views: 5,000
Bracket retaining pin is made from paduk and tapered to a friction fit.
 

Attachments

  • Bracketpin.jpg
    Bracketpin.jpg
    40.6 KB · Views: 6,782
I also added a moxon vise sized to fit the breadth of the bench.  I used the sjobergs smart vise and a couple other designs for inspiration.
 

Attachments

  • Moxonbench.jpg
    Moxonbench.jpg
    50.1 KB · Views: 4,155
The rear shows that it can be clamped just about anywhere.
 

Attachments

  • Moxonrear.jpg
    Moxonrear.jpg
    56.4 KB · Views: 3,970
Back
Top