Ster1154
Member
- Joined
- Feb 15, 2016
- Messages
- 145
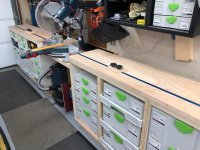
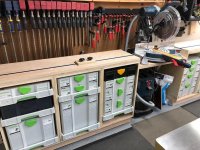
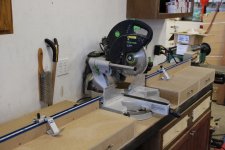
Finally got around to revising and redesigning my miter saw station after putting it off for months. Originally it was a very similar setup but not nearly as sturdy and when I got the Bosch Glide I found that I just needed to rebuild the entire thing and start from scratch.
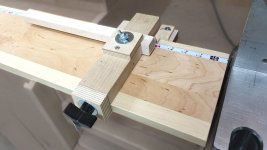
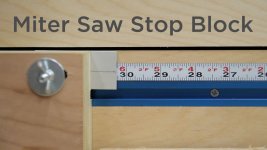
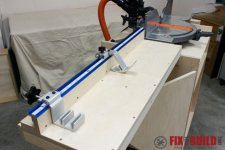
I opted for the 'en vogue' T-track stop that The Wood Whisperer and Make Something channels have popularized lately. It seems to work very well and gives an overall cleaner look IMO. I used baltic birch for the carcasses, some Sys-AZ drawers for the systainers (still need to get some more!, and 1/4" baltic birch for the back panel.
I've never uploaded plans so hopefully these links work. Note that I revised my cabinet to be 15" deep instead of 18" for no other reason than my old station was 15" and it kept me from having to buy two extra sheets since I could recycle some old parts.
AutoCAD
Cut List
I'm happy to answer any questions though truth be told the build was relatively straight forward (thankfully) and took only a day to build.