Birdhunter
Member
- Joined
- Jun 16, 2012
- Messages
- 4,144
Birdhunter said:...
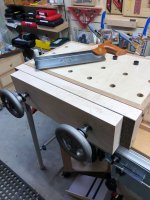
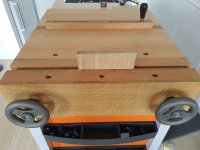
He also left the front jaws short. No clue why this was in the plans.i applied the cork like material to the long back jaw in case I wanted to change the front jaw.
Birdhunter said:Snipe
He also left the front jaws short. No clue why this was in the plans.i applied the cork like material to the long back jaw in case I wanted to change the front jaw.
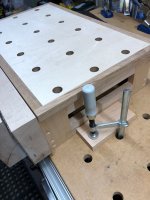
ChuckM said:It wouldn't matter whether the jaws are of the same length or not, as the clamping is done between the threaded shafts.
") . (or suede).
. (or suede).