nicholam77
Member
- Joined
- Mar 7, 2019
- Messages
- 115
Can never have enough of these, right? [big grin]
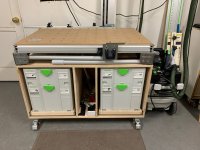
The ETS 125 REQ you see is actually my only Festool, but I am enamored with the "system" and the creativeness of the community that seems to surround these tools. This is my effort to incorporate some of these ideas and ways of working into an all-purpose small shop workbench.
I'm calling it a hybrid because it's a combination of several others' ideas that I borrowed. To give credit where credit is due -- the carcass is largely a copy Justin Michael's cart from this thread. The "rails" of the top are from Guy Dunlap's MFT/Outfeed table project.
Guy Dunlap
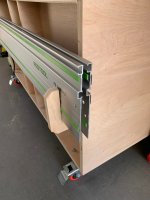
The mortise and peg system from the legs you might recognize as borrowed from Timothy Wilmots System Workshop benches.
Timoth Wilmots
Basically I really liked bits and pieces from each of these designs, and combined them to make something that worked for me in my small garage.
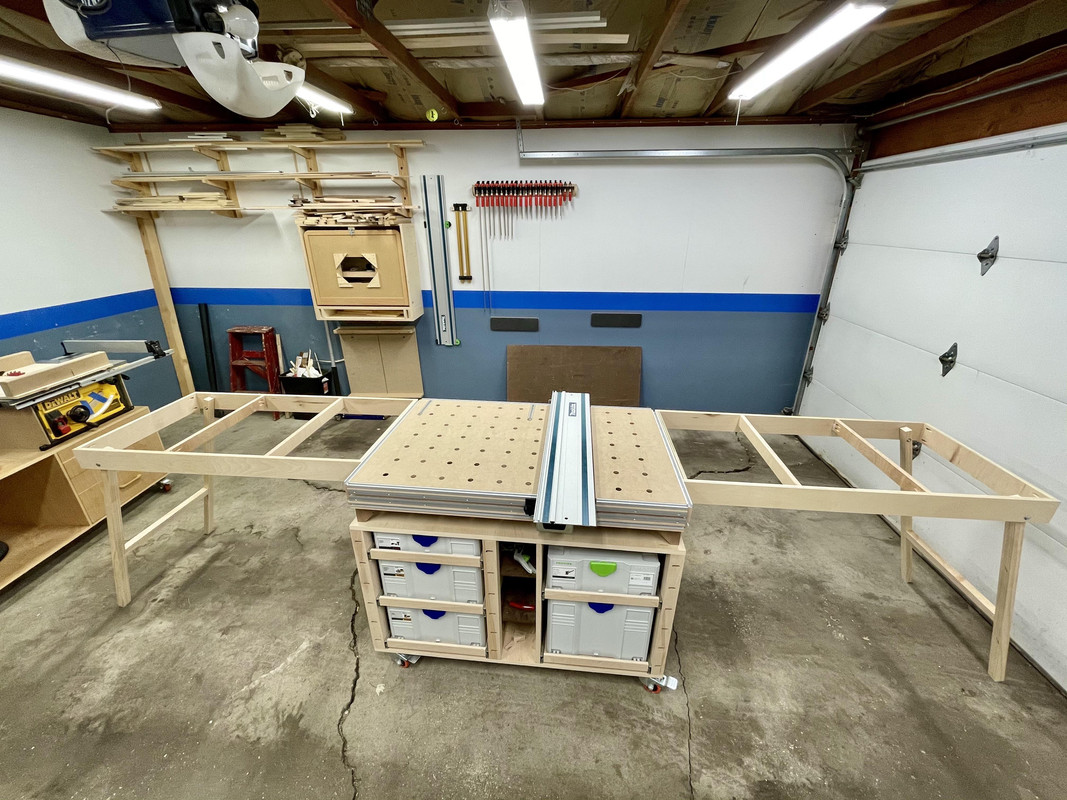
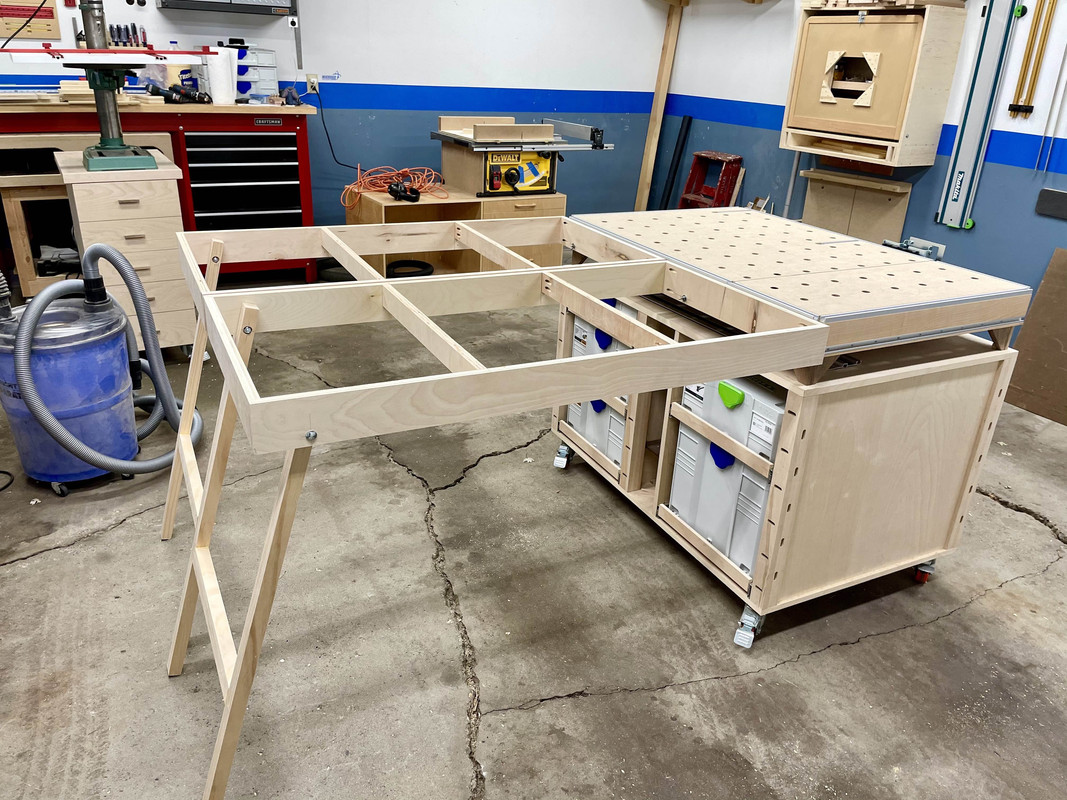
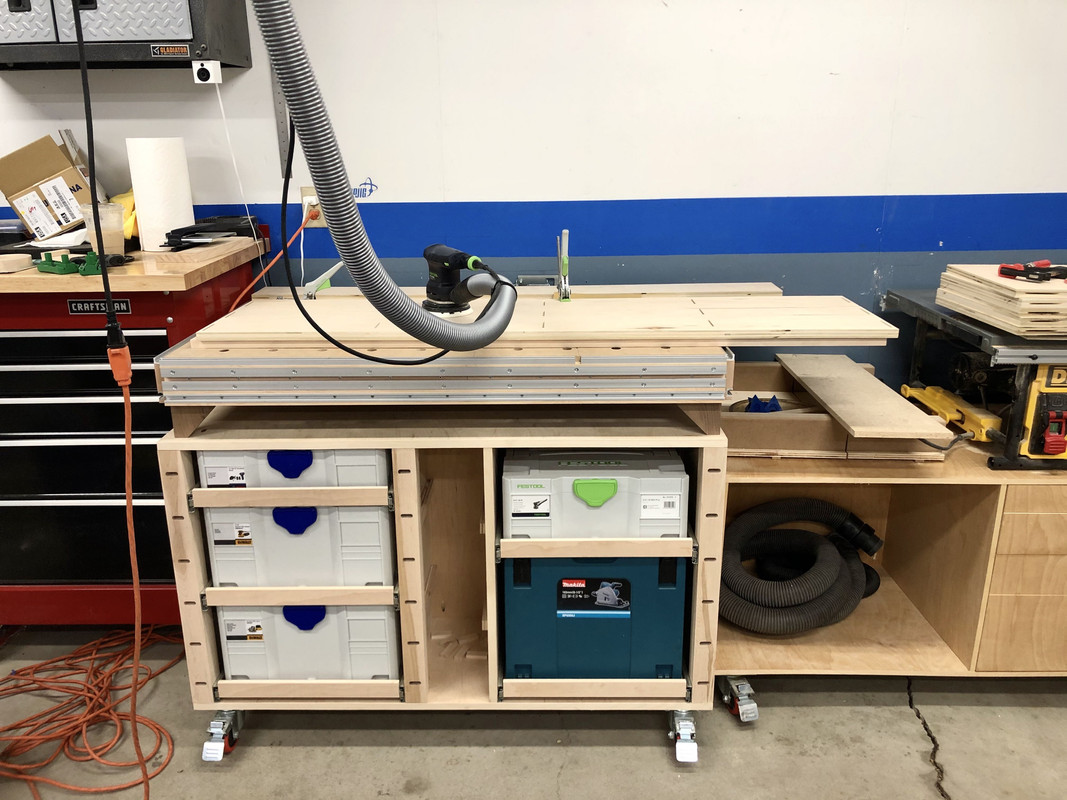
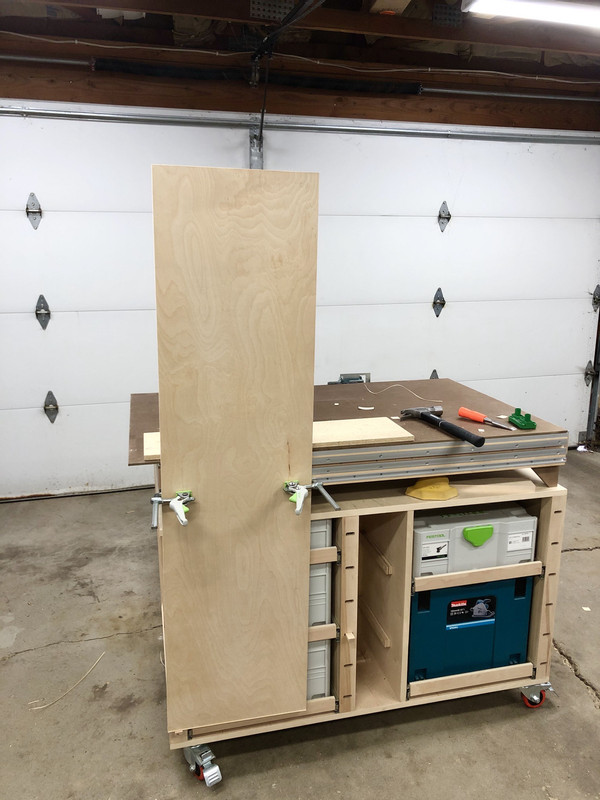
The carcass is birch ply, biscuited and pocked screwed. The legs of the cart and the horizontal "rails" of the work surface are maple. The little feet that elevate the work surface are walnut, and the holey top is 3/4" MDF.
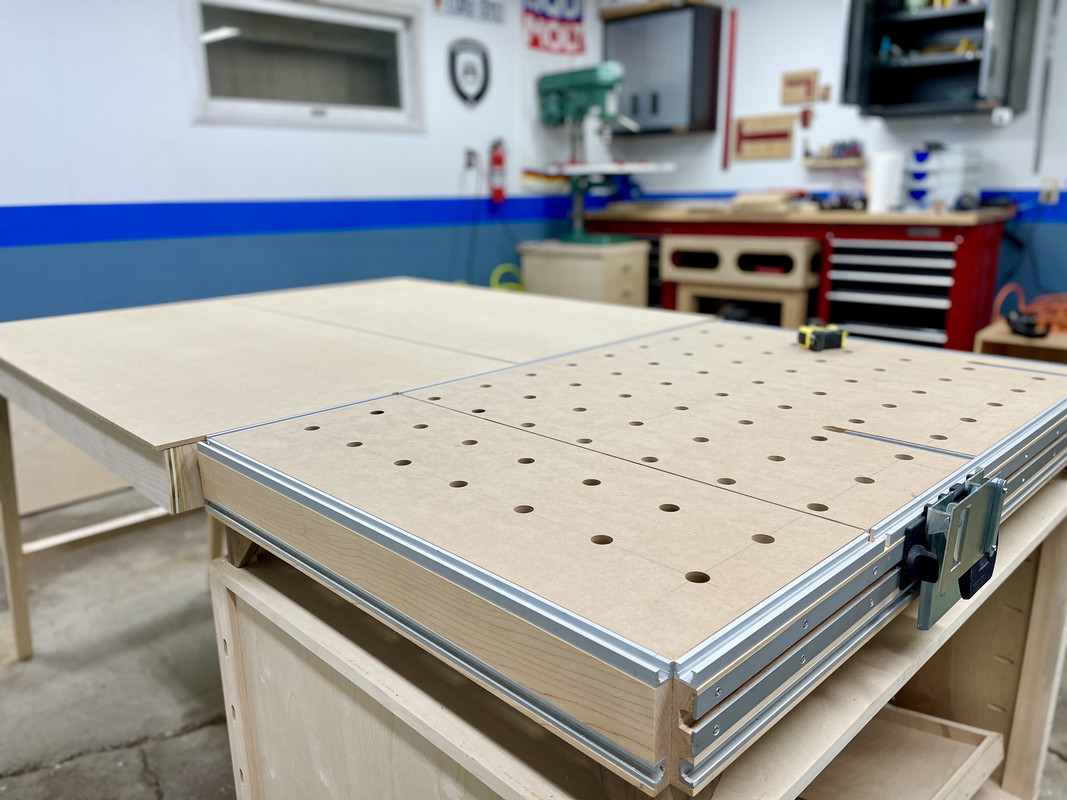
The work surface is 46" x 30", so almost the same as the official MFT/3 surface.
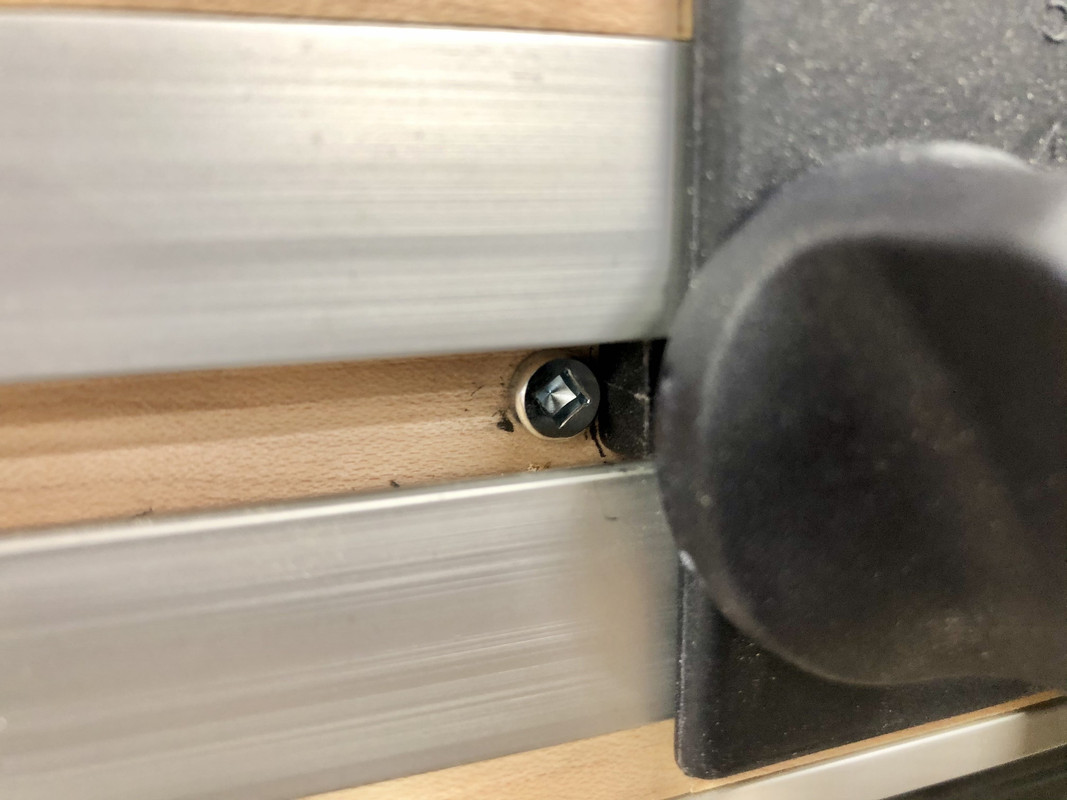
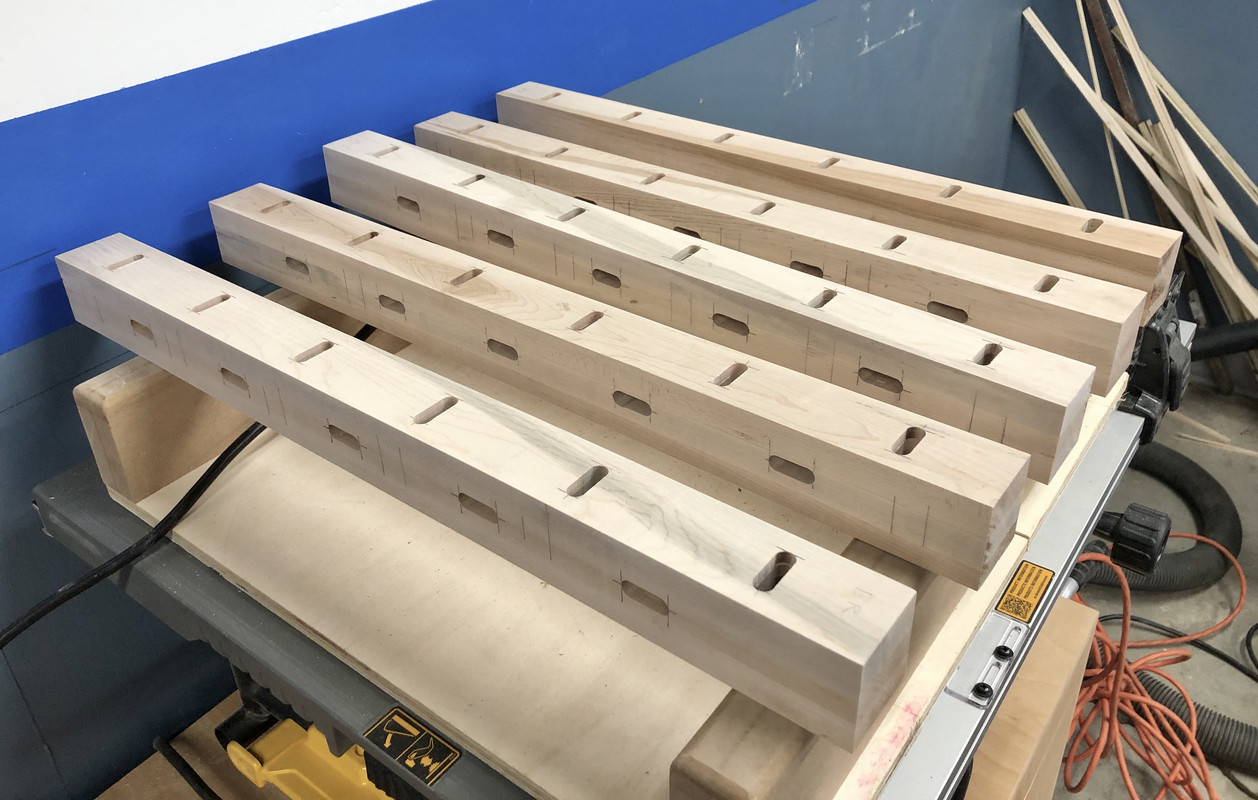
A bit about the construction. I realize this would arguably have been a great project to justify a Domino, but I simply don't have the funds, so all of the leg mortises were done with my DeWalt 618 router:
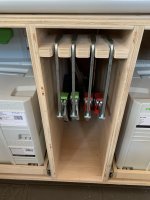
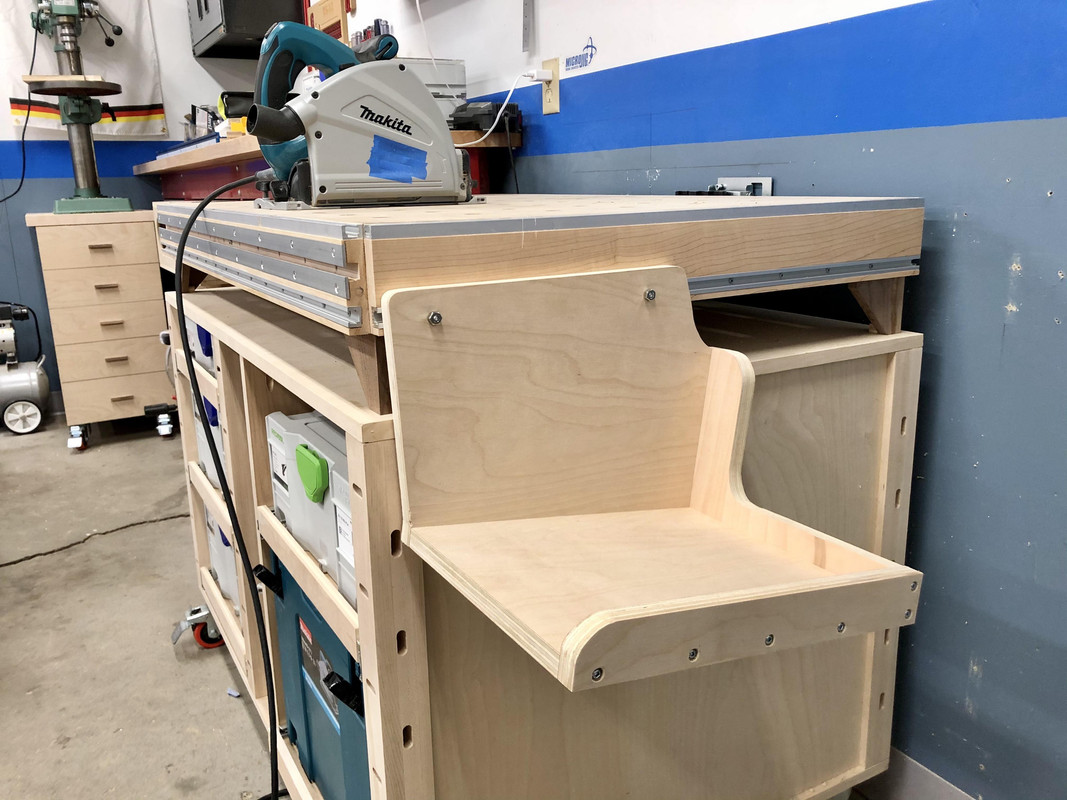
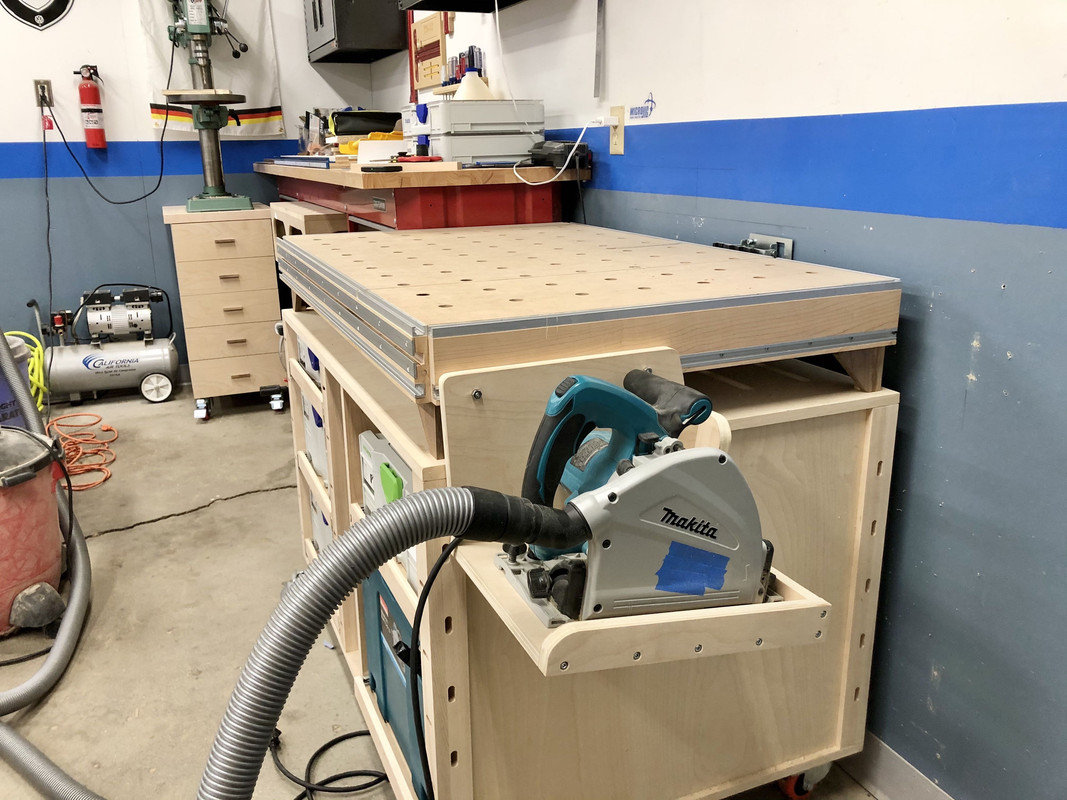
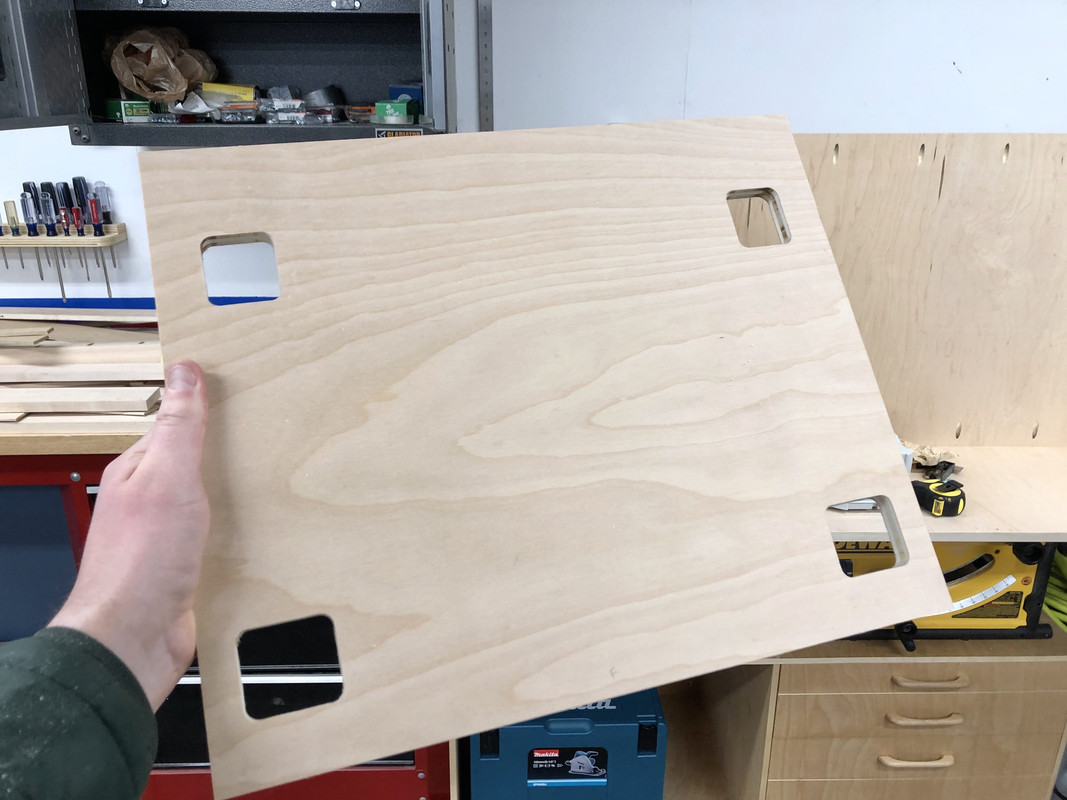
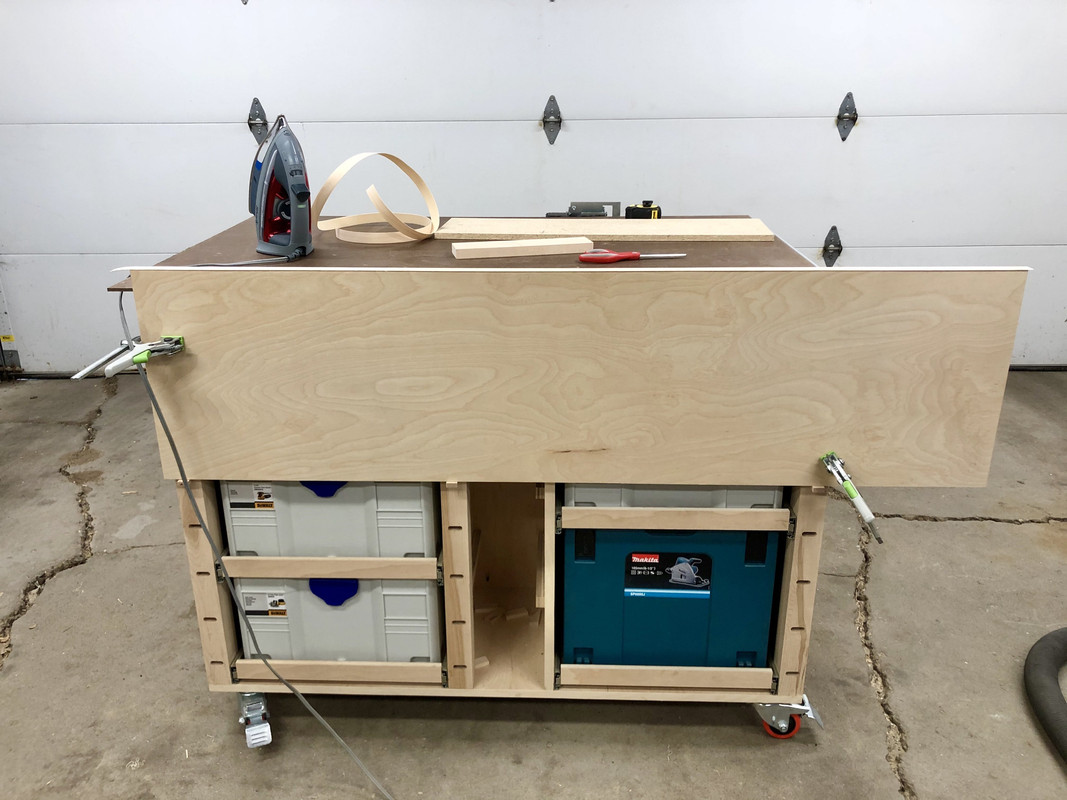
The Systainers have pull out drawers with indexing holes for the foot pads which I template routed with the help of a jig:

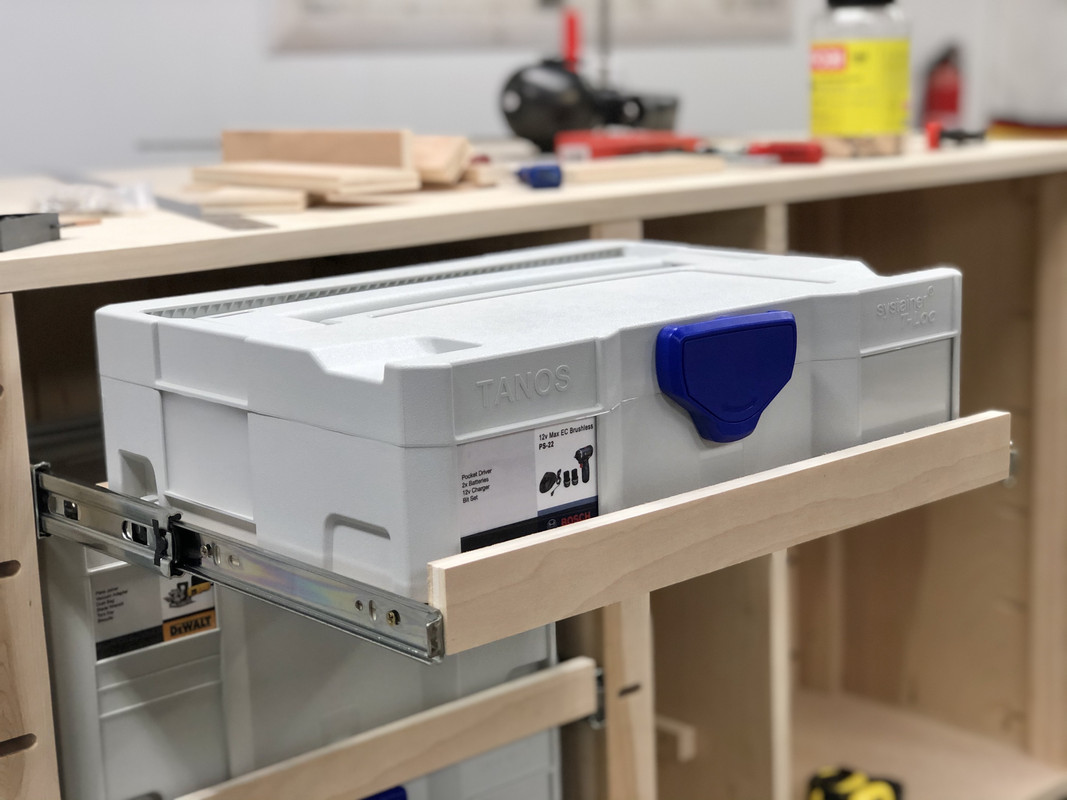
Systainers can be opened fully while in the drawer.
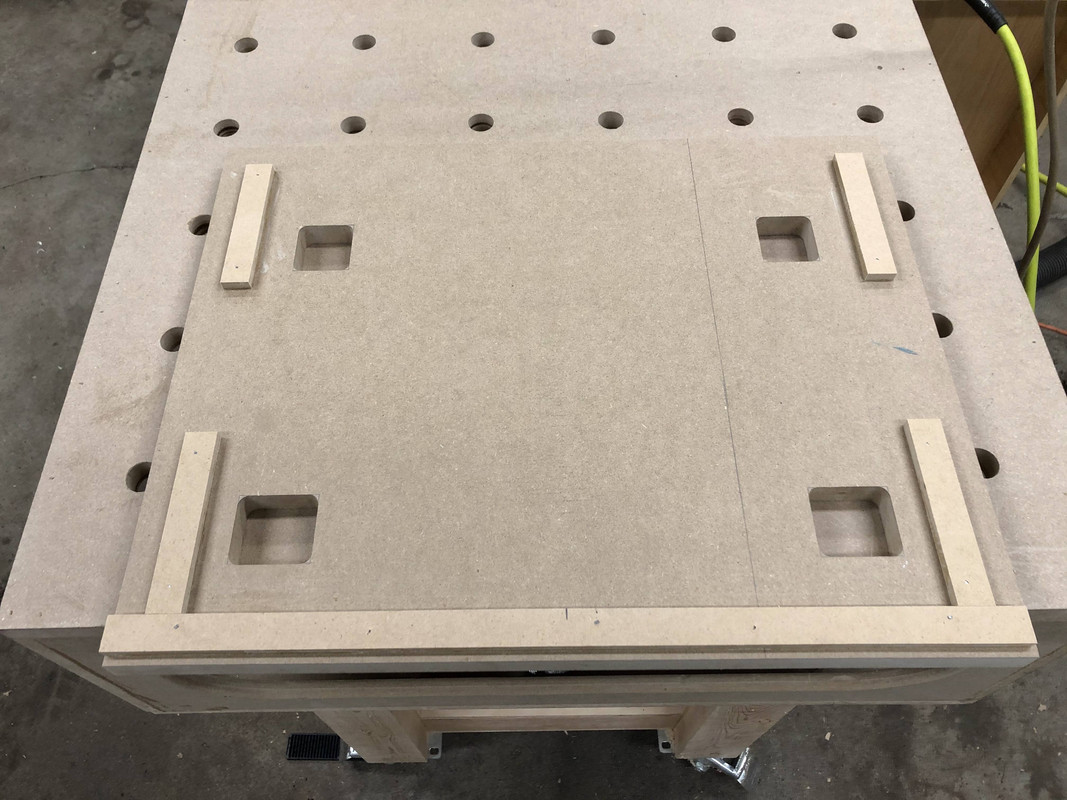
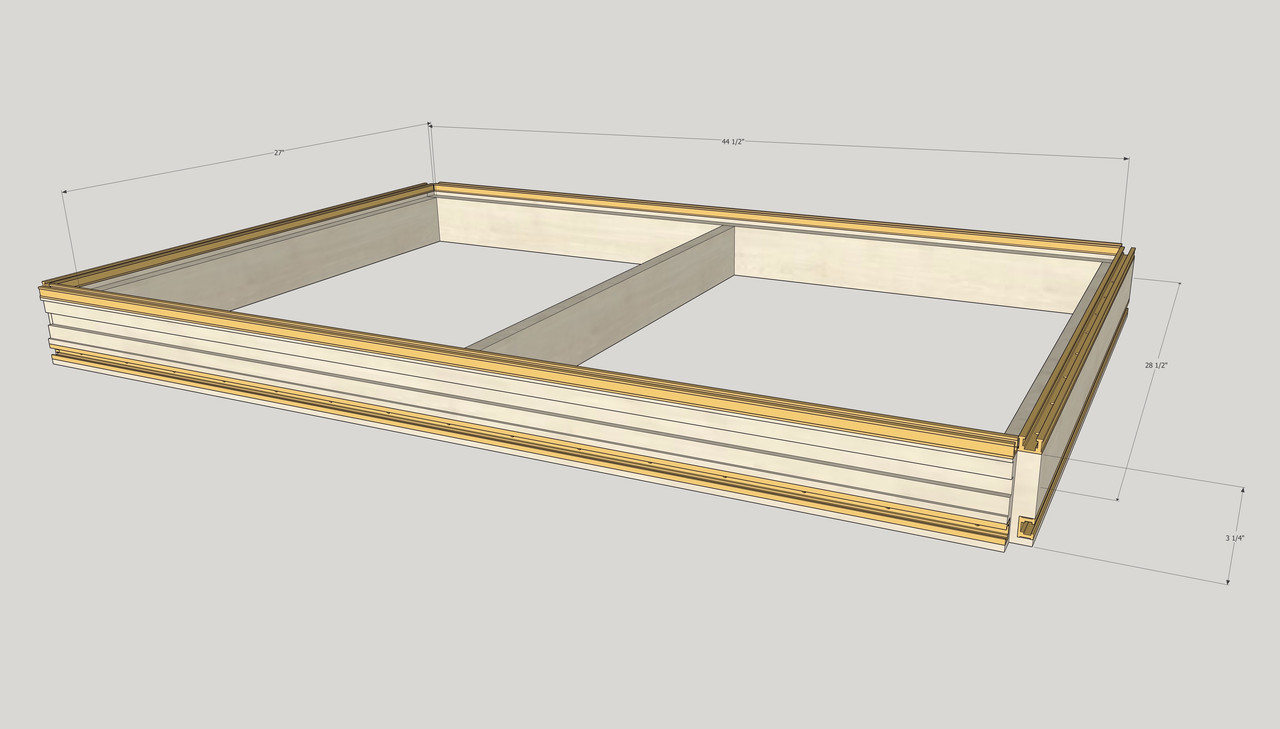
Here is a Sketchup of what the work surface frame looks like. Birch ply inner frame, maple outer frame. Inner frame height is recessed to accept the MDF top.
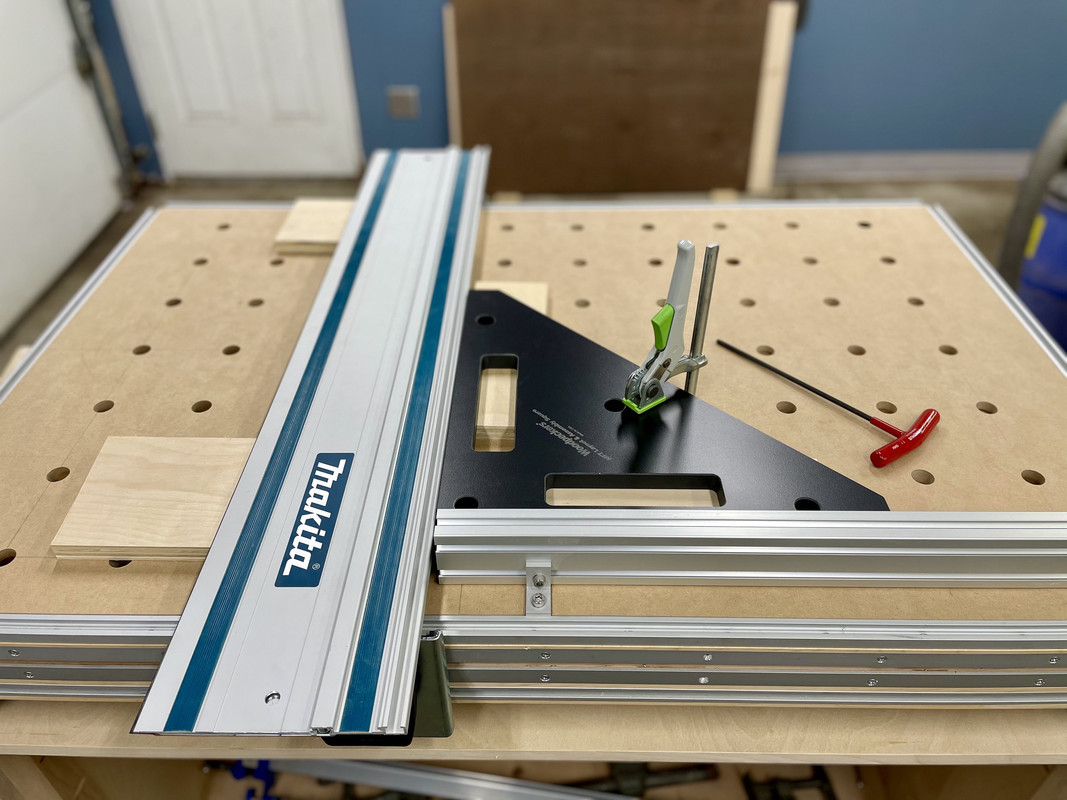
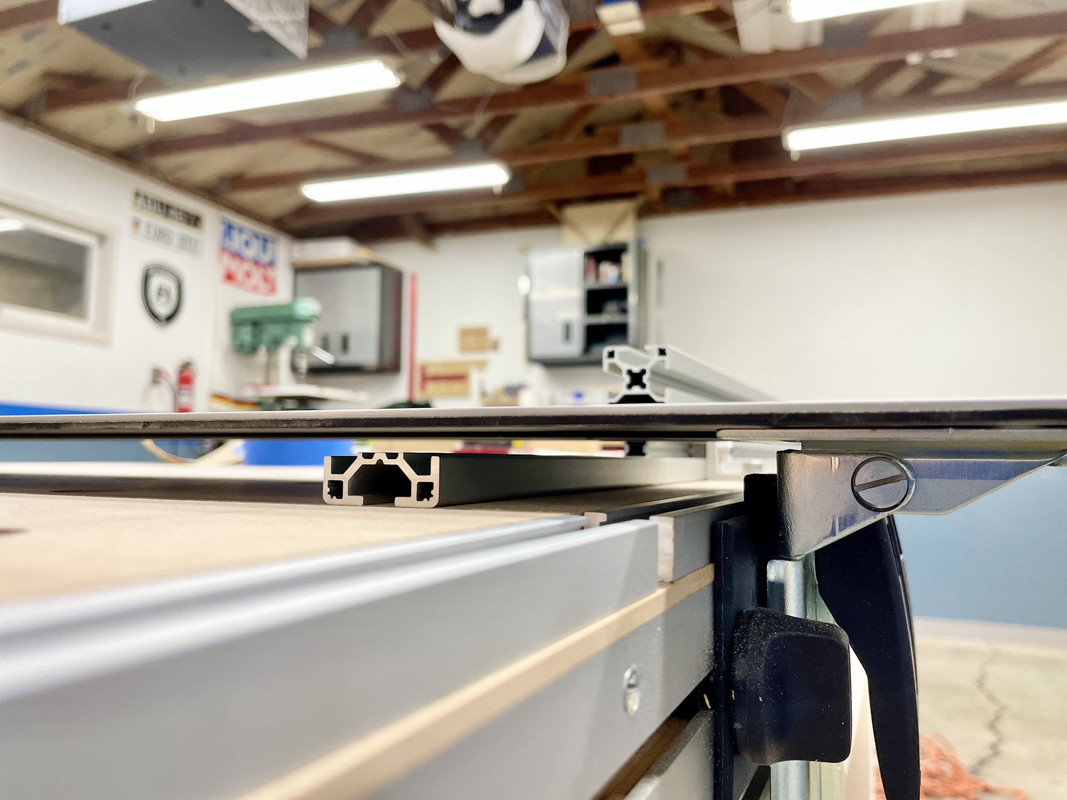
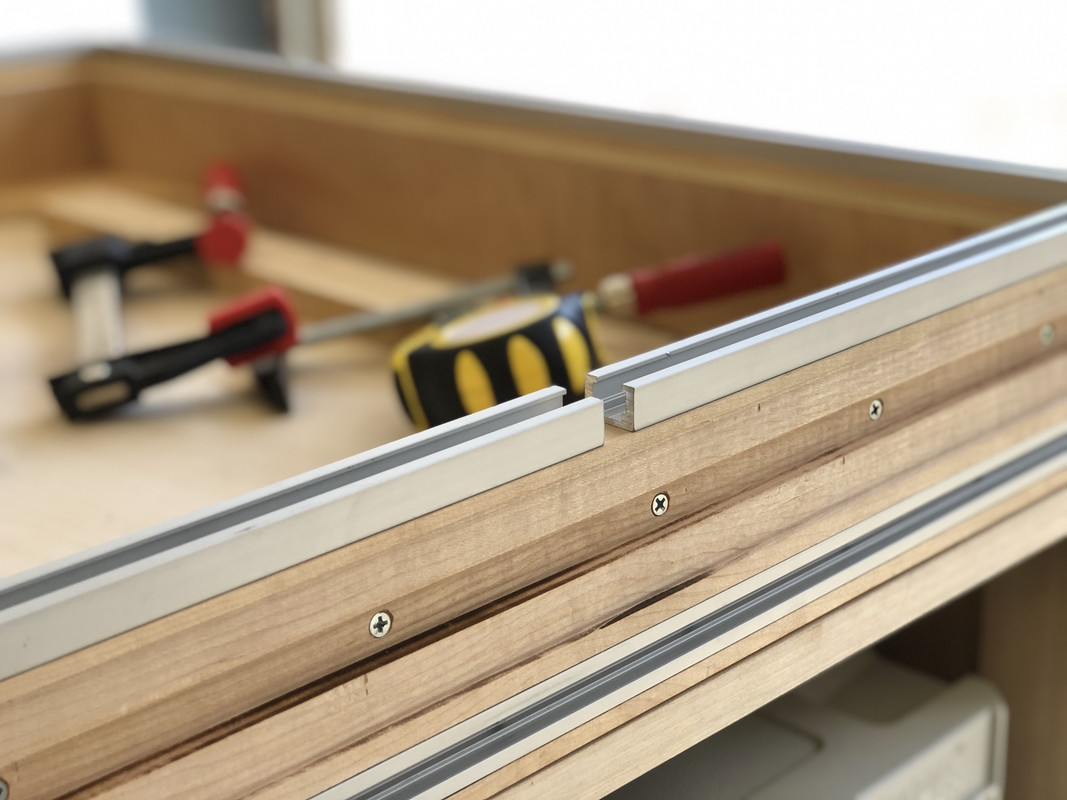
T-tracks from Orange Aluminum were added (these fit the Festool Quick Clamps), with a notch left for the track saw blade to pass through on both sides.
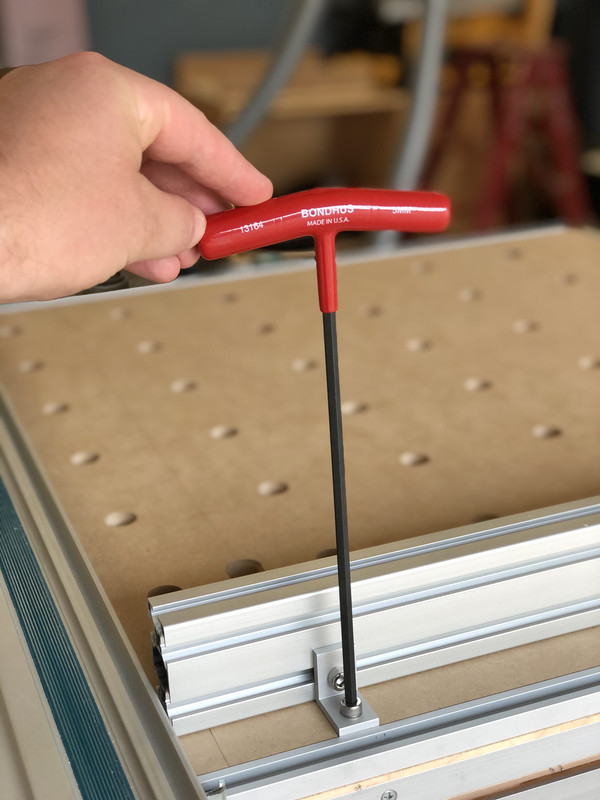
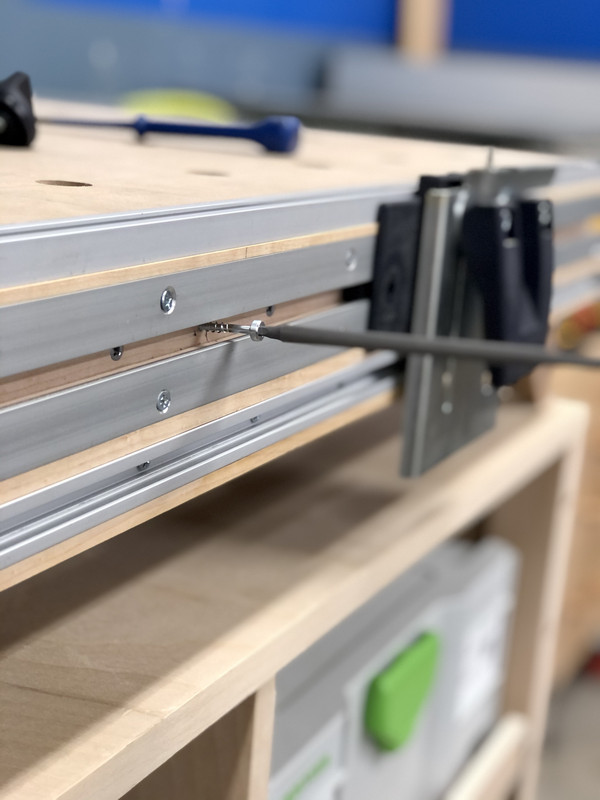
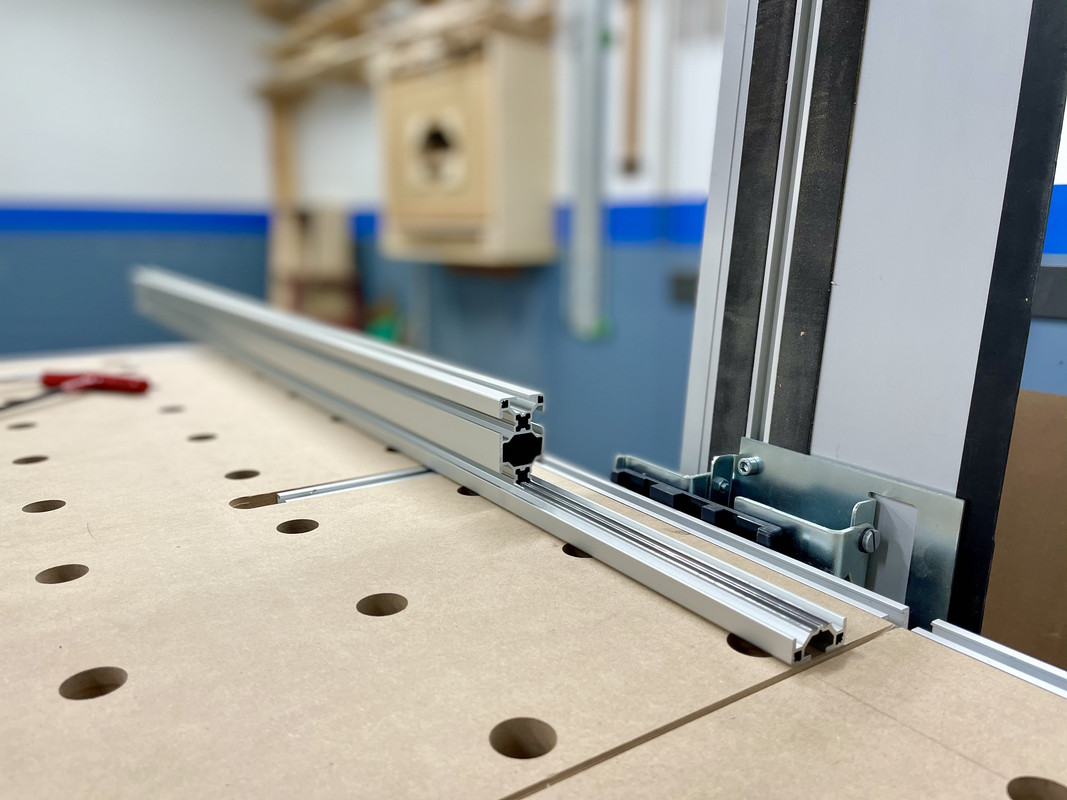
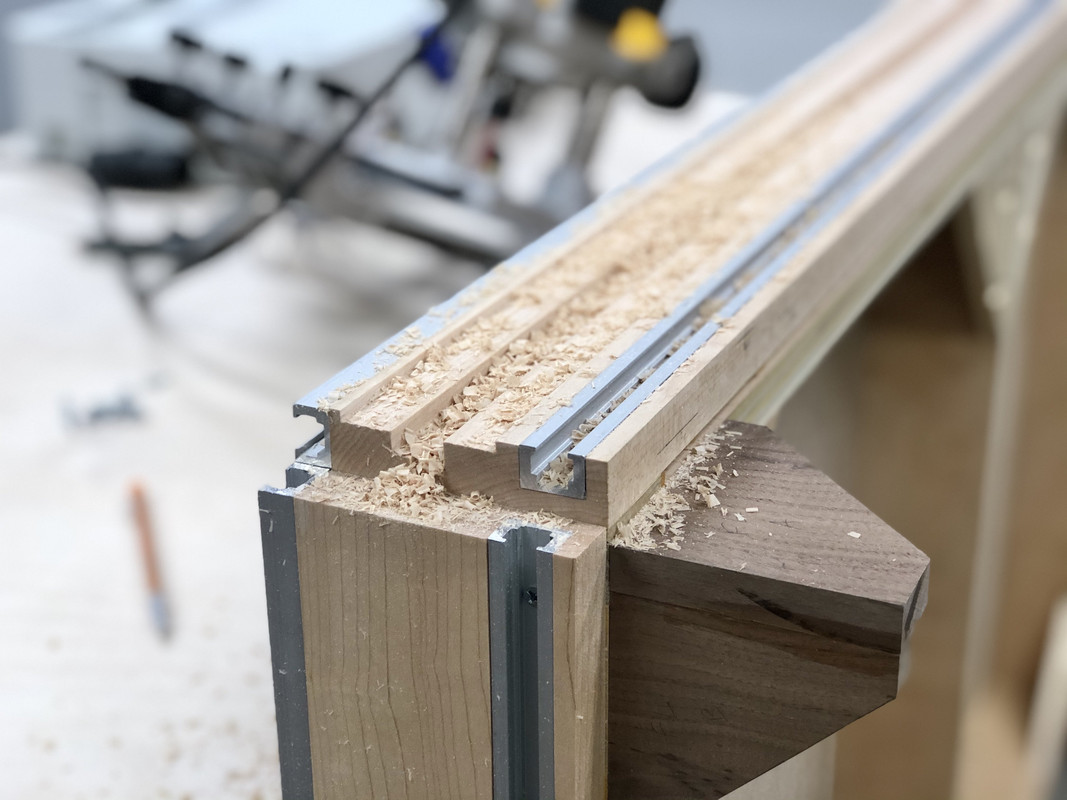
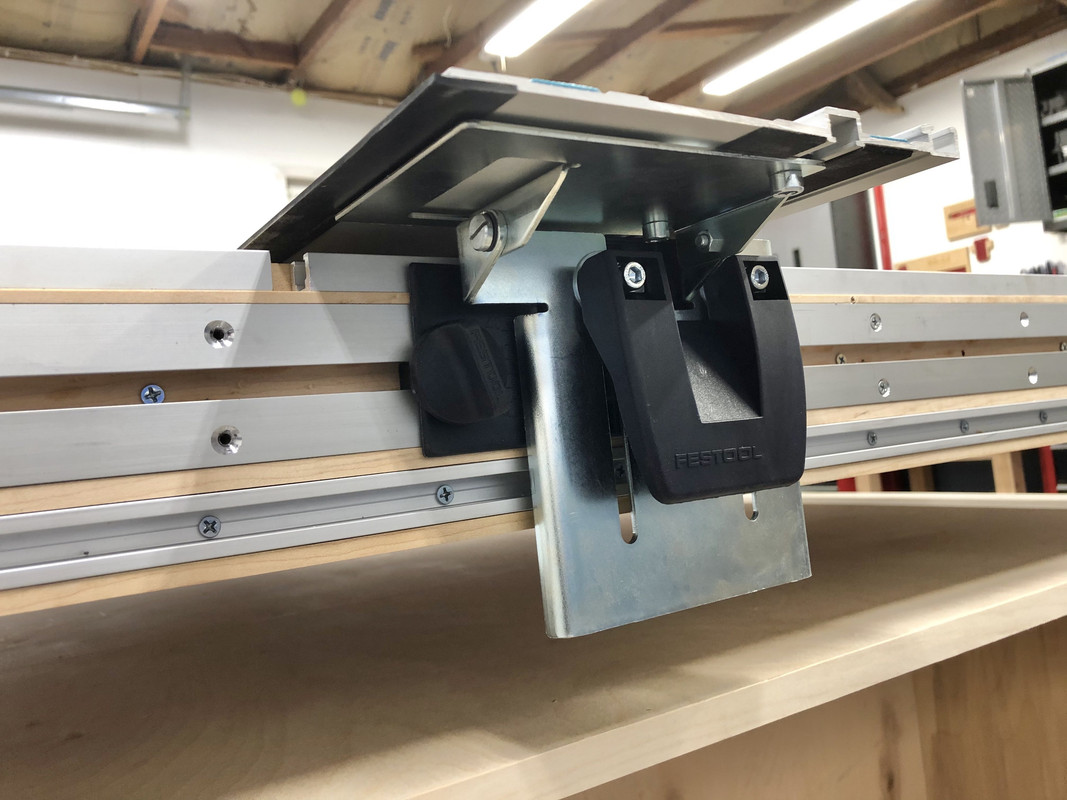
Then some 1/8" bar aluminum was added to accept the Festool rail support pivots (I ordered these from a parts dealer). If I could redo I'd actually use 1/16" bar aluminum instead so they slide easier:

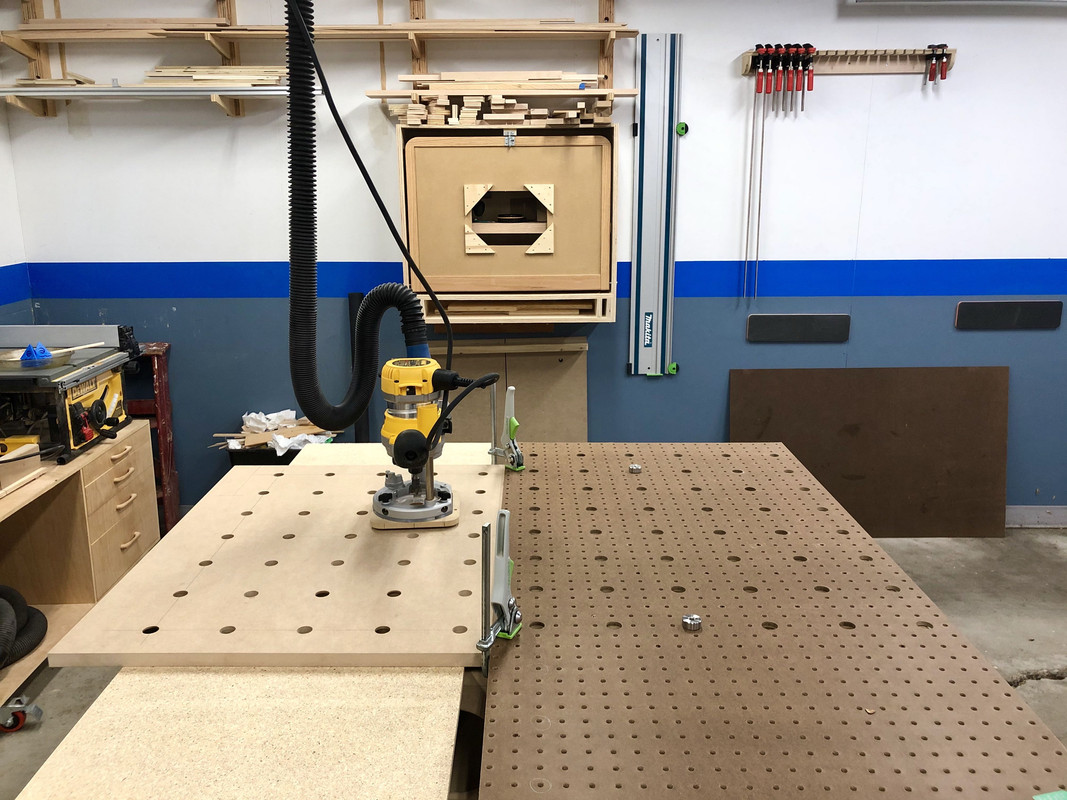
The holey top was drilled with my router, Woodrave Etsy jig, and Bosch 20mm bit. I only use the holes for clamping, not square, so this method was accurate enough for my needs:
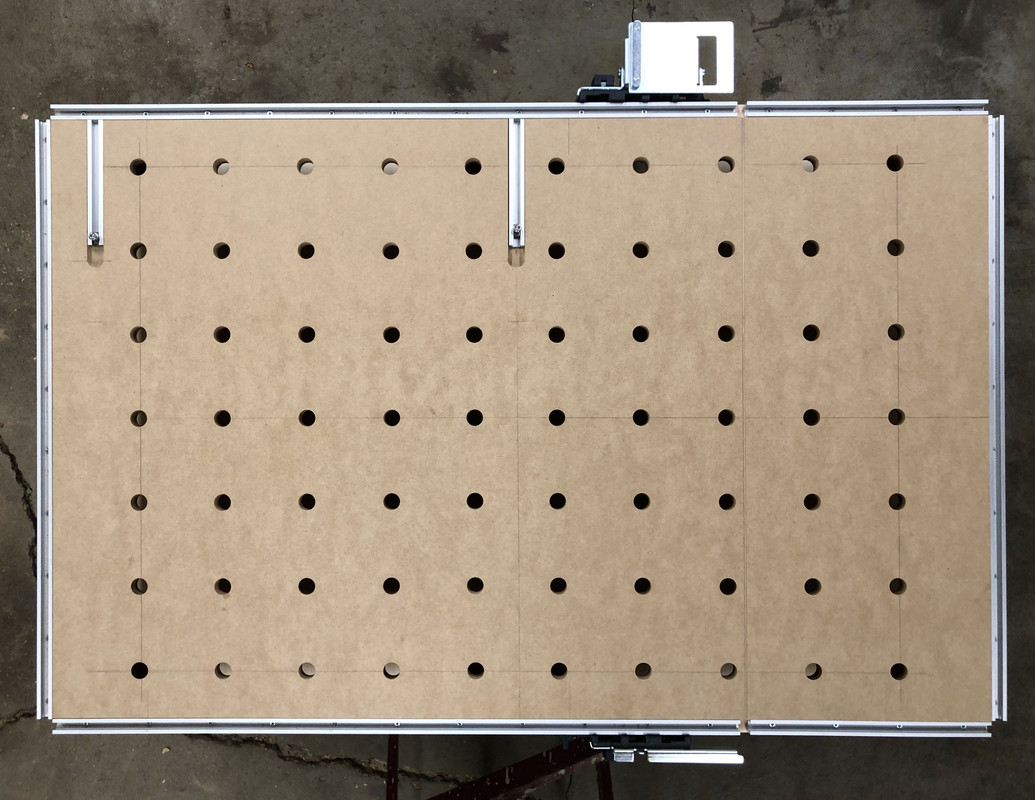
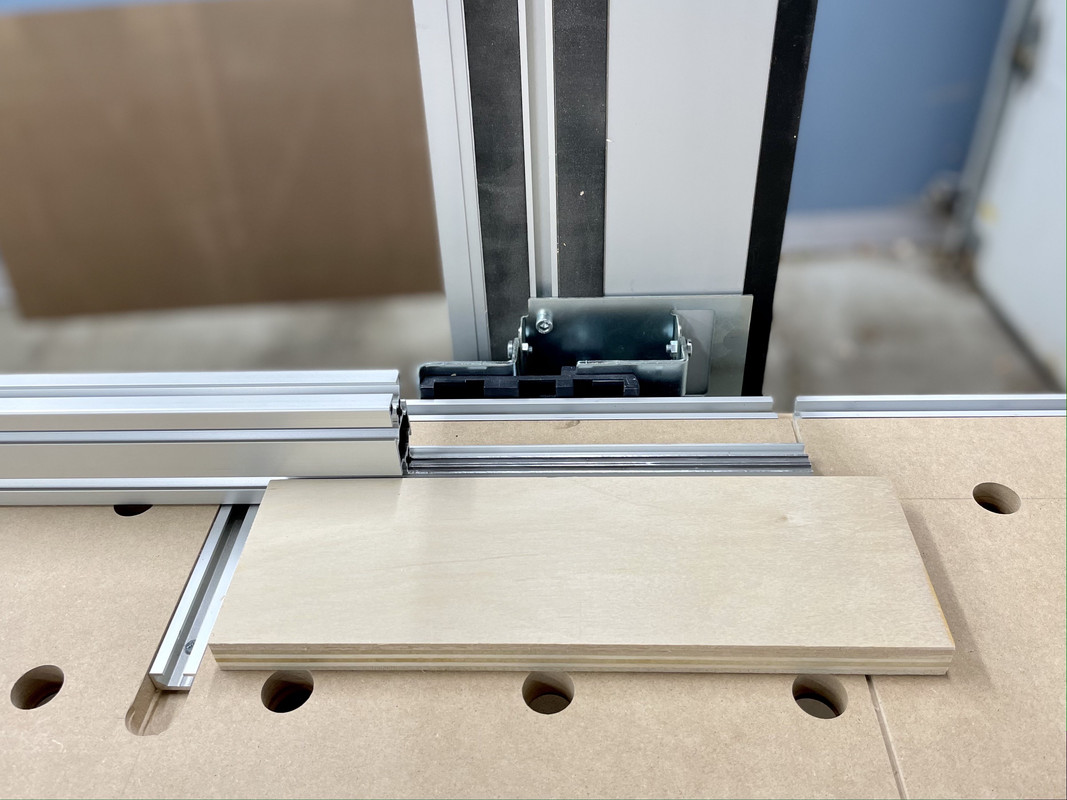
Above you can see I also added two short sections of T-track for positioning a cross cut fence.
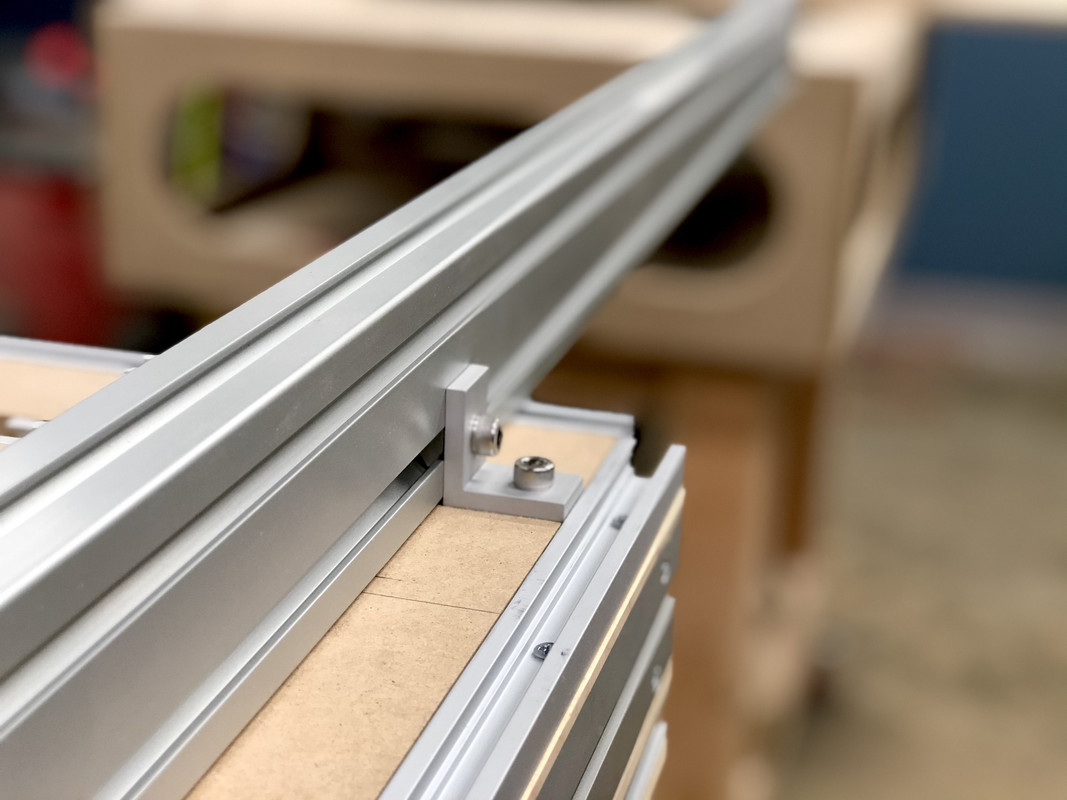
I went with a Misumi aluminum extrusion for this:
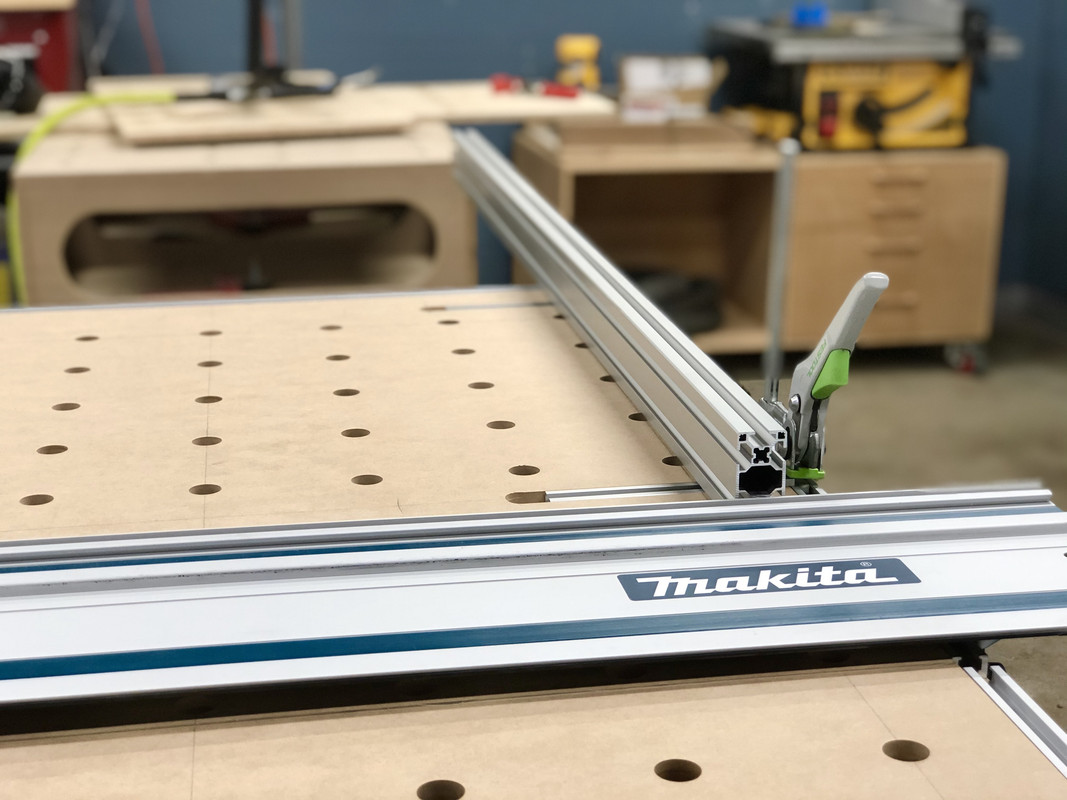
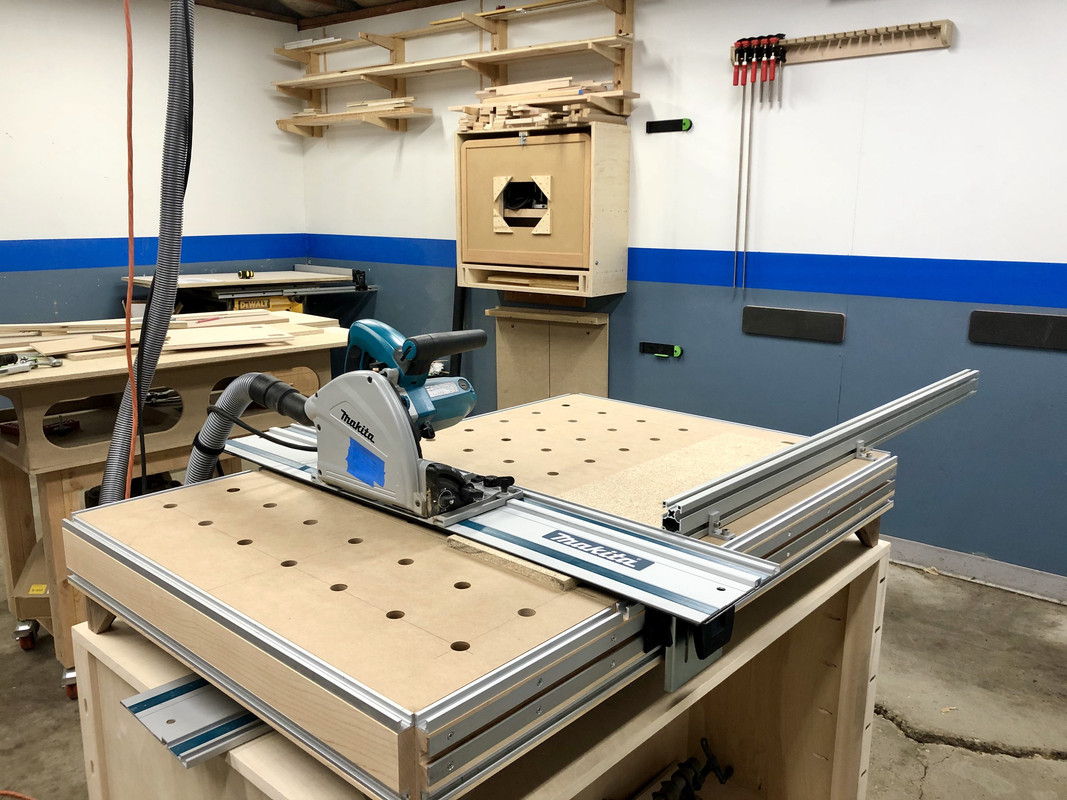
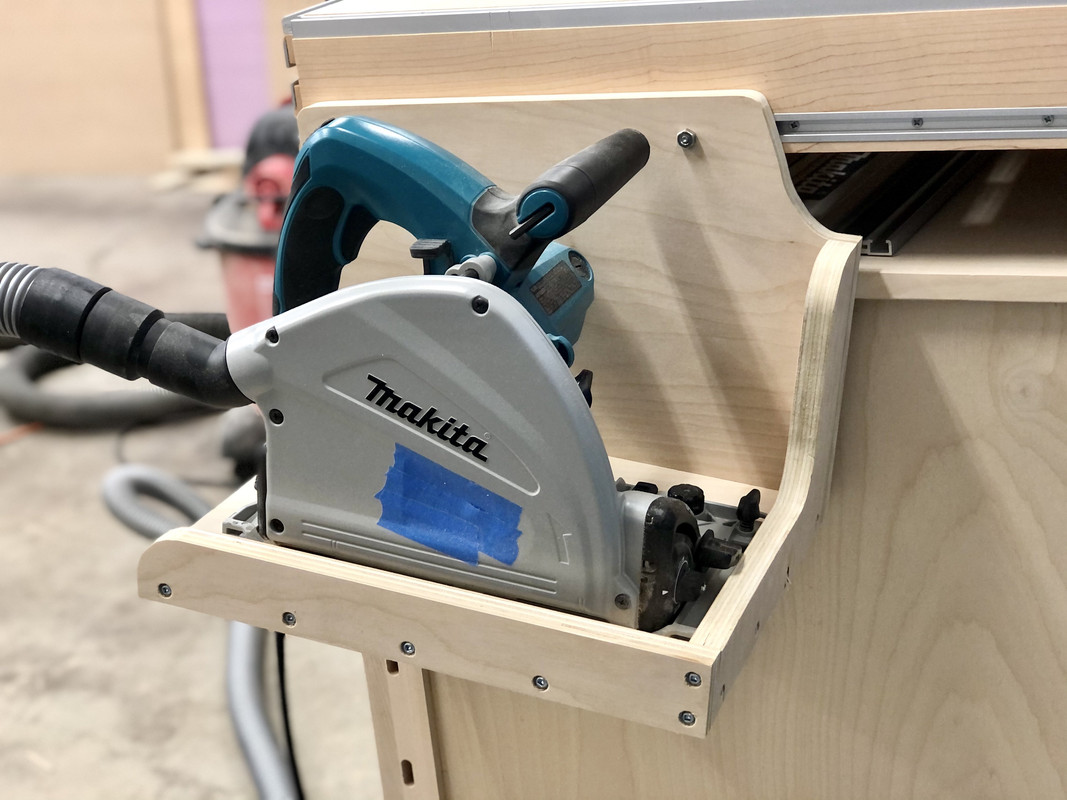
Yes I have the Makita, not the TS55. [big grin]
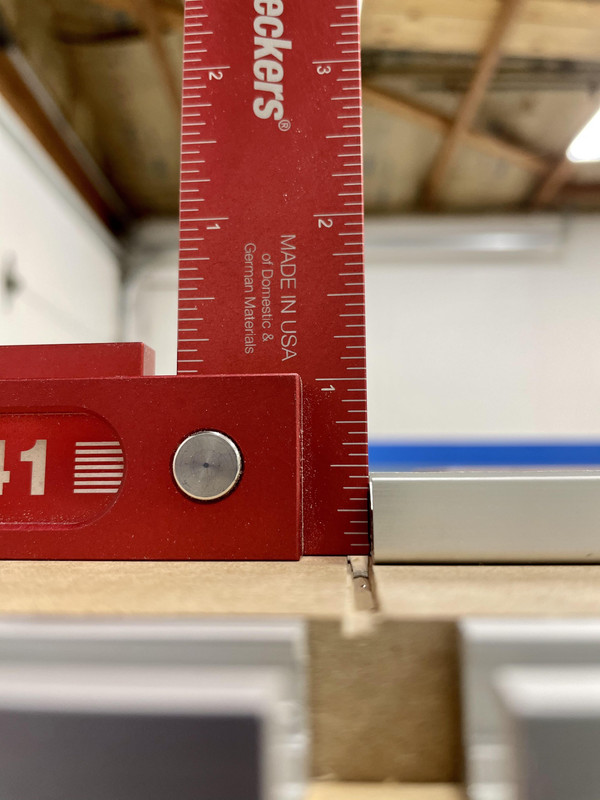
To square I simply install the rail, install the fence loosely, position a large known square and butt the fence up to it, then tighten the L-brackets. It's easy, and accurate.
As far as function, it does all the things you might expect.
Crosscuts up to 28", really any length:
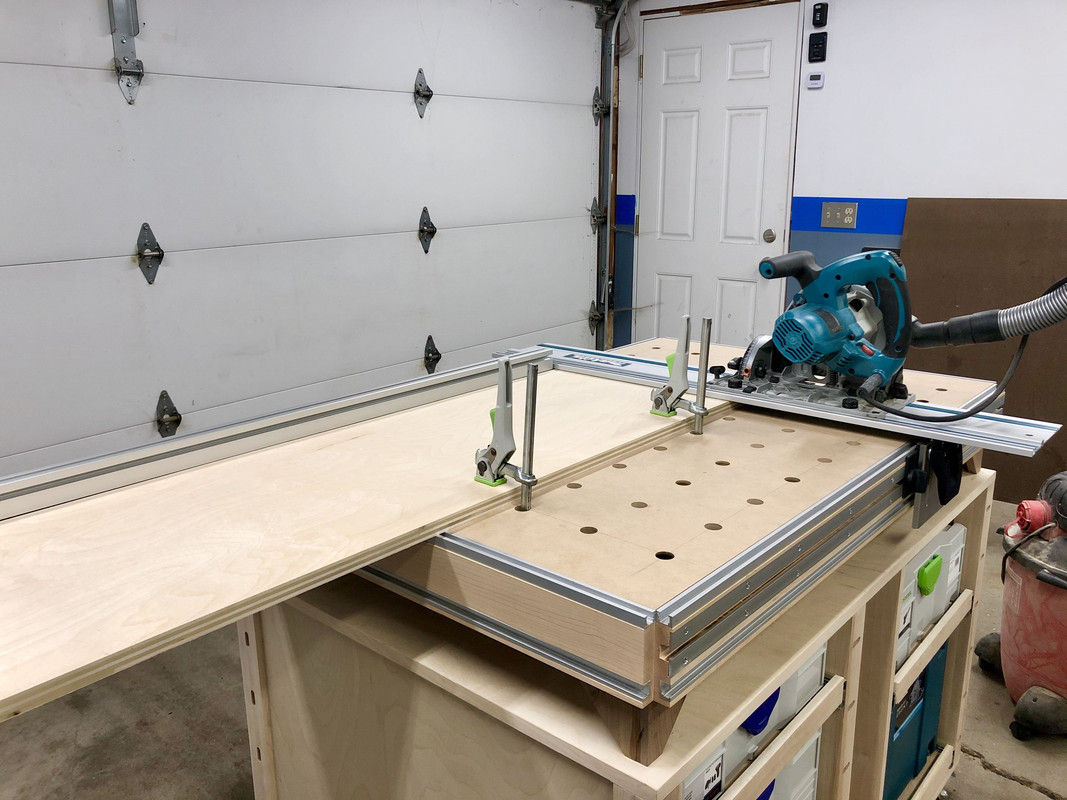
Surface for standalone cuts:

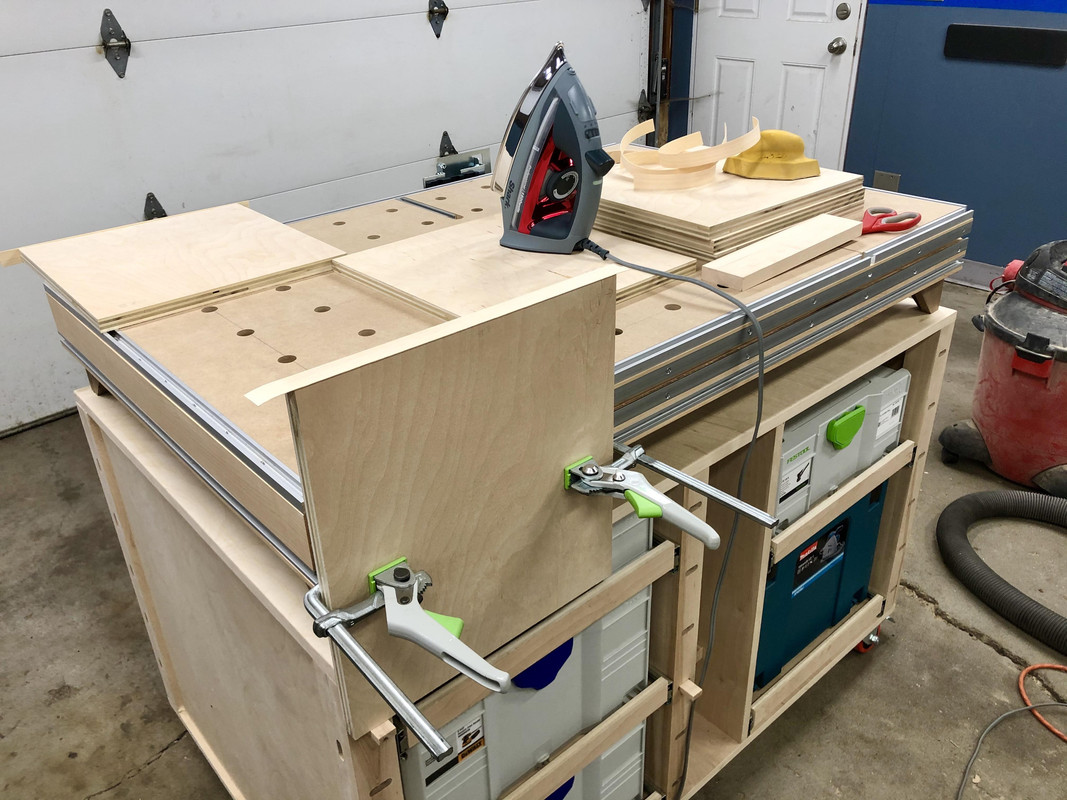
Vertical clamping for edgebanding:
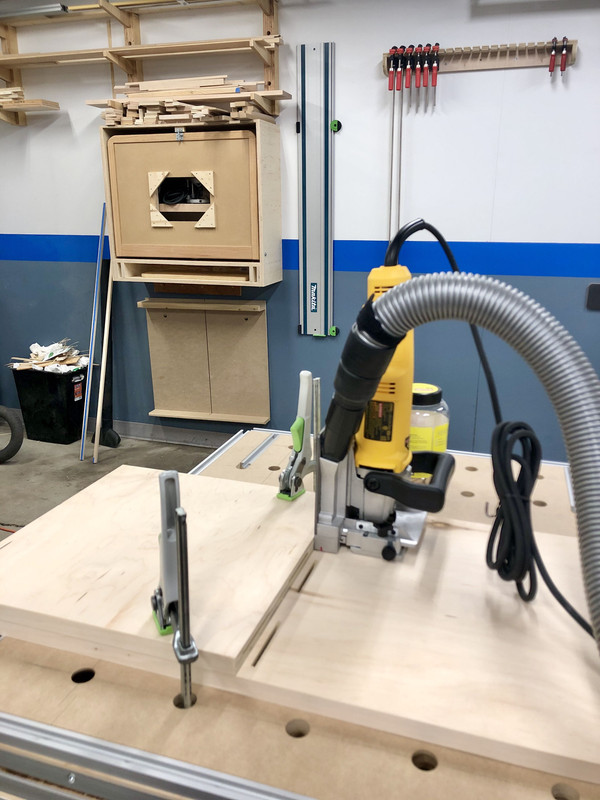
Joinery:
Finishing on protective 1/8" hardboard spoil surface:
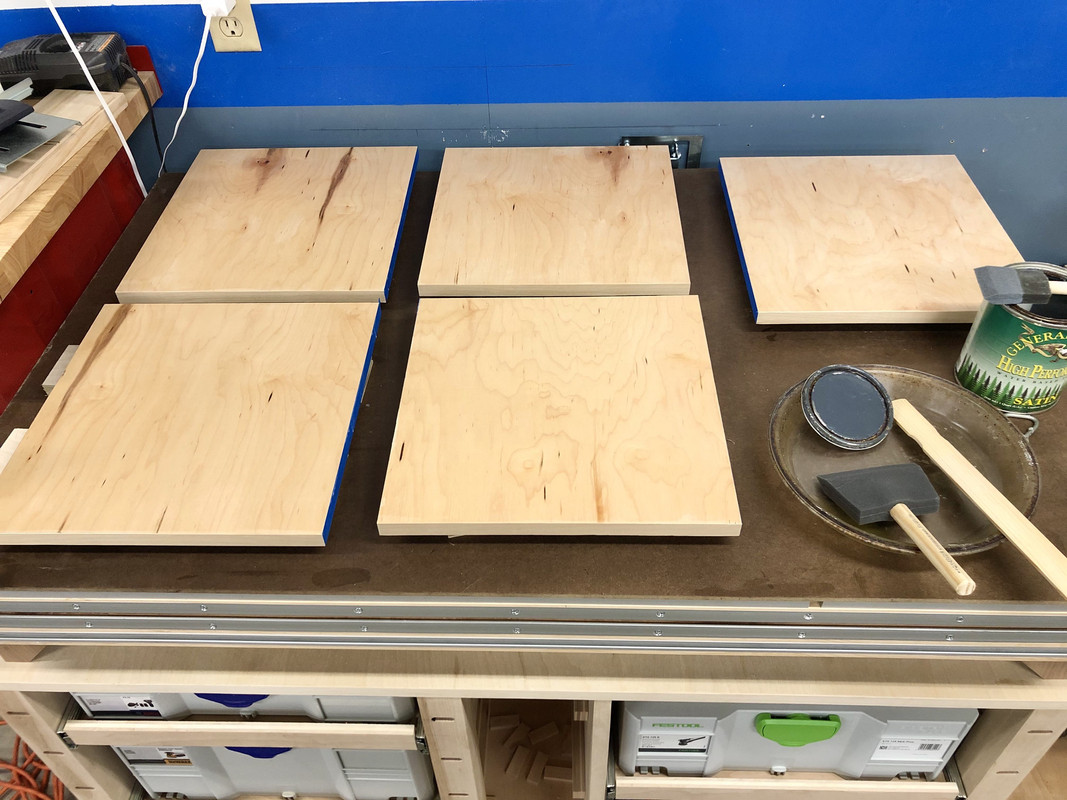
Table saw outfeed:
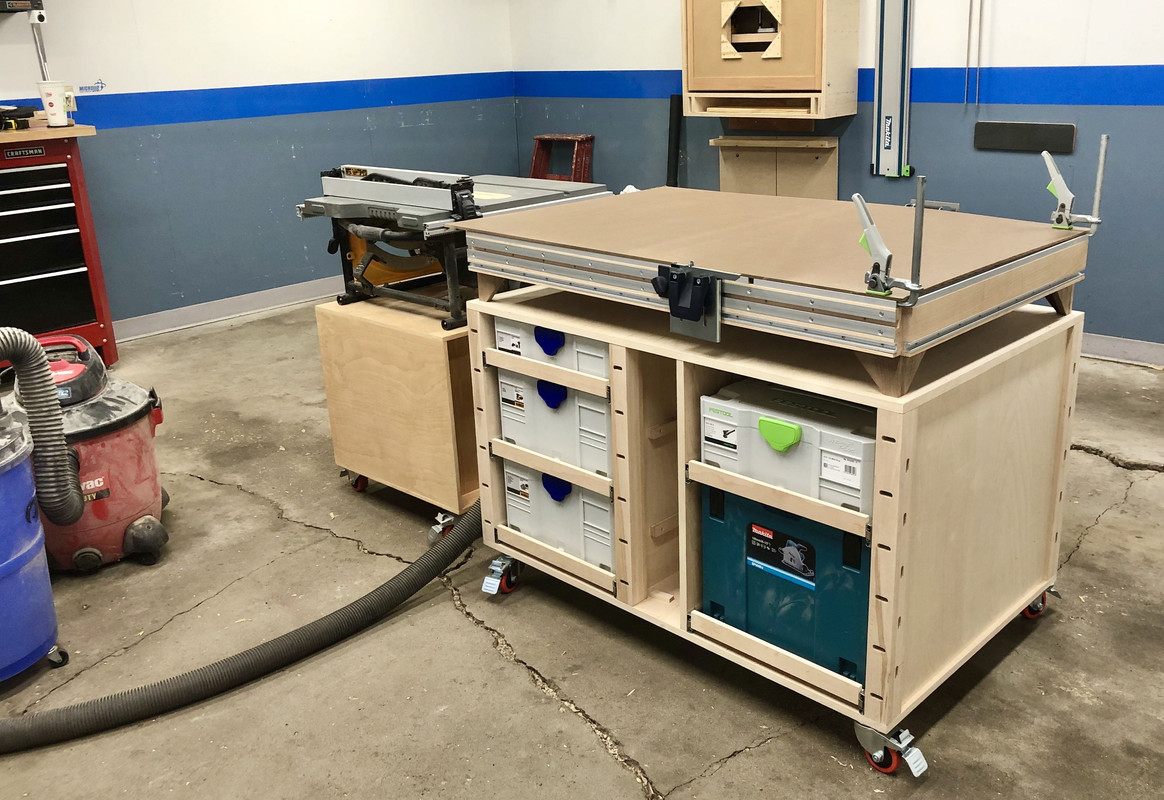
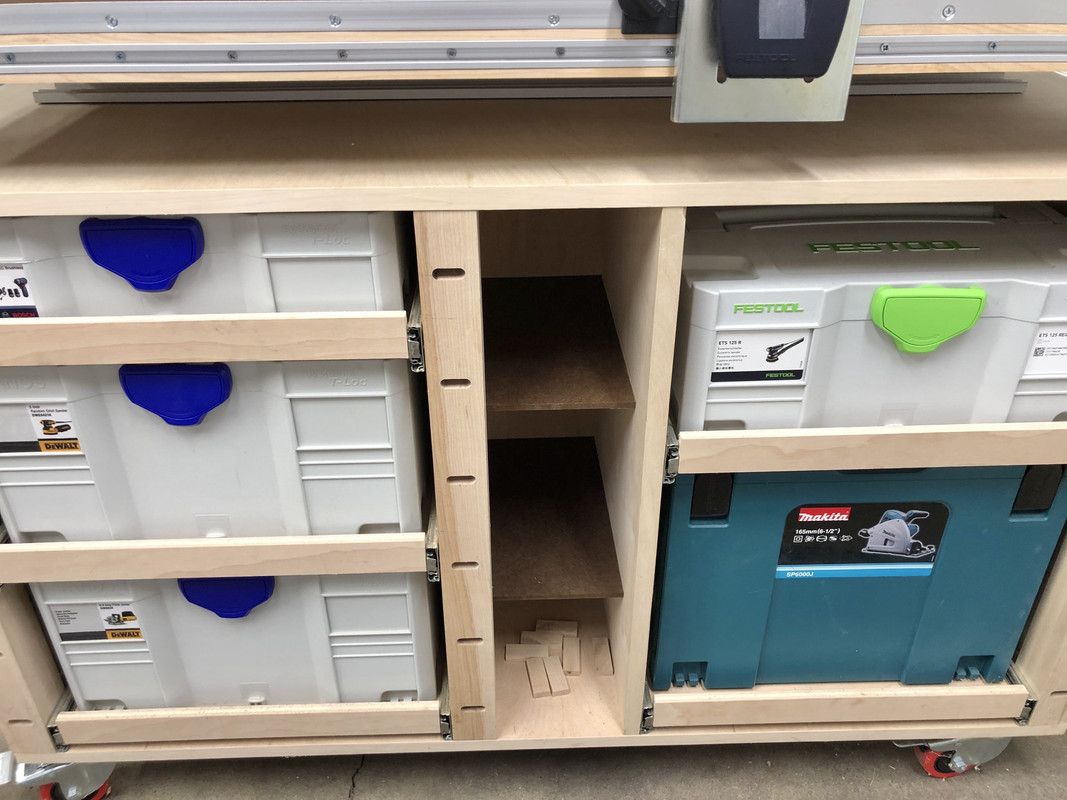
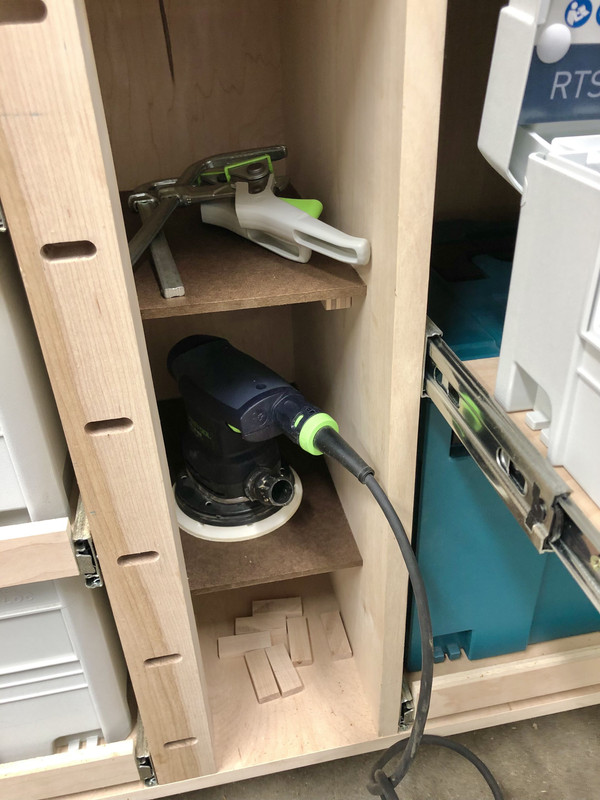
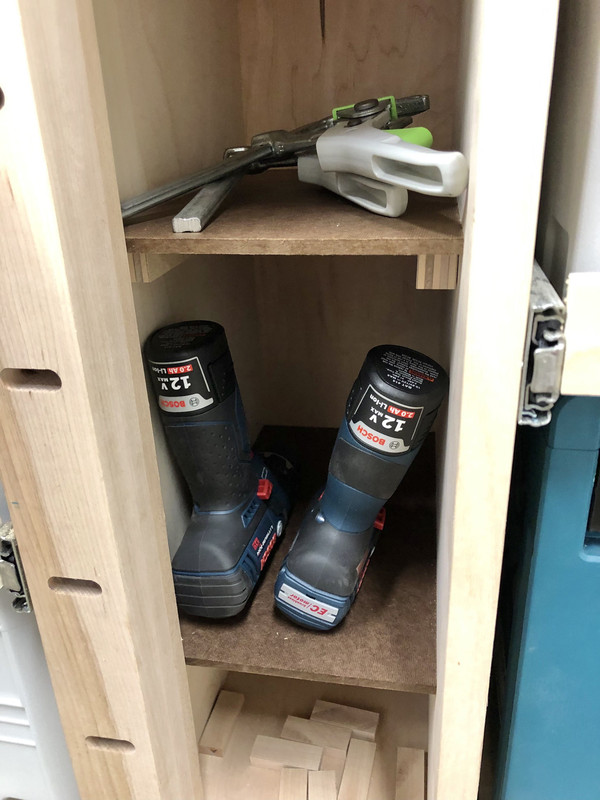
Sanding, assembly, Systainer storage, and more!
All in all it cost about $500 to build in materials and the Festool rail parts.
I know there are a million of these out there, but I was definitely inspired by many designs on this forum and hope someone finds this interesting!
I have ideas for more features / expansion as well, so stay tuned. [big grin]
Cheers,
-Nick
The ETS 125 REQ you see is actually my only Festool, but I am enamored with the "system" and the creativeness of the community that seems to surround these tools. This is my effort to incorporate some of these ideas and ways of working into an all-purpose small shop workbench.
I'm calling it a hybrid because it's a combination of several others' ideas that I borrowed. To give credit where credit is due -- the carcass is largely a copy Justin Michael's cart from this thread. The "rails" of the top are from Guy Dunlap's MFT/Outfeed table project.
Guy Dunlap
The mortise and peg system from the legs you might recognize as borrowed from Timothy Wilmots System Workshop benches.
Timoth Wilmots
Basically I really liked bits and pieces from each of these designs, and combined them to make something that worked for me in my small garage.
The carcass is birch ply, biscuited and pocked screwed. The legs of the cart and the horizontal "rails" of the work surface are maple. The little feet that elevate the work surface are walnut, and the holey top is 3/4" MDF.
The work surface is 46" x 30", so almost the same as the official MFT/3 surface.
A bit about the construction. I realize this would arguably have been a great project to justify a Domino, but I simply don't have the funds, so all of the leg mortises were done with my DeWalt 618 router:
The Systainers have pull out drawers with indexing holes for the foot pads which I template routed with the help of a jig:
Systainers can be opened fully while in the drawer.
Here is a Sketchup of what the work surface frame looks like. Birch ply inner frame, maple outer frame. Inner frame height is recessed to accept the MDF top.
T-tracks from Orange Aluminum were added (these fit the Festool Quick Clamps), with a notch left for the track saw blade to pass through on both sides.
Then some 1/8" bar aluminum was added to accept the Festool rail support pivots (I ordered these from a parts dealer). If I could redo I'd actually use 1/16" bar aluminum instead so they slide easier:
The holey top was drilled with my router, Woodrave Etsy jig, and Bosch 20mm bit. I only use the holes for clamping, not square, so this method was accurate enough for my needs:
Above you can see I also added two short sections of T-track for positioning a cross cut fence.
I went with a Misumi aluminum extrusion for this:
Yes I have the Makita, not the TS55. [big grin]
To square I simply install the rail, install the fence loosely, position a large known square and butt the fence up to it, then tighten the L-brackets. It's easy, and accurate.
As far as function, it does all the things you might expect.
Crosscuts up to 28", really any length:
Surface for standalone cuts:
Vertical clamping for edgebanding:
Joinery:
Finishing on protective 1/8" hardboard spoil surface:
Table saw outfeed:
Sanding, assembly, Systainer storage, and more!
All in all it cost about $500 to build in materials and the Festool rail parts.
I know there are a million of these out there, but I was definitely inspired by many designs on this forum and hope someone finds this interesting!
I have ideas for more features / expansion as well, so stay tuned. [big grin]
Cheers,
-Nick