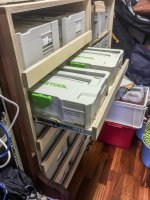
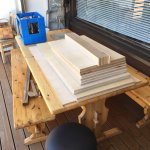
I finally found the time over my summer vacation to get my thumb out and actually build these Sysports that I have been procrastinating on for years. Since my storage space is basically a half of a walk-in closet which is designed to hold standard 60cm deep kitchen-type drawers I opted to rotate my Systainers 90-degrees e.g. sideways to make the most out of the space available and put two on each shelf since I'm a bit tightfisted - it halved my drawer runner bill [wink]
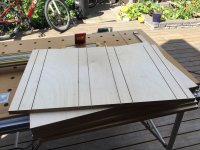
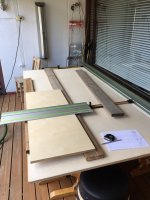
Attached are the cutlists for the plywood and an export of the shelf construction for those interested.
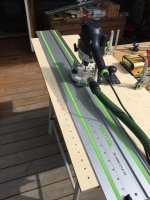
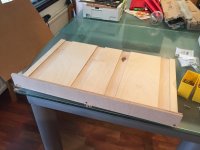
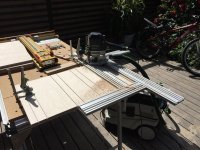
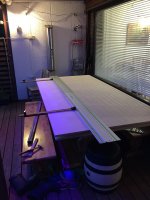
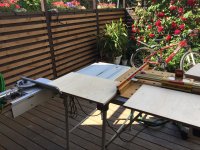
The case is Domino'd together as well as the drawer fronts. The backs I just screwed in since they will never be seen again. I used my TS55 and guiderails of 800mm, 1400mm and joined 2x1400mm for the plywood cutting and my Precision Dogs parallel guides.
View attachment 3View attachment 4View attachment 5View attachment 6View attachment 7
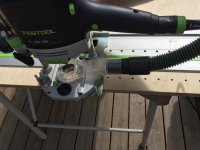
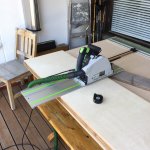
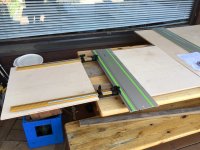
Then I cut the edges of the drawer grooves for the Systainer feet on my TS55 in my MFT-VL with the help of my Incra LS-positioner fence system and finished the waste removal with my OF1400 router on MFS guides.
View attachment 8View attachment 9View attachment 10View attachment 11View attachment 12
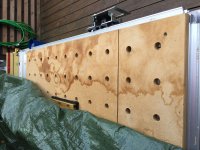
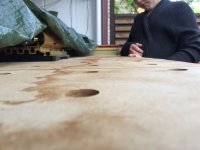
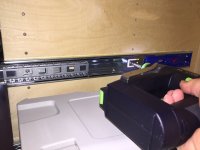
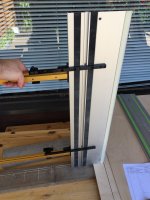
Then I made the LR32 holes in the case sides for the sliders with my OF1400 router on the "Holy"-rail using the LR32 Kit.
View attachment 13View attachment 14
I attached the drawer back support with only screws as it's there only to act as a stop and being totally hidden from view.
View attachment 15
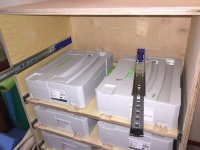
Then it was time to start attaching the runners in place with my CXS and I filled the cabinet from bottom to top using the Systainers as a reference guide to the location for the next runners. The systainers are quite the right size for the 32mm system as there is exactly enough space between the shelf above and the systainer to close the drawers even with the latch open on T-loc Systainers.
View attachment 16View attachment 17
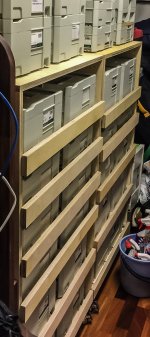
First prototype cabinet fully loaded (missing fronts)
View attachment 18
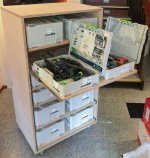
Fronts coming in place - sorry forgot to take photos of the Dominoing... [sad]
View attachment 19View attachment 20
Notice: When cutting the Domino mortices on the drawer, make sure that you are morticing into the unthinned part of the drawer or you'll end up with a 0.2mm thick top side of the mortice... Don't ask how I know [embarassed]
Attached are the cutlists for the plywood and an export of the shelf construction for those interested.
The case is Domino'd together as well as the drawer fronts. The backs I just screwed in since they will never be seen again. I used my TS55 and guiderails of 800mm, 1400mm and joined 2x1400mm for the plywood cutting and my Precision Dogs parallel guides.
View attachment 3View attachment 4View attachment 5View attachment 6View attachment 7
Then I cut the edges of the drawer grooves for the Systainer feet on my TS55 in my MFT-VL with the help of my Incra LS-positioner fence system and finished the waste removal with my OF1400 router on MFS guides.
View attachment 8View attachment 9View attachment 10View attachment 11View attachment 12
Then I made the LR32 holes in the case sides for the sliders with my OF1400 router on the "Holy"-rail using the LR32 Kit.
View attachment 13View attachment 14
I attached the drawer back support with only screws as it's there only to act as a stop and being totally hidden from view.
View attachment 15
Then it was time to start attaching the runners in place with my CXS and I filled the cabinet from bottom to top using the Systainers as a reference guide to the location for the next runners. The systainers are quite the right size for the 32mm system as there is exactly enough space between the shelf above and the systainer to close the drawers even with the latch open on T-loc Systainers.
View attachment 16View attachment 17
First prototype cabinet fully loaded (missing fronts)
View attachment 18
Fronts coming in place - sorry forgot to take photos of the Dominoing... [sad]
View attachment 19View attachment 20
Notice: When cutting the Domino mortices on the drawer, make sure that you are morticing into the unthinned part of the drawer or you'll end up with a 0.2mm thick top side of the mortice... Don't ask how I know [embarassed]
Attachments
-
Single Unit Cutlist Final.pdf99.1 KB · Views: 179
-
 2017-08-01 Sysport Build 2017 (IMG_4888) - 018.jpg674 KB · Views: 320
 -
 2017-08-01 Sysport Build 2017 (IMG_4889) - 019.jpg889.5 KB · Views: 382
 -
 2017-08-02 Sysport Build 2017 (IMG_4891) - 020.jpg770.8 KB · Views: 381
 -
 2017-08-02 Sysport Build 2017 (IMG_4896) - 025.jpg714 KB · Views: 362
 -
 2017-08-02 Sysport Build 2017 (IMG_4897) - 026.jpg762.9 KB · Views: 501
 -
 2017-08-02 Sysport Build 2017 (IMG_4899) - 028.jpg887.8 KB · Views: 723
 -
 2017-08-20 Sysport Build 2017 (IMG_4957) - 038.jpg990.2 KB · Views: 388
 -
 2017-09-14 Sysport Build 2017 (IMG_5002) - 041.jpg594.3 KB · Views: 411
 -
 2017-08-01 Sysport Build 2017 (IMG_4885) - 015.jpg731.1 KB · Views: 387
 -
 2017-08-01 Sysport Build 2017 (IMG_4883) - 013.jpg191.4 KB · Views: 342
 -
 2017-08-01 Sysport Build 2017 (IMG_4882) - 012.jpg894.6 KB · Views: 299
 -
Shelf Bottom 410x651x18 Symmetric.pdf26.7 KB · Views: 168
-
 2017-07-29 Sysport Build 2017 (IMG_4869) - 001.jpg922.8 KB · Views: 531
 -
 2017-07-30 Sysport Build 2017 (IMG_4871) - 002.jpg899.6 KB · Views: 418
 -
 2017-07-30 Sysport Build 2017 (IMG_4874) - 005.jpg843.2 KB · Views: 347
 -
 2017-07-30 Sysport Build 2017 (IMG_4875) - 006.jpg982.4 KB · Views: 376
 -
 2017-07-30 Sysport Build 2017 (IMG_4876) - 007.jpg862.8 KB · Views: 455
 -
 2017-07-30 Sysport Build 2017 (IMG_4877) - 008.jpg863.1 KB · Views: 310
 -
 2017-08-01 Sysport Build 2017 (IMG_4881) - 011.jpg826.3 KB · Views: 451