4nthony
Member
A few things I've been wanting to do:
- Make some joinery using Shaper Origin
- Make a jig to dish out a seat and backrest for a chair build, and...
- Make an actual chair
Over an Shaper Hub, there are plans for the Stock Chair that I'd been thinking would be a good first chair project. It's pretty basic as far as chairs go and after watching the Shaper Sessions guys go through the build, I decided to skip the plans and just wing it.
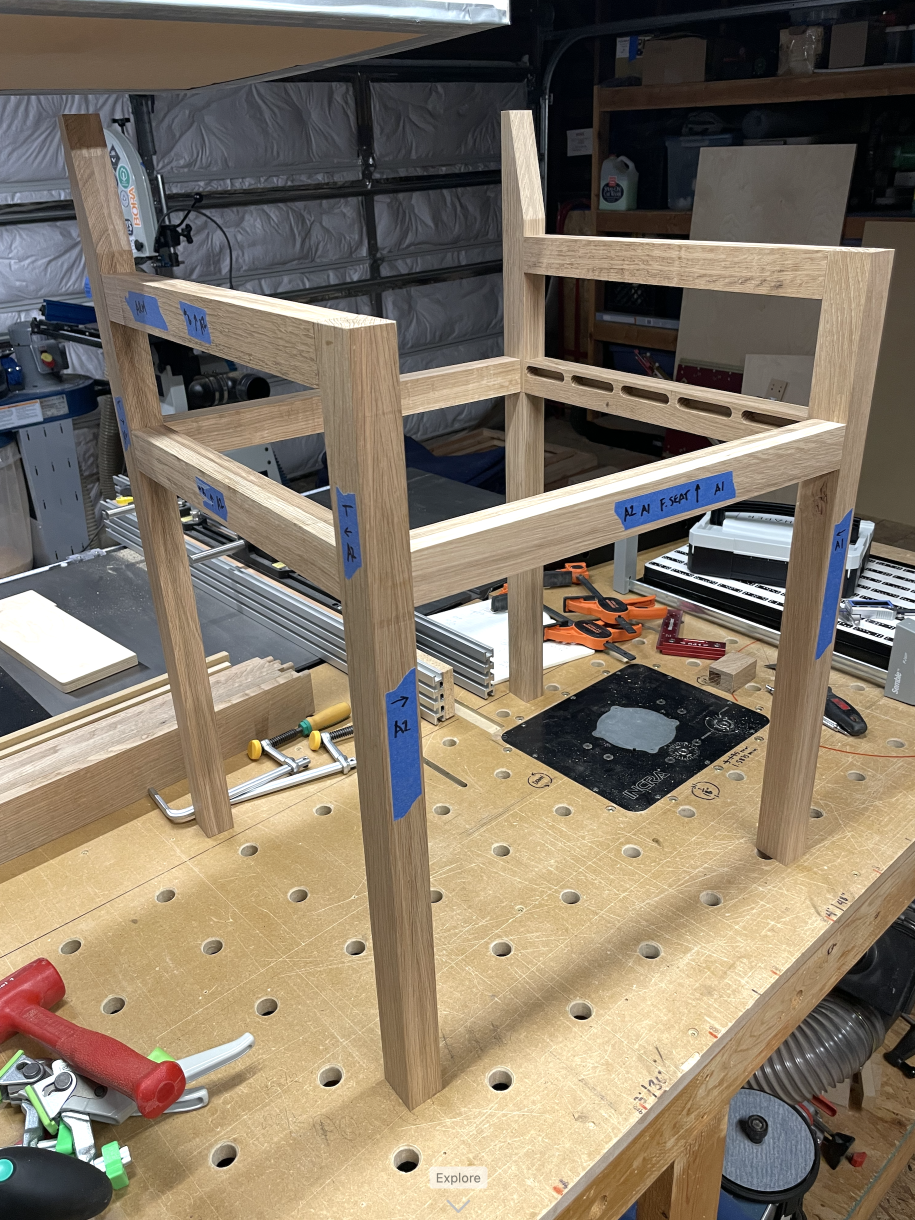
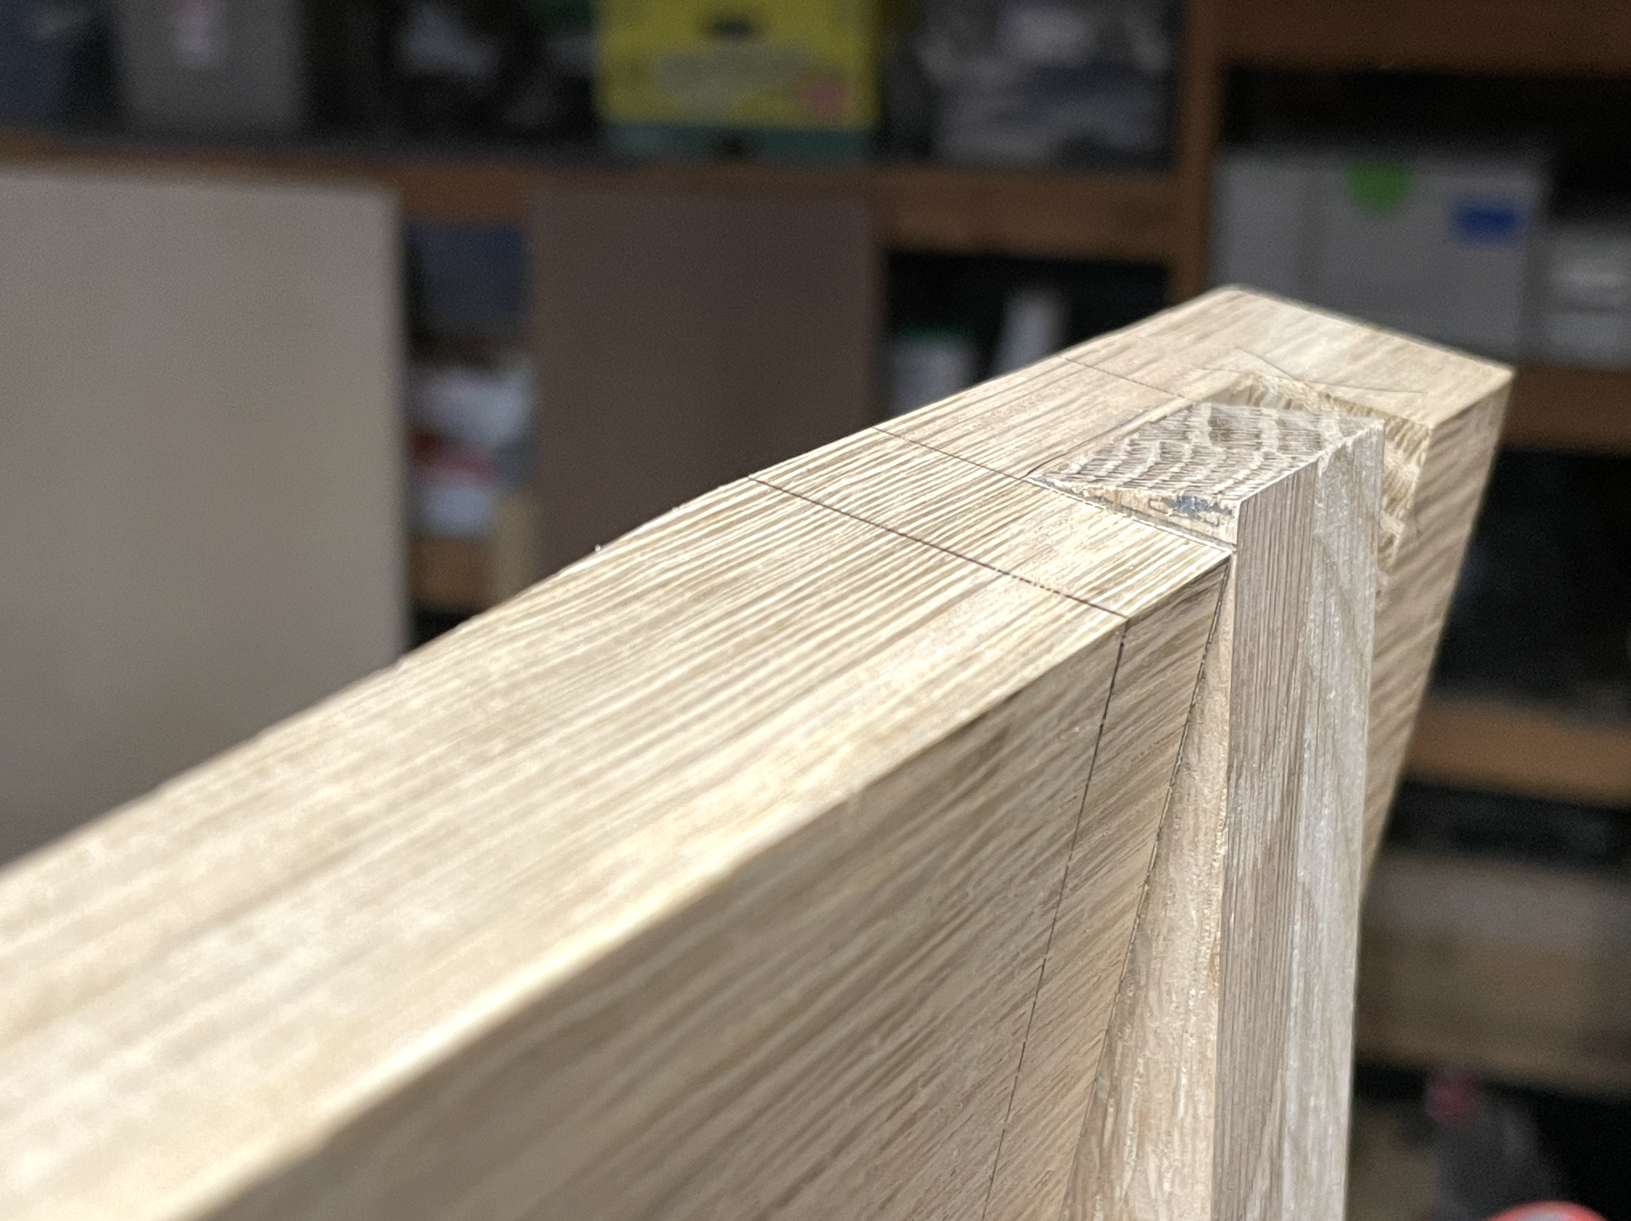
I had some quarter sawn 4/4 white oak that I milled and laminated into 8/4 boards. Once those were cut to size, I mounted them in the Shaper Workstation and went to work cutting the mortise and tenons. Using the Origin for joinery is almost as easy as the Domino and after cutting a few, I was questioning whether I should keep using the Origin.
Edit: I think for any future chair project, I'll probably use the Domino, unless I want to do some kind of decorative through tenon.
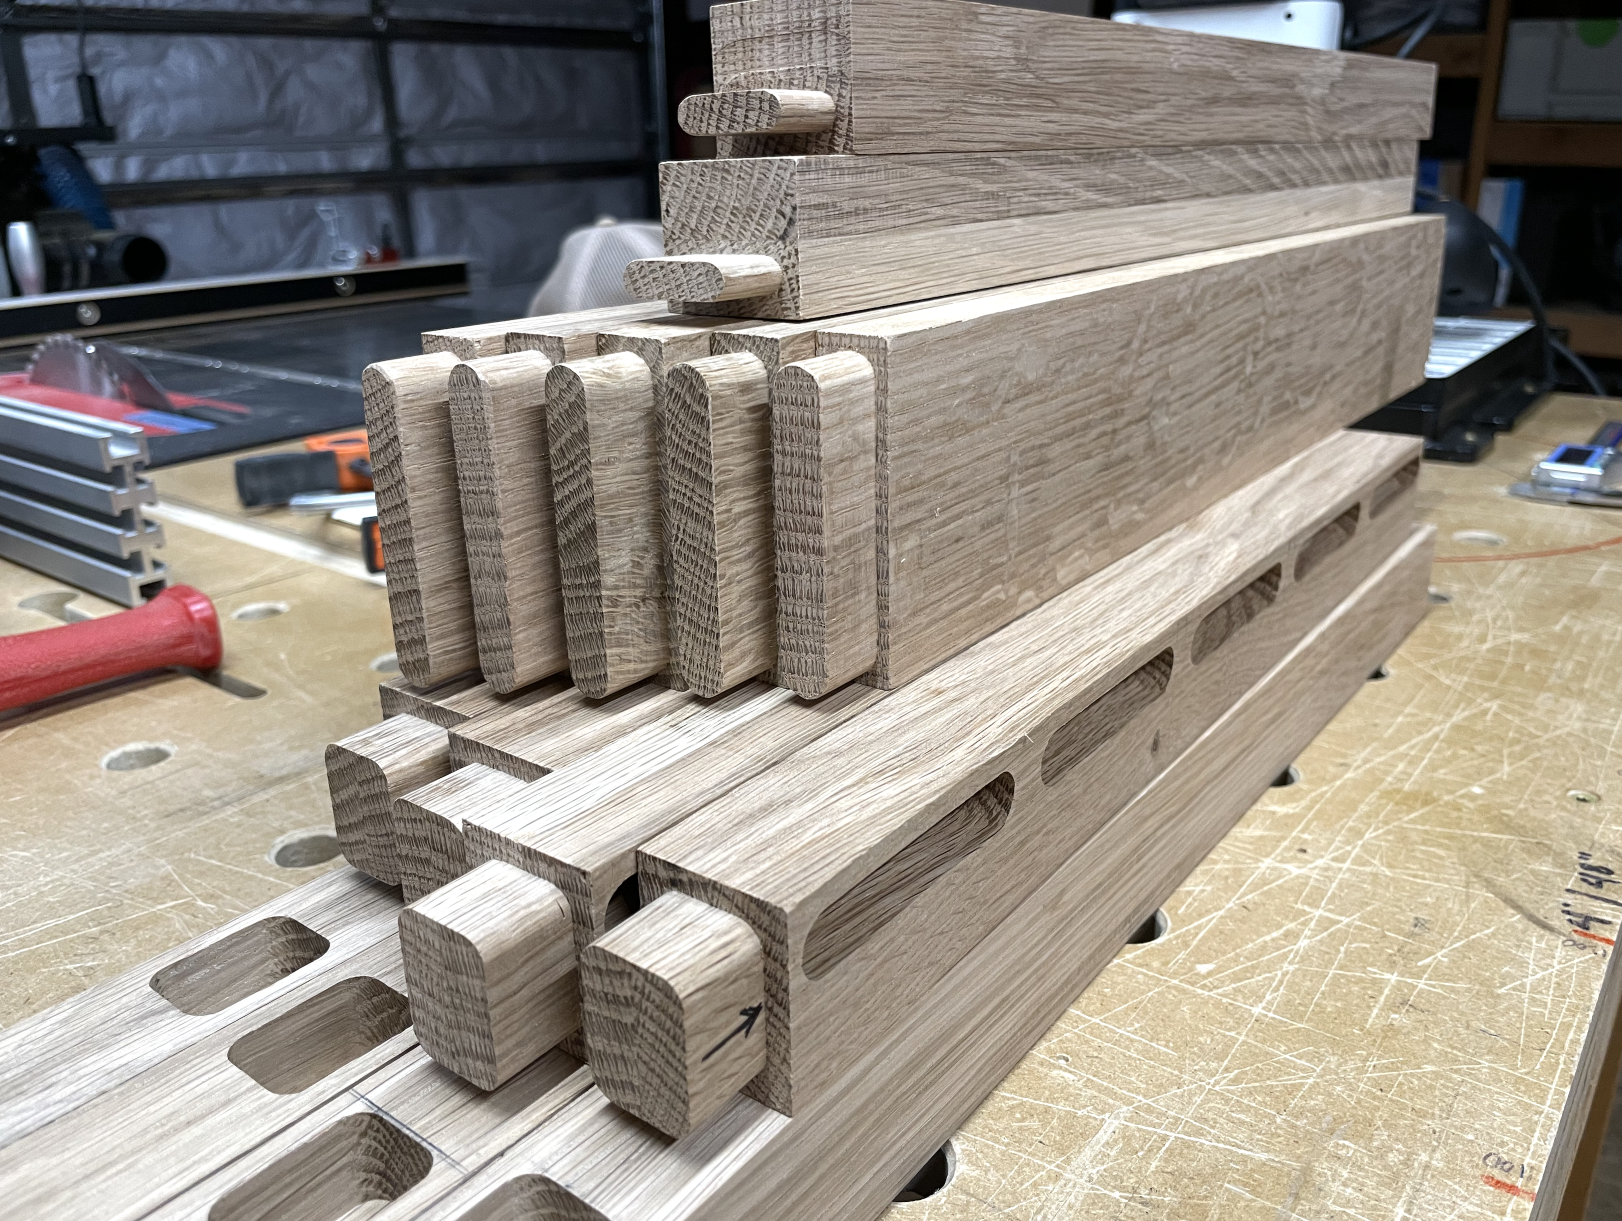
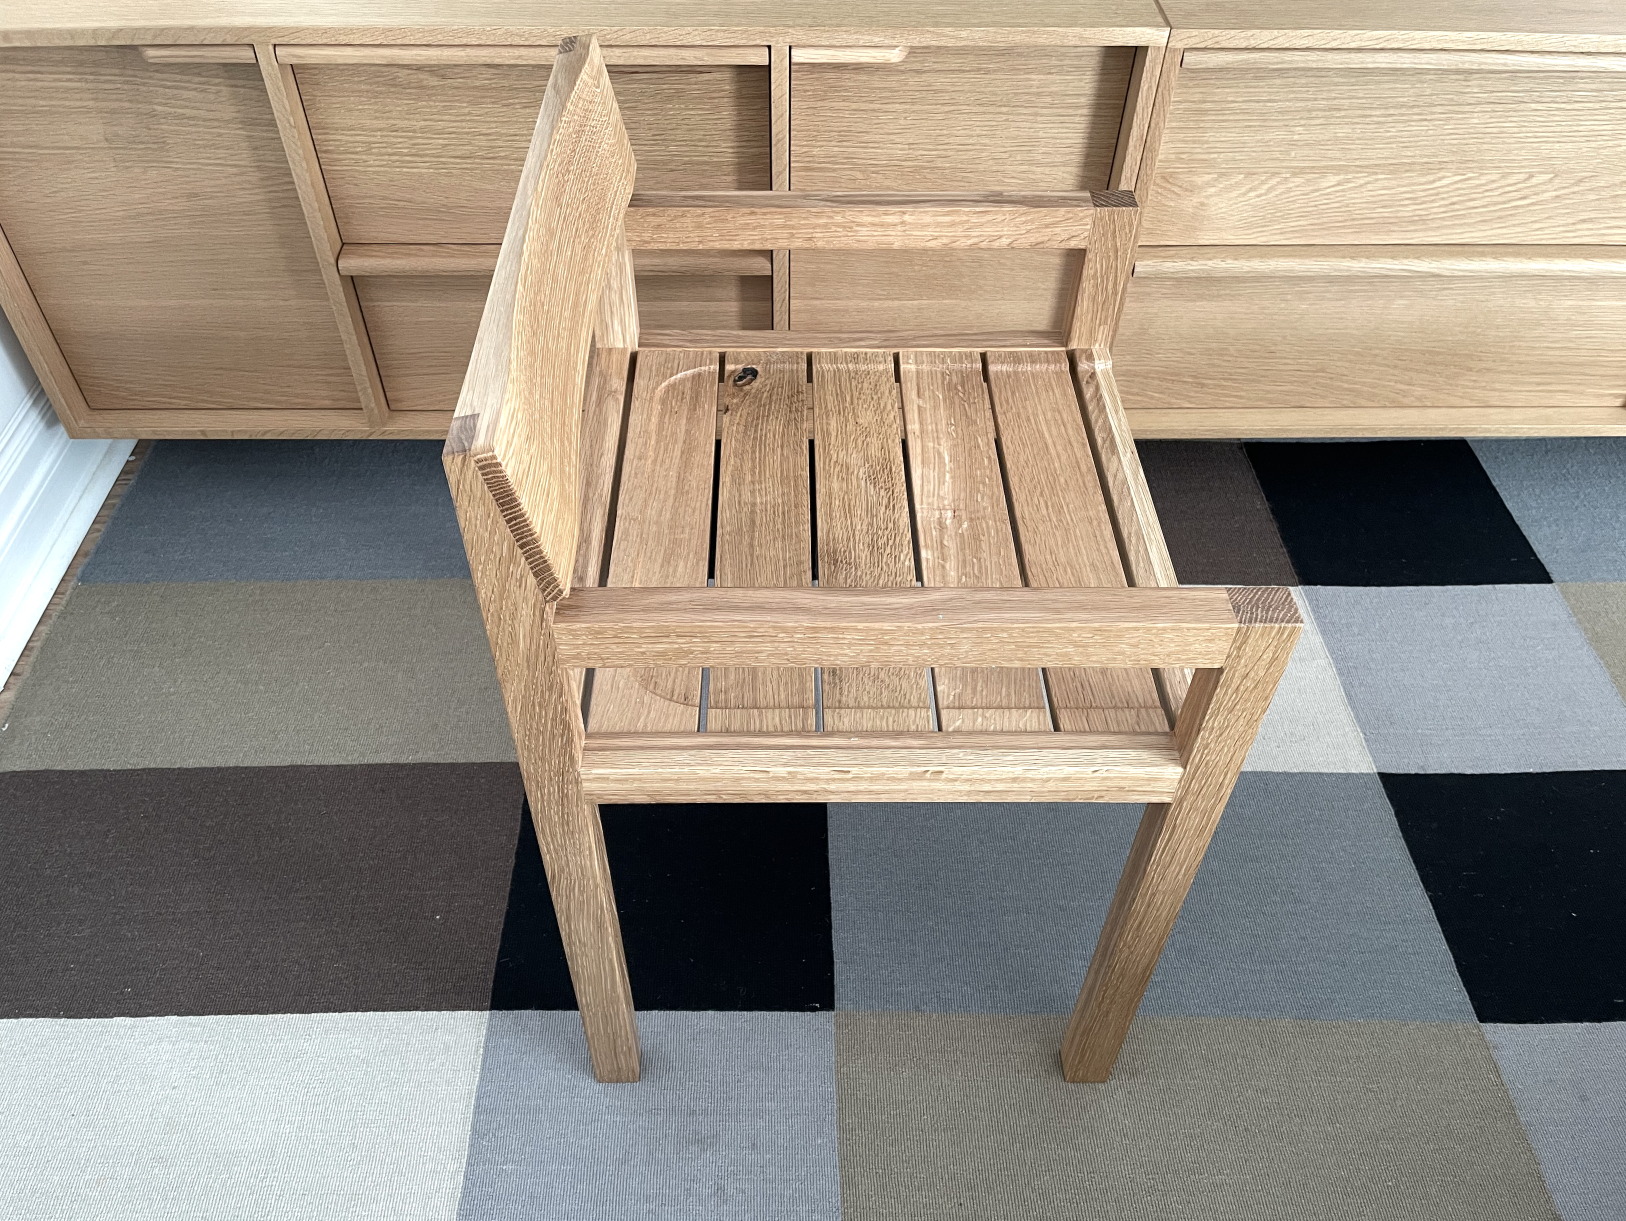
Legs, arms, stretchers, rails, slats....
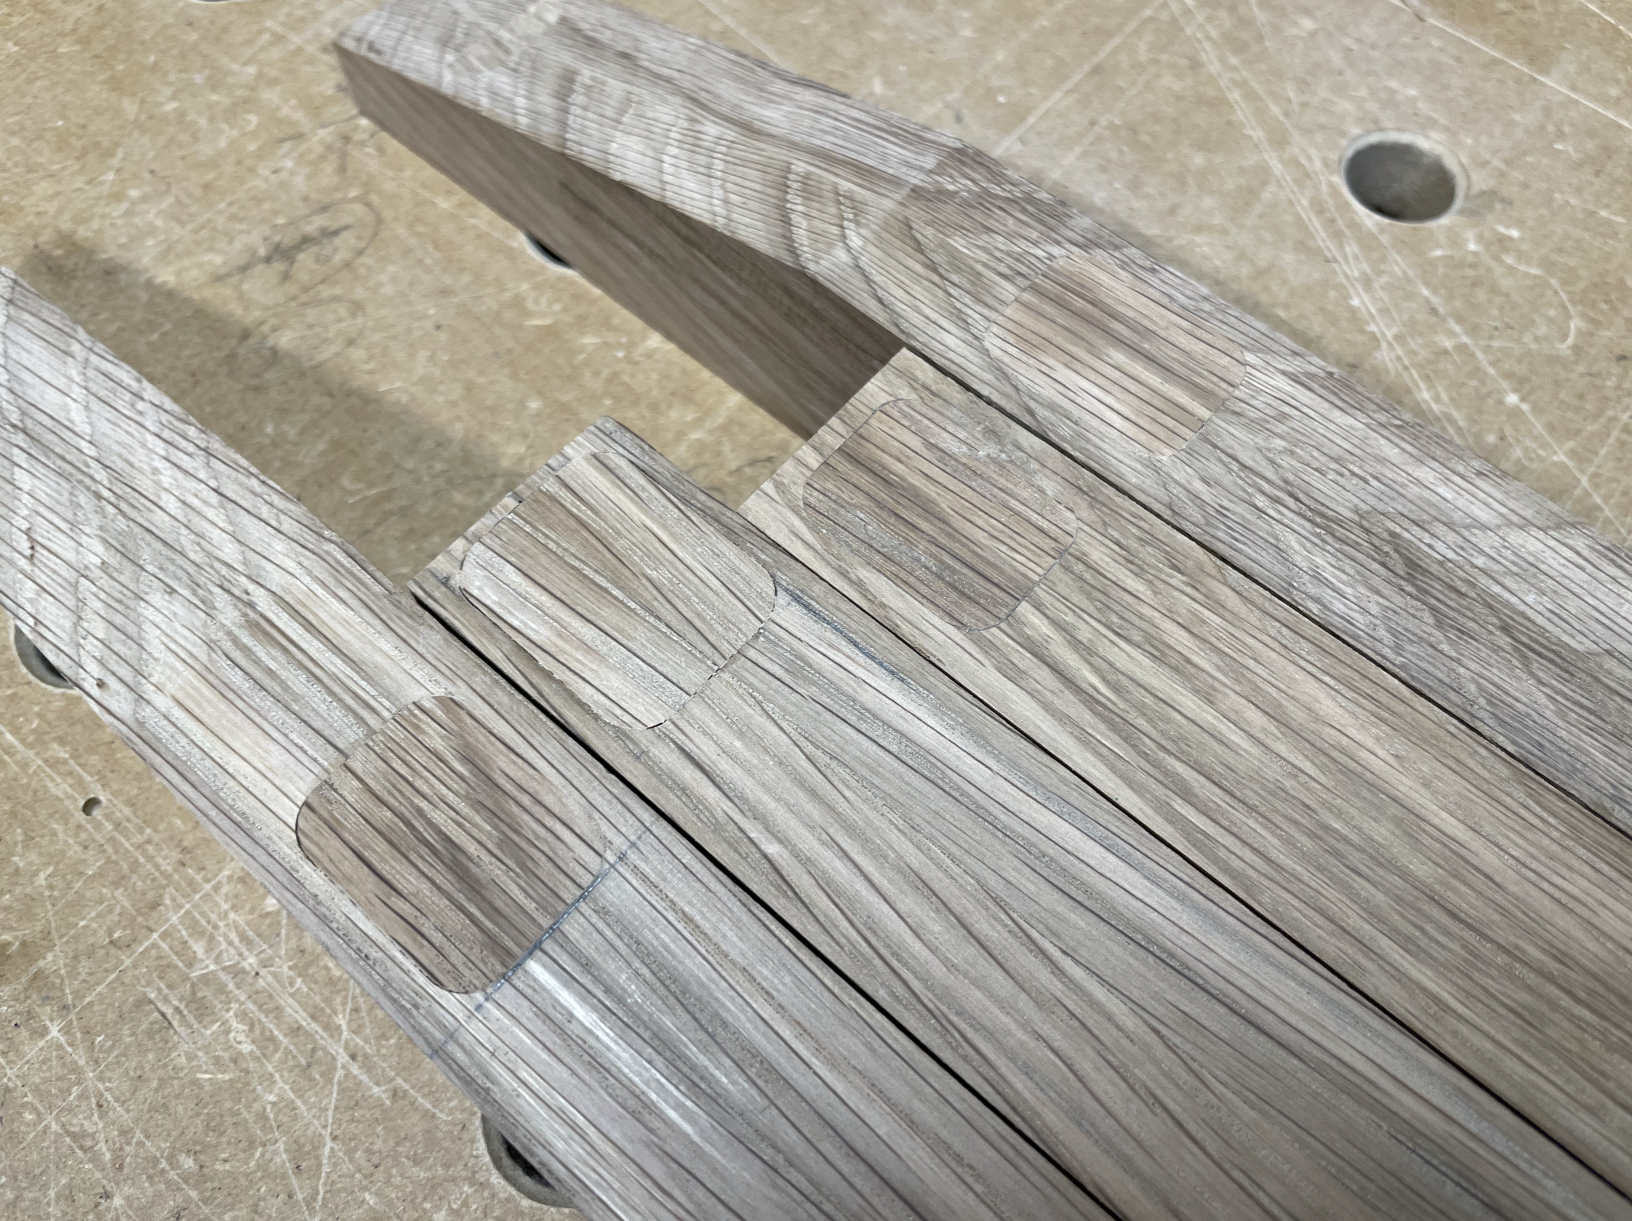
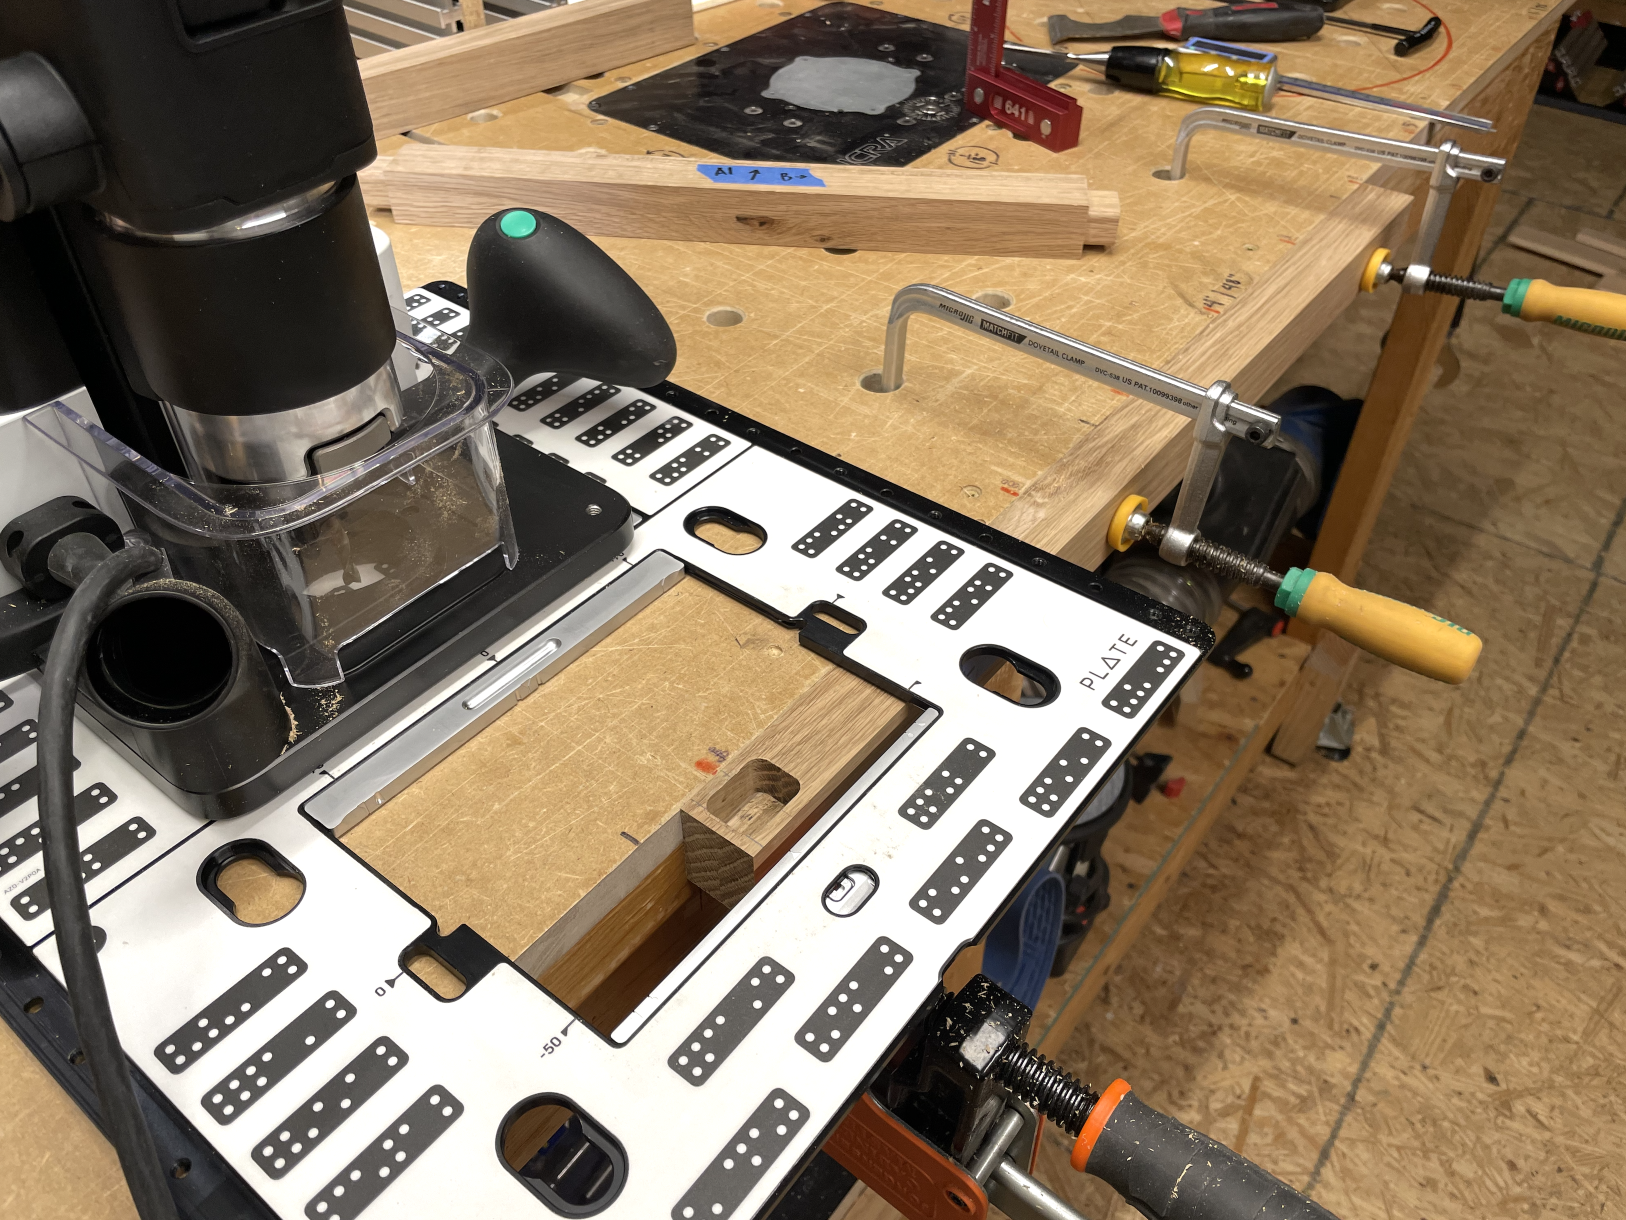
One issue I ran into was when cutting the mortises in the legs. The front legs are shorter than the rear legs and after gridding, I must've cut the back leg mortises measuring from the top and the front legs measuring from the bottom. The difference wasn't much -- about 1.5mm -- but it introduced a visual alignment issue, along with a wobble, so I decided to plug the mortises and recut them, but this time using Plate instead of Workstation. They used Workstation in the video but I felt the longer legs were a bit unwieldy and it was much easier to clamp the legs to the front of my workbench and use the Plate to make sure everything was aligned.
Out of the 12 mortises I cut, I ended up plugging and recutting 8 of them (including a 9th, that was simply misplaced).

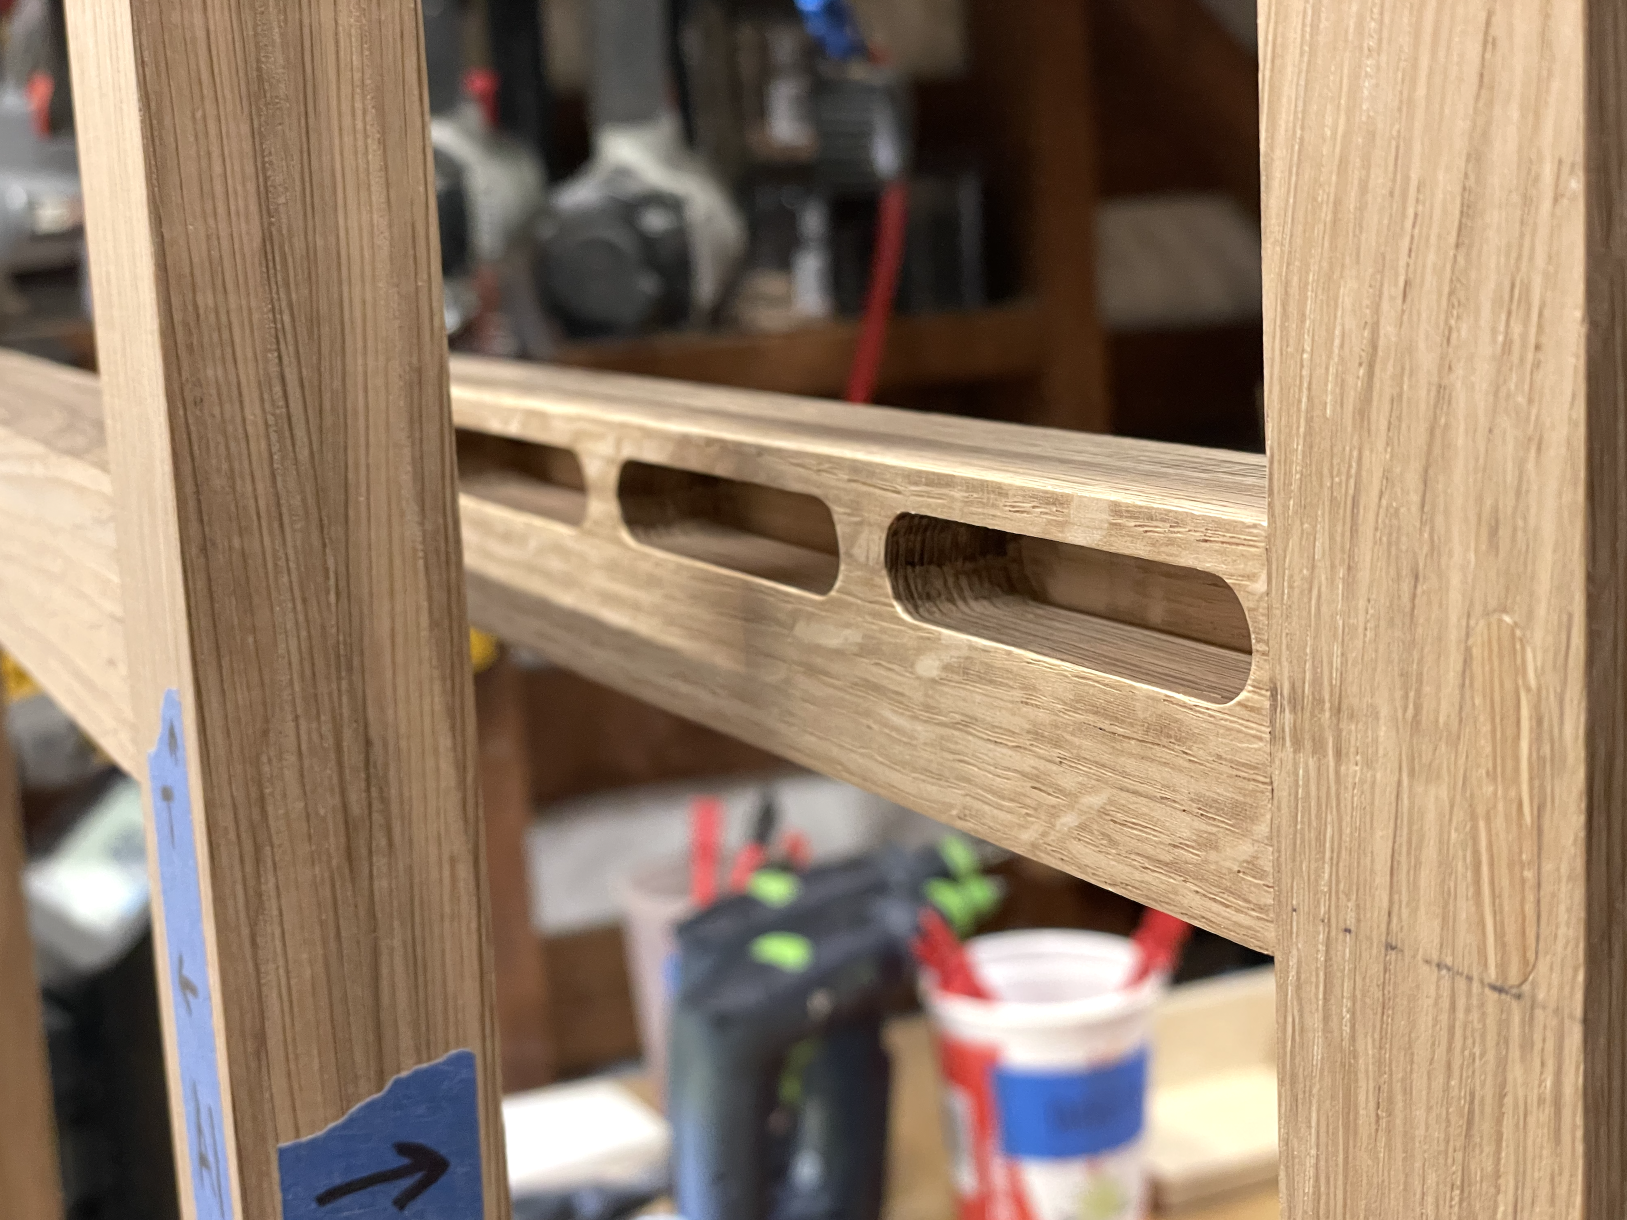
Fortunately, the 10 mortises for the chair slats were correct on both sides and didn't need to be plugged and recut.
From what I've learned, in traditional mortise and tenon joinery, you cut the mortise first, then size your tenon appropriately. With Origin, you cut the tenon first, then size the mortise to fit the tenon. This is easily accomplished with offsets, and I was able to get a nice friction fit with a .15mm offset.

In the original plans, they used 2" webbing to create the chair seat. I was never planning on using webbing so I milled up the slats. After a dry fit with the slats in place, it looked more like a table with arms so it was time to make the jig for dishing out the seat.
I created the outline in Shaper Studio, cut it on some MDF, and secured the slats in place.
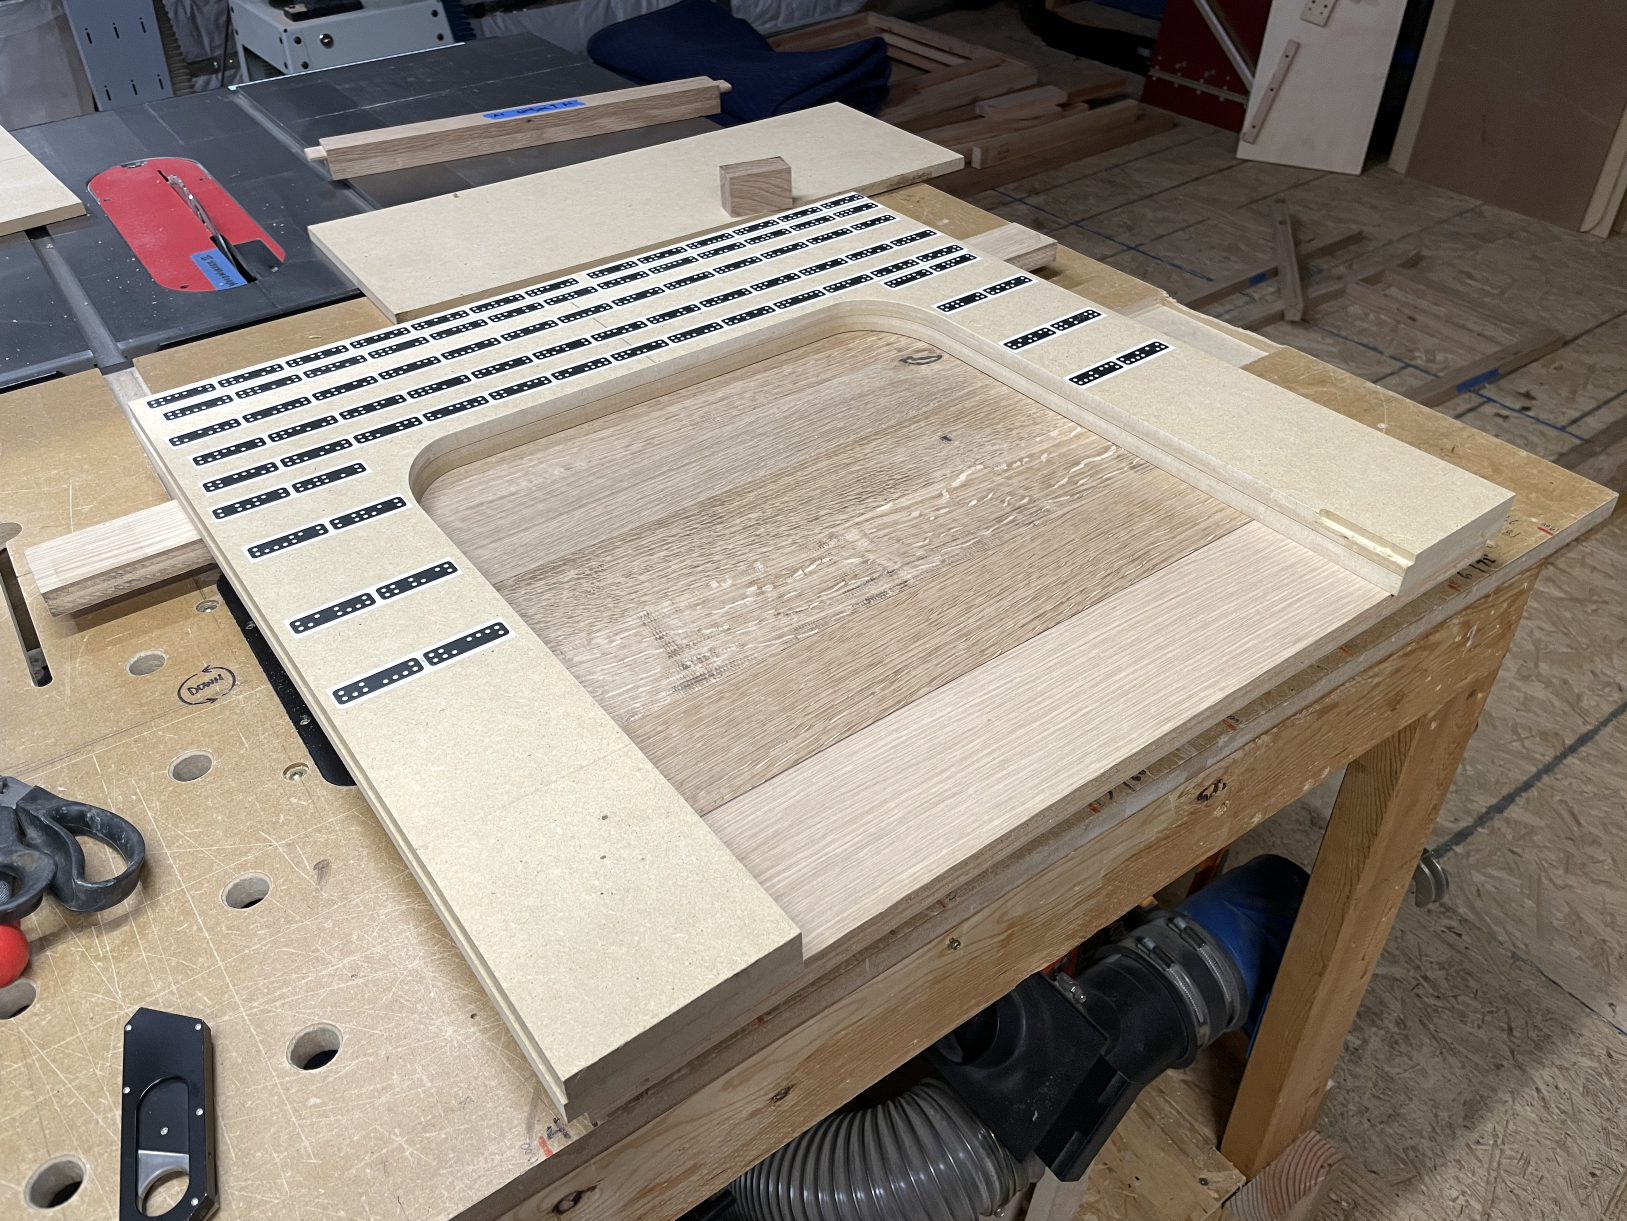
The slats were intentionally set a couple mm below the rails, and because I was winging it and not going from any plans, dishing out the seat and having lower slats create a slight issue with the front stretcher.
I also should've made a much larger router base as the one I was using required me to move a piece of scrap MDF around inside the dishing jig and in a few places, the router tipped and the bit dug a little bit deeper into the slats.
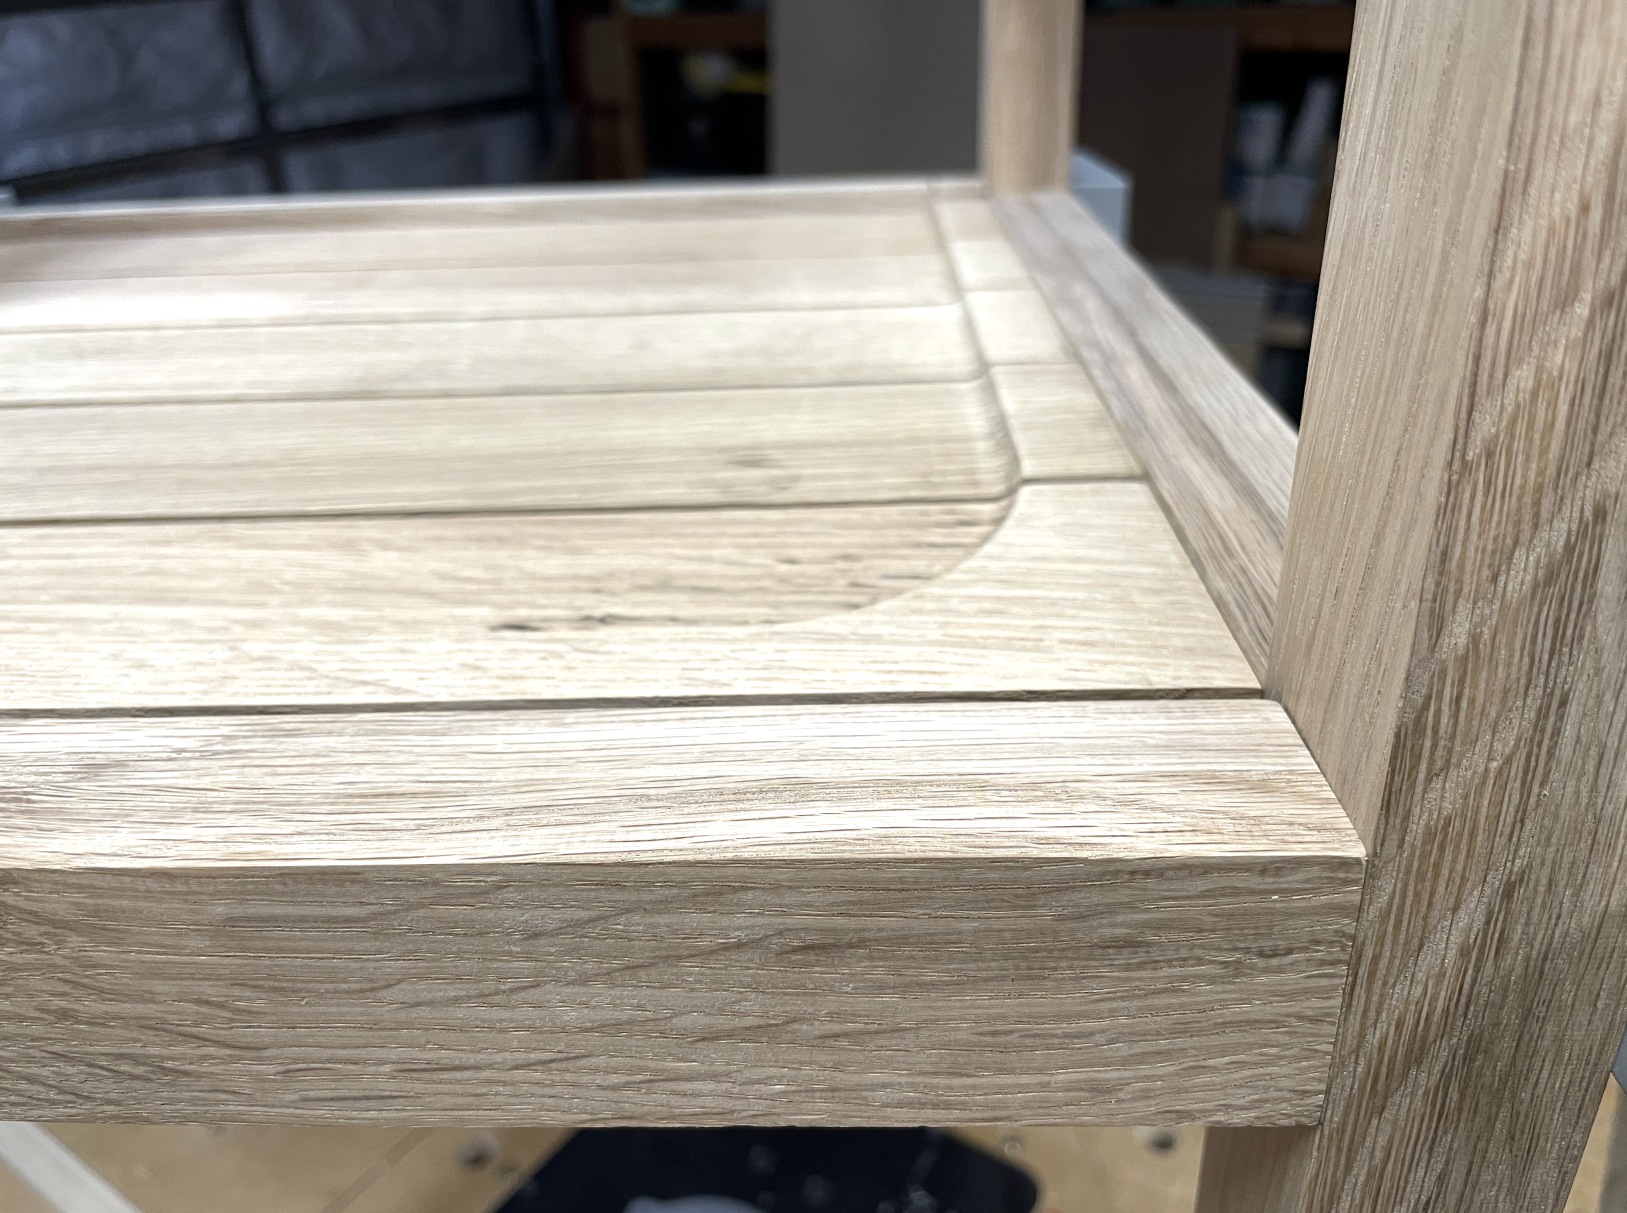
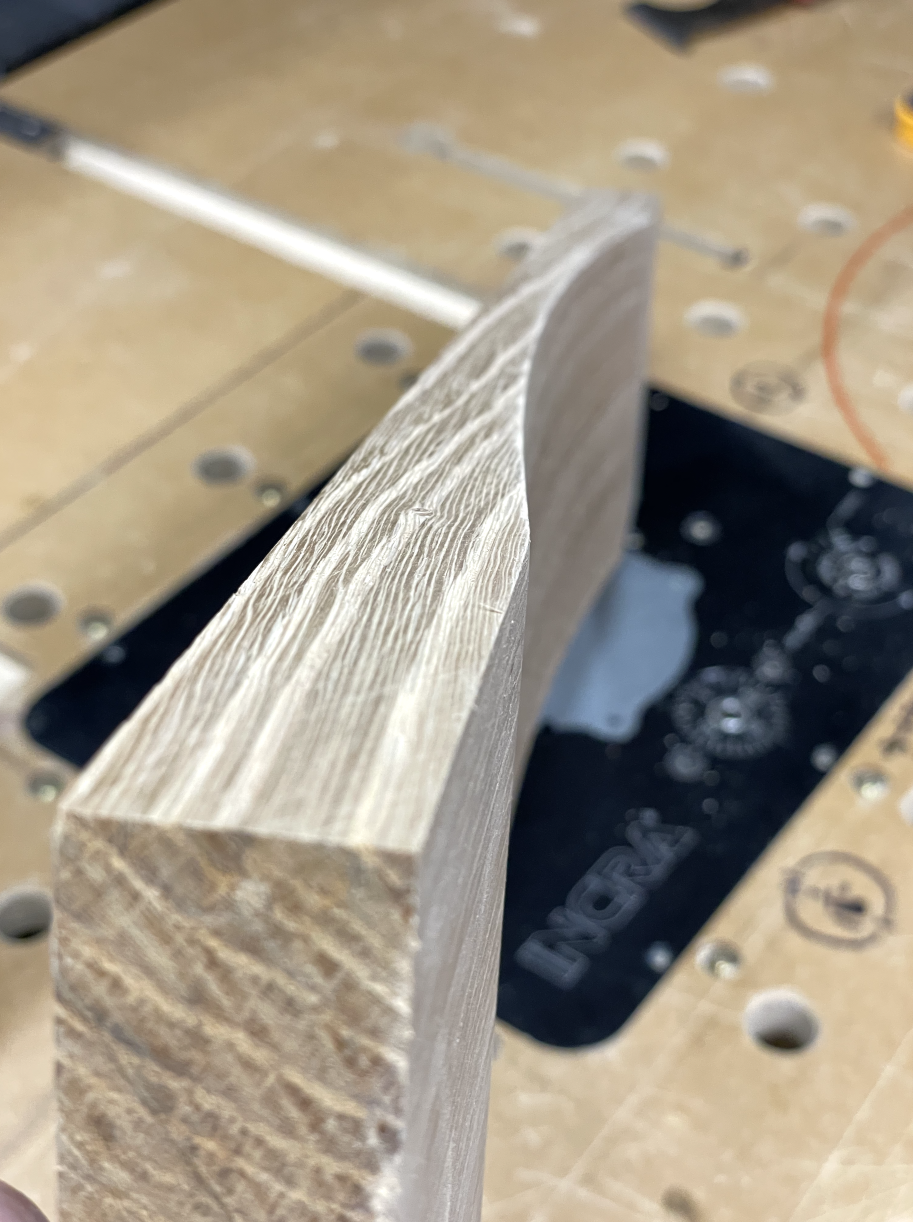
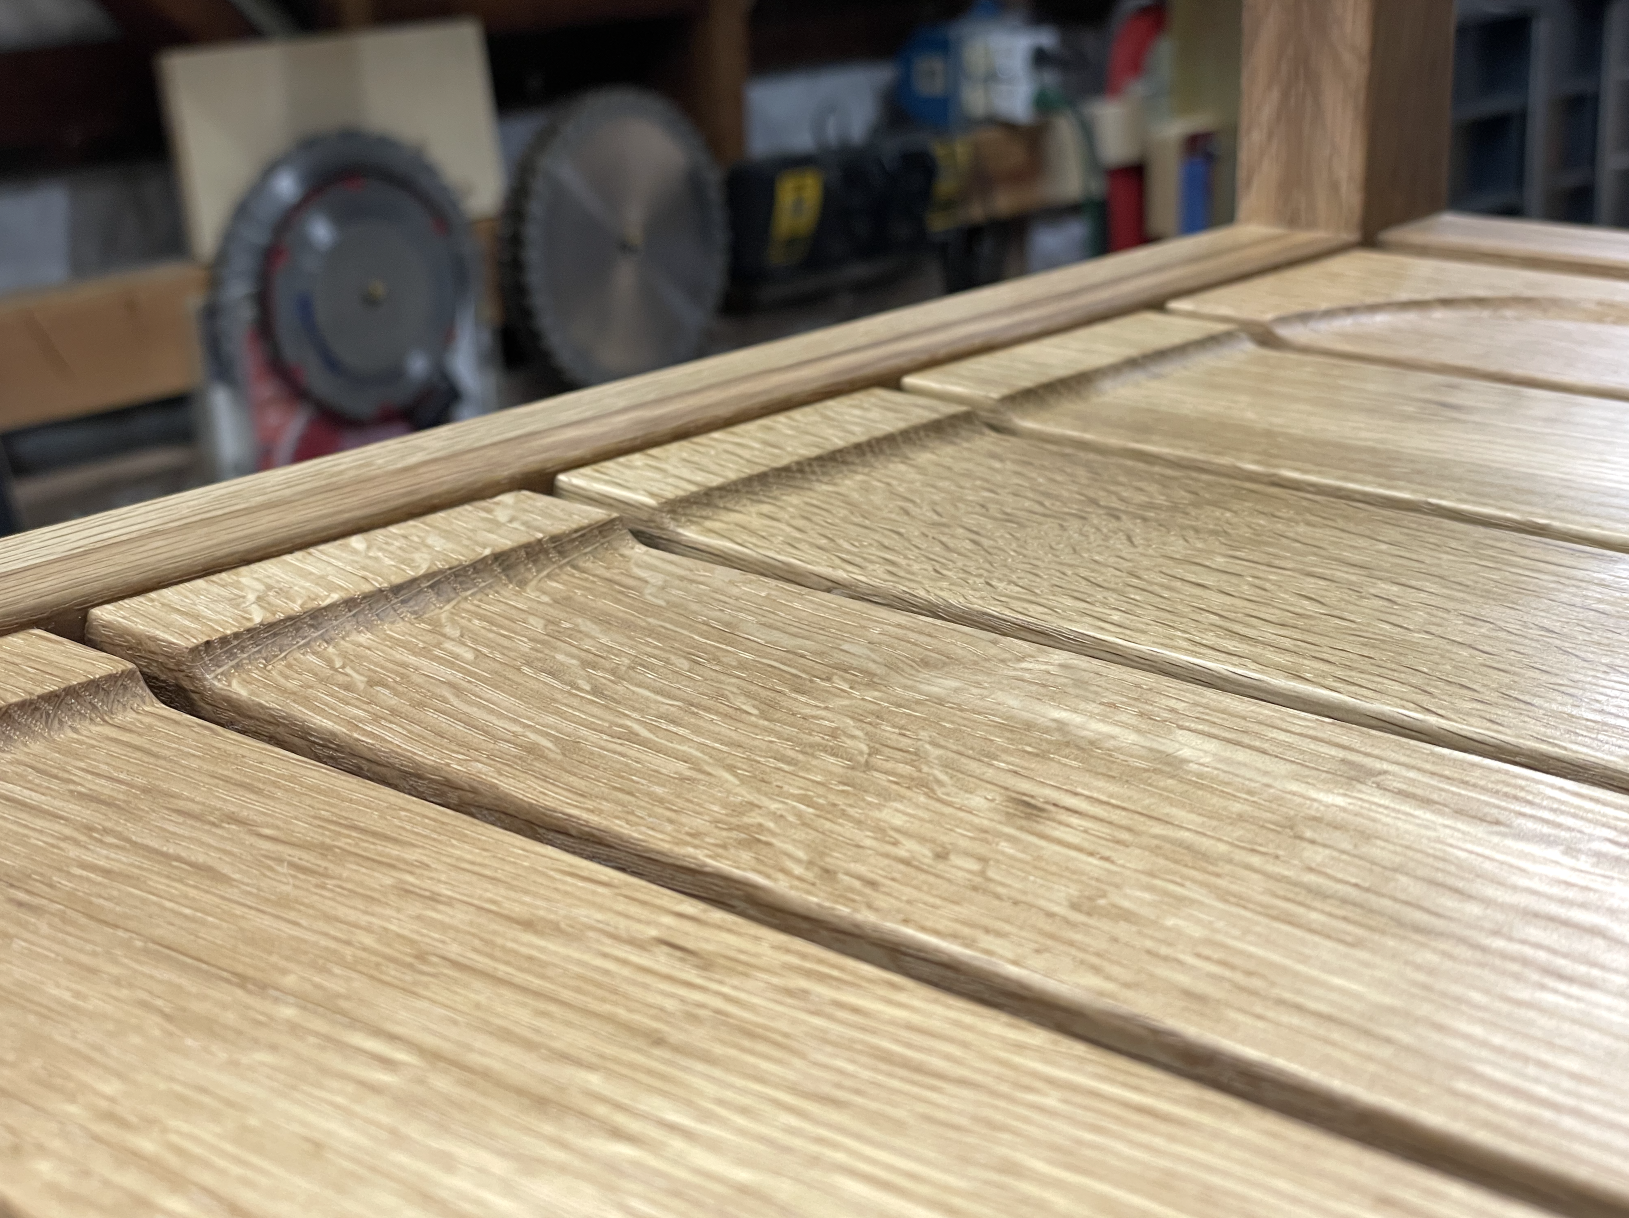
Here's the issue up close. The slats are now lower than the front stretcher and I need to dish out the stretcher so it's level with the slats.

The rear stretcher is also higher than the slats, but the dish doesn't extend as far back so I ended up leaving it as is.
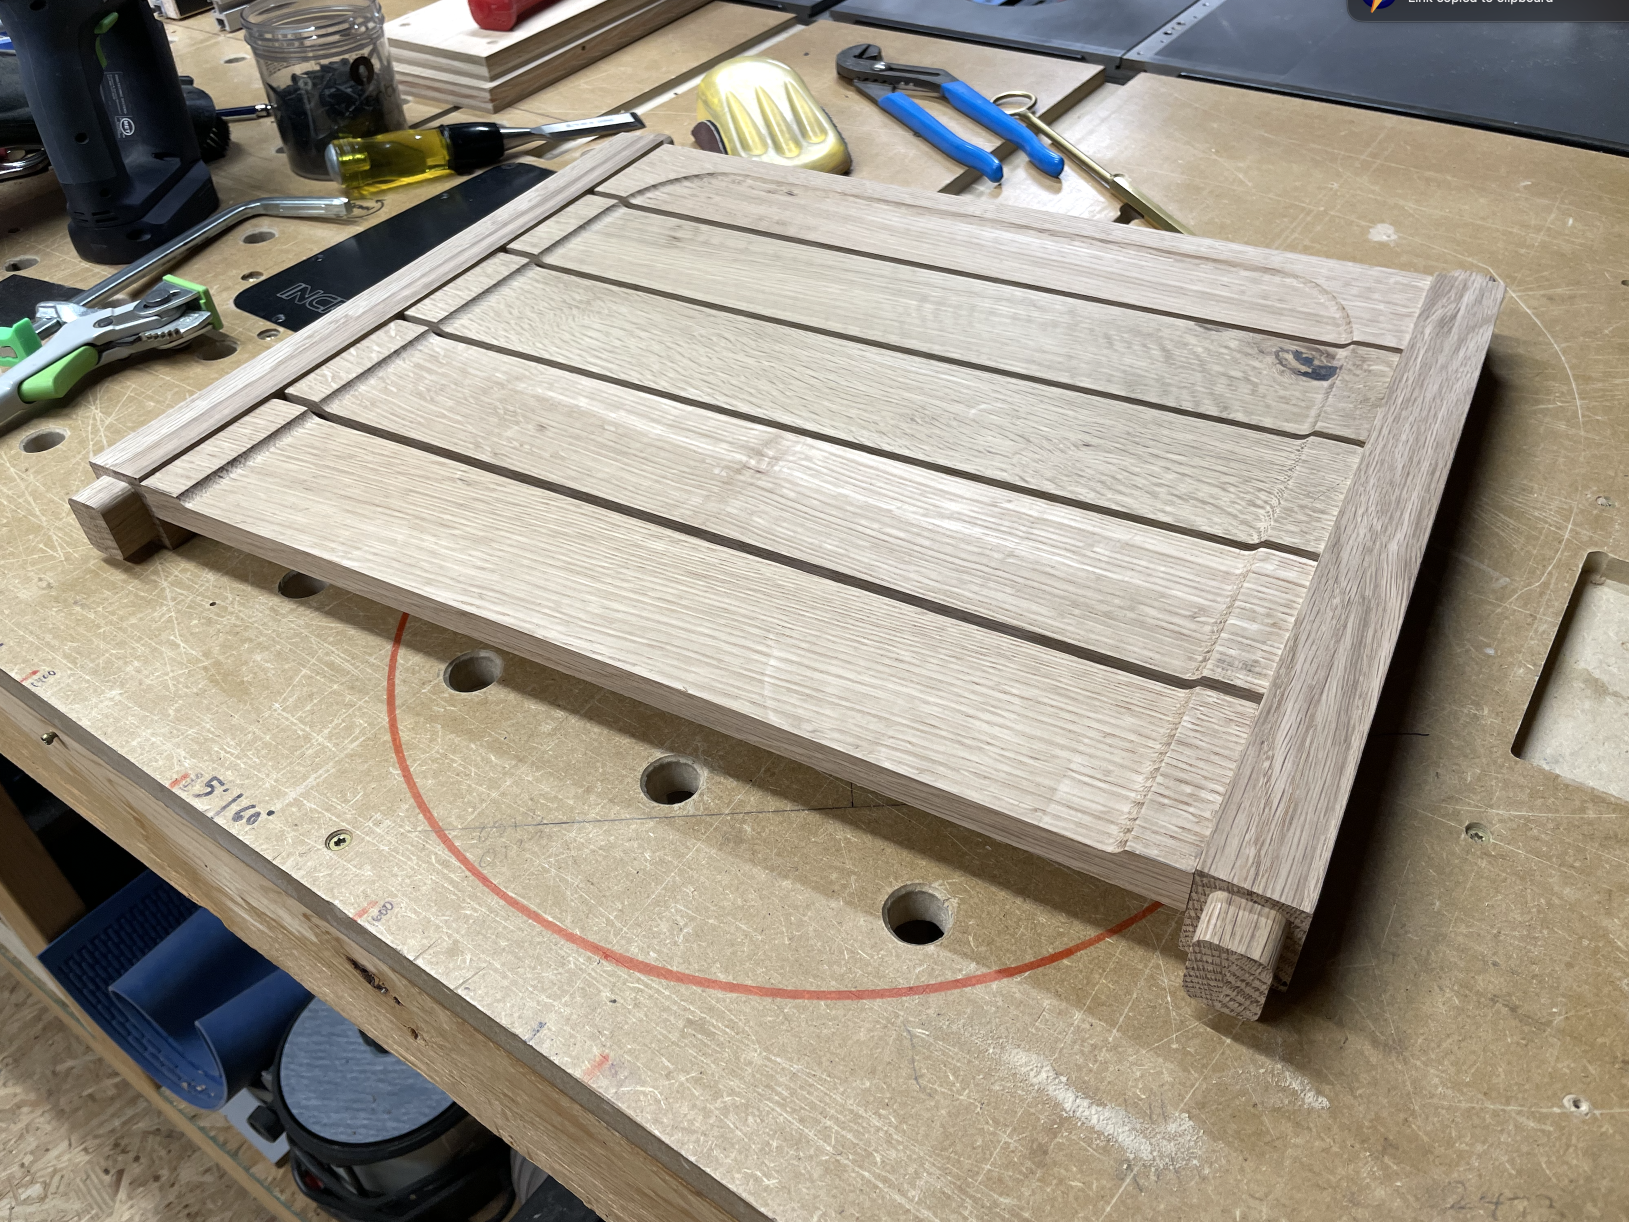
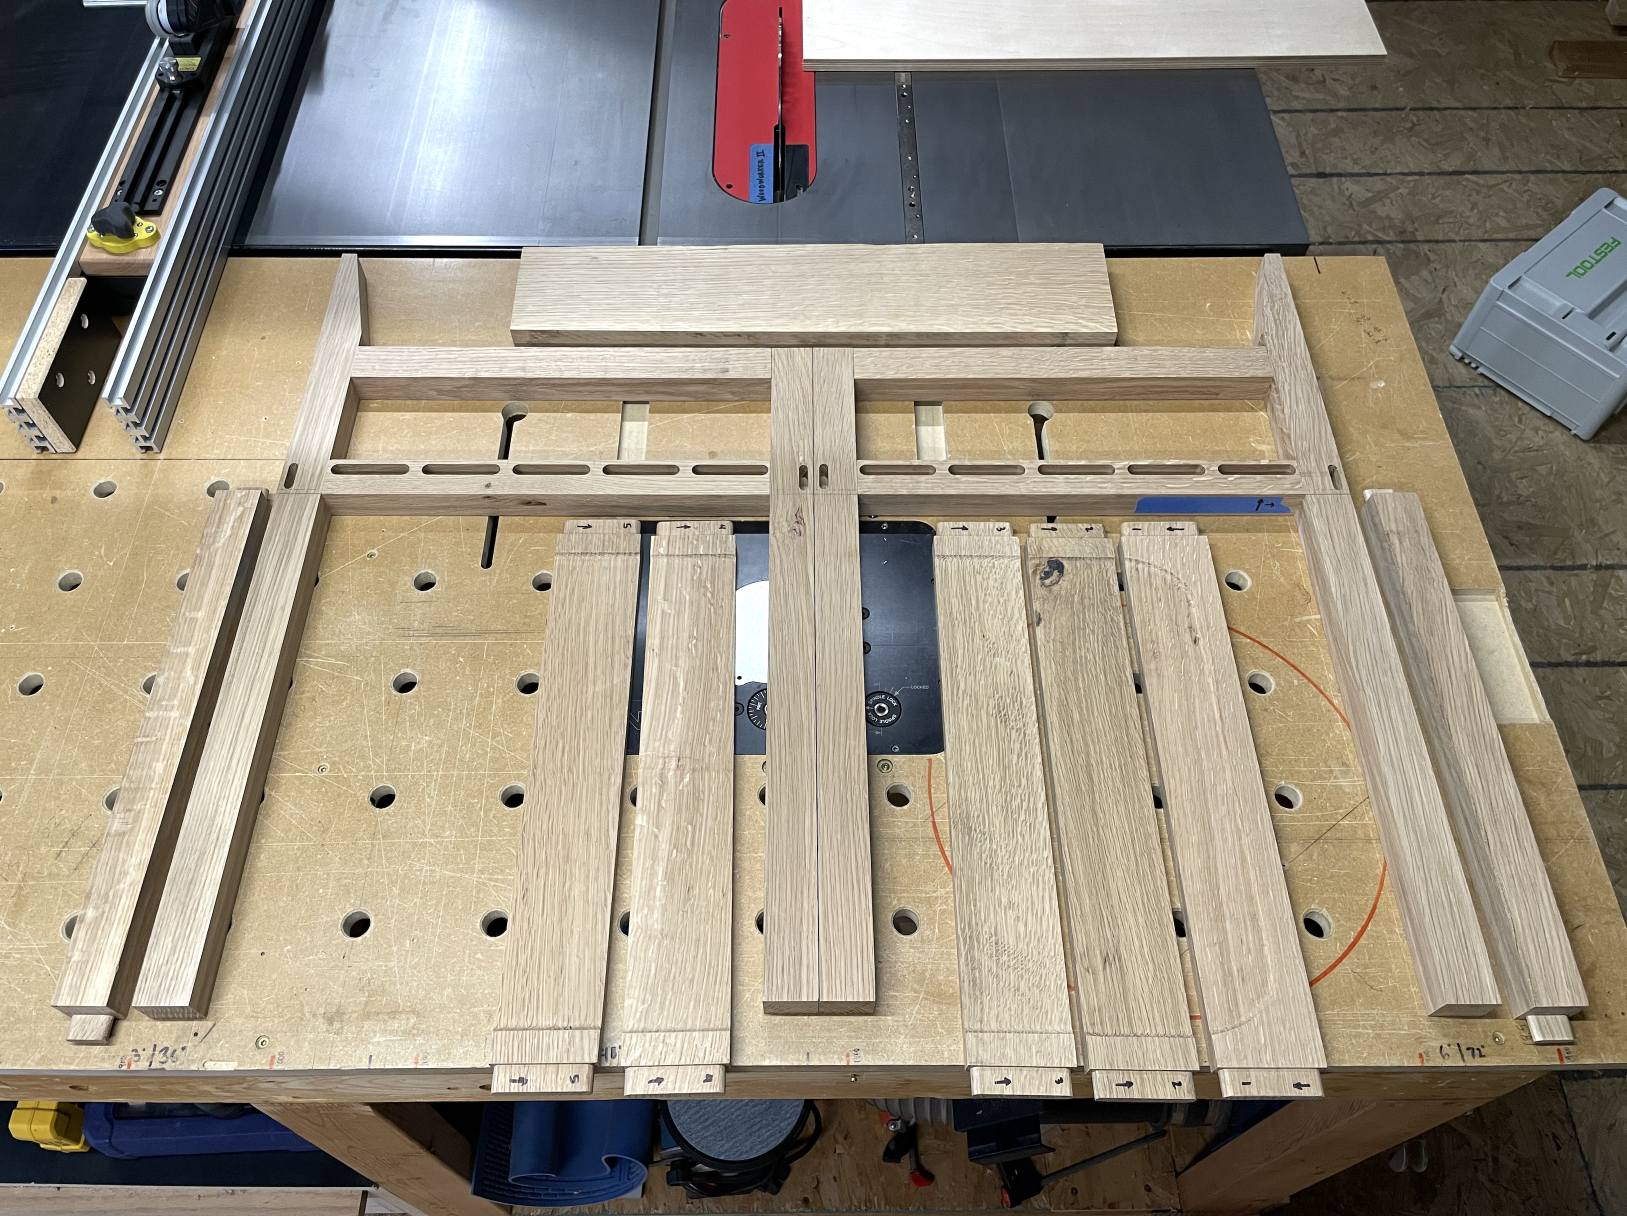
Here are all the parts so far. The backrest will come from the 8/4 board at the top. I missed getting a picture of the sled I used to cut the angles on the back legs.
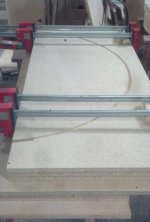
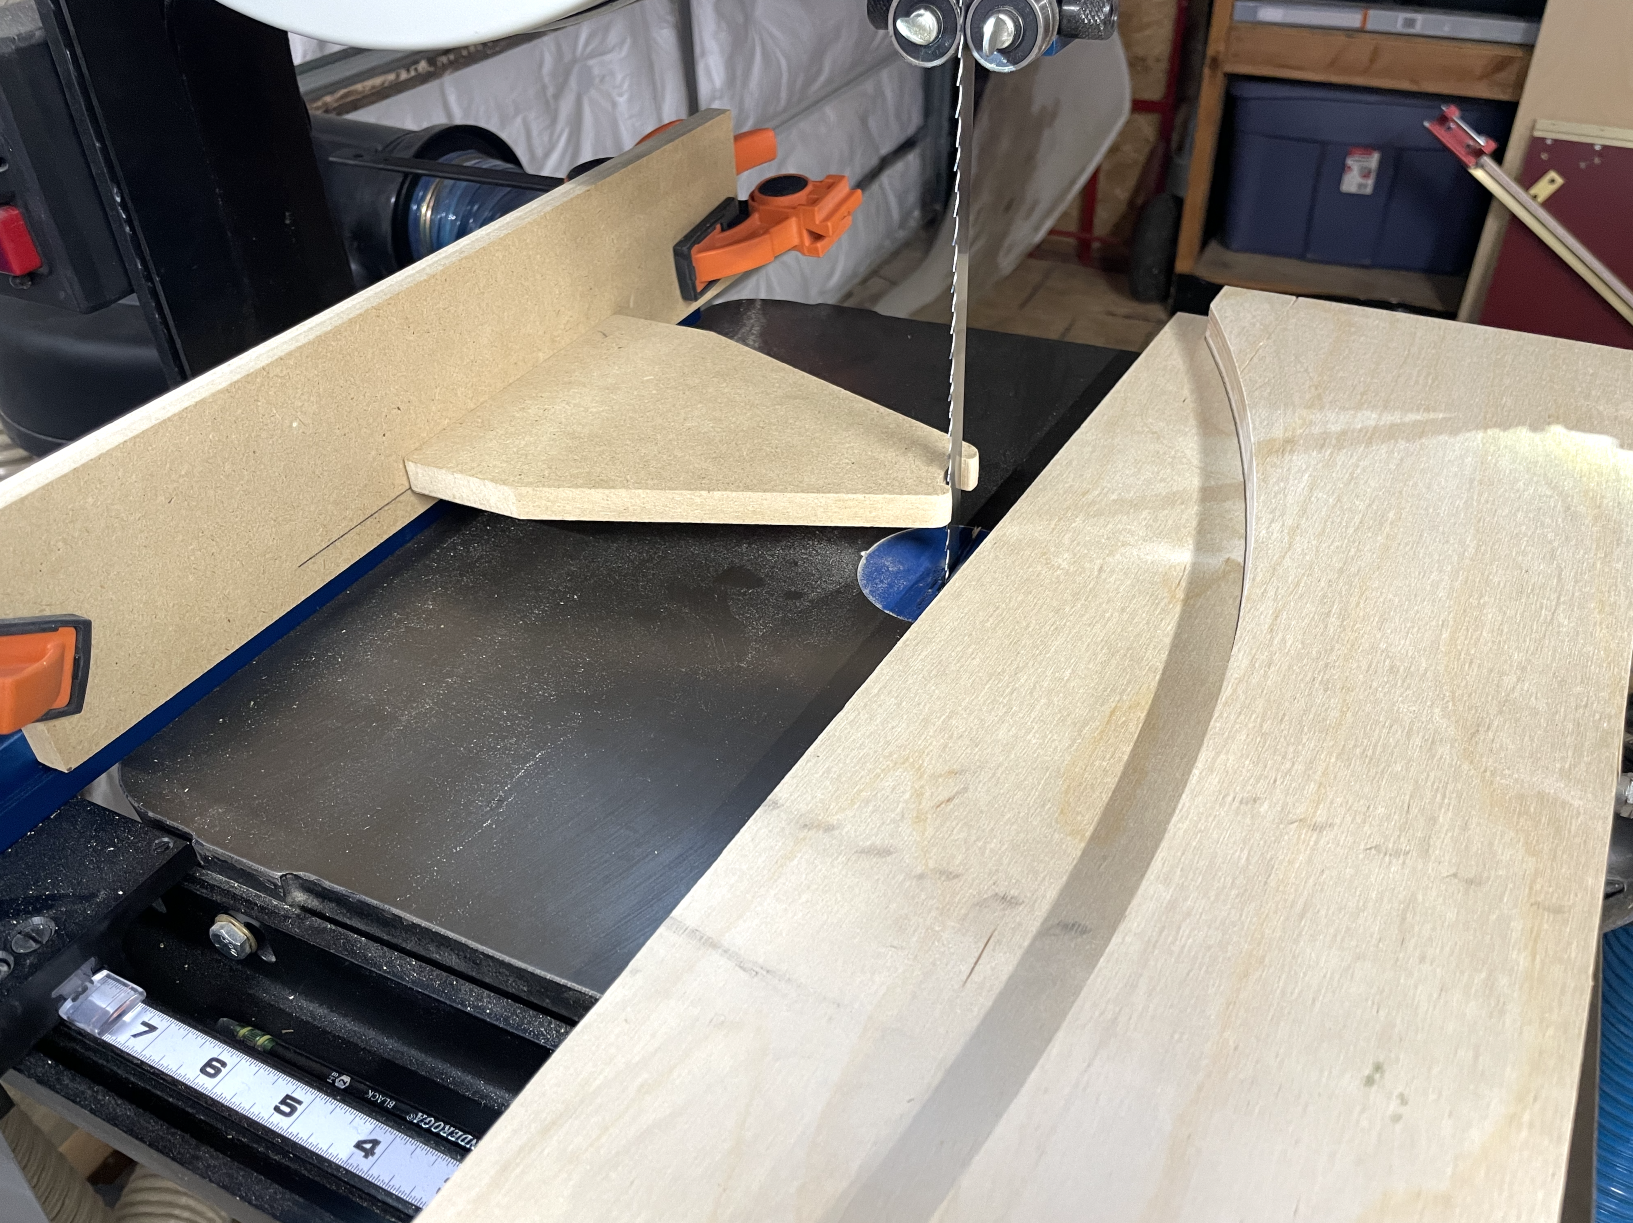
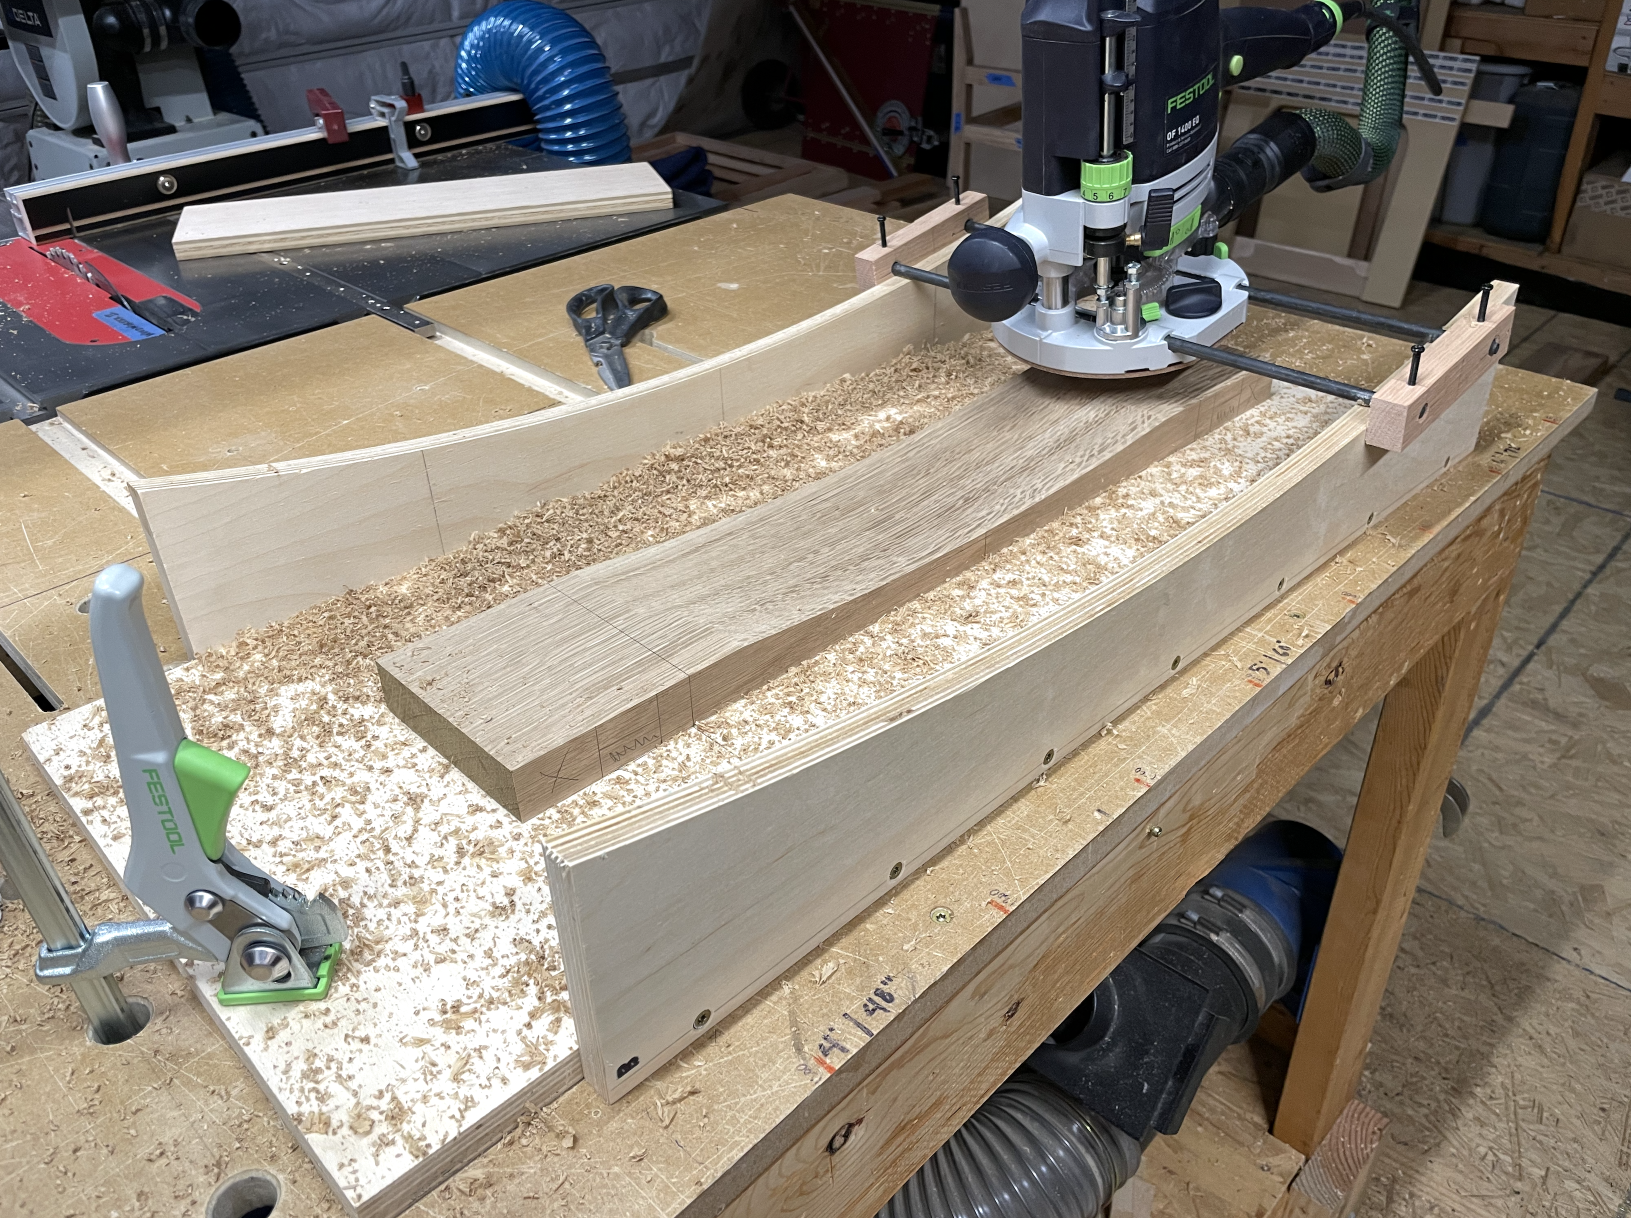
For the backrest, I needed to make a jig for dishing it out. Woodpeckers makes a really nice template guide that I'd been eyeing since it came out, but I decided to make my own. My freehand cuts on the bandsaw are always a bit wonky and I was really impressed by how well this little guide worked. Hat tip to Laguna Tools for their how-to video! (video at bottom). I don't know how durable this will be long-term, but it's easy enough to make another when this one gets beat up.
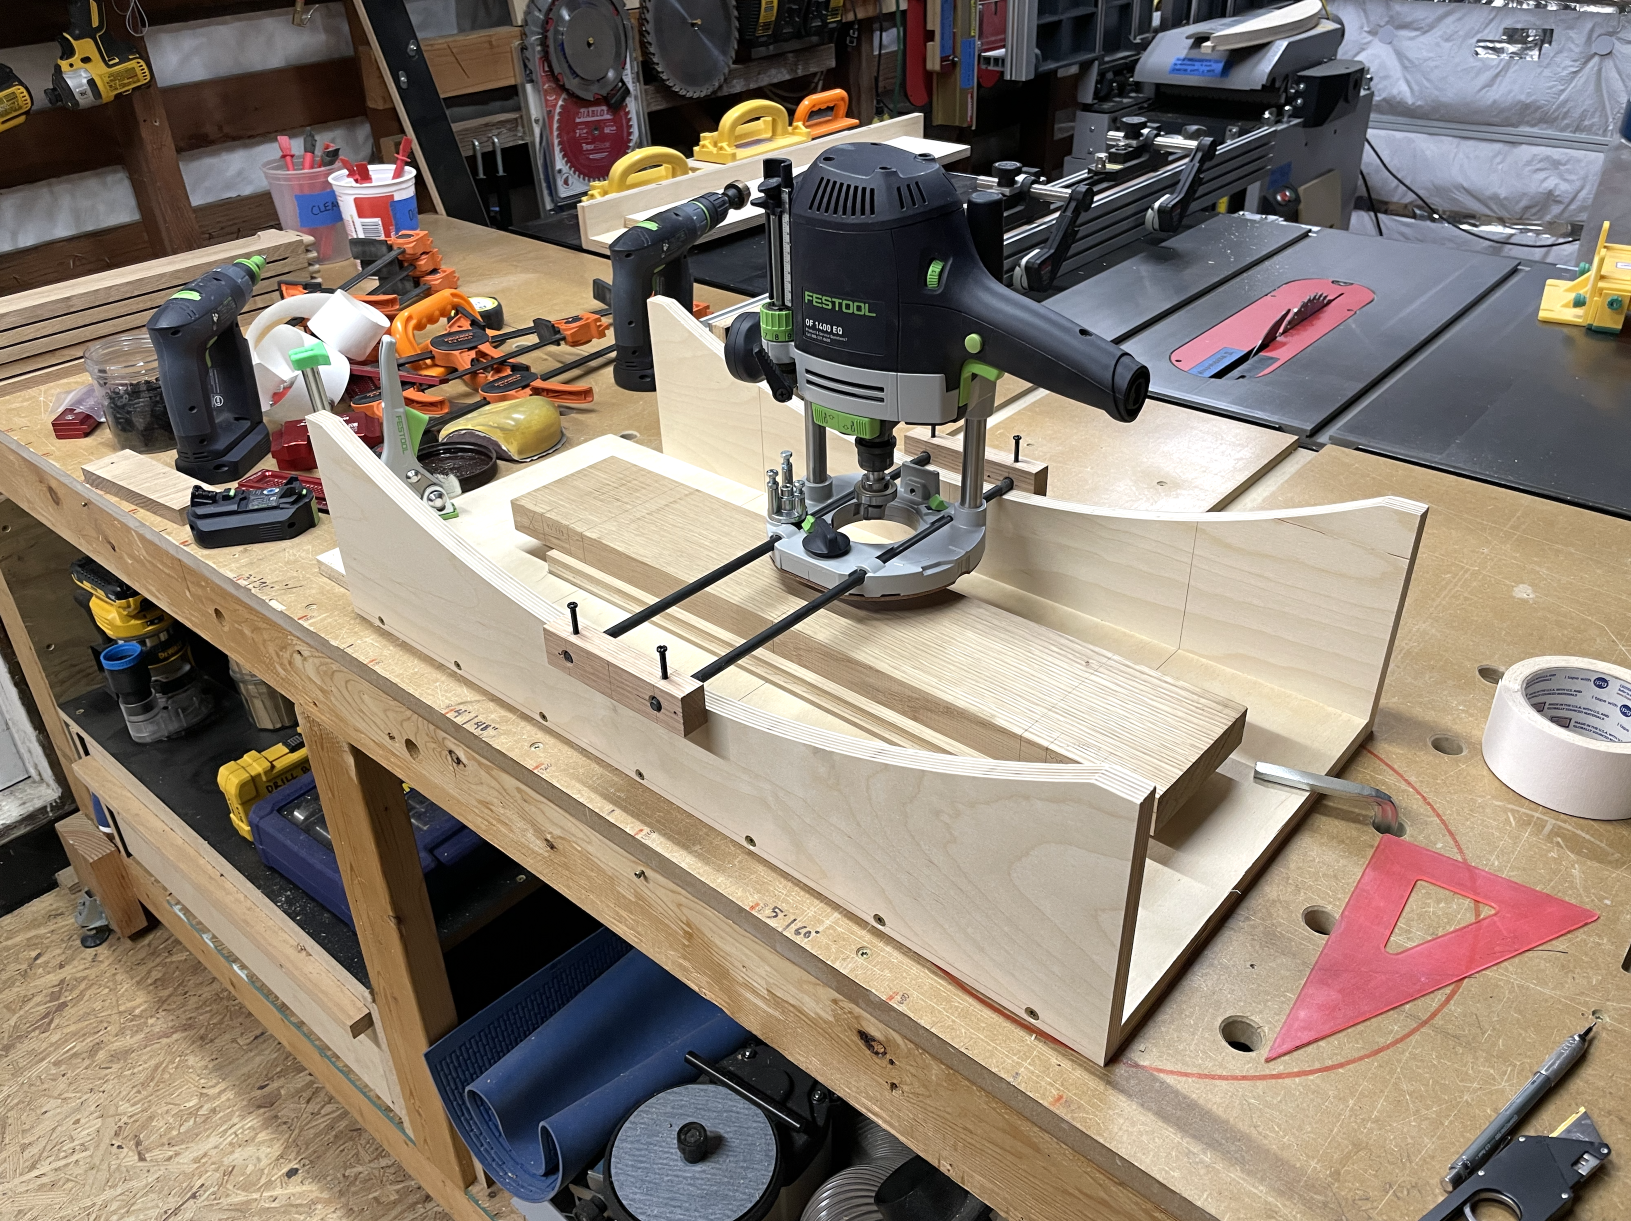
My math was off on the first jig and there was way too much curve.
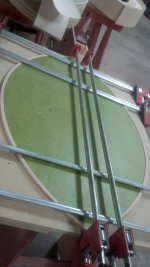
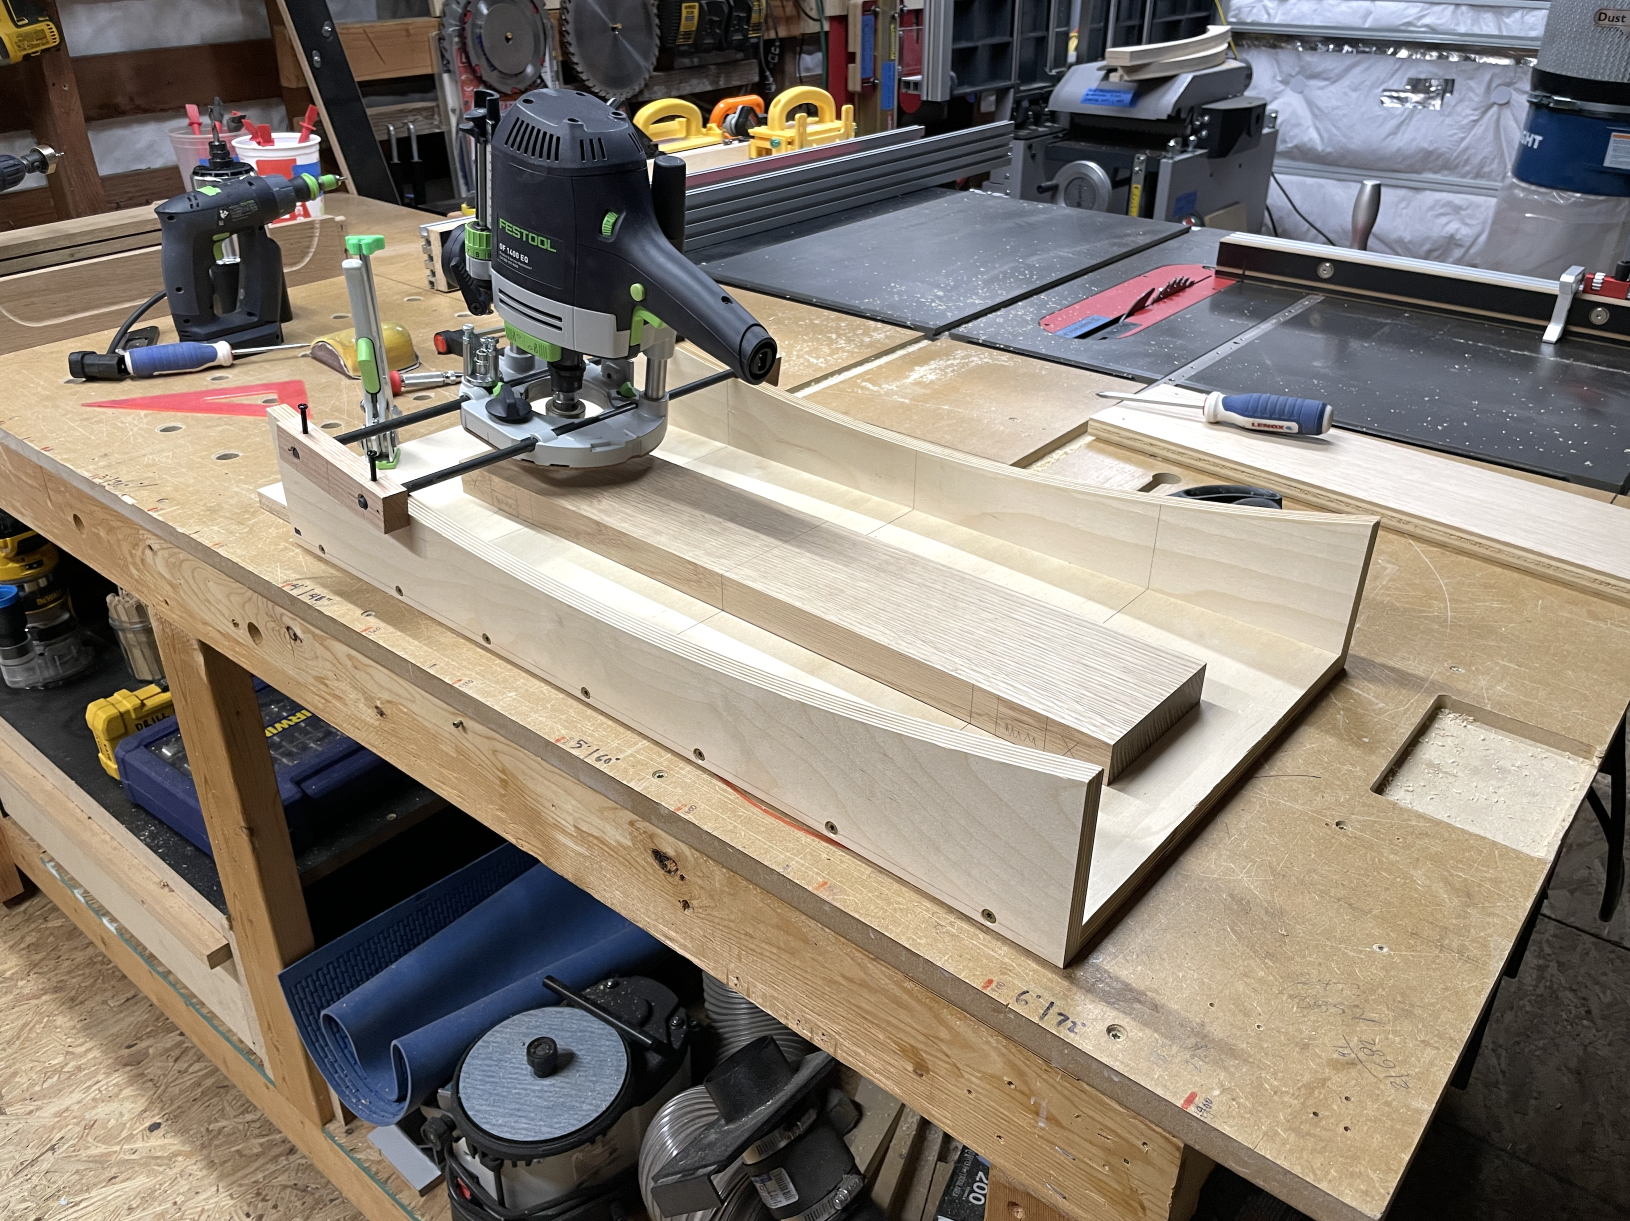
Second try turned out much better. I made some blocks to prevent the guide rods from sliding off the jig. For future dishing, I'll make larger blocks. These worked OK, but I think larger blocks will be easier to hold and slide.
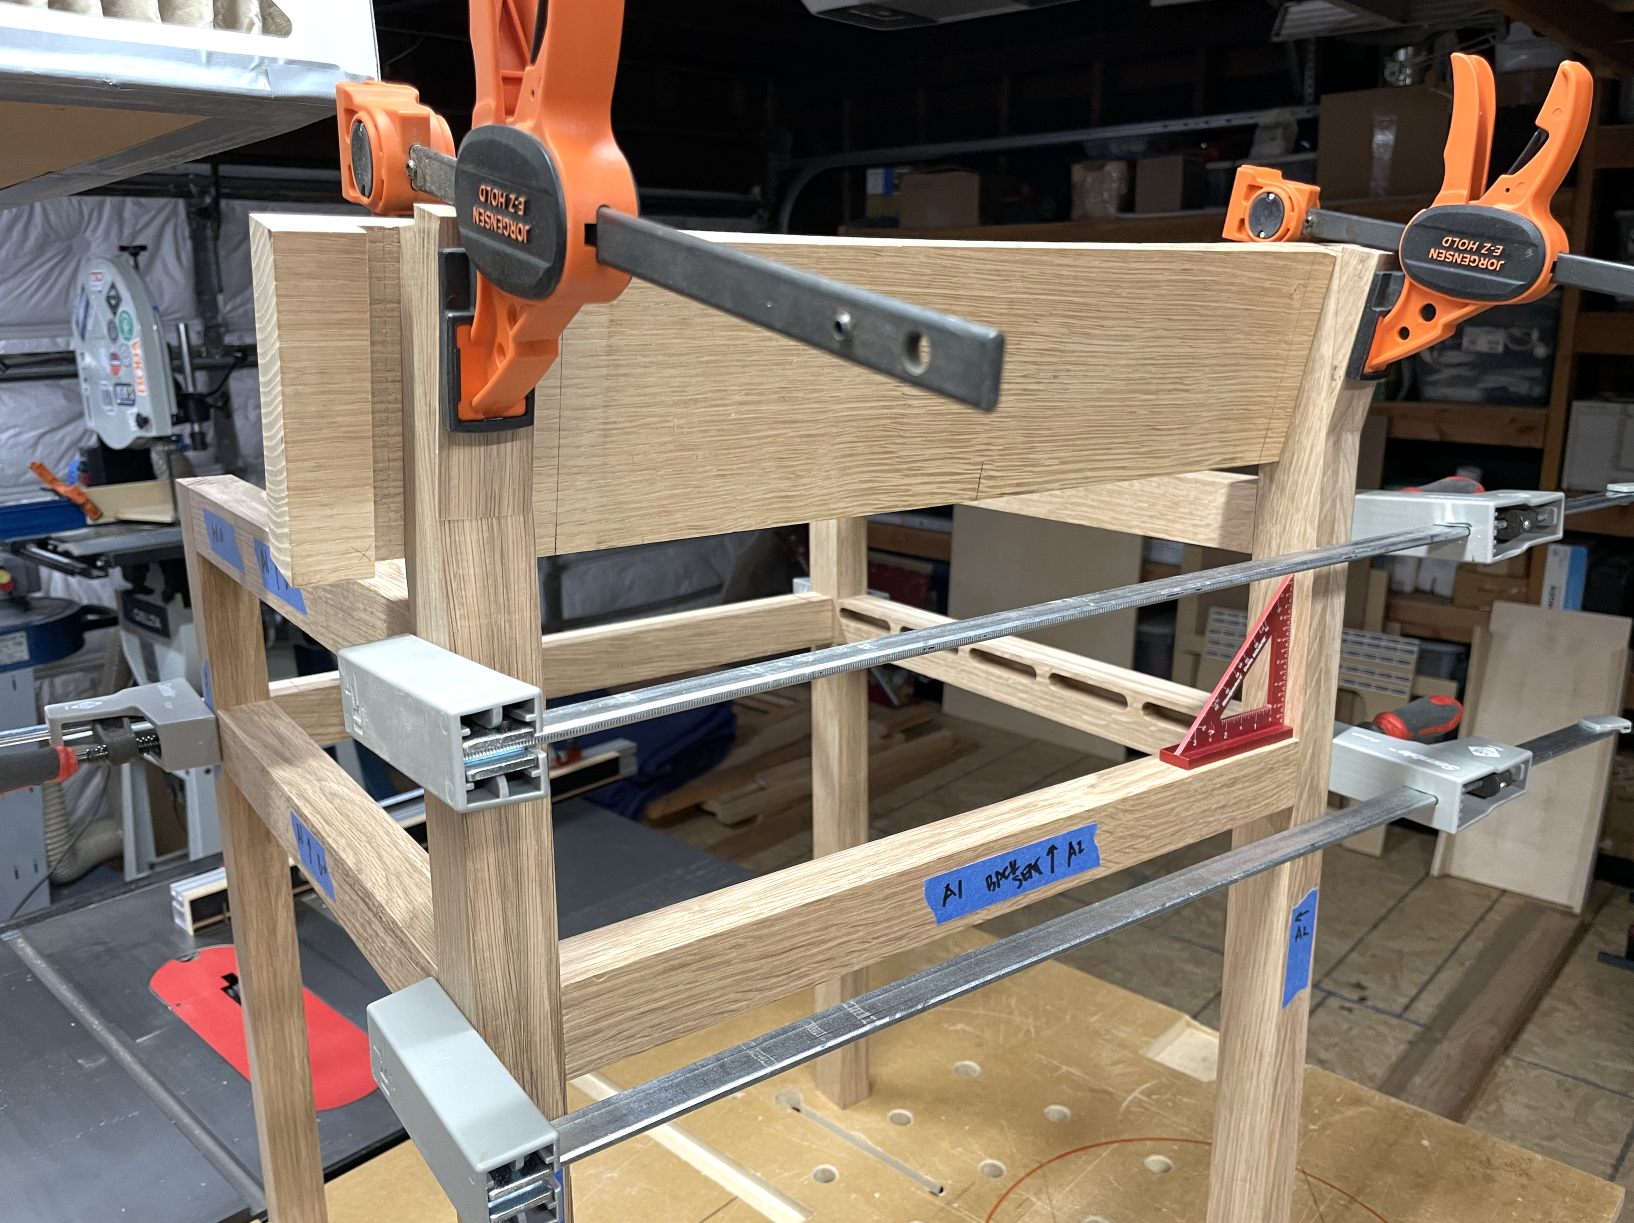
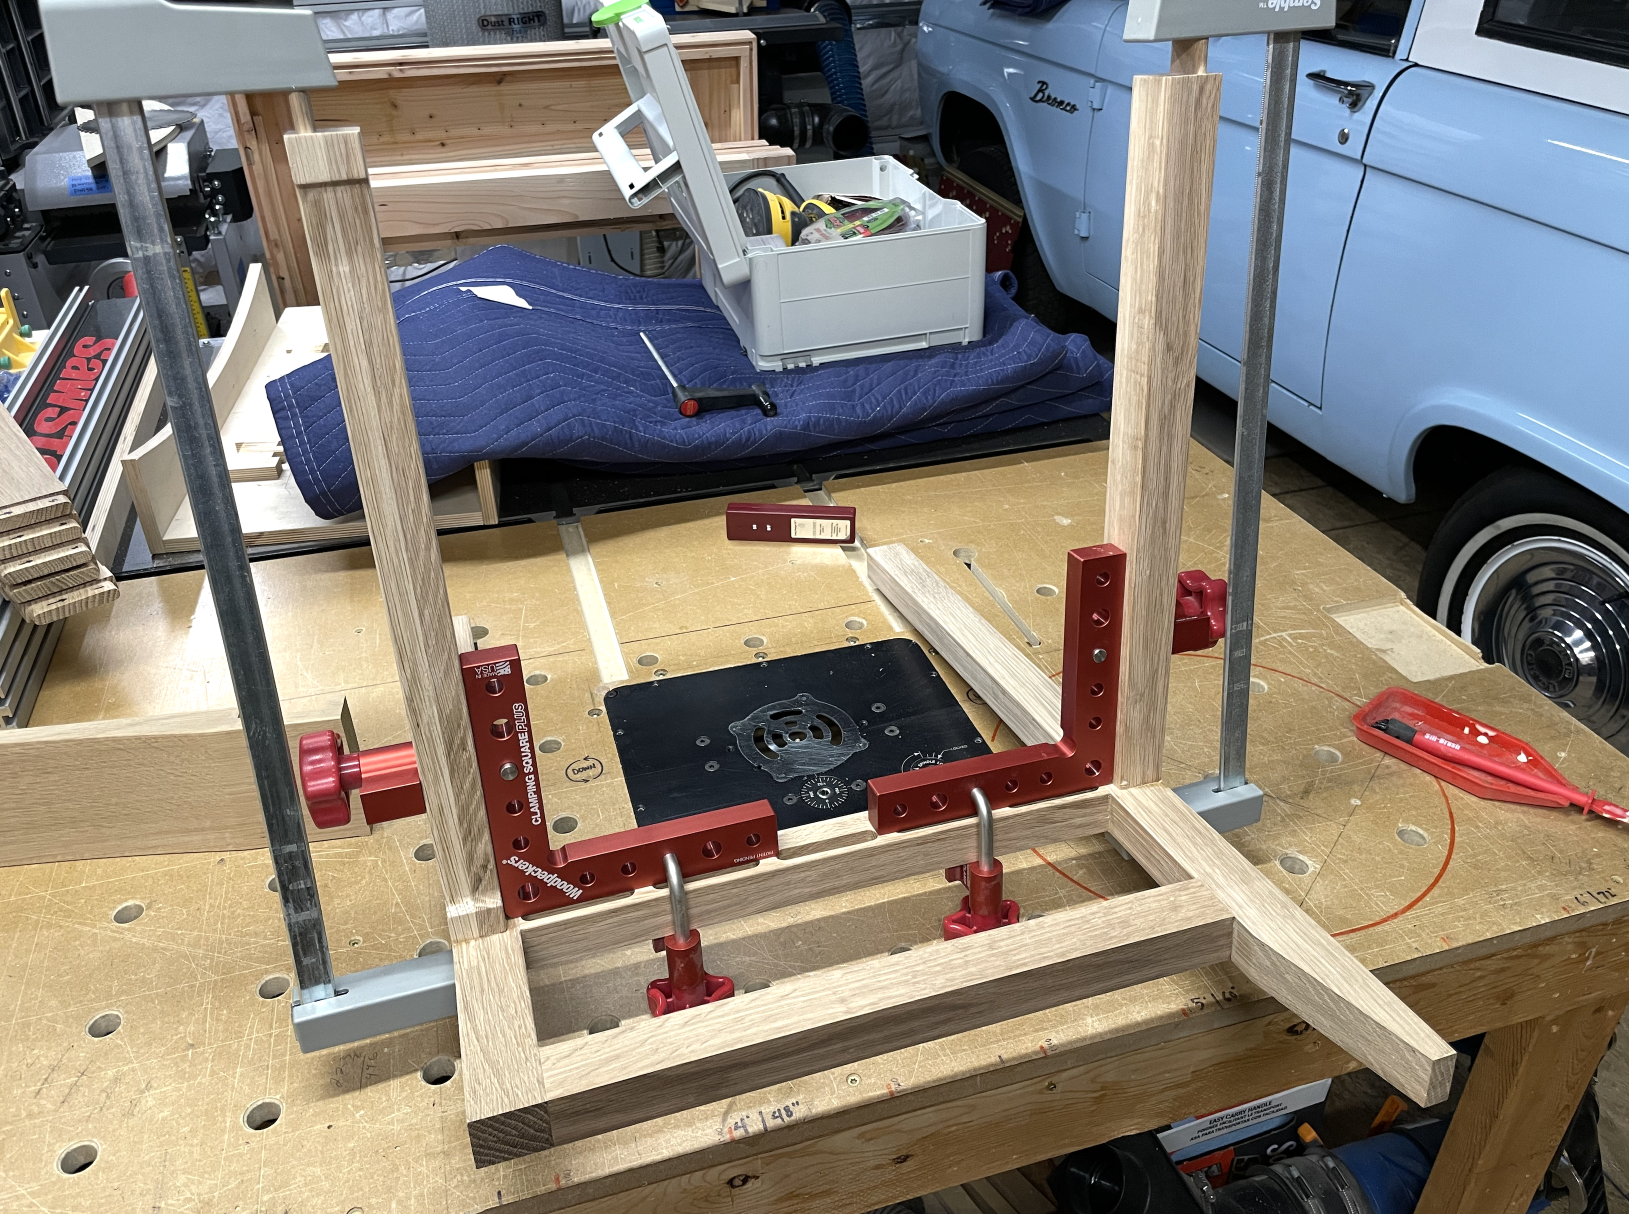
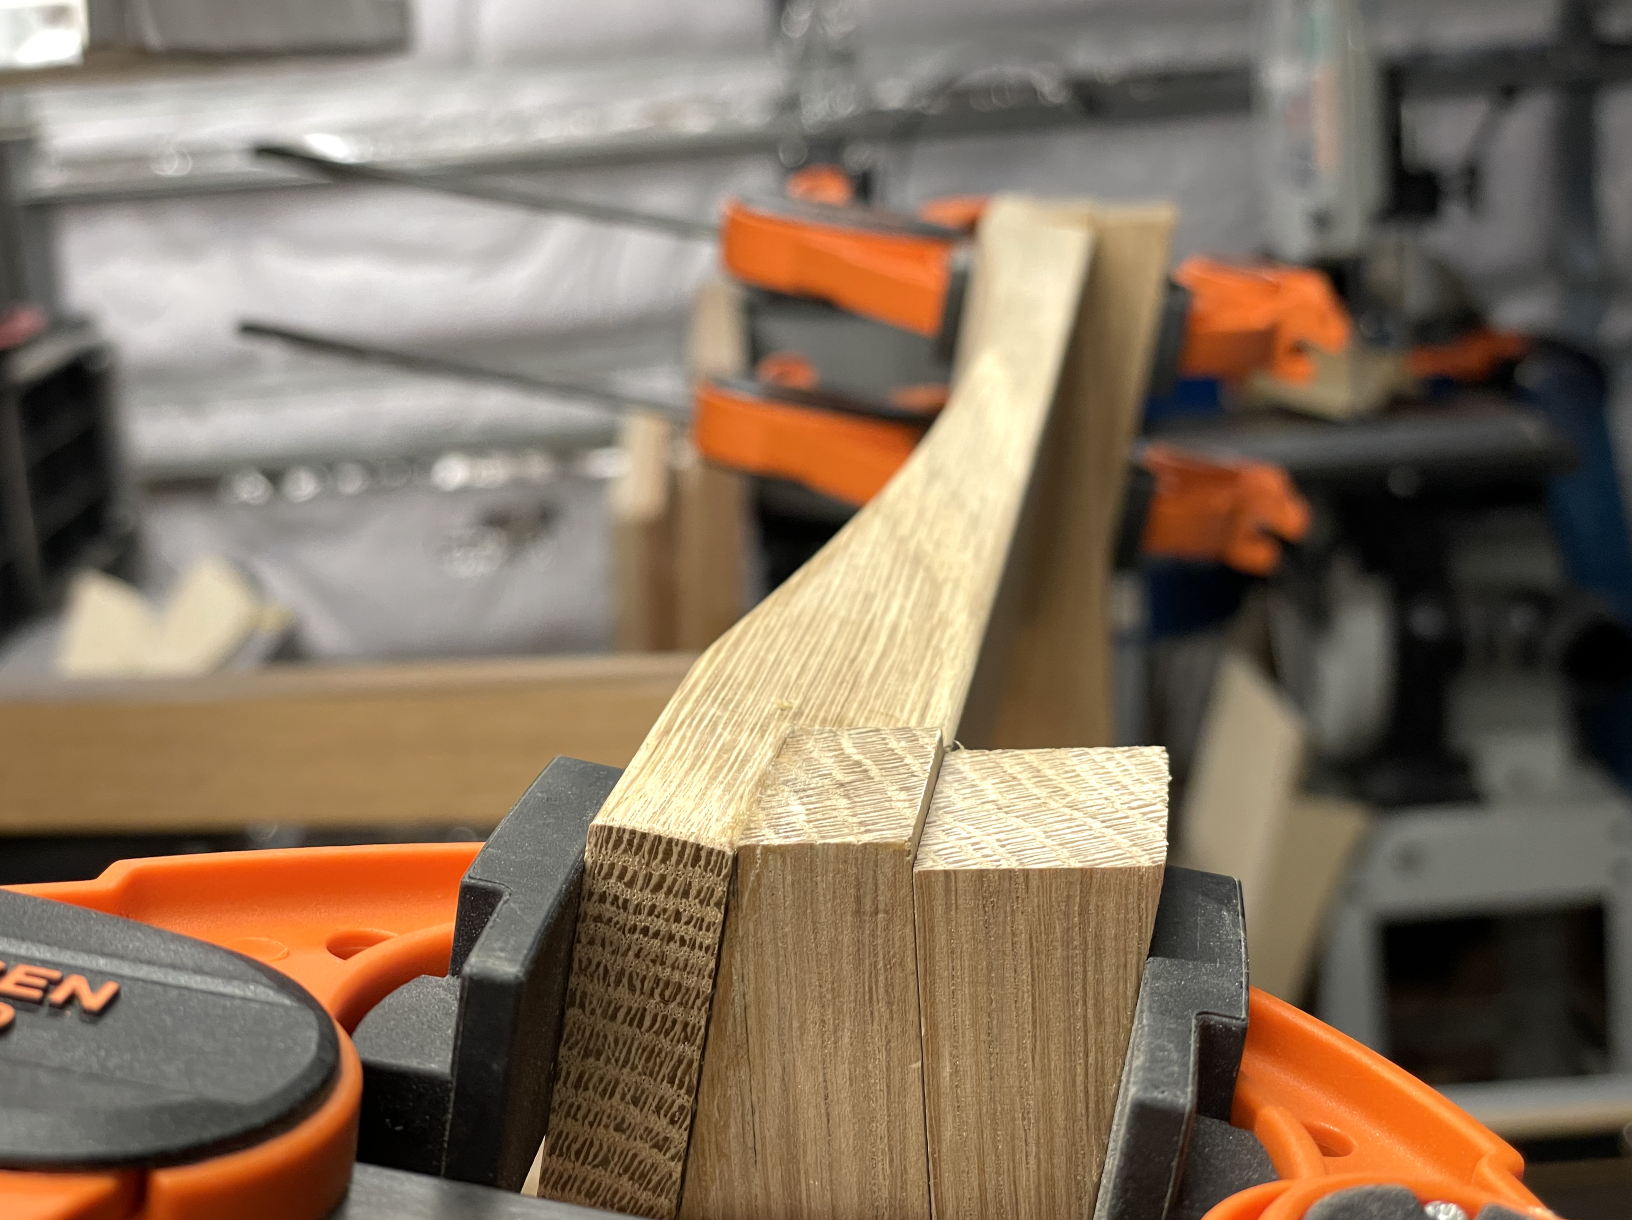
Test clamping the backrest.
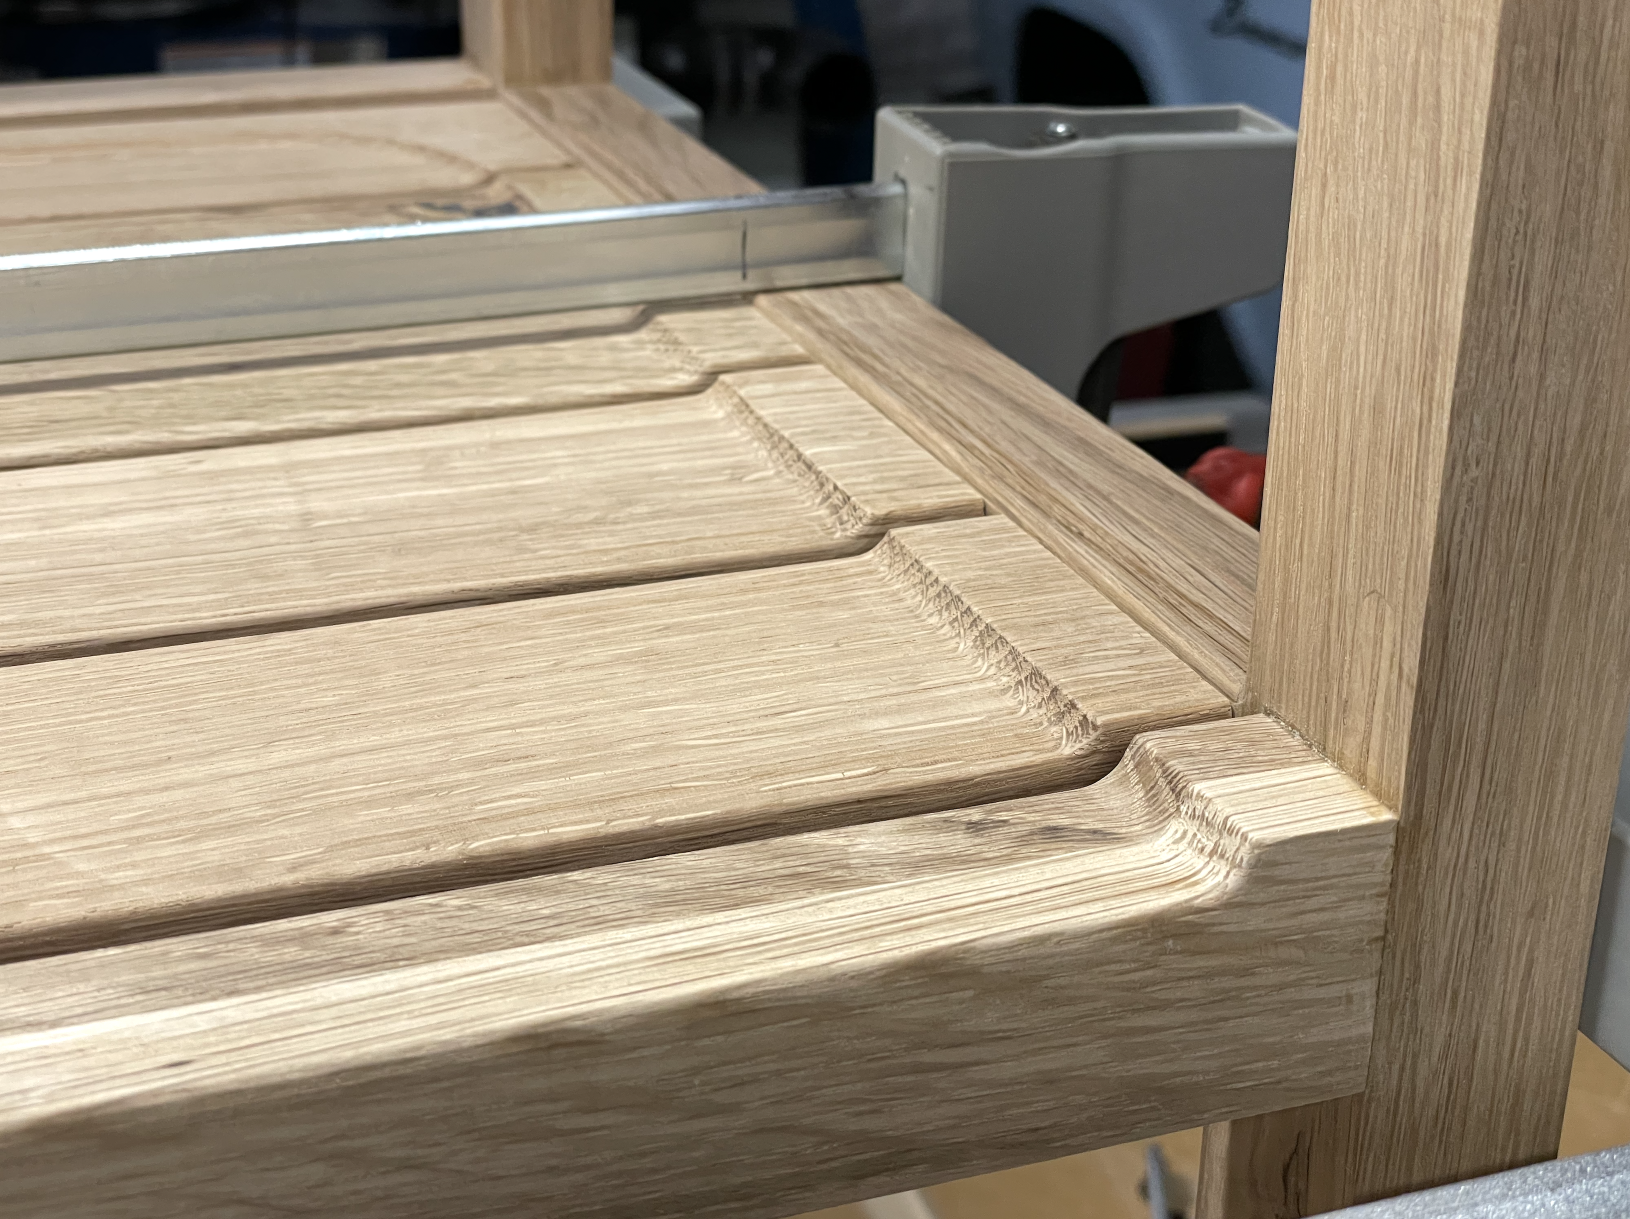
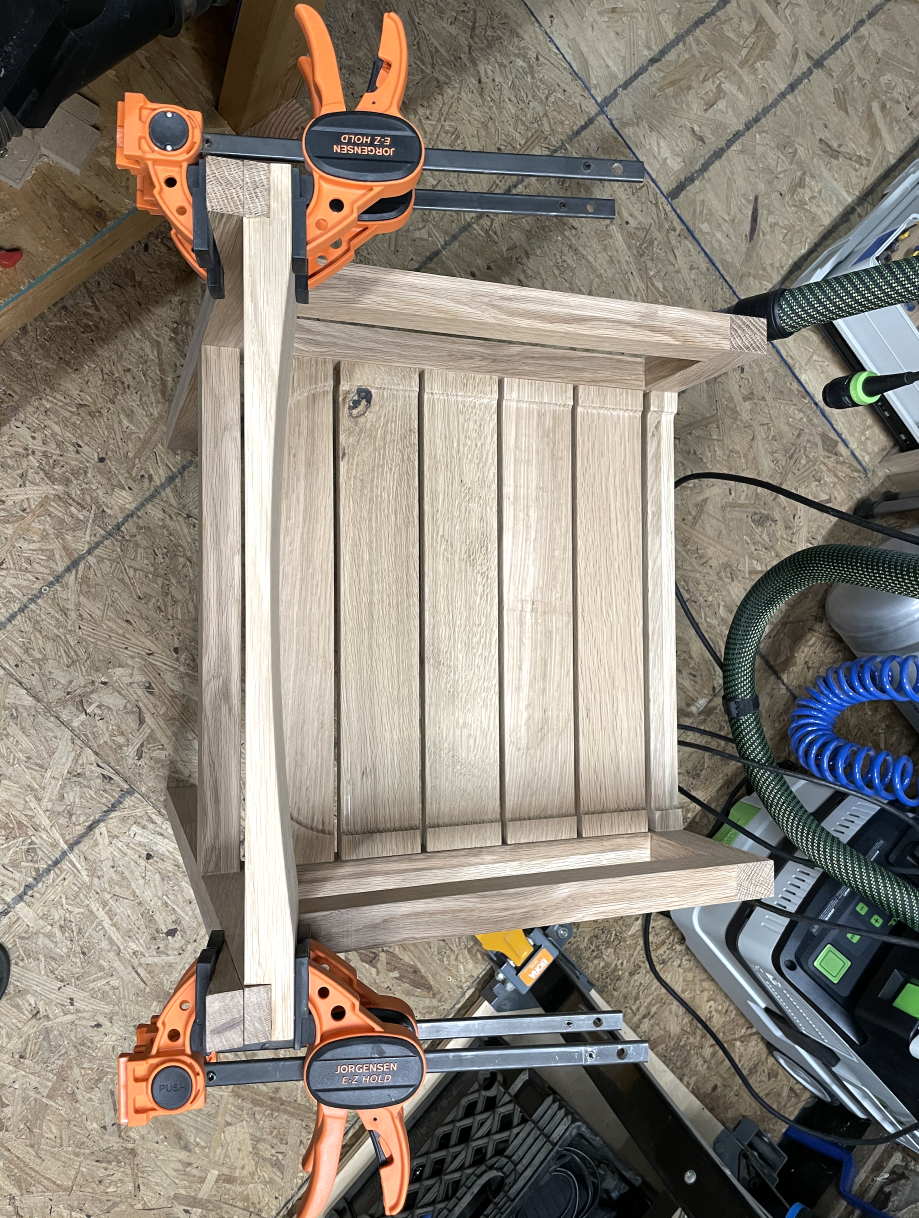
A few glue up shots. The front stretcher has been dished out to match up with the slats.
Front stretcher close up
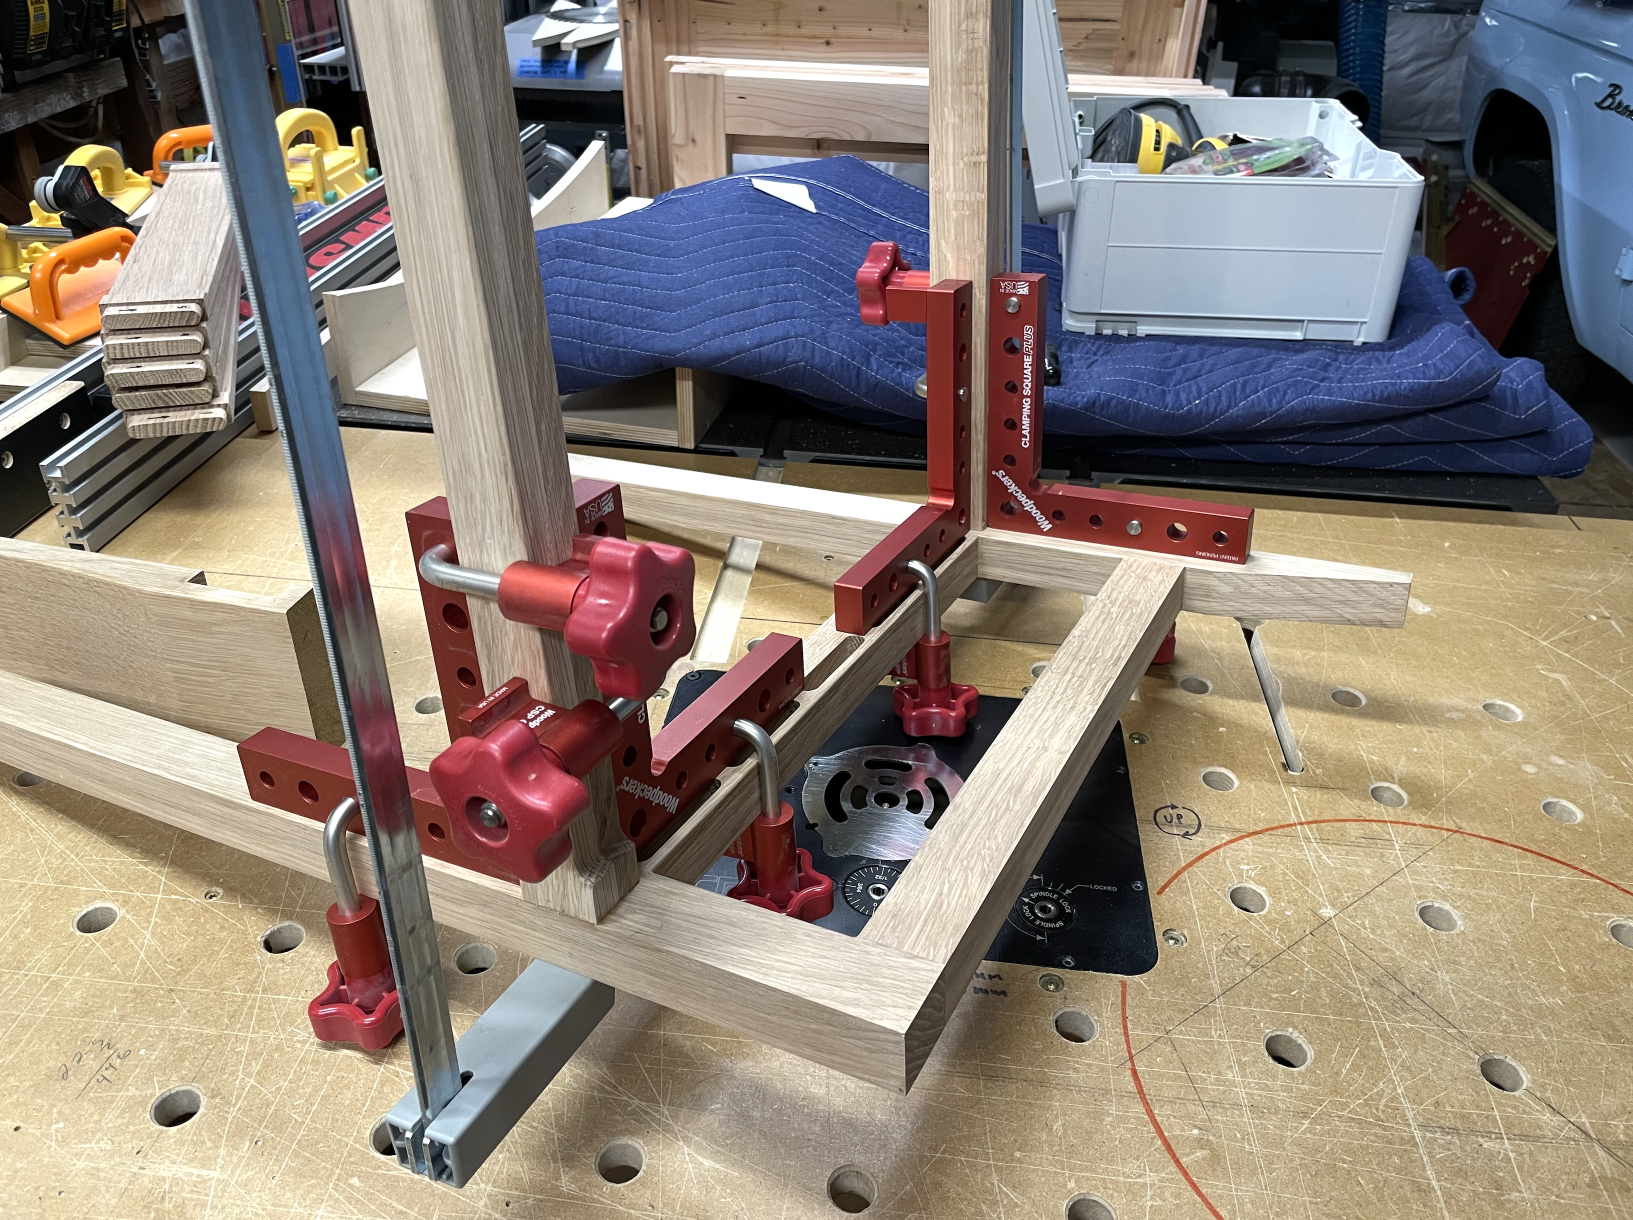
Back rest clamp and glue up
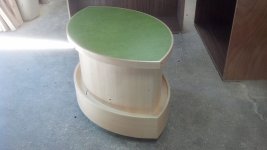
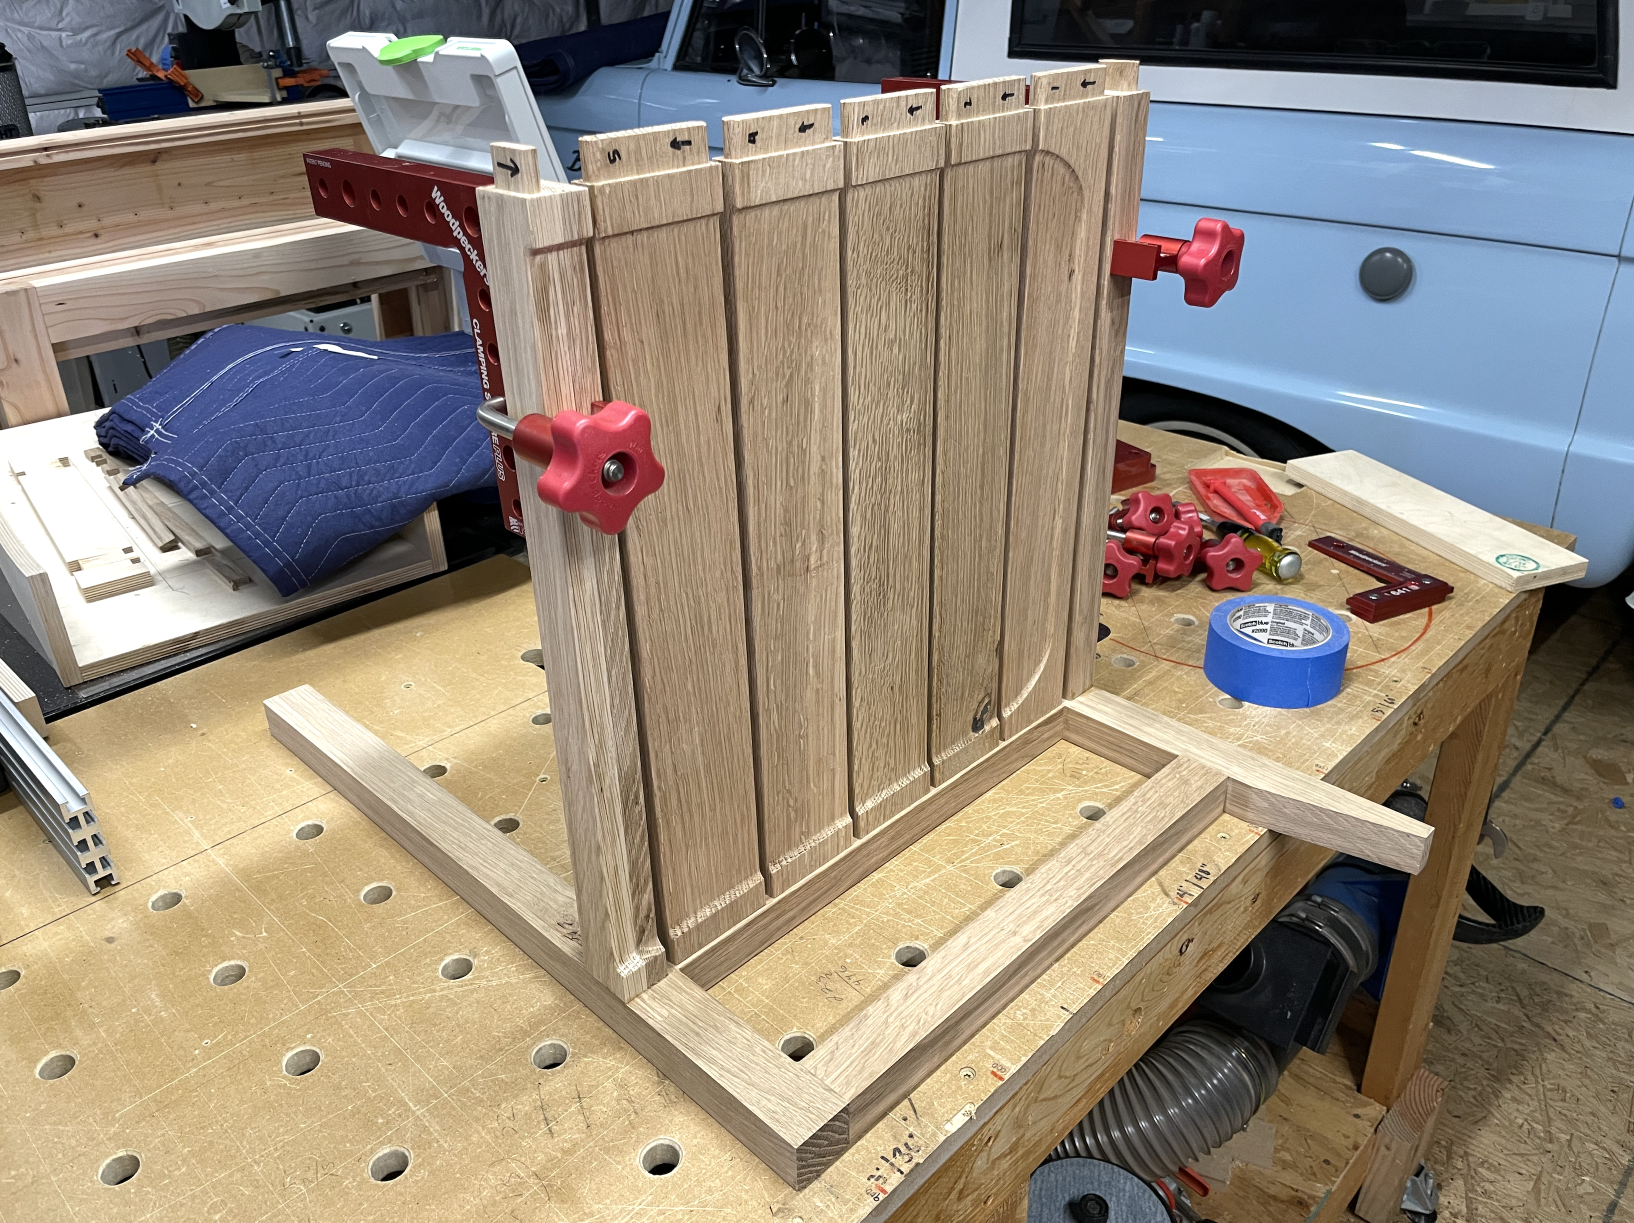
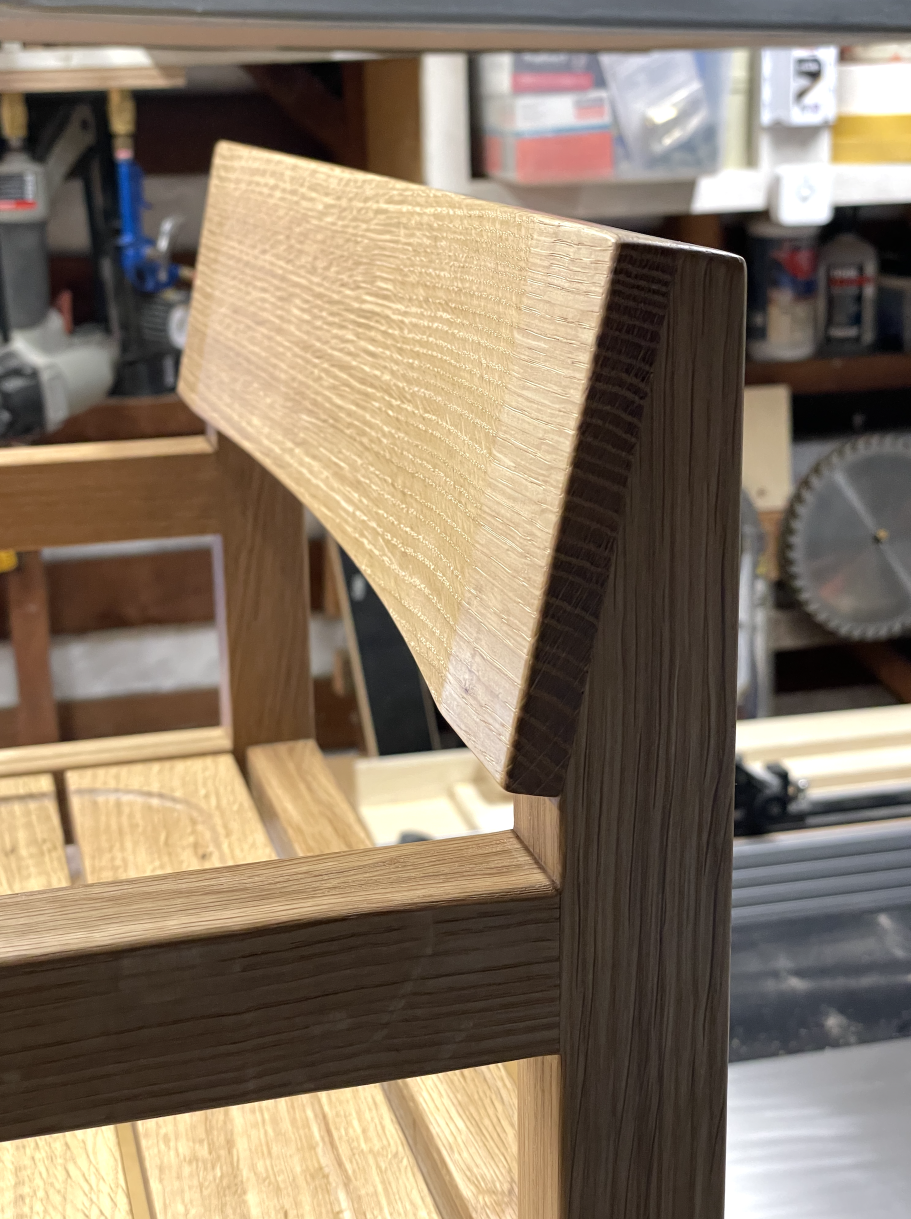
Back rest trimmed and sanded

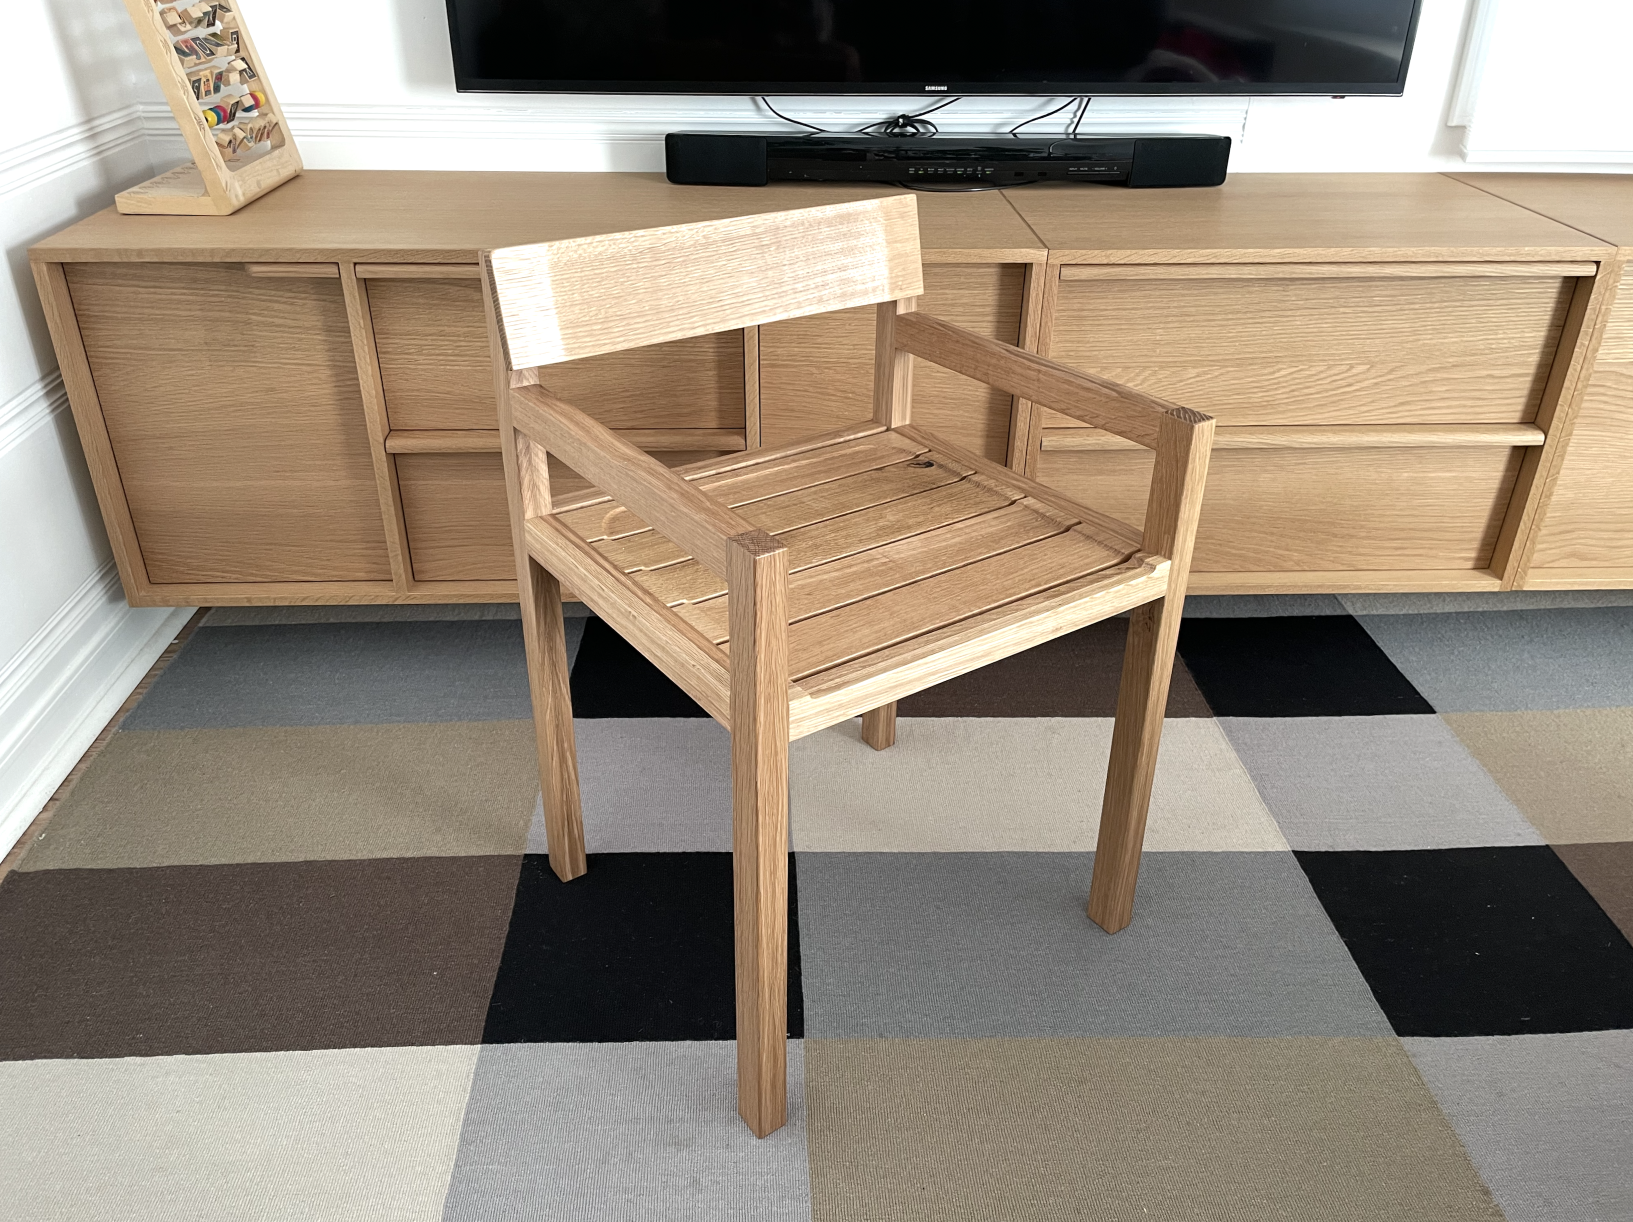
Finished with Osmo Raw Matte. The shop lights give it an amber tone but in natural light, it looks much better.
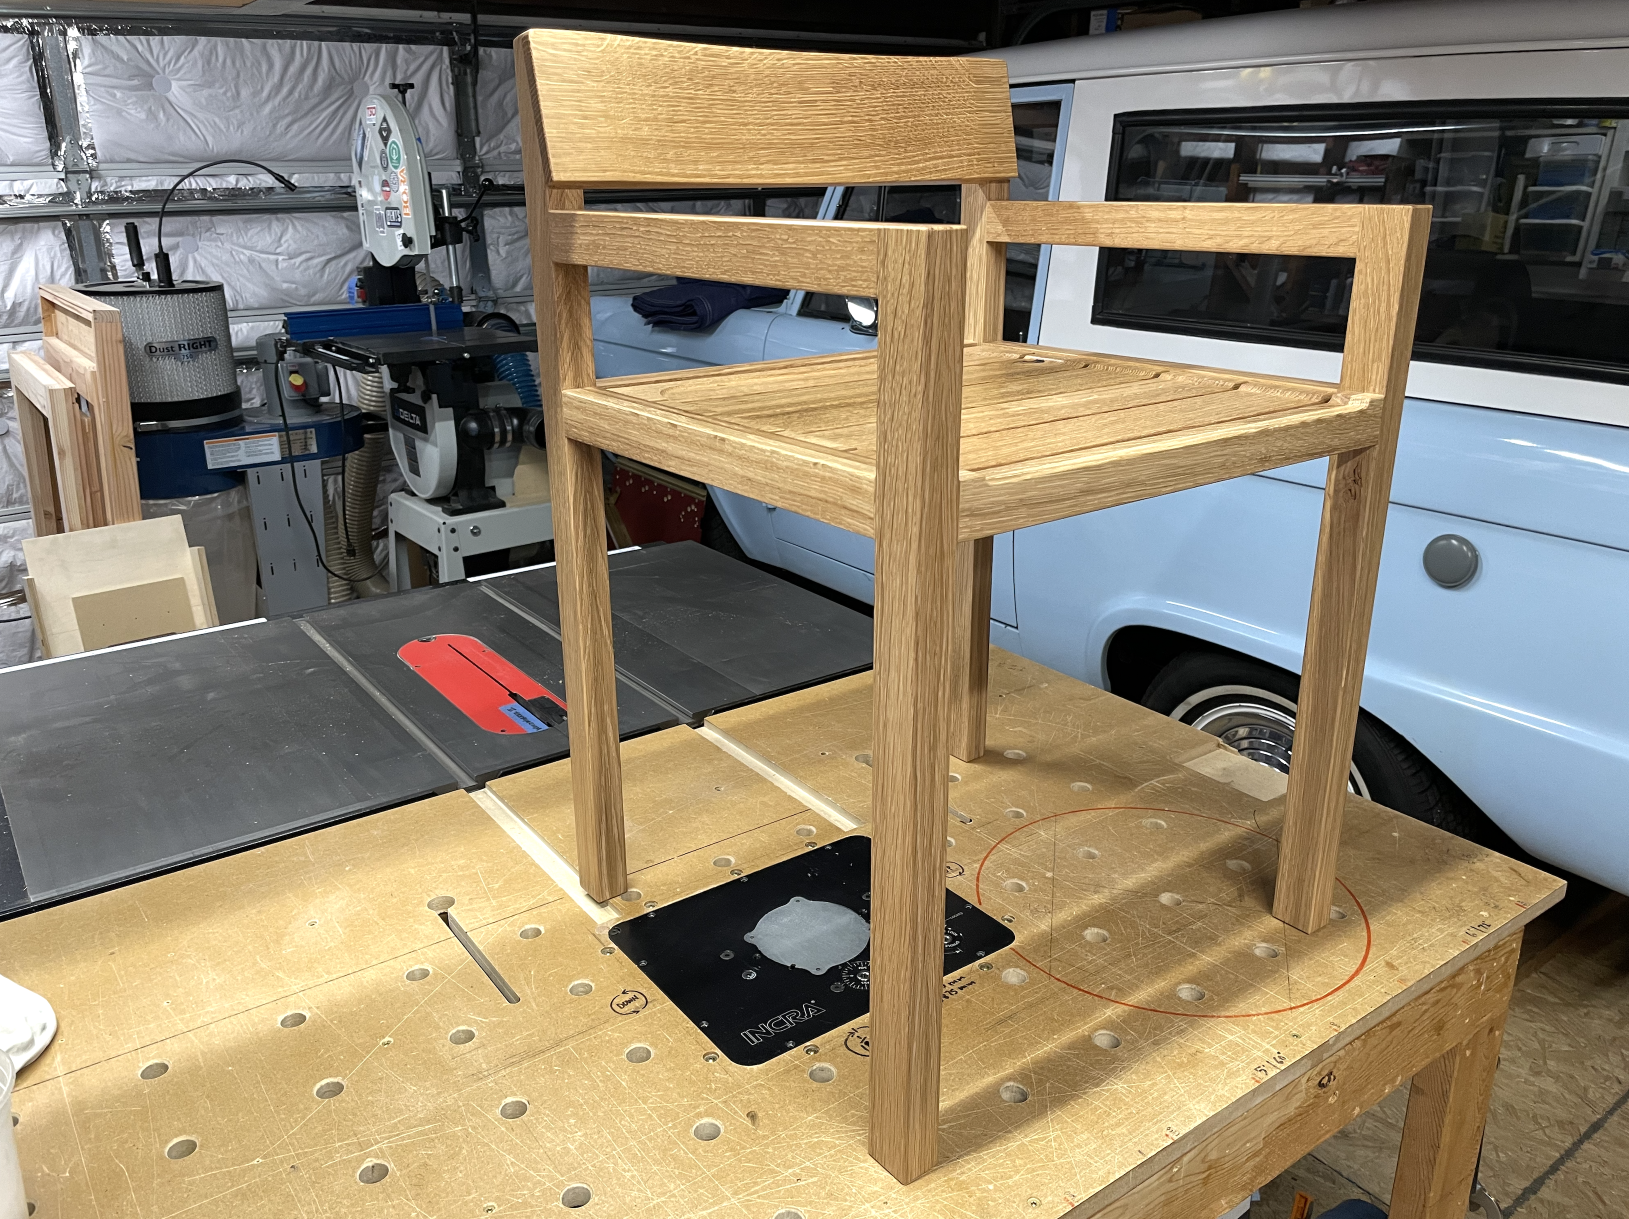

Overall, I like the chair, but I don't like it enough to build more to make a dining room set. It was fun to make and I think I've been bitten by the chair bug.
Thanks for reading!
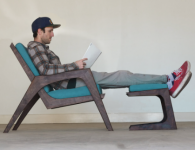
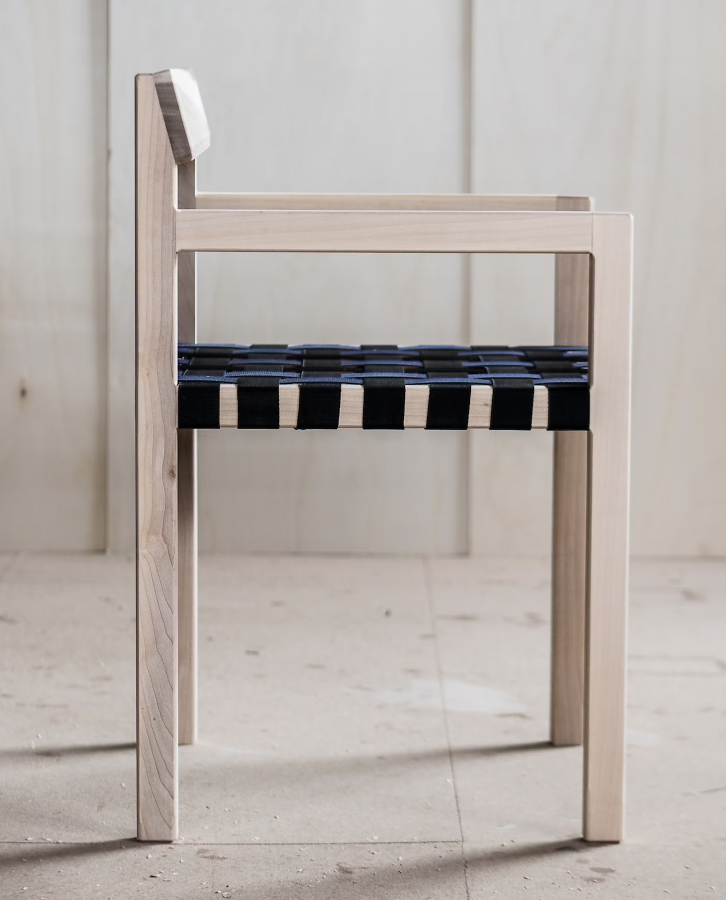
Original chair
- Make some joinery using Shaper Origin
- Make a jig to dish out a seat and backrest for a chair build, and...
- Make an actual chair
Over an Shaper Hub, there are plans for the Stock Chair that I'd been thinking would be a good first chair project. It's pretty basic as far as chairs go and after watching the Shaper Sessions guys go through the build, I decided to skip the plans and just wing it.
I had some quarter sawn 4/4 white oak that I milled and laminated into 8/4 boards. Once those were cut to size, I mounted them in the Shaper Workstation and went to work cutting the mortise and tenons. Using the Origin for joinery is almost as easy as the Domino and after cutting a few, I was questioning whether I should keep using the Origin.
Edit: I think for any future chair project, I'll probably use the Domino, unless I want to do some kind of decorative through tenon.
Legs, arms, stretchers, rails, slats....
One issue I ran into was when cutting the mortises in the legs. The front legs are shorter than the rear legs and after gridding, I must've cut the back leg mortises measuring from the top and the front legs measuring from the bottom. The difference wasn't much -- about 1.5mm -- but it introduced a visual alignment issue, along with a wobble, so I decided to plug the mortises and recut them, but this time using Plate instead of Workstation. They used Workstation in the video but I felt the longer legs were a bit unwieldy and it was much easier to clamp the legs to the front of my workbench and use the Plate to make sure everything was aligned.
Out of the 12 mortises I cut, I ended up plugging and recutting 8 of them (including a 9th, that was simply misplaced).
Fortunately, the 10 mortises for the chair slats were correct on both sides and didn't need to be plugged and recut.
From what I've learned, in traditional mortise and tenon joinery, you cut the mortise first, then size your tenon appropriately. With Origin, you cut the tenon first, then size the mortise to fit the tenon. This is easily accomplished with offsets, and I was able to get a nice friction fit with a .15mm offset.
In the original plans, they used 2" webbing to create the chair seat. I was never planning on using webbing so I milled up the slats. After a dry fit with the slats in place, it looked more like a table with arms so it was time to make the jig for dishing out the seat.
I created the outline in Shaper Studio, cut it on some MDF, and secured the slats in place.
The slats were intentionally set a couple mm below the rails, and because I was winging it and not going from any plans, dishing out the seat and having lower slats create a slight issue with the front stretcher.
I also should've made a much larger router base as the one I was using required me to move a piece of scrap MDF around inside the dishing jig and in a few places, the router tipped and the bit dug a little bit deeper into the slats.
Here's the issue up close. The slats are now lower than the front stretcher and I need to dish out the stretcher so it's level with the slats.
The rear stretcher is also higher than the slats, but the dish doesn't extend as far back so I ended up leaving it as is.
Here are all the parts so far. The backrest will come from the 8/4 board at the top. I missed getting a picture of the sled I used to cut the angles on the back legs.
For the backrest, I needed to make a jig for dishing it out. Woodpeckers makes a really nice template guide that I'd been eyeing since it came out, but I decided to make my own. My freehand cuts on the bandsaw are always a bit wonky and I was really impressed by how well this little guide worked. Hat tip to Laguna Tools for their how-to video! (video at bottom). I don't know how durable this will be long-term, but it's easy enough to make another when this one gets beat up.
My math was off on the first jig and there was way too much curve.
Second try turned out much better. I made some blocks to prevent the guide rods from sliding off the jig. For future dishing, I'll make larger blocks. These worked OK, but I think larger blocks will be easier to hold and slide.
Test clamping the backrest.
A few glue up shots. The front stretcher has been dished out to match up with the slats.
Front stretcher close up
Back rest clamp and glue up
Back rest trimmed and sanded
Finished with Osmo Raw Matte. The shop lights give it an amber tone but in natural light, it looks much better.
Overall, I like the chair, but I don't like it enough to build more to make a dining room set. It was fun to make and I think I've been bitten by the chair bug.
Thanks for reading!
Original chair