Need advice - DIY MFT with LR32

myer84

Member
Joined
Feb 28, 2013
Messages
35
Hello all,

Like many of you, I want to build my own mft workstation. I recently had the opportunity (wife's permission) to add an OF 1400 router, LR32 55" guide rail, LR32 router guide, Festool 20mm router bit, and a pair of Festool clamps to my collection. I'm just waiting on UPS to deliver my new toys this evening :)

My question to you all is, what method or methods can I apply to layout perfectly aligned 20mm holes to my custom 36" x 97" table top with the LR32 system? Ideally, I like to space out the holes the same way as the MFT/3.

I've seen the diy mft top with LR 32 video on YouTube, but I don't see how I can execute that method if I don't have an existing mft. I've also see the rail dog method, but can't figure out how I would finish my hole layout at my starting point (location where I first lay down my rail).

Any help and guidance is appreciated. Thanks.
 
Personally I think coping the MFT top is over rated.

You can use the LR32 system.  The thing that matters is that your top is square and the  holes are parallel and 90* with each other.

The distance between the hole is up to you.  It makes no difference where you place them.

You can place the 20mm holes any place you like, it's your table.  The LR32 will enable you to place them where you like.

You don't need a MFT top to copy.  Make or use a story stick to set up the LR32 once the edge stops will no longer work.  I helped

my brother-in-law make a very big MFT top with the LR32 and a woodpecker story stick that came out perfect. 

I think a lot of guys over think this simple project and I'm the type of guy that over thinks a lot of things.

Even if you made a grid with a tape, straight edge and 20mm bit and a drill, I'm willing to bet you can make a darn good MFT top.

For woodworking, a darn good top !

Keep it simple, don't over think it.

Eric
 
I have a set of short dogs(Parf Dogs) that have a milled center hole in them.  I think I had to shorten the set up guides 1 mm to 95.  I made my first holes like 30mm in using the set up bars.  then I changed the length to 95mm.  I simply used the guide bars connected to the rail to set up the rail for every row.  It was simple.  I was within 1mm over a 6' table top.[attachimg=1]
Someone mentioned already, the only reason for an equal grid [attern is to use the holes for assembling things square.  I actually have a bunch of odd placed holes in my bench becuase they're useful where they are even though they aren't on any particular layout. 
 

Attachments

  • MFLR-32PARFDOGT.jpg
    MFLR-32PARFDOGT.jpg
    2.3 MB · Views: 6,137
Thanks all for your responses. I need look more into the link you posted Mikey. I also have trouble seeing the pics. I might need to create an account and see if by login in I can see the pics.

The reason why accuracy and even spacing is important for me is because I will be adapting an incra t track plus and use it as a fence 90 degrees to my guide rail. The guide rail will be attached to my profile guide rail support brackets. I figured 97mm spacing since that's what the lr32 rail has as a spacing option, but I could be wrong.

I like the idea of using the guide rail setup bars, but I would need to find a good excuse to justify another $100+ on tools.
 
"I like the idea of using the guide rail setup bars, but I would need to find a good excuse to justify another $100+ on tools"
those bars come with the lr32 set.  i think the short parf dogs are $20
 
hopper said:
There is a young guy on here that developed a very smart way to build your own top using the LR32 system.
Watch this video:  http://festoolownersgroup.com/festool-how-to/mft-top-video/

Yes, saw that video and great technique. I just don't see how I can go with this method without an existing mft setup. I would need to come up with a way to setup my rail supports to a temporary table and align the jig created on this video to the rail.
 
Does anyone know the distance from the center of the lr32 hole to the center of the slot on the bottom of the rail? I don't have an lr32 yet to find out but it would be cool if you could slap on a set of rail dogs and use them for your row-to-row offset. If that isn't 96mm then maybe attaching the dogs and rail to a sheet of plywood to create the 96mm row spacing would work.
 
myer84 said:
Hello all,

Like many of you, I want to build my own mft workstation. I recently had the opportunity (wife's permission) to add an OF 1400 router, LR32 55" guide rail, LR32 router guide, Festool 20mm router bit, and a pair of Festool clamps to my collection. I'm just waiting on UPS to deliver my new toys this evening :)

My question to you all is, what method or methods can I apply to layout perfectly aligned 20mm holes to my custom 36" x 97" table top with the LR32 system? Ideally, I like to space out the holes the same way as the MFT/3.

Any help and guidance is appreciated. Thanks.
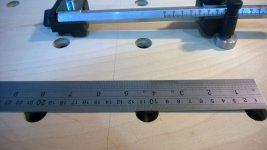
This is how I made mine

http://festoolownersgroup.com/member-projects/20mm-hole-on-a-96mm-grid-system-(mft-top-style)/

And from a recent posting

Infact having just thought about the process no template is needed and only a couple of sanity check marks. The process would be:

Use the LR32 end stop and distance stops to make 2 rows of 6mm positioning holes 96mm spacing (the LR32makes this trivial) at some random distance from the long edge (make sure they are clear of a 96mm hole position)

Then using the rail and end stop, or stops, with the distance stops set to 96mm use the 20mm hinge bit to drill every 3rd position.

The distance stops together with the 6mm positioning holes give longitudinal accuracy. The rail with 1 or 2 end stops give latitudinal accuracy.

The only slight problem is that because of the end stop screw you can't rout a 20mm hole very close to the end stop. But of course you can trim the work surface after routing the grid.

This of course is assuming you have the LR32 setup.
 
 
Firestorm said:
The images are not working for me either? Anyone got an idea as to why?

Mikey f said:
Here's I link,I used this method a while back. Worked well.

http://www.talkfestool.com/vb/festool-tips-techniques/1352-make-your-own-mft-top-11.html

just checked the link the pictures are not working, not sure if its on my end.

It is related to the server that the pictures were (are) on "www acdseeonline com" is still there but the direct URL e.g. /1002/4733/3427/3222689_x.jpg no longer works so either the OP's account has gone, they have moved the account, or they have stopped permitting deep linking.
 
After cutting the top square, I used the LR-32 rail with the stops and cut a series of holes 96mm apart along the two longest ends of the top, making sure to reference the stops on the same edge.  I also used the parallel guides with the LR-32 system to aid in making sure the guide rail was square to the reference edge.

Then I attached my rail dogs to the guide rail and was able put them in the holes I had cut previously.  I left the stops from the LR-32 system attached to the underside of the rail to maintain the proper location along the other axis. 

After that was complete, I cut off the reference holes and sized the top to fit my needs.  Worked like a charm.

It is tedious work, though. 
 
I guess you can call it cheating but we have a 30 foot long CNC router at work so I just draw up the grid and through a sheet of MDF on the router to have it cut out.
 
I think the easiest and cheapest way to do it is the way I did it.

*Purchase the Sys-MFT Systainer and remove the MDF top from it.  The top on it is removable and can be re-attached later with easy torx screws on the underside of the lid.  I think it's 4 or 6 screws total.  Mine was very easy to remove.
http://www.amazon.com/Festool-500076-SYS-MFT-Tabletop-Systainer/dp/B00F0GJW12

*Purchase three or four 20mm dogs to hold the Sys-MFT top in place while you clamp it down and drill.

*Buy a 20mm drill bit.  There are a few different bits that would be suggested around here.  If you let it, this can actually be one of the most expensive parts of this method!

*Line the Sys-MFT top up square in a corner of your MDF or bench top surface.  There are a few ways to ensure it's square on the wood.  Clamp it securely so it will not move at all during drilling - which is actually surprisingly easy because of the recessed clamping areas on the MDF top - then drill your first hole.  If you have a drilling jig use it, but it's not that important due to the depth of the Sys-MFT MDF top which helps keep the bit straight and reduces speed wobble.  Insert your 20mm dog into the first hole to help keep it in line even more, leaving it clamped.  Drill the additional holes, inserting dogs into the holes as needed.

*After all holes for that section have been drilled, remove the clamps and dogs, and re-position the Sys-MFT top using the dogs as a guide to keep it straight and square.  Keep repeating the process as needed until you get as many holes in your bench top as you want.

---------------
This method is far cheaper than buying an LR32 system just for this purpose.  The Sys-MFT is actually extremely valuable as well - it's one of the most underrated Festool products out there.  At ~$78.00 I am very surprised more people don't feature it in threads.
 
That's brilliant! I've been reading these threads and thinking about how to afford the holes for a year plus. Amazed such a elegant solution has been hiding in plain sight. Thanks!
 
This seems like a great idea. Just curious though; are the holes on the Sys-MFT spaced on the same 96mm centers as the regular MFT top?
 
[member=58595]WoodButcher402[/member] - Yes,  we'll kind of.  The only holes that are not spaced 96mm on center are the 4 "corner" holes in the recessed areas in the mdf top. 

When I get access to my computer again next week I can annotate an image showing what I mean.  But to answer your implied question -  Yes, you can achieve the 96mm spacing using the sys-mft and keep all holes perfectly square.
 
Sometimewoodworker said:
It is related to the server that the pictures were (are) on "www acdseeonline com" is still there but the direct URL e.g. /1002/4733/3427/3222689_x.jpg no longer works so either the OP's account has gone, they have moved the account, or they have stopped permitting deep linking.

I believe its related to the "talkFestool" server, a number of people have commented losing complete albums. Its on Paul's (moderator) list to see if he can resolve.

Kev
 
Back
Top