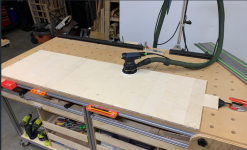
Festool sanders are just magic!
I still don't like sanding, but being able to spend an hour sanding and then walk into the house without leaving a trail of sanding dust is fantastic. I don't even feel the need to wear a mask when sanding.
Using 3 grits was a learning experience. I have switched to just sanding with 180 and find that I cannot feel the difference, and it saves a lot of time. Thanks [member=44099]Cheese[/member]!
[member=3513]PaulMarcel[/member] This is the second batch of drawers. The previous batch was 18. I made my first set of cabinets a couple years ago. I am guessing that my total is probably getting close to 100 drawers. Some of those drawers are really tray drawers for Systainers and L-Boxxes.
[member=74278]Packard[/member] Regarding pocket holes, I have been using pocket holes for cabinets and drawers for a couple years not. I have not had any problems. To date, I have not even used glue with the pocket holes. Some of my drawers are very heavy, containing hardware. I am glad that I did not use glue in the past because my first cabinet was too tall, too wide and too deep and I hated it. It was disassembled and the wood reused in newer cabinets. I also made the boxes for the first cabinets from Home Depot pre-finished plywood. I have since switched to Baltic birch for boxes and drawers and 5mm Luan for the drawer bottoms. I do plan to start glueing now that I have settled on a standard size cabinet for all general storage projects. As for the strength of glue, I have seen many tests of glue strength. PVA glue is always stronger than the wood so I cannot see any reason why glue with pocket holes should need any extra reinforcement.
I will post a photo of an assembled cabinet later.
I just want to mention that my design is based on my specific needs and not what I have seen as standard for cabinet making. I wanted to minimize material and assembly steps.
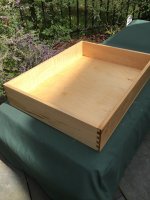
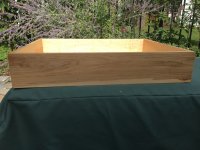
My cabinets are a single box with no frames or covering, so I use pocket holes on the inside with very careful setting of the hole depth and position to get max strength without protruding screws. For my drawers, the front of the box is the face of the drawer so that I do not need that extra piece of wood. This means that my pocket holes are on the outside of the drawer sides. I do not care if they show when the drawers are open. I used 1/2 BB ply for drawer bottoms initially. I realized that was overkill and switched to 5mm ply in grooves and that is strong enough for a full 100# load.