New Desk

Baremeg55 said:
Jack,

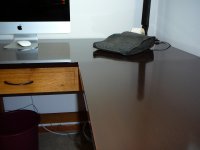
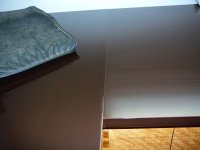
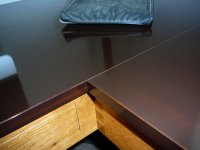
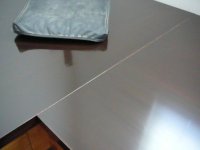
The desk looks great, especially the QSWO!!!  Great job!  I'm sure the wife was extremely happy.

Gary

Gary,

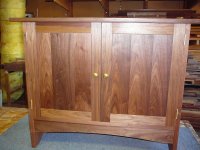
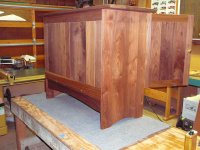
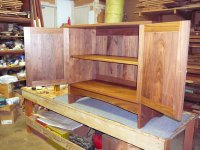
My wife moved all of her files into the new desk and spread out her computer and all and she is a very happy camper.  Next up is a black walnut chest/credenza for her to be able to spread out her cloths, etc.

Jack

 
Jack,

Looking forward to seeing the chest/credenza.  Walnut is probably my favorite wood to work with!!!  Machines nice, and looks really great with only several coats of oil...
 
Baremeg55 said:
Jack,

Looking forward to seeing the chest/credenza.  Walnut is probably my favorite wood to work with!!!  Machines nice, and looks really great with only several coats of oil...

I'm looking forward to working with walnut now that I have my Oneida V-3000 and my Festool CT22.  Here's the last walnut credenza I made "before Oneida".

I hate walnut dust but wood does finish very nicely.

Jack
 

Attachments

  • P1000843(1).JPG
    P1000843(1).JPG
    2.4 MB · Views: 290
  • P1000848(1).JPG
    P1000848(1).JPG
    2.2 MB · Views: 247
  • P1000849.JPG
    P1000849.JPG
    2.2 MB · Views: 275
Very nice Jack, I like the style!!!  Was this your own design?  Great job on the front, nice proportions and the doors looks perfectly trimmed out.....

Gary
 
Baremeg55 said:
Very nice Jack, I like the style!!!  Was this your own design?  Great job on the front, nice proportions and the doors looks perfectly trimmed out.....

Gary

Gary,

I saw a similar design in Fine Woodworking magazine but the build techniques were all my Festool stuff and the door fitting was tedious to say the least.  The Brusso spring loaded door stops were a challenge but the pictures don't show the end and front curve profiles on the top that I cut with my Festool jigsaw that came out very nicely propotioned (I need better camera shots).

Jack
 
Tom Bellemare said:
You sure make some nice furniture, Jack!

Tom

Thanks Tom and that's the reason my wife hasen't thrown away your business card and phone number [wink]

Jack
 
Beautiful work.  Any close up pictures of the intersection of the two sides?  Have had a similar idea floating around in my head for a corner of our family room.  My wife needs a craft table.
 
bronco71 said:
Beautiful work.  Any close up pictures of the intersection of the two sides?  Have had a similar idea floating around in my head for a corner of our family room.  My wife needs a craft table.

I'll take some pictures but all you'll see is a line where the build up of finish rounded over the sharp edge.  The Domino Joiner is a great tool for alignment (and joining).  I cut the desktop sections to size and lined up the two sections on my assembly table and marked the lines for the Domino cuts.  I used the exact size on one section and the mid width on the other.  I selected dominos from the bag that were a very tight fit and installed them on the exact fit side.  The edge that was protruding was beveled to asset with the assembly (but it fit so nicely with no play I probably didn't need to add the extra bevel).  Let me know if these are the pictures of the detail you wanted to see or if you wanted to see the under structure?

Jack
 

Attachments

  • P1010331.JPG
    P1010331.JPG
    2.2 MB · Views: 217
  • P1010330.JPG
    P1010330.JPG
    499.4 KB · Views: 208
  • P1010329.JPG
    P1010329.JPG
    2.4 MB · Views: 212
  • P1010328.JPG
    P1010328.JPG
    44.5 KB · Views: 227
bronco71 said:
Beautiful work.  Any close up pictures of the intersection of the two sides?  Have had a similar idea floating around in my head for a corner of our family room.  My wife needs a craft table.

I may not have answered your question with my reply below since I thought at first glance you were looking for the desk top intersection.

If your were looking for a close up of the structural joining of the two desk sections I didn't take any close up pictures. If you look at the photo of the desk without the top you'll notice that the front and back rails were the same width and the corner without a leg had the two rails joined together with a dovetail joint.  By aligning the back legs and rail tops I was able to get a good 90 degree alignment and then clamped the two sections in place.  I didn't think to take pictures of the mechanical attachments of the two sections but, the method used was to drill two holes for removal press fit pins and then two larger holes for 3/8" bolts with large washers and nyloc nuts.

If you want any additional detail PM me and I'll try to get you the information.

Jack
 
Back
Top