New Office Desk

ear3

Member
Joined
Jul 24, 2014
Messages
4,341
I mentioned a few months ago the possibility that I would be moving to a bigger office following a promotion at work, pending continuance of my overall employment status into the indefinite future:http://festoolownersgroup.com/general-friendly-chat/my-new-office-(i-e-blank-canvas)/.  Well, I got confirmation of that continuance a few weeks ago, and have started in on building the various office furnishings that will be replacing the ugly institutional looking ones currently on site.

First up, the anchor of the whole space, which is the desk.

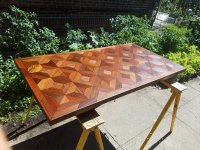
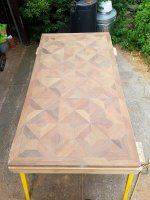
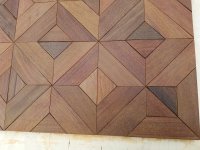
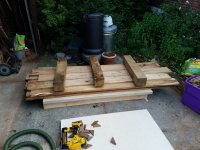
Over the winter I did a commission for a series of table tops for a Japanese restaurant that employed these 12" x 2.75" x 3/4" Ipe offcut scraps I had sourced from a friend who had earlier done a large outdoor furniture project:http://festoolownersgroup.com/member-projects/ipe-offcut-table-tops/  Although I used maybe 7-800 of the pieces I had rescued, I still had a few hundred taking up space in the corner of my shop that I did not have the heart to toss after the commission was completed, so I decided to make another dent in the pile by using the same process for the desktop.

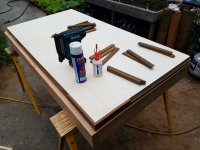
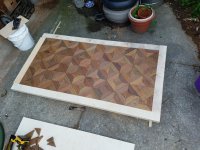
You can consult the Ipe offcut table thread for specific details about the process -- it's actually a lot quicker than you might think, as it's just a question of setting the stops on the miter saw, and then cut cut cutting your way to the necessary number (in the case of the table, it was 216 pieces for the interior pattern, and around 240 total including the outside border).  The one major change I made vs. the table build was that I used a thicker 1" BB plywood substrate, and I was also more diligent about applying pressure on the pattern while they were setting in the adhesive.  I had done this only intermittently on the tables, and I ended up having to resand some of them level after there was more settling of the pieces in the adhesive.

View attachment 1

View attachment 2

View attachment 3

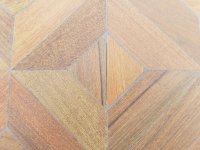
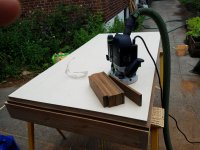
The other difference was that I spent several mind-numbing hours chamfering the edges of all the pieces with a quick pass of a 1/16" radius roundover bit mounted on the router table so that there would be a more consistent grout line in the resulting pattern

View attachment 4

I cut the whole thing to size, then added a rabbet to inlay some pieces to cover the ply edge:

View attachment 5

View attachment 6

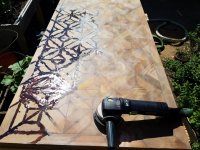
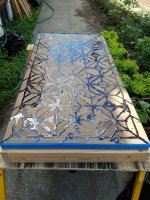
After some rotex sanding to level everything out, I mixed up and applied West System epoxy to fill the gaps.  I decided to go with epoxy filler after experimenting with various methods on the restaurant tables and finding them less than optimal.  The solution I eventually settled on was to use a liquid sanding sealer that dried to a rubbery consistency, and so did not crack when there was the inevitable wood movement in the pieces.  But the application and reapplication process for that took a really long time, and with the chamfers on the desktop there was a lot more space to fill, which is why I ultimately went with the epoxy, tinted with a few drops of dark walnut transtint dye.

View attachment 7

I worked mostly with syringe applicators, though you can see near the top where I got impatient and started pouring the mixture.

Worked off the bulk of the dried epoxy with the RAS and 100 grit paper

View attachment 8

Even after a few spot reapplications there was still some cracking that developed:

View attachment 9

I eventually just resigned myself to accepting this, trusting that the epoxy would hold in place.  Just looking at how the wood behaves over the past two weeks, I've noticed that these cracks open and close periodically depending upon the climate.

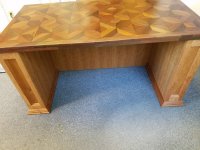
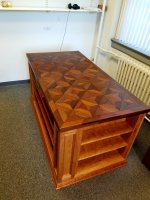
Finished up the top with the Rotex and ETS-EC 150/5 up to 180 grit, and then applied two coats of Surfix Heavy Duty oil, which brought out that rich red color of the Ipe:

View attachment 10

View attachment 11

Next up, the base of the desk.
 

Attachments

  • 20180621_180125.jpg
    20180621_180125.jpg
    679.7 KB · Views: 412
  • 20180708_102028.jpg
    20180708_102028.jpg
    825.6 KB · Views: 514
  • 20180627_092930.jpg
    20180627_092930.jpg
    297.5 KB · Views: 320
  • 20180627_092943.jpg
    20180627_092943.jpg
    770.1 KB · Views: 334
  • 20180626_095038.jpg
    20180626_095038.jpg
    669.4 KB · Views: 322
  • 20180625_162137.jpg
    20180625_162137.jpg
    381.4 KB · Views: 357
  • 20180623_184436.jpg
    20180623_184436.jpg
    595.5 KB · Views: 186
  • 20180623_172749.jpg
    20180623_172749.jpg
    626.6 KB · Views: 258
  • 20180622_165136(1).jpg
    20180622_165136(1).jpg
    705.6 KB · Views: 329
  • 20180621_184419.jpg
    20180621_184419.jpg
    680.7 KB · Views: 203
  • 20180621_183159.jpg
    20180621_183159.jpg
    154.8 KB · Views: 390
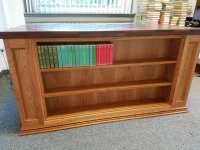
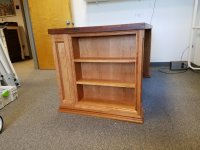
I have some pretty specific parameters for my desk.  Obviously having enough top surface area is important, but in terms of the base, I tend to view desk drawers as essentially dead space, repositories for stuff you throw in only to forget about for several years.  All of my writing utensils and stationary equipment are stored above in wooden containers, and I have a large metal filing cabinet for documents and other papers, so I don't really need closed storage.  But what I really can use is additional book shelving, and specifically for a set of books I have that are very compact, and which, when placed on regular bookshelves, make for a very inefficient use of space.  So I designed the desk base simply to function as a series of small book shelves: A long shelf for the front, and then two short shelves along the side.
     
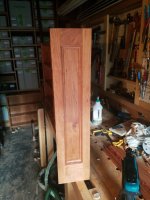
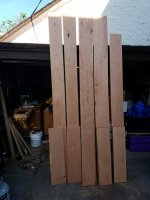
I picked up a bunch of rough 5/4 cherry at Boards and Beams in Fairfield, NJ, which I planed down to a mixture of 1 1/8 and 3/4 boards:

View attachment 1

View attachment 2

I picked out boards that were between 8-10", which would provide enough of an offcut to do the moulding after accounting for the 5 1/4" deep shelves.

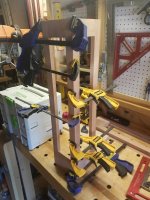
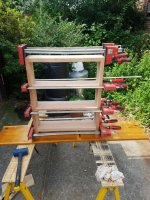
The shelving units were dominoed and glue clamped:

View attachment 3

View attachment 4

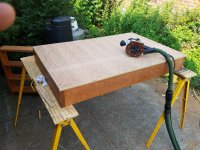
I then added a 3/4 cherry veneer plywood as a backing, which I routed flush to the shelving units

View attachment 5

View attachment 6

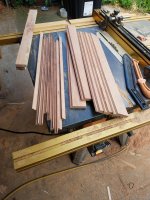
I used the offcuts to mill the two main moulding profiles I would use in the framed corner connectors and around the shelves (the base moulding I ended up using was premilled):

View attachment 7

View attachment 8

The corner connectors were made from the scrap 1" BB, pocket holed at the top so that the exterior frame could be secured from the inside:

View attachment 9

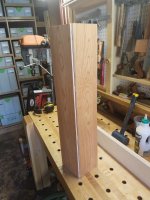
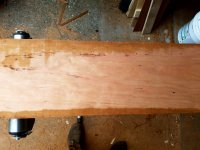
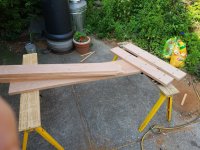
I resawed two cherry boards to serve as the corner panels so I could get a bookmatch, at least on the front of the desk:

View attachment 10

View attachment 11

Since the boards for the shelving unit mostly had a dirty, undefinied-grain, I decided to use a board with a lighter, cathedral face grain for the panels.

I pre-applied the frames and interior moulding to the back of the shorter shelving units (on the chair side), using the vertical of the shelf unit itself as the panel:

View attachment 12

For the front corners, I mitered and dominoed two frames together that would be applied when the unit was installed:

View attachment 13

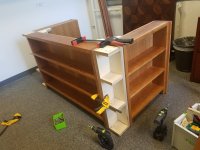
Installation was pretty straightforward.  Positioned the units square to each other using a combination of interior plywood triangles and the corner connectors:

View attachment 14

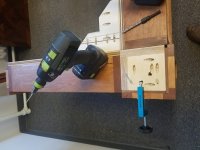
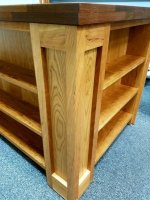
Attached the corner panels with a pin nailer and then the mitered corner frames using the pocket screws at the top (aided by a fence clamp) and screws/nails at the bottom, which would be hidden by the base moulding:

View attachment 15

View attachment 16

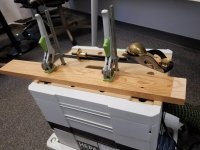
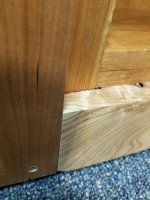
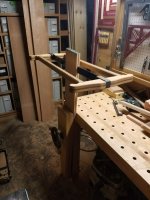
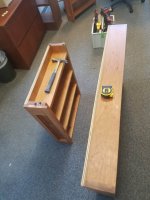
To hide the gap at the bottom of the shelving units, and provide an edge against which to set the shelf moulding, I carefully fit a few planks, rabbeting as needed to account for slight differences in depth, which was easy to do thanks to the conversion of my CT-Sys I did a few months back -- with the Sys-2 + Sys-MFT top, you don't even have to remove the hose to do any clamping

View attachment 17

View attachment 18

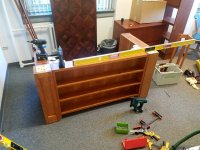
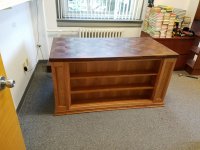
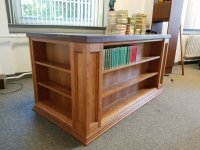
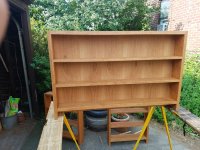
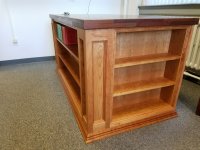
Chopped the rest of the moulding on the Kapex, and applied with a mix of pins and 18 gauge nails, leaving the finished product pictured below.  I'll be putting the rest of the books in today.

View attachment 19

View attachment 20

View attachment 21

View attachment 22

View attachment 23

There are a few more finishing touches left, like a pull out attached to the underside for a computer docking bay, and maybe some triangular shelves in the right corner to hold speakers, external hard drive or other computer related equipment.  I may also build a movable, wheeled 2 drawer filing cabinet that would slide under the desk on the left depending upon my future storage needs, but for now I'm fine just with having the work surface.
 

Attachments

  • 20180708_195125.jpg
    20180708_195125.jpg
    217.5 KB · Views: 159
  • 20180707_173453.jpg
    20180707_173453.jpg
    231.3 KB · Views: 216
  • 20180709_174119.jpg
    20180709_174119.jpg
    568.8 KB · Views: 324
  • 20180709_182621.jpg
    20180709_182621.jpg
    531.6 KB · Views: 156
  • 20180709_182817.jpg
    20180709_182817.jpg
    705.7 KB · Views: 273
  • 20180710_121621.jpg
    20180710_121621.jpg
    518.1 KB · Views: 231
  • 20180710_115528.jpg
    20180710_115528.jpg
    195.5 KB · Views: 159
  • 20180710_183349.jpg
    20180710_183349.jpg
    628.4 KB · Views: 328
  • 20180710_183819.jpg
    20180710_183819.jpg
    624.6 KB · Views: 373
  • 20180707_122053.jpg
    20180707_122053.jpg
    223.2 KB · Views: 209
  • 20180704_203542.jpg
    20180704_203542.jpg
    208.7 KB · Views: 226
  • 20180625_181415.jpg
    20180625_181415.jpg
    186.5 KB · Views: 148
  • 20180624_180915.jpg
    20180624_180915.jpg
    597.7 KB · Views: 168
  • 20180701_084109.jpg
    20180701_084109.jpg
    763.4 KB · Views: 183
  • 20180701_103356.jpg
    20180701_103356.jpg
    379.8 KB · Views: 178
  • 20180703_085648.jpg
    20180703_085648.jpg
    777.7 KB · Views: 169
  • 20180703_090043.jpg
    20180703_090043.jpg
    710.4 KB · Views: 236
  • 20180704_191323.jpg
    20180704_191323.jpg
    109.4 KB · Views: 221
  • 20180705_112414.jpg
    20180705_112414.jpg
    323.4 KB · Views: 169
  • 20180707_101931.jpg
    20180707_101931.jpg
    611.3 KB · Views: 172
Just wanted to point to one detail I'm particularly proud of, which may not be obvious from the full pictures.  That is the way the mitered frames line up on the front right corner (was able to get two pieces out of one of the offcuts):

[attachimg=1]
 

Attachments

  • 20180709_212346(1).jpg
    20180709_212346(1).jpg
    259.6 KB · Views: 1,215
Awesome desk, I love the idea of having the book shelves on the exterior!  Any idea how much it weighs?

 
Thanks.  It's heavy as f*$#.  The top alone is right at the upper limit of what I can maneuver safely without damaging my back.  Fortunately, I nailed in some metal furniture glides on the bottom, so it can be pushed around pretty easily on the office carpet:

View attachment 1

GoingMyWay said:
Awesome desk, I love the idea of having the book shelves on the exterior!  Any idea how much it weighs?
 

Attachments

  • 20180709_154243.jpg
    20180709_154243.jpg
    229.1 KB · Views: 212
[member=37411]ear3[/member] 
Edward, Congratulations on the promotion!  I somehow missed that earlier post.

As always, your craftsmanship is superb, and the photos you provide are a true inspiration!

Thank you for sharing!

Mike A.
 
Beautiful work!!  God help the carpet installers that have to move this thing!
 
Fantastic work and love the top as well as the side bookcases.

What's your day job, Edward?  I always assumed your woodworking was full-time given the nature of the projects and quality of the work you produce!

Are you doing anything to accommodate cables / desk lamp cord management in the top?  That's a big top so I assume you might have something like a computer / lamp on it.

Thanks for the step-by-step.  That tabletop is just awesome, especially when you consider it was 'scraps' till you got them!

 
Thanks Neil.  I'm currently messing around with the computer configuration, as I will almost certainly need to drill a hole through the desk at one or more points to accommodate all the cords.  In the main, though, the large desktop (62"x32") is for laying out books and other things required for my job, which is professing History.

ed

neilc said:
Fantastic work and love the top as well as the side bookcases.

What's your day job, Edward?  I always assumed your woodworking was full-time given the nature of the projects and quality of the work you produce!

Are you doing anything to accommodate cables / desk lamp cord management in the top?  That's a big top so I assume you might have something like a computer / lamp on it.

Thanks for the step-by-step.  That tabletop is just awesome, especially when you consider it was 'scraps' till you got them!
 
Nice stuff Edward.  [big grin]  The front right corner is especially nice. I hope you angled that feature towards the door so when entering the room, that detail from the 3/4 view will be the first element they see.  [smile]

How did you attach the desk top?

The round over of all the individual desk top pieces really makes a difference aesthetically.  [thumbs up]

Did you ever consider using the Domino D14 system for ease of assembly/disassembly?

I take it everything is Surfix One-Step?
 
Beautiful work.  It must have been fun designing it.  The colors and finish really make it stand out.  Clearly an exercise in patience and craftsmanship.
 
Thanks [member=44099]Cheese[/member] and [member=59951]Dick Mahany[/member] !  I did toy briefly with using connectors, but settled on a construction that is actually not too difficult to take apart in the future if it has to be.  Once the moulding is pried off (and it would only have to be the base moulding, which would be pretty simple since it's just shot with 18 or 23 gauge pins), the corner assemblies can simply be unscrewed to free up the three individual shelving units.

Unfortunately, the orientation of the space means that simply entering the room will not put the mitered corner into full view, but when we have meetings at the conference table on the other side of the office -- well, folks will be able to sneak a peak.

Top is just screwed in from the underside of the shelving units with trim head screws.  I trust no one is going to get on their hands and knees to inspect that detail (which, in any case, are mostly obscured by the books), so I'm not really sweating it.  Ipe is so dense though that you have to be careful about screwing into it lest the piece simply resists the screw point and pops up.  This can happen even with pilot holes, as I discovered on one or two occasions when attaching the table tops I made over the Winter to their bases.  This was actually a further reason why I used the 1" BB substrate, as it provided enough purchase for a screw so that I didn't have to drive it into the Ipe.

Finished with Heavy Duty rather than One Step.  I dunno, but I'm not a fan of the added wax in one-step, and I think you get a slightly richer color with the heavy duty, but maybe that's just me. 

Cheese said:
Nice stuff Edward.  [big grin]  The front right corner is especially nice. I hope you angled that feature towards the door so when entering the room, that detail from the 3/4 view will be the first element they see.  [smile]

How did you attach the desk top?

The round over of all the individual desk top pieces really makes a difference aesthetically.  [thumbs up]

Did you ever consider using the Domino D14 system for ease of assembly/disassembly?

I take it everything is Surfix One-Step?
 
ear3 said:
Top is just screwed in from the underside of the shelving units with trim head screws.  I trust no one is going to get on their hands and knees to inspect that detail (which, in any case, are mostly obscured by the books), so I'm not really sweating it.  Ipe is so dense though that you have to be careful about screwing into it lest the piece simply resists the screw point and pops up.  This can happen even with pilot holes, as I discovered on one or two occasions when attaching the table tops I made over the Winter to their bases.  This was actually a further reason why I used the 1" BB substrate, as it provided enough purchase for a screw so that I didn't have to drive it into the Ipe.

I have used a tap to thread a drilled hole in ipe, especially when attaching a piece of wood into a thinner piece of wood.  I’ll use the coarsest thread readily available for the size of machine screw I’m using.  Obviously it doesn’t help in most situations, but might be worth considering sometimes.

Cool desk!
 
Good tip.  Thanks!

Koamolly said:
ear3 said:
Top is just screwed in from the underside of the shelving units with trim head screws.  I trust no one is going to get on their hands and knees to inspect that detail (which, in any case, are mostly obscured by the books), so I'm not really sweating it.  Ipe is so dense though that you have to be careful about screwing into it lest the piece simply resists the screw point and pops up.  This can happen even with pilot holes, as I discovered on one or two occasions when attaching the table tops I made over the Winter to their bases.  This was actually a further reason why I used the 1" BB substrate, as it provided enough purchase for a screw so that I didn't have to drive it into the Ipe.

I have used a tap to thread a drilled hole in ipe, especially when attaching a piece of wood into a thinner piece of wood.  I’ll use the coarsest thread readily available for the size of machine screw I’m using.  Obviously it doesn’t help in most situations, but might be worth considering sometimes.

Cool desk!
 
Re. Screwing two pieces of wood together...

There is no need for the screw to thread into the the first piece of wood. If it does so it is likely to push the second piece of wood away unless the two are clamped or weighed down. If you can’t keep the two pieces together then you need to make the pilot hole for the first piece full sized to prevent the screw from getting a purchase from which to push the second piece of wood away.

The Fuller type tapered drill bits allow you to make such a clearance pilot hole for both pieces in one go, as long as the depth collar is set right. This is what the tapered drills are best at these days now that most screws are straight shanked instead of the traditional form of wood screw, which is tapered.

The other option is to take advantage of the modern screw form for example the Kreg pocket screws with an upper shank that is smooth and a smaller diameter than the threaded portion. With the right length you might be able to skip drilling pilot holes.
 
Does anyone make Centrotec compatible tapered bits btw?

Michael Kellough said:
Re. Screwing two pieces of wood together...

There is no need for the screw to thread into the the first piece of wood. If it does so it is likely to push the second piece of wood away unless the two are clamped or weighed down. If you can’t keep the two pieces together then you need to make the pilot hole for the first piece full sized to prevent the screw from getting a purchase from which to push the second piece of wood away.

The Fuller type tapered drill bits allow you to make such a clearance pilot hole for both pieces in one go, as long as the depth collar is set right. This is what the tapered drills are best at these days now that most screws are straight shanked instead of the traditional form of wood screw, which is tapered.

The other option is to take advantage of the modern screw form for example the Kreg pocket screws with an upper shank that is smooth and a smaller diameter than the threaded portion. With the right length you might be able to skip drilling pilot holes.
 
Back
Top