ear3
Member
- Joined
- Jul 24, 2014
- Messages
- 4,342
I mentioned a few months ago the possibility that I would be moving to a bigger office following a promotion at work, pending continuance of my overall employment status into the indefinite future:http://festoolownersgroup.com/general-friendly-chat/my-new-office-(i-e-blank-canvas)/. Well, I got confirmation of that continuance a few weeks ago, and have started in on building the various office furnishings that will be replacing the ugly institutional looking ones currently on site.
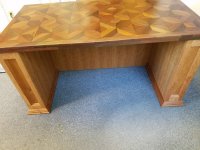
First up, the anchor of the whole space, which is the desk.
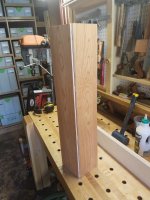
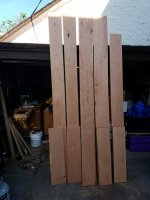
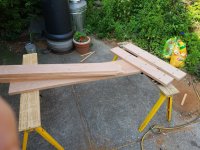
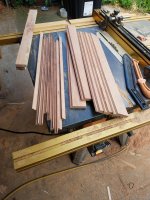
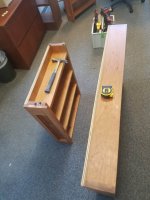
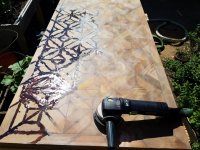
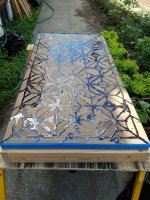
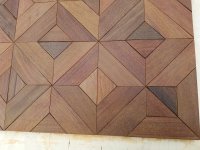
Over the winter I did a commission for a series of table tops for a Japanese restaurant that employed these 12" x 2.75" x 3/4" Ipe offcut scraps I had sourced from a friend who had earlier done a large outdoor furniture project:http://festoolownersgroup.com/member-projects/ipe-offcut-table-tops/ Although I used maybe 7-800 of the pieces I had rescued, I still had a few hundred taking up space in the corner of my shop that I did not have the heart to toss after the commission was completed, so I decided to make another dent in the pile by using the same process for the desktop.
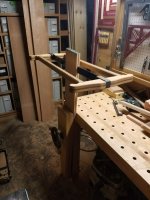
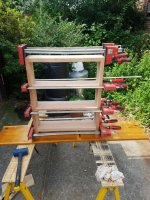
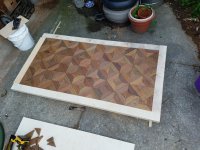
You can consult the Ipe offcut table thread for specific details about the process -- it's actually a lot quicker than you might think, as it's just a question of setting the stops on the miter saw, and then cut cut cutting your way to the necessary number (in the case of the table, it was 216 pieces for the interior pattern, and around 240 total including the outside border). The one major change I made vs. the table build was that I used a thicker 1" BB plywood substrate, and I was also more diligent about applying pressure on the pattern while they were setting in the adhesive. I had done this only intermittently on the tables, and I ended up having to resand some of them level after there was more settling of the pieces in the adhesive.
View attachment 1
View attachment 2
View attachment 3
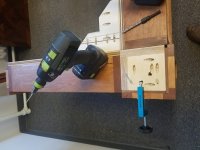
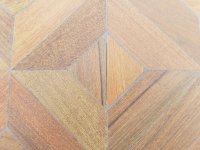
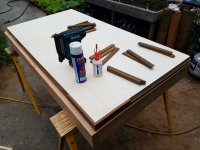
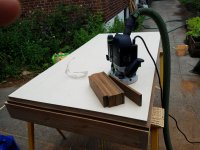
The other difference was that I spent several mind-numbing hours chamfering the edges of all the pieces with a quick pass of a 1/16" radius roundover bit mounted on the router table so that there would be a more consistent grout line in the resulting pattern
View attachment 4
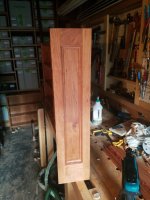
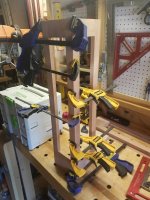
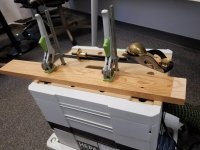
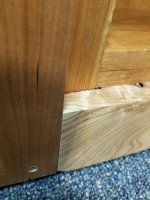
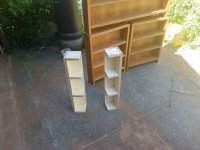
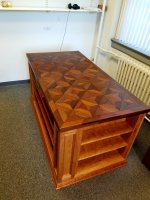
I cut the whole thing to size, then added a rabbet to inlay some pieces to cover the ply edge:
View attachment 5
View attachment 6
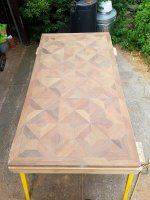
After some rotex sanding to level everything out, I mixed up and applied West System epoxy to fill the gaps. I decided to go with epoxy filler after experimenting with various methods on the restaurant tables and finding them less than optimal. The solution I eventually settled on was to use a liquid sanding sealer that dried to a rubbery consistency, and so did not crack when there was the inevitable wood movement in the pieces. But the application and reapplication process for that took a really long time, and with the chamfers on the desktop there was a lot more space to fill, which is why I ultimately went with the epoxy, tinted with a few drops of dark walnut transtint dye.
View attachment 7
I worked mostly with syringe applicators, though you can see near the top where I got impatient and started pouring the mixture.
Worked off the bulk of the dried epoxy with the RAS and 100 grit paper
View attachment 8
Even after a few spot reapplications there was still some cracking that developed:
View attachment 9
I eventually just resigned myself to accepting this, trusting that the epoxy would hold in place. Just looking at how the wood behaves over the past two weeks, I've noticed that these cracks open and close periodically depending upon the climate.
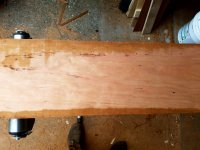
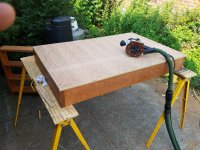
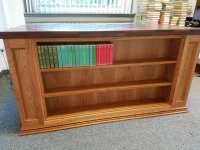
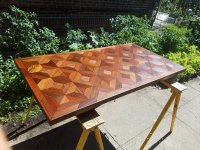
Finished up the top with the Rotex and ETS-EC 150/5 up to 180 grit, and then applied two coats of Surfix Heavy Duty oil, which brought out that rich red color of the Ipe:
View attachment 10
View attachment 11
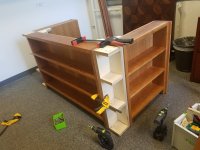
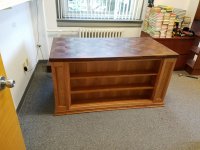
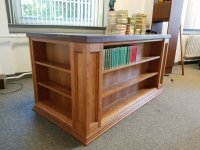
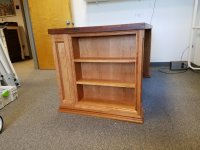
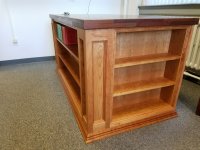
Next up, the base of the desk.
First up, the anchor of the whole space, which is the desk.
Over the winter I did a commission for a series of table tops for a Japanese restaurant that employed these 12" x 2.75" x 3/4" Ipe offcut scraps I had sourced from a friend who had earlier done a large outdoor furniture project:http://festoolownersgroup.com/member-projects/ipe-offcut-table-tops/ Although I used maybe 7-800 of the pieces I had rescued, I still had a few hundred taking up space in the corner of my shop that I did not have the heart to toss after the commission was completed, so I decided to make another dent in the pile by using the same process for the desktop.
You can consult the Ipe offcut table thread for specific details about the process -- it's actually a lot quicker than you might think, as it's just a question of setting the stops on the miter saw, and then cut cut cutting your way to the necessary number (in the case of the table, it was 216 pieces for the interior pattern, and around 240 total including the outside border). The one major change I made vs. the table build was that I used a thicker 1" BB plywood substrate, and I was also more diligent about applying pressure on the pattern while they were setting in the adhesive. I had done this only intermittently on the tables, and I ended up having to resand some of them level after there was more settling of the pieces in the adhesive.
View attachment 1
View attachment 2
View attachment 3
The other difference was that I spent several mind-numbing hours chamfering the edges of all the pieces with a quick pass of a 1/16" radius roundover bit mounted on the router table so that there would be a more consistent grout line in the resulting pattern
View attachment 4
I cut the whole thing to size, then added a rabbet to inlay some pieces to cover the ply edge:
View attachment 5
View attachment 6
After some rotex sanding to level everything out, I mixed up and applied West System epoxy to fill the gaps. I decided to go with epoxy filler after experimenting with various methods on the restaurant tables and finding them less than optimal. The solution I eventually settled on was to use a liquid sanding sealer that dried to a rubbery consistency, and so did not crack when there was the inevitable wood movement in the pieces. But the application and reapplication process for that took a really long time, and with the chamfers on the desktop there was a lot more space to fill, which is why I ultimately went with the epoxy, tinted with a few drops of dark walnut transtint dye.
View attachment 7
I worked mostly with syringe applicators, though you can see near the top where I got impatient and started pouring the mixture.
Worked off the bulk of the dried epoxy with the RAS and 100 grit paper
View attachment 8
Even after a few spot reapplications there was still some cracking that developed:
View attachment 9
I eventually just resigned myself to accepting this, trusting that the epoxy would hold in place. Just looking at how the wood behaves over the past two weeks, I've noticed that these cracks open and close periodically depending upon the climate.
Finished up the top with the Rotex and ETS-EC 150/5 up to 180 grit, and then applied two coats of Surfix Heavy Duty oil, which brought out that rich red color of the Ipe:
View attachment 10
View attachment 11
Next up, the base of the desk.
Attachments
-
 20180621_180125.jpg679.7 KB · Views: 412
 -
 20180708_102028.jpg825.6 KB · Views: 514
 -
 20180627_092930.jpg297.5 KB · Views: 320
 -
 20180627_092943.jpg770.1 KB · Views: 334
 -
 20180626_095038.jpg669.4 KB · Views: 322
 -
 20180625_162137.jpg381.4 KB · Views: 357
 -
 20180623_184436.jpg595.5 KB · Views: 186
 -
 20180623_172749.jpg626.6 KB · Views: 258
 -
 20180622_165136(1).jpg705.6 KB · Views: 329
 -
 20180621_184419.jpg680.7 KB · Views: 203
 -
 20180621_183159.jpg154.8 KB · Views: 390