WoodWhisperer
Member
- Joined
- Jun 25, 2013
- Messages
- 175
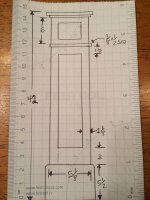
Start off by saying I loved building all the parts for the stairway. Installing a pre-finished stairway, not all that fun! I spent countless hours in the shop building the 20 newel post, milling the landing treads, and sanding all the pieces and parts.
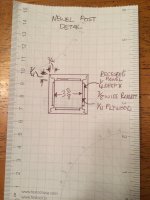
I used a locking 45 corner for the newel post. First time I used the locking 45 on a project. I loved how they worked. It's a lot of set up but worth it when u are running a lot of corners. I used over 50 kreg jig screws per newel post.
From start to finish, it took me and a helper almost 6 days to remove the old stair parts and install all the new parts.
All the parts were poplar. Once I finished building all the parts, I packed them up and took them to our painters shop. He stained everything with an ebony stain and then lacquered.
We removed the iron spindles and reused once everything was replaced. The existing stairs had carpet wrapped around the exposed tread. The whole reason for redoing the stairway was because the customer wanted wood tread caps installed. Then they decided they really didn't like the stain color of the existing stairway. It was only 10 yrs old but whatever!!
Thanks for taking a look!
Sean
Attachments
-
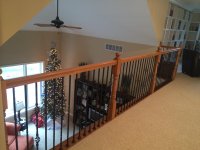 image.jpg630.7 KB · Views: 881
 -
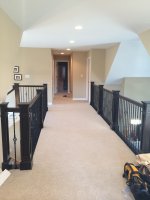 image.jpg529.9 KB · Views: 605
 -
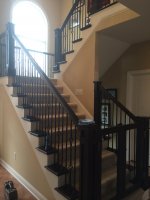 image.jpg484.5 KB · Views: 676
 -
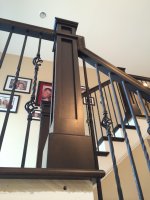 image.jpg537.1 KB · Views: 609
 -
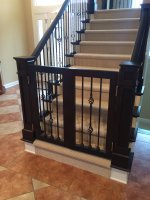 image.jpg667 KB · Views: 638
 -
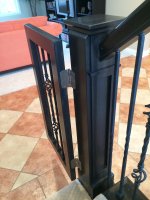 image.jpg584.4 KB · Views: 510
 -
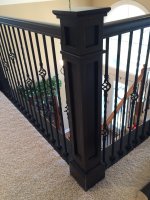 image.jpg799.4 KB · Views: 446
 -
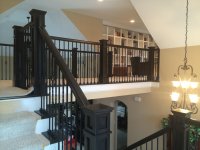 image.jpg539.2 KB · Views: 539
 -
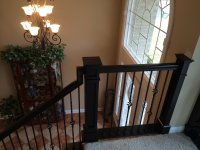 image.jpg569.5 KB · Views: 544
 -
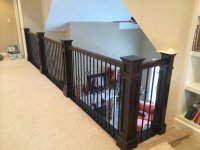 image.jpg574.2 KB · Views: 807
 -
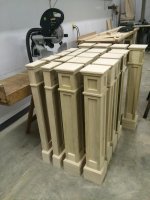 image.jpg583.7 KB · Views: 652
 -
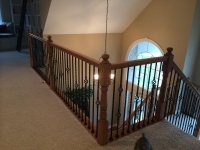 image.jpg628.6 KB · Views: 654
 -
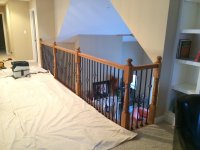 image.jpg514.6 KB · Views: 653
 -
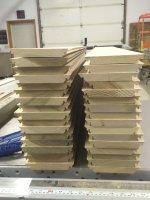 image.jpg503.1 KB · Views: 707
 -
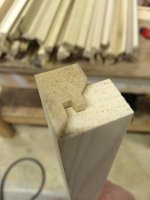 image.jpg439 KB · Views: 745
 -
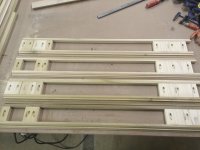 image.jpg529.9 KB · Views: 817
 -
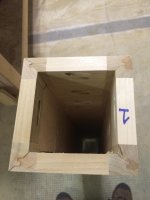 image.jpg445.2 KB · Views: 806
 -
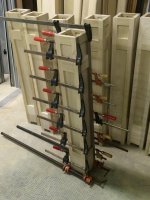 image.jpg559.8 KB · Views: 772
 -
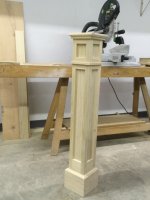 image.jpg441.9 KB · Views: 760
")