OF1400 - Repeatably Routing Grooves for Drawboxes / Table Mounting

jiffff

Member
Joined
Feb 5, 2019
Messages
26
Hello,

I'm about to build 20 drawboxes. The front/backs/sides all need to have a 15mm groove routed in them, 12mm from the bottom edge to enable the 15mm draw-box base to sit. It's my first time building them.

Nearly all of the videos I've watched show people using table mounted routers with grooving bits to quickly pass through the material and generate the groove. Given the wood is resting against the table; and the router is in a fixed position; the groove spacing from the edge of the board is identical.?

I'm wondering two things:

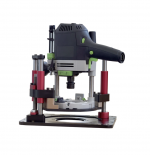
- Are there any solutions (other than the CMS) for under-mounting the 1400? Are they recommended?

- If I was to use the OF1400 on a festool rail to route the grooves, can anyone suggest the best workflow, clamping approach? I've got 80 pieces to groove and will be working to tight tolerances. The workflows I can think of seem quite cumbersome.

I must admit, I'm more and more attracted to the idea of a table mounted router. While I was enough of a believer to buy the OF1400, I've not quite gelled with the use of the router on a rail; and I find that so much of what I'd like to be routing seems easier with a table setup. I'm sort of wondering if I'd be better selling my barely used OF1400 and investing a table-mount kit. The obvious downside for that is that I'm extremely limited for space; so for the time being; I'd probably have to go with one of those 'mini router table' kits, rather than something in a nice big bench.

Grateful for any thoughts!

 
There is always more than one way to do things (if you think about it before you start cutting).  Remind yourself of that.  If you don't have a table mounted router, can you use an edge guide with the router on a full sheet of plywood?  Route the groove along the edge, then do your rip cut.  Groove the new exposed edge on the plywood sheet, then rip, and so on.  The full sheet of plywood makes it much easier to have a stable surface to plant the router and you can add a clamp to keep the sheet firmly in place.  You'll only run into trouble on the very last piece you groove, but that depends on how much material you have left.  You can get creative with that one if you have to.  When you're done, do all your cross cuts.
 
Can you use one half of a tongue and groove set (or a similar adjustable groove bit)? Once you get the cutting height dialed in, you can just run it along the edge of the board and use the edge guide (if you have one), or use another straight piece of wood on top as a reference surface, as RKA suggested.
 
Building a router table is a very simple job. A Porter Cable router motor,  a lift, a mounting plate, and some plywood are all you need. Even simpler would buy a cheap plunge router and a universal mounting plate And skip the lift although a lift is a nice feature. High volume routing like you describe is perfect for a router table.
 
A Triton router is inexpensive and I believe the best router for use in a table. It has automatic spindle locking when you raise the bit to change it, and through the table height adjustment.

It is beyond me why people would buy an expensive router and a lift for a table.

I love Festool routers - I have the 1010 and the 1400 - but would not dream of using them in a table.

Andrew
 
Another vote for the Triton. I picked up a TRA001 router and a RTA300 stand second hand a couple of years back and the set up has performed really well. The router is rock solid and so easy to adjust height and change bits. As Roseland says the spindle locks automatically when raised to change bits (it also wont raise unless the power switch is locked off too).

I've made a few modifications to the old table top. Havent worked with the new Triton table so cant comment on that.
 
I just looked at the Triton product and accessories for a router table. Very impressive.
 
Thanks for all the replies and ideas. I've already cut my stock to size, so some of my options are a bit constrained. I think I'm leaning towards selling my OF1400 and getting the Triton or similar. Looking to the future, I think my requirement for freehand routing is quite limited and while there will be some exceptions, I think something table mounted will suit my needs better.

[member=72891]AstroKeith[/member] - Is the RTA300 the predecessor to the TWX7 and router insert? Any specific modifications you needed to do to the table?

I've had a look at the TRA001 - looks like it generally gets a great review for table mounting. I'm wondering what sort of table/insert/fence setup would suit me best. I'm on a bit of a budget, so a really meaty cast-iron affair isn't currently on the cards. I've looked at the TWX7 with router insert, which is really a bit more than I'd want to spend - but could stretch to if necessary. But I don't have a need for the 'work station' as such. I use the MFT/3 at the moment which covers most of that and am currently workshop-less - setting up outside until I get my shed built.

I'm wondering whether there is a standalone table that will happily accept the TRA001, or if there is merit in a more temporary 'slab of wood with a recommended insert/fence' combo which I can just put across my saw horses for the time being.

Many thanks.
 
My modifications to the table are,

Replaced MDF fence pieces with Aluminium track/fence, primarily so as to be able to add adjustable stops.
Made a removable plain plywood insert to replace the slide assembly when I'm not using the slide.
Added some extra guides under the slide to take up a bit of slack present.

Looking at the new table, none of these would be necessary. But also it doesn't look like the new table has track slides in the main working surface. Seem strange.

I would make an insert (or get a Krug one) and mount the TRA001 on a good solid wood table, and add some track slides yourself. As for  fence - Think thats very much a personal choice.

If you can afford it I'd keep the OF1400. The TRA001 is a big beast and I leave mine under the table permanently. I find the OF1400 a joy to use.
 
I echo AstroKeith's comments; try and keep the OF1400.  The Triton is great in a table but a bit cumbersome when handheld.

Just buy a Triton and router insert plate like this:https://www.axminstertools.com/ujk-technology-10mm-aluminium-router-table-insert-105932
and make your own table and fence; it's really not that hard.

(I think Axminster's description of their plate is wrong, I don't think this version is actually 10mm thick).

Good luck!

Andrew
 
Another option: get the edge guide for the OF1400 and mount it upside down in a vice. It'll be good enough "router table" that takes up minimal space. Obviously, if you are using a router table more often, then yeah, a minimal portable router table may serve you better.
 
[member=69877]jiffff[/member]  I fully endorse Triton option for the future.

For the present, though, the edge guide for the 1400, as someone has already suggested, would seem to be the best solution, as it will easily give you the repeat cuts.

Clamping/work holding appears to be your main issue though, if I understand you correctly.  Are your boards tall enough such that there will be some amount of the top edge (the edge opposite the groove) exposed so that you can clamp that side while still having clearance for the edge guide rods?  If there is, then you could just use a scrap piece of plywood, make some holes near the opposite edge being routed, and pass from underneath the heads of some short clamps (or the festool lever clamps) to secure the board down while it's being routed.  If instead the boards are fairly narrow, such that the router base will be covering most or all of the board, then I would make a jig on a piece of plywood that held the boards captive on the three sides not being routed, but which allowed the groove edge to hang slightly over the board to give clearance for the router (obviously the naildown boards have to be of an equal or lesser thockness than the drawer elements).  You will have to do two different configurations to do the front/back and sides.  If you are doing stopped dadoes on the front and back, then make sure to put a mark on the board (or the naildown board if the drawer board is fully covered by the router base) where to start and stop the plunge.


Attachments

  • Router jig.jpg
    Router jig.jpg
    424.4 KB · Views: 315
I would clamp a board or straight-edge clamp to the bench, line up a bench worth of drawer sides against the straight edge, align the rail for the proper position and cut away. I have found routing with a guide rail equal or superior to table routing in many situations, and I've been using a router table since the early 80s. I might not approach this project with guide rail in mind at first, but I wouldn't go out and buy a router table to do the job when I had a perfectly capable system in my hands.
 
This Jessem Router lift will take your OF1400. Simples to build a table around it, and add a basic fence.

It's the usual Jessem quality (I have one)

[attachimg=1]


Attachments

  • Screenshot 2020-06-03 17.09.33.png
    Screenshot 2020-06-03 17.09.33.png
    539.2 KB · Views: 970
I'm sure the Jessem lift is beautifully engineered, but what will an OF1400 and Jessem lift do that a Triton router won't at about a third the cost?

I have no connection with Triton, other than as a satisfied customer, but I honestly believe it's a better solution than using a premium router and lift.

Andrew
 
With that number of pieces to process without a router table, I was thinking along the same lines as ear3 - i.e. making a pair of jigs (always a nice way of working, I find - somehow makes me imagine I’m more “professional” than I really am)… though I think I’d enclose the workpiece on all sides with same thickness material and, if not doing stopped dadoes, just run the router through the ends of the jig as well as the piece.

Obviously the right hand side outside edge of the jig has to be parallel to to the edge of the workpiece if using an edge guide. Alternatively use an improvised rail/straight edge held, removably, over the workpiece by dowels into the surrounding jig material. With the jig held down securely, hopefully there’s no clamps impeding the router travel and no need to keep clamping and unclamping drawer parts from the bench - just drop them into place for each cut. A bit of prep work needed, but a satisfying way of zipping through all those grooves?
 
jiffff said:
. I think I'm leaning towards selling my OF1400 and getting the Triton or similar.

Hi [member=69877]jiffff[/member] , I'd be interested in buying your OF1400 if you go that direction.

Mark
 
why not simply just use the 1400 with a edge guide?

You can route the ply full length say 8 ft use your guide rails and PG to rip it to width and repeat

 
jobsworth said:
why not simply just use the 1400 with a edge guide?

You can route the ply full length say 8 ft use your guide rails and PG to rip it to width and repeat

I think all the pieces had already been cut to size, hadn't they?
 
Back
Top