I've been doing some cabinet doors using Osmo Polyx and for the most part, they are turning out very well. I like the application, and the feel of the finish is great.
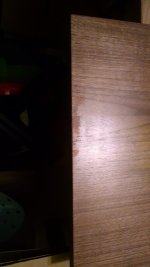
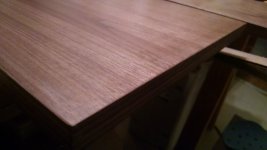
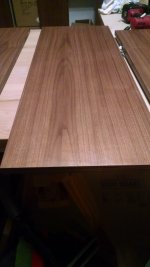
Occasionally, there appear to be some 'dry spots' on the doors when viewed from certain angles. I've attached a few photographs of what I'm referring to. These spots don't seem to follow a consistent pattern, and are present even after the second coat.
For my part, I've been sanding everything to 220, and filling the fronts of the doors with a water based grain filler (timbermate). Then I am resanding at 220 with both a Rotary sander and finishing up with the grain by hand with a mirka block.
I've been using a white abrasive pad to apply the OSMO and have been diligent about 1) using a raking light and 2) applying extremely sparingly. I am applying the OSMO in a pattern similar to a french polish. Once I have worked the oil into every part of the surface, I finish with strokes going with the grain. Finally, I am removing any excess with a shop towel, until the surface looks more 'buffed' than 'wet'.
From most angles, everything looks great and the feel is wonderful. But, as the photos illustrate, there are spots where the wood looks 'dry', even though I've carefully applied material to these areas. Those dry spots are not visible from every angle, and sometimes a spot that looks 'dry' will look fine from another perspective.
Hoping someone can offer some insight into what could be going on here. I'm sure my grain filling job could have been better, but I also know there are areas with filled grain that don't demonstrate this issue. I'm wondering if the finish somehow wasn't fully emulsified when I applied it?
Thanks,
Adam