Pair of arch-topped bookcases/finished

Crazyraceguy

Member
Joined
Oct 16, 2015
Messages
5,046
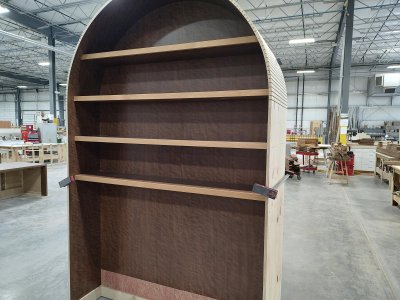
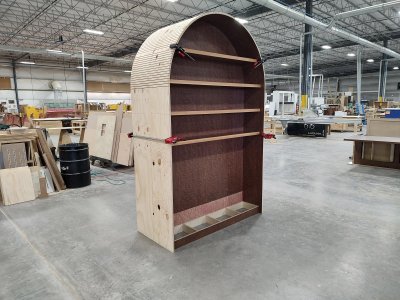
They will likely be more display cases than books, but the concept is the same. They are identical and will flank a large fireplace.
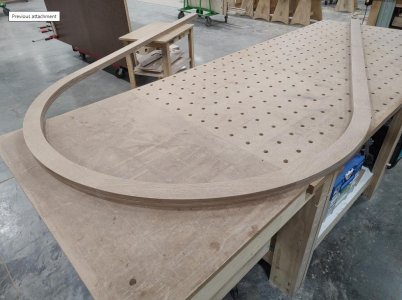
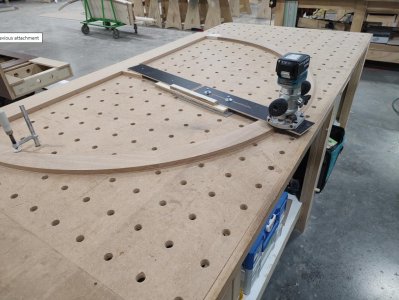
So far, I have just cut out the backs and shelves, along with the rough shaping of the arches for the face trim.
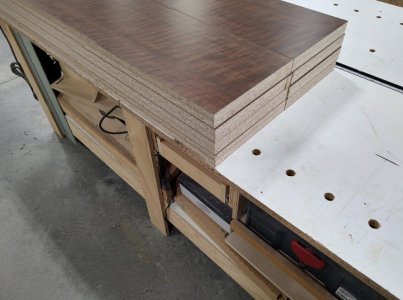
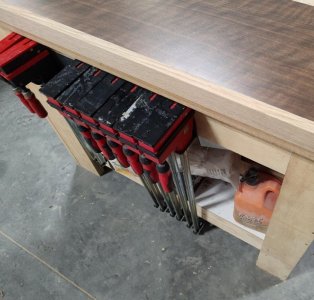
The shelves are 1 1/2" thick, with a Rift White Oak front edge. This is my main reason for the zero-degree base modification, on the MFK700. I do this kind of thing a lot.
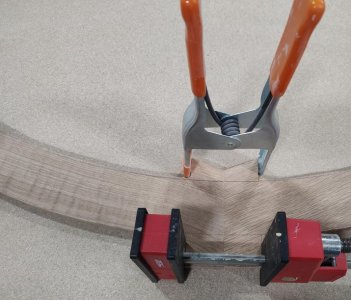
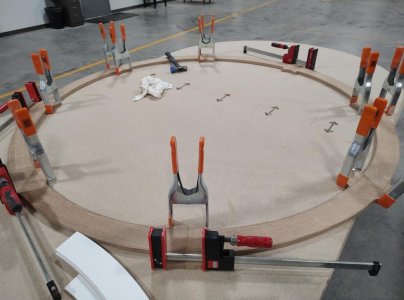
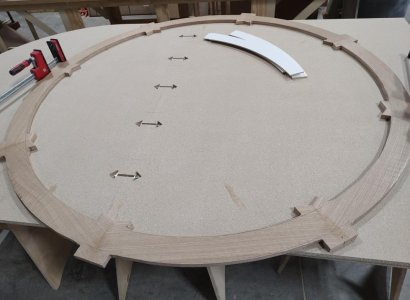
The face frame is a glue-up of segments. Fourpieces with 22.5 degree mitered ends, for each one. In the pic below, both halves are attached to each other. This not only "proved" my angle settings, it also assured me that they are indeed equal in size.
The clamping ears are something that I learned so long ago that I don't even remember where I saw it, but it drew comments from several people, who had never seen it.
They are quite large 65" wide and 110" high, nothing like that under-staircase unit from last year, but still impressive.
 

Attachments

  • Dublin SS bookcase shelves.jpg
    Dublin SS bookcase shelves.jpg
    127.1 KB · Views: 60
  • Dublin SS bookcase shelf edge.jpg
    Dublin SS bookcase shelf edge.jpg
    104.7 KB · Views: 54
  • Dublin SS bookcase frame joint.jpg
    Dublin SS bookcase frame joint.jpg
    126 KB · Views: 52
  • Dublin SS face frame arches.jpg
    Dublin SS face frame arches.jpg
    114.5 KB · Views: 53
  • Dublin SS face frame .jpg
    Dublin SS face frame .jpg
    121.6 KB · Views: 55
I trimmed/cleaned-up the arches today, after making a quick little jig to hold them in place. The adjustable trammel made it so I could make incremental cuts, to avoid tear out. White Oak does not play well with cutting uphill into the grain, so a few light cuts increase the chances of it going well. It worked out, the cuts were as nice as you could ask for.
The straight sections are still loose, to make finishing easier. They will go to the finish dept tomorrow, while I get started on the main cases. It is really nice to use a cordless router with a trammel, no cord wrangling needed.
 

Attachments

  • Dublin SS bookcase frames.jpg
    Dublin SS bookcase frames.jpg
    144.3 KB · Views: 28
  • Dublin SS bookcase frame trammel 2.jpg
    Dublin SS bookcase frame trammel 2.jpg
    142.4 KB · Views: 25
  • Dublin SS bookcase frame tramel.jpg
    Dublin SS bookcase frame tramel.jpg
    158.2 KB · Views: 36
Nice work!

As an avid booklover, it always gives me a little more hope for humanity when I see bookcases in use or being built!
 
I’ve cut a couple of large arches. For those attempting this, if the arch does not look perfect, the project tends to look like crap.

I rough cut my arch with a hand held jigsaw. I made the finish cut with a router. I got about equal quality results by using a trammel-point directly attached to the part to be cut and using a straight cut bit to trim the arc.

Alternatively, I used the trammel point guide to make a template and clamped the template to the stock and then used a bearing guided bit to trim.

If I was making several arches, I would probably make a template. No noticeable difference in results though.

However, if you are planning on just drawing the arc and cutting it with a jigsaw, your skill set would have to be exceptional or the results will betray you.
 
Last edited:
Finished, except for the face frames. (They are still in the finish department) They are clamped back to back, just to stabilize them. 9 feet tall and only 15" deep, not so great free standing. They get cabinets, on the toe kick platforms, and a quartz top. All that will happen in the field, they're already pretty heavy.
 

Attachments

  • Dublin SS bookcases3.jpg
    Dublin SS bookcases3.jpg
    412 KB · Views: 23
  • Dublin SS bookcases.jpg
    Dublin SS bookcases.jpg
    352.7 KB · Views: 25
  • Dublin SS bookcases 2.jpg
    Dublin SS bookcases 2.jpg
    451.9 KB · Views: 23
Are the ends of the top shelf bevelled or rounded? If they're rounded, how did you cut the profile?

Thanks
Bob
Bob, they are just bevel cut. The second one down at 4 degrees, top one at 26 degrees. The 4 degree ones are so minimal that the screws pull the gap out totally. The uppers to have a tiny gap, but they are so far above your head, you'll never see it. That upper shelf also covers 90 % of the seam too. There are a couple of inches of it exposed, but again way over anyone's head.
 
Back
Top