Gerald_D said:
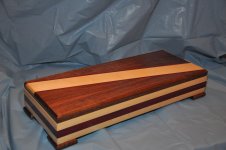
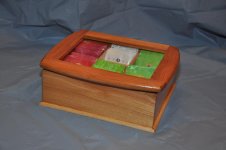
Hoping someone can help me understand what I'm doing wrong. Any time I try to take pictures of my work, I cannot seem to get a quality picture. The attached pictures were taken with a Nikon D90 with SB900 flash, lense 18-105mm, ISO2500, 1/125s, and f stop of 4.2 and 5, respectively. After reading another post, I'm guessing I need better lighting but, before I go spend some serious $$ on lights, I want to make sure. I love landscape/nature photography, but am a complete beginner on the 'studio' thing.
I shot with a D300 for years. The D90 uses the same sensor. ISO2500 is really way too high for that sensor; I tried hard to never go beyond ISO1600, otherwise the sensor grain would just become too much. The SB900 is definitely powerful enough to light this at ISO200 using the Fstop you listed.
Honestly, looking at the photos you posted there's nothing specifically *wrong* with the exposure. My guess is that you might be using the camera on Auto or maybe P-mode? For consistency, one of the first things I always do when doing product photography is to set it the camera to manual, ISO200, 1/250th of a second to kill all the ambient (you can bring it back in later as needed), at F8 in order to get the whole box in focus (if that's not want, open up the F-stop and choose the depth of field that makes you happy ... this is just a starting point).
Then take the SB900 and remove it from the camera and stick it somewhere to your left. Start the power somewhere at 1/32 or 1/16. As others have suggested, you want to diffuse the light. If you don't have something like an umbrella, you can bounce the light off a white wall or even a piece of white foamcore poster board. You're just trying to make the light appear larger than the object you're lighting. Just remember: when it comes to lighting, the bigger the light appears in relation to the object, the softer the light will appear to be. You don't need huge lights to do this stuff.
One of the best resources you can go to to learn more about lighting is
the Strobist. That's where I picked up almost all of my lighting knowledge.
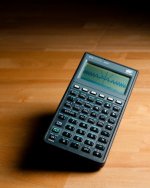
If it helps any, here's a few photos to compare. The Veto Pro Pac was shot with a D800 at F5, ISO100, 1/250th. There's one SB900 on the right side of the picture, just out of frame, in a small 15x15 softbox (but I could have easily used an umbrella). I think I was shooting at 1/8th power. There's an SB800 coming from the top of the photo with a small 6 inch softbox just to get the rim light along the left side. That was around 1/32nd power.
The HP calculator photo was shot with a D300 at F8, ISO200, 1/250th. There's one SB900 on the right side of the picture, just out of frame, in a small 15x15 softbox. It was about a foot away according to my notes. I didn't record the power setting, but if I had to guess, it was probably 1/16th or so.