Post #1000 - First Major Festool Project - Reclaimed Bookshelf Conversion

squall_line

Member
Joined
Feb 17, 2021
Messages
2,922
I figured if I was going to have quad-digit posts on here, maybe it should be more than kvetching, kibbitzing, and posting Recon notices.  So now that I'm on post #1000, it's time for a project post.  But I don't have time to start a new project (I have some Sys Ports to build next), so here's one whose memory popped up in my photos feed last week.

Reclaimed Bookshelf Conversion

Material: 3/4" mahogany?, reclaimed from a law office; pine 2x4 base
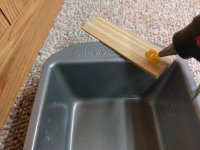
Assembly method: screws, corner brackets for base, nailed backer board for rigidity, hot melt wood glue for shims
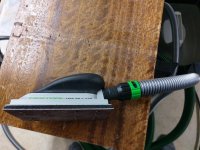
Festools used: HKC 55 with FSK 420 rail, CXS, RO 90, CT MINI, HSK 80x133 Hand Sanding Block
Other tools used: Craftsman C3 drill, Milwaukee 7 1/4" circular saw, Swanson straight edge, Irwin Quick Clamps
Finishes used: Minwax Oil-modified water-based polyurethane, Zinsser Cover Stain Oil-based Primer, Easy Care Ultra Eggshell interior latex paint (True Value house brand)

The donor
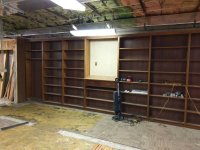
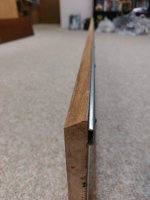
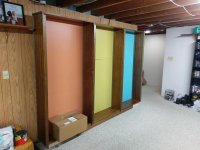
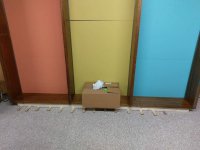
Even though this project was completed at the end of March, 2021, it all started a little over a year ago when I saw a listing on Facebook Marketplace for solid wood built-ins that were being removed from a law office remodel.  I needed shelving for the basement of our new house for all of my CDs, and this felt like it would be a "cheap" and fun way to do it (note: it had its fun moments, but it was not cheap).  I took a trip to go see the shelving in person and found the entire office was in the middle of demolition.  The wood appeared (and still appears) to be mahogany, and during demo I found "Japan" stamped on the ends of some of the boards.  They had likely been there since the mid-60s when the office was originally built. 

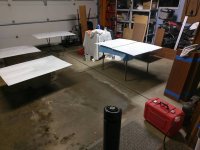
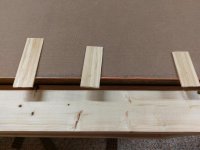
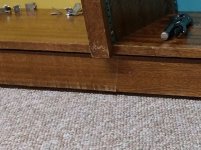
Considering they held a law library for over 50 years, they were remarkably free from major bowing.

[attachimg=1]

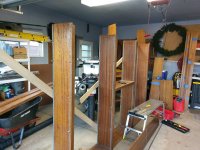
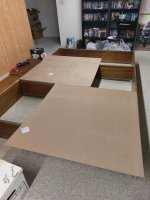
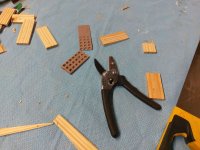
The seller said that he had someone else interested, but the other person "only really needed the left half". Good news, I only really had enough projects in mind for the wood from the right half!  So a few days later, my wife and I rented a U-Haul (which is its own long, annoying story) and headed out with tools in hand to start to demo the shelves and load them up.  I really wish I had taken pictures of the demo, but it wasn't terribly exciting: mostly pry bars, hammers, and linesman pliers to pull the myriad nails out of everything.  The best parts of the demo: it was my first major preservation-minded demo, and it was the first major project my wife and I worked on together without getting in each other's way or on each other's nerves.

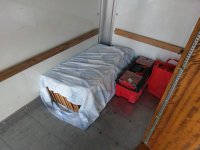
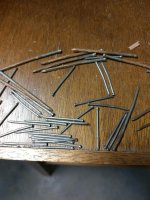
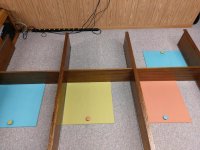
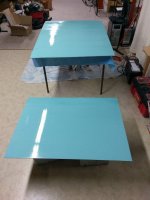
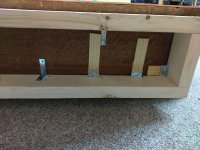
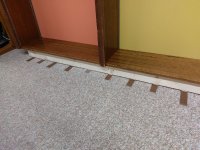
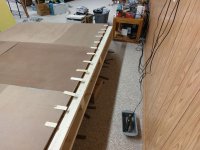
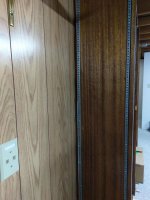
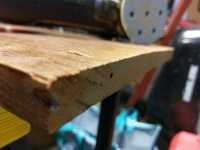
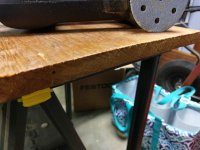
The main shelves were all stationary and nailed in place, but there also happened to be a set of adjustable shelves left behind that had seen some better days.  All of the shelves had already been claimed, but the pilaster strips and clips were all present and accounted for, so we left it in one piece and moved it into the truck by itself.

[attachimg=2]

[attachimg=3]

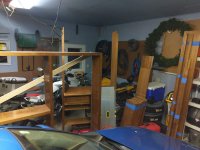
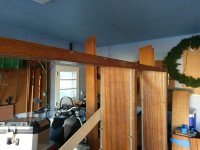
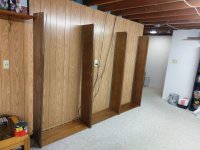
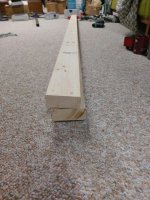
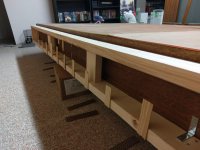
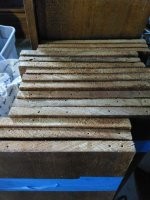
It took up quite a bit more space in the already full garage than I had anticipated.

[attachimg=4]
 

Attachments

  • 001-BuiltInBefore.jpg
    001-BuiltInBefore.jpg
    79.8 KB · Views: 392
  • 002-LoadingUp.jpg
    002-LoadingUp.jpg
    78.3 KB · Views: 412
  • 003-LoadingMore.jpg
    003-LoadingMore.jpg
    64.6 KB · Views: 392
  • 004-PileMessyGarage.jpg
    004-PileMessyGarage.jpg
    80.5 KB · Views: 367
Further demo work
Unfortunately (or fortunately), the built-in shelves were almost 3 inches longer than the adjustable shelf openings, so I had two options: shorten all of the shelves, or widen the openings in the carcass.  Since the adjustable carcass was about 12' long and I only had a 9' space to use, I went with "widen the openings but use one fewer bay".  Then it was time to get to work on demoing the adjustable shelves.

[attachimg=1]

[attachimg=2]

So. Many. Nails.  These things weren't going anywhere in that office.

[attachimg=3]

[attachimg=4]
 

Attachments

  • 008-Toenails.jpg
    008-Toenails.jpg
    77 KB · Views: 397
  • 007-NotGoingAnywhere.jpg
    007-NotGoingAnywhere.jpg
    113.8 KB · Views: 391
  • 006-MoreDisassembly.jpg
    006-MoreDisassembly.jpg
    95.1 KB · Views: 401
  • 005-StartDisassembly.jpg
    005-StartDisassembly.jpg
    91 KB · Views: 393
Test Fitting
I dragged the uprights into the basement with some of the fixed shelves as spacers for a test fit.  Almost like the space was designed for it (or like I measured beforehand)!  When it came time to shorten the top and bottom pieces from the original shelf, I used my HKC 55 with the FSK 420 rail and took beautiful, clean, square cuts off of the ends.  In fact, I used my HKC 55 for all of the hardwood cuts and trims in this project.

[attachimg=1]

My vision was for the back of the shelving unit to match the colors on a set of desks that came with the house when we moved in two years ago.  Testing out locations for each of the colors and figuring out how to line up the 1/8" hardboard backer.

[attachimg=2]

[attachimg=3]

This was truly built in place when it was originally installed; the back was beveled to get it to wedge into the corner where it originally sat. This made adding a backer a bit difficult because there wasn't a surface to nail into. With the pilaster strips against the rear edge of the board and the shelves cut to match, the backer couldn't be dadoed in without significant extra effort and hassle.

[attachimg=4]

"Easy" solution:  The face fame is 1 5/8" wide, the boards are 3/4" thick, so I grabbed a spare board and attached it to the end of the unit and covered the seam with the face frame.  This gave me the meat I needed to attach the backer board and doesn't look terribly out of place. No pictures of that, unfortunately.

I didn't want to re-stain any of the wood and I wanted it to maintain some of its reclaimed charm, so the 80x133 sanding block with extraction was my main weapon of choice to clean up any polyurethane ridges and sand between new poly coatings.  I used oil-modified water-based Minwax poly to give me the yellow look of oil with the easy cleanup of water-based.  This was easier in my head than in practice because I was putting water-based poly over oil-based poly.  Even with sanding, it beaded up more than I wanted.

User note: the non-anti-static hose is very non-anti-static.  I got a jolt or two after walking away from the table during the process.

[attachimg=5]
 

Attachments

  • 013-LightSanding.jpg
    013-LightSanding.jpg
    190.2 KB · Views: 389
  • 012-NowhereToNail.jpg
    012-NowhereToNail.jpg
    48.7 KB · Views: 393
  • 011-BackerTest.jpg
    011-BackerTest.jpg
    84.5 KB · Views: 391
  • 010-ColorTest.jpg
    010-ColorTest.jpg
    125.8 KB · Views: 368
  • 009-SpacingTest.jpg
    009-SpacingTest.jpg
    90 KB · Views: 395
I Want to Paint the Back
Priming the hard board for paint after cutting it.  When I started this project, I only had the RO 90 and a CT Mini (OG).  I grabbed an HK 55 and HKC 55 from Recon partway into the project, and splurged on a brand new CXS about halfway through.  I used my old Milwaukee 7 1/4" circular saw with a straight edge to size down the hardboard backer.  I used oil-based Zinsser Cover Stain which meant application out in the garage.  I found a warm-ish day in February, but still had to open the door to the house and draw warm air into the garage to get it up to a moderately acceptable working temperature.  I almost got it up to 50, which still meant LONG drying times.  Also, I learned never to do it this way again.  Even with light sanding between coats, there were horrific brush marks.  Warmer temps, a better application method, or maybe even a different primer are all on my list for the next time I need to paint something that absorbs water so readily like hardboard.

[attachimg=1]

[attachimg=2]

Two colors done and dry, laid out to ensure sizing.

[attachimg=3]

Final color, probably the second coat.  This was latex, so I did it in the basement.  It wasn't scentless, but it was better than waiting for warm weather in the garage.

[attachimg=4]
 

Attachments

  • 014-Primer.jpg
    014-Primer.jpg
    68.2 KB · Views: 392
  • 015-NotIdealConditions.jpg
    015-NotIdealConditions.jpg
    49.3 KB · Views: 388
  • 016-TwoColorsDown.jpg
    016-TwoColorsDown.jpg
    192.5 KB · Views: 387
  • 017-FinalColor.jpg
    017-FinalColor.jpg
    83.8 KB · Views: 386
Creating a Built-in Look
I wanted a built-in look, so I built a 2x4 frame to set the shelves on.  Here's the first test standing it up.  I attached the back with panel nails, but they didn't want to go into the mahogany.  I purchased my CXS the day before attaching the panels, so I busted it out and pilot drilled all of the panel nail holes.  With the CXS, it was a joy to just drill, nail, drill, nail.  I love that little thing.

[attachimg=1]

Um, um, that's not plumb...

[attachimg=2]

Here's at least one culprit: One of the 2x4s warped horribly once it was home and in the basement. 

[attachimg=3]

Off to Menards for another 10-footer; fortunately this was before lumber prices were completely out of control.

Even with a new 2x4, there was just enough of a twist left that I couldn't get the unit to sit flush on the 2x4s.  Shims are cheaper than my sanity, so out they came.  Screwed into place for good measure.

[attachimg=4]
 

Attachments

  • 021-StartingToShim.jpg
    021-StartingToShim.jpg
    99.8 KB · Views: 362
  • 020-BORG2x4.jpg
    020-BORG2x4.jpg
    143.5 KB · Views: 358
  • 019-NotLevel.jpg
    019-NotLevel.jpg
    127 KB · Views: 380
  • 018-TestFit2.jpg
    018-TestFit2.jpg
    82.6 KB · Views: 390
Getting Things Plumb (but not Plumbing)
With that out of the way, we're still dealing with a basement which is poured with a natural slope towards a floor drain.  There is also a nasty lump under the left hand side right against the wall.  I could try to pull the carpet and grind down the lump or just deal with it.  My brother recommended scribing the frame to match the floor.  Without a good reference for both boards (they each had a different issue), I decided to shim under the frame as well.  I was looking for either dead plumb or leaning slightly back towards the wall for stability.  Which reminds me, I still need some anti-tip straps at the top...

Out come some more shims.  Wood on top, composite underneath, in a traditional opposing wedge setup.

[attachimg=1]

Ahh, much better.

[attachimg=2]

I used some garden shears to score and cut the wood shims; they worked rather well, all things considered.  Then lay them all out, make sure they're numbered, and get them in place.  I chose to use hot melt wood glue for its fast set time, which allowed me to stand the cabinet back up after only a few minutes.

[attachimg=3]

[attachimg=4]

[attachimg=5]

[attachimg=6]

[attachimg=7]

With the wood shims in place, I went composite underneath, which dragged nicely across the carpet and gave me an easier, thinner end to score and snap off.

[attachimg=8]
 

Attachments

  • 029-ShimMates.jpg
    029-ShimMates.jpg
    151.9 KB · Views: 385
  • 028-ReadyToLift.jpg
    028-ReadyToLift.jpg
    109.6 KB · Views: 375
  • 027-HotWoodGlue.jpg
    027-HotWoodGlue.jpg
    87.4 KB · Views: 378
  • 026-NumberEverything.jpg
    026-NumberEverything.jpg
    96.1 KB · Views: 381
  • 025-ShimPrep2.jpg
    025-ShimPrep2.jpg
    136.4 KB · Views: 373
  • 024-MakinShimmies.jpg
    024-MakinShimmies.jpg
    186.4 KB · Views: 379
  • 023-MoreLevel.jpg
    023-MoreLevel.jpg
    108.6 KB · Views: 375
  • 022-ShimOrScribe.jpg
    022-ShimOrScribe.jpg
    48.7 KB · Views: 381
Still Rough Around the Edges
Now, about those shelves...  This was definitely a built-in, fixed shelving unit.  About the only smooth face on any of the boards were from the factory.  I can't even figure what was used to cut these and leave them so ragged.  Definitely a hand saw based on some of the saw marks, but the others almost look like they were just scored and snapped.

[attachimg=1]

RO90 and some 40 grit to the rescue!  A RAS-115 would have been a MUCH better choice, in hindsight (and if I had a RAS, which I don't). Alas, the RO90 hadn't gotten much love in the 4 1/2 years since it was purchased, so it got tagged in.  I wasn't going for butter-smooth, I just was tired of catching splinters and slicing my skin on the crusty remains of the poly that was dripped over the edges (another indication this was both built and stained in place).

[attachimg=2]

[attachimg=3]
 

Attachments

  • 032-NoMoSplintahs.jpg
    032-NoMoSplintahs.jpg
    51.7 KB · Views: 346
  • 031-RO90ToTheRescue.jpg
    031-RO90ToTheRescue.jpg
    98 KB · Views: 376
  • 030-RoughEdges.jpg
    030-RoughEdges.jpg
    135.4 KB · Views: 384
Putting it All Together
First shelves in place, strategically located at the seams between the panels.  A face frame scrap is laid on the top for a visual aid for the finished look.

[attachimg=1]

More shelves installed, and the face trim and kick plate applied.  In retrospect, I should have grabbed the 15' long piece of kickplate trim that was at the law office, since I ended up with barely 3 inches more trim than I needed.  I had to piece the front together, so I used my HKC 55 to make a beveled and mitered scarf joint.  I could have probably done better if I had gone over it with a sander and refinished it, or even come close to matching the grain, but again I wanted the reclaimed look.  Now that I have a Kapex, I'll probably use it if I'm doing a lot of trim work, but the beauty of the HKC 55 with the FSK rail is using it as an impromptu compound miter saw for one or two cuts like this.

[attachimg=2]

[attachimg=3]
 

Attachments

  • 033-FirstShelves.jpg
    033-FirstShelves.jpg
    58.1 KB · Views: 385
  • 034-TrimmedOut.jpg
    034-TrimmedOut.jpg
    65.1 KB · Views: 354
  • 035-ScarfJoint.jpg
    035-ScarfJoint.jpg
    139 KB · Views: 371
And here's the final project, with most of the CDs loaded up that need to go on it.  I've added some more CDs from storage and some other kitsch and knick-knacks since, but this is pretty much how it sits.

[attachimg=1]

Lessons Learned
Lessons learned during this build:

-Don't trust dimensional lumber from a big box (or anywhere, really) to remain straight after you bring it to your workshop
-Don't trust sheet goods to be square from the factory (the hardboard wasn't fully square and during my cuts I only addressed 2 or 3 out of the 4 sides, much to my dismay upon final assembly)
-The HKC55 with FSK rails is not just for framing. I will do some squareness checks before relying on it for intricate work
-The CXS is super handy for all sorts of things, and interchangeable chucks are a game changer.  Now that I have some centrotec drill bits, life might get even easier to switch between drilling and driving
-Don't apply oil-based coatings at the bottom end of their temperature rating.  If you can't avoid it, don't be in a hurry to get done.
-I don't mind sanding, but I don't much enjoy painting or finish coating
-Metric may have made measuring the dividers easier
-Large projects don't like to stay square.  Don't rely on a square without also checking diagonals

Now I feel like an actual contributor around here!  I'm hoping it's not another 1000 posts or 9 1/2 months before I post another project.  I have way too many new tools/toys to let them all sit around collecting dust while I surf the web!
 

Attachments

  • 036-FinalResult.jpg
    036-FinalResult.jpg
    140.3 KB · Views: 380
Back
Top