QF 1400 or Domino

Jmacpherson

Member
Joined
Jun 9, 2016
Messages
215
Strange question but hear me out.

Background, I don't have a table saw or the space for one.

I don't do a lot of routing generally but I'm about to do something along the lines of:
wood-planter-box-australia.jpg


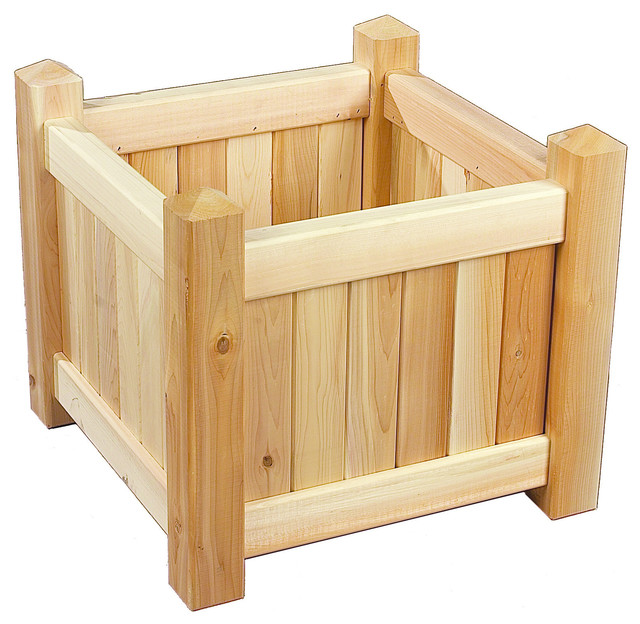
but with a bench between two of them like this:
Planter-Box-Bench-DIY-Free-Plans.jpg


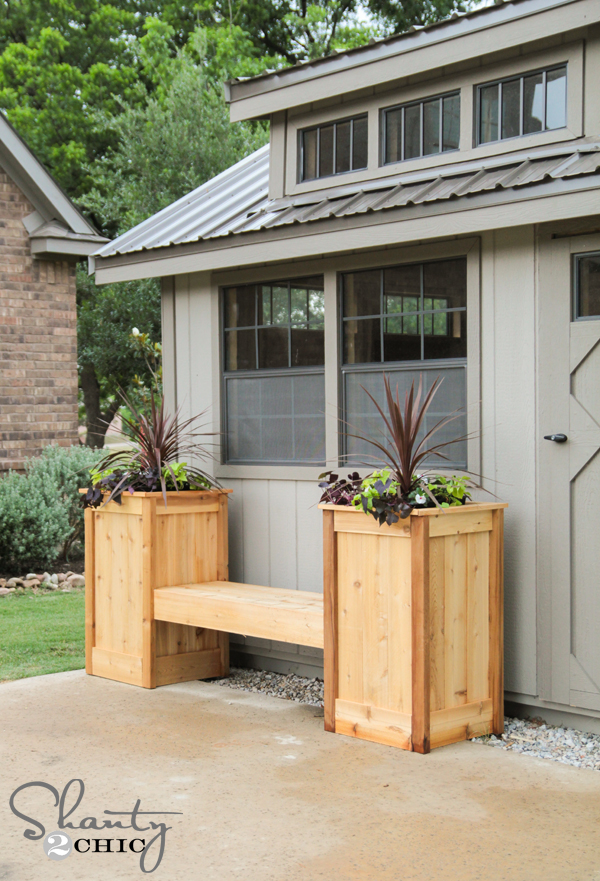
I'm thinking of routing grooves in the planter box legs and/or frames but were are talking about 70x70mm wide stock.
How easy is that to do with a QF 1400?
Then slot everything together.

Or instead of grooves do the whole thing with dominoes instead and invest in the domino once and for all which gives me more options in the long run?
I can then hide all the joinery and have no screws visible. The idea is for a contemporary planter box/bench combo not the traditional rustic look.
Will the dominoes stand up to the elements, weight, wet soil etc. over time?

Then use a small palm/trim router like say Makita's for small round overs down the line if needs be?

Thoughts and opinions?
 
I'd want to join the rails to the posts with dominos, but I'd want to router the slots in the rails for the sides.

Sorry, not "or" here ... both ! [wink]
 
Kev said:
I'd want to join the rails to the posts with dominos, but I'd want to router the slots in the rails for the sides.

Sorry, not "or" here ... both ! [wink]

I was afraid someone was going to say that  [big grin] but I have to agree the more I think about it and look at photos of what I'm intending on doing

 
You could potentially do both with the router, but you can definitely do both with the domino. I'd definitely recommend the domino over the router for what you want to do. Also, you can get a cheaper router if you must have one, but can't get a cheaper domino. I had both a 1400 and a domino. I use my domino for basically every project and rarely used my router. I recently sold the router. Definitely vote domino.
 
Yeah, I don't see how you would be able to embed the "panels" in the top and bottom rails on the box except with a router.  I suppose you could always make the rails by laminating three pieces of cedar together, with the middle piece -- cut between 1/2" to 1" narrower -- the exact thickness of the boards that are used for the panel, so then the panel just fits into the resulting channel.  Problem would be getting the resulting thick rails flush along the visible edge using a jointer/planer, which I imagine you don't have.  And if there was variations in the color of the laminated pieces, it might look weird.

Alternatively, you could make the panels first, trim everything with a track saw so that you have a perfect straight and square edge on all four sides, then domino that to the rails (rather than dominoing each board in the panel separately).  Again, that would require jointing the panel edge of the rails to make sure there would be no gaps where the panel meets the rails.

I would say you definitely need the domino, but you could muddle through with a cheaper router. Make sure to get SAIPO tenons, though.     
 
I have both a domino and several routers, and a table saw so understand your question.

But, here's an alternative... if you have fewer tools and a smaller budget.

Think about using splines.

If you have a track saw and an MFT table, you could clamp the legs to the side, perhaps with a jig depending on length and width of the leg stock.  Clamp with the leg side flat with the MFT top.  Then align the rail over the edge to the center of the leg side and cut a saw kerf down the side of the leg.  If you need to, offset the piece and cut a second kerf for a wider groove.  Do the same thing with the panels.

Use splines cut from 3/4" material with saw.  You could do the same thing along the individual panel pieces using splines.

Alternatively, use the saw with offsets to cut the full dado for insetting the side into the leg 1/4".  Stop the dados at each end with rail stops on the rail so you maintain strength at the end for dominos or hand-cut mortise and tenons.

All done with a track saw and MFT table.  (BTW you can cut grooves with the 1400 on the rail in the same way.)

For making the 2x2" structure, purchase a Domino, or go old school mortise and tenon with the track saw cutting the tenons on the rails with stopped cuts on the MFT table.  Really easy to do.  Repeatable and accurate.  Cheek cuts can be cut from the side of the table with the saw and the legs / rails clamped upright like above.  Or use a handsaw.

Drill out the mortises and chisel them to match the tenons.  Bevels on the edges could be planed with a block plane.

If you enjoy hand tool work, it's a great way to do it and would actually give you a really sturdy set.

Or purchase a Domino if you see future uses.  And a router, because it has lots of uses.

Dominos or tenons will hold up to the weight and weather, but you will want to consider movement of the panels given it's outdoors.  Definitely use waterproof glue or epoxy.  And perhaps Sipo dominos as Edward suggested.  And the panel will need to 'float' whatever method you choose and rely on the strength of the tenons or dominos for structural strength.

Good luck and please share your work progress!

neil
 
Thanks for all the input guys

[member=167]neilc[/member] I have a HKC55 but no MFT, if I go the router path part of my thinking was in conjunction with the MFT and the guide rails (besides the FSK rails I have a 1400 rail too)

I never thought of clamping the legs to the side of the MFT and flush with the top which would automatically give you a larger surface to work with.

Maybe I have been looking at this all wrong or started from the point of view. I'm concerned about routing narrow stock with the QF 1400, not just this project per say. Where as what I'm routing the piece of wood on to begin with makes a world of difference!

Can I clamp something as thick/wide as 70x70mm to the side of the MFT as you suggest?
 
One more thing guys, the sample images are that, samples :)

Down here is South Africa, cedar isn't common so the panel pieces might end up being a solid piece of exterior plywood or cca treated pine. Problem with the treated pine is that depending on the thickness and width, you are not guaranteed that all of them are exactly that size.
Eg. 76x38, some of them will be that. Then the next one will be 76x37/75x38/76x36/74x38 etc.

Or I can go with 70x20 but they are rounded over on one face only and that is where the groove/dado idea came from. - domino won't work so well here.
 
I don't see a problem clamping 70x70 leg to the side of the MFT. You just need the longer clamps in the t-slots and run the router on the rail or with an edge guide if you have clearance with clamps.

No problem routing that size either. Lay the piece on the MFT top and use the Festool clamping elements to hold it and the edge guide on the router to center the dado.

 
If you can only afford one tool at the moment I'd go for the domino and get a really cheap router for the grooves. Then get a 1400 when you can. There isn't really a cheap domino. You could dowel or make tenons or even pocket screw but I think the domino is the best option out of the two. Actually as I type this I realise I did something similar. I bought a Domino before my 1400 and it's not something I regret or thought I got wrong.

Sent from my iPhone using Tapatalk
 
[member=43879]DiscoStu[/member] has a great idea. Most routers, regardless of price, would do the job you require. Ryobi, for example, has at least one router in the $60 - $80 range. I've found Ryobi to be very usable in the shop and owned one for many years. Would it last forever; probably not, but it would last at least 3 - 5 years of heavy use I would imagine.

So, I would suggest the Domino with a cheap router. Then you'd have both and could upgrade the router when you can or when the cheap one fails.
 
[member=167]neilc[/member] mentioned splines.

And people made stuff before the 1400 router came around, so i'll suggest some different angles...

1) with a smaller fold up contractors saw all the tenons can be cut on the end of the 70-mm.
2) with some jig to hold parts most slots can be cut with a track saw and cleaned up a chisel.
3) Another method would be some brad point bits and dowels and use the transfer bits to replicate the hole position to the next peice of wood.

I would probably try doing the spines and use the dowels for the 70-mm pieces.
The thing will be most likely rotted out in 10 years if it has water and dirt against it, so only needs to start out good.

You may need to make some jigs and the Ryobi router was not a bad idea, or some used machine.
 
Always nice with an excuse to buy tools. That said you could use pocket screws as well thus skipping both purchases.

Groves in the sides can be done with a saw or just use separate sticks as the picture or some t1-11 plywood.

Think about what you're project after this would be. Then decide on the tool purchase. See if you hook up with friends that have similar interests and perhaps they can help with tool use etc.

I use my router for lots of projects. You'd be amazed how versatile it is. do some googling of router projects and jigs. You can get small handheld ones fairly cheap. Take light cuts at a time.

Domino is cream puff for sure and worth it as well imho, but maybe not for this project.

Edit: if you go with a router consider getting one that could do double duty. Handheld and in a router table. Or create a makeshift router table like:http://www.startwoodworking.com/post/how-build-simple-router-table
 
mwildt said:
...See if you hook up with friends that have similar interests and perhaps they can help with tool use etc.
...

I like ˆitˆ.
Ideally with non overlapping tools, and then you get a coop model.
 
Back
Top