Renovating a table

derekcohen

Member
Joined
Jun 22, 2008
Messages
922
I'd like to throw this one out for discussion.

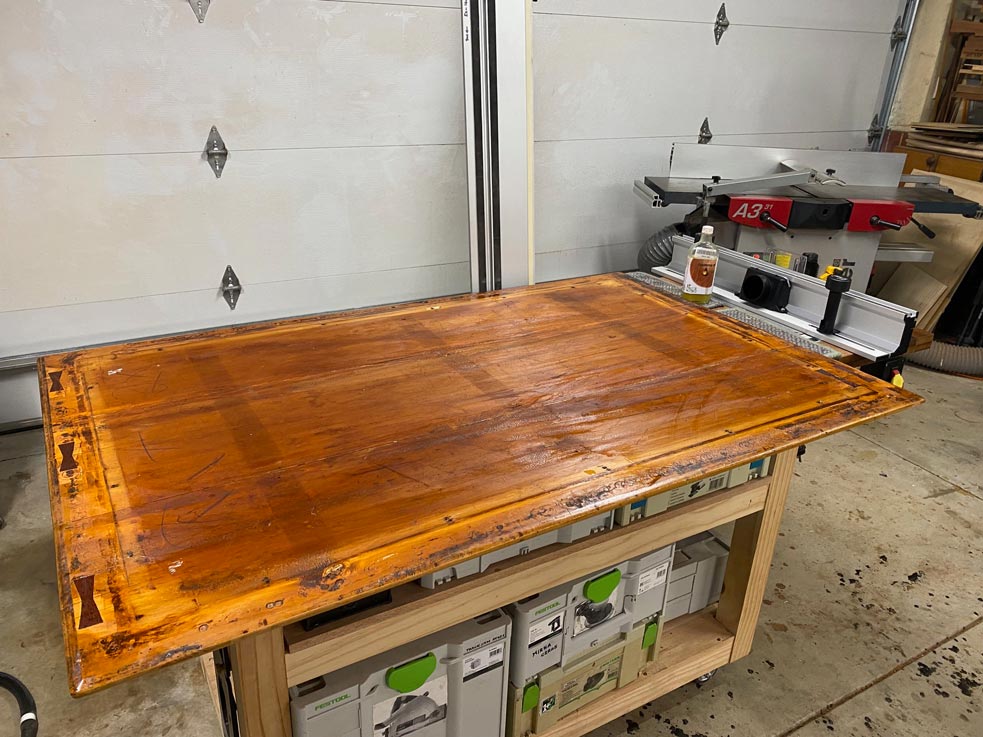
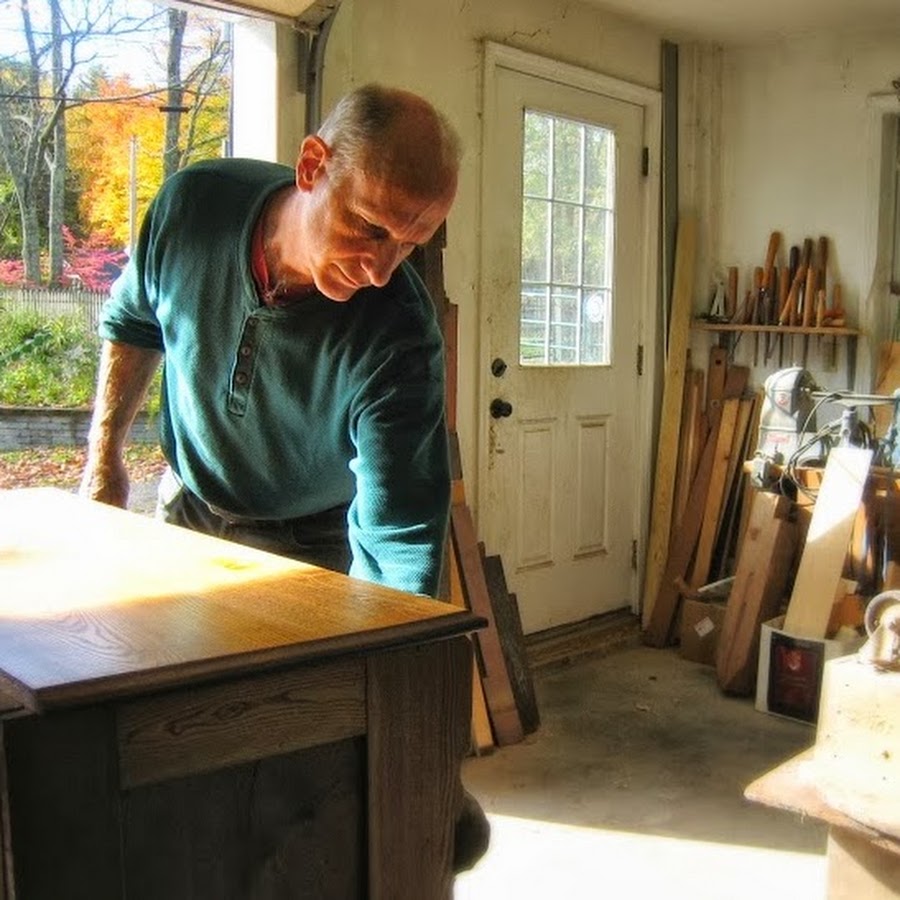
This is table I have just replaced ...


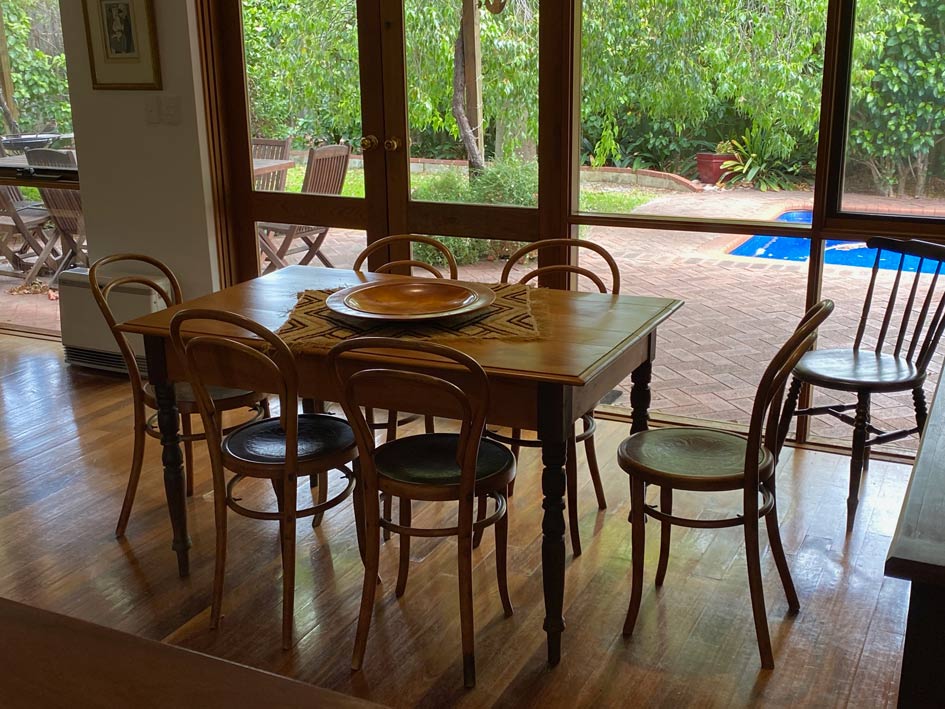
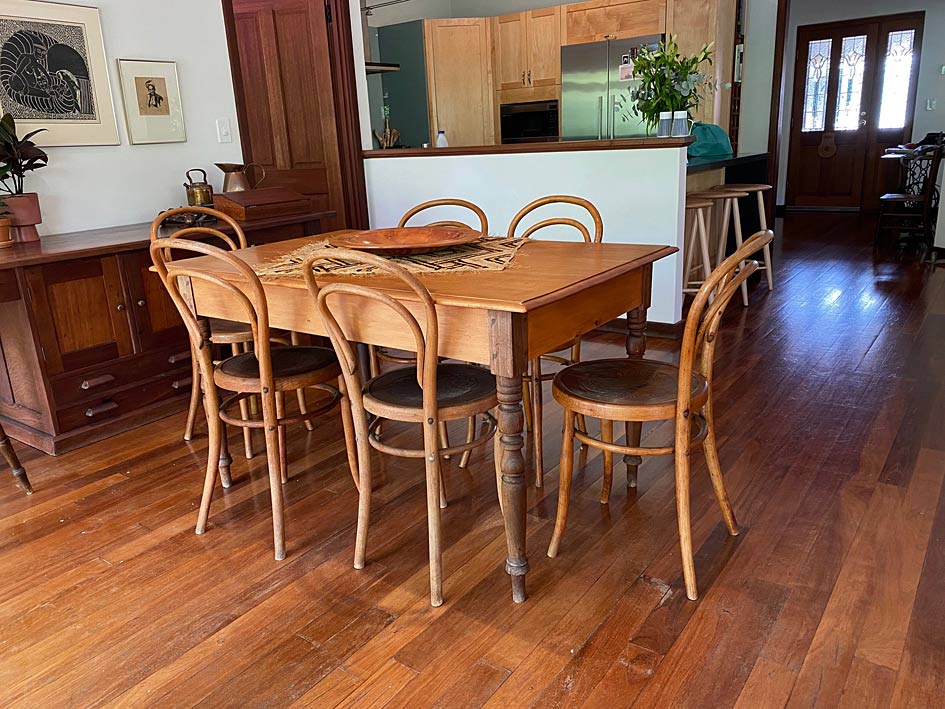
The plan is to restore it and give it to my son and daughter-in-law.

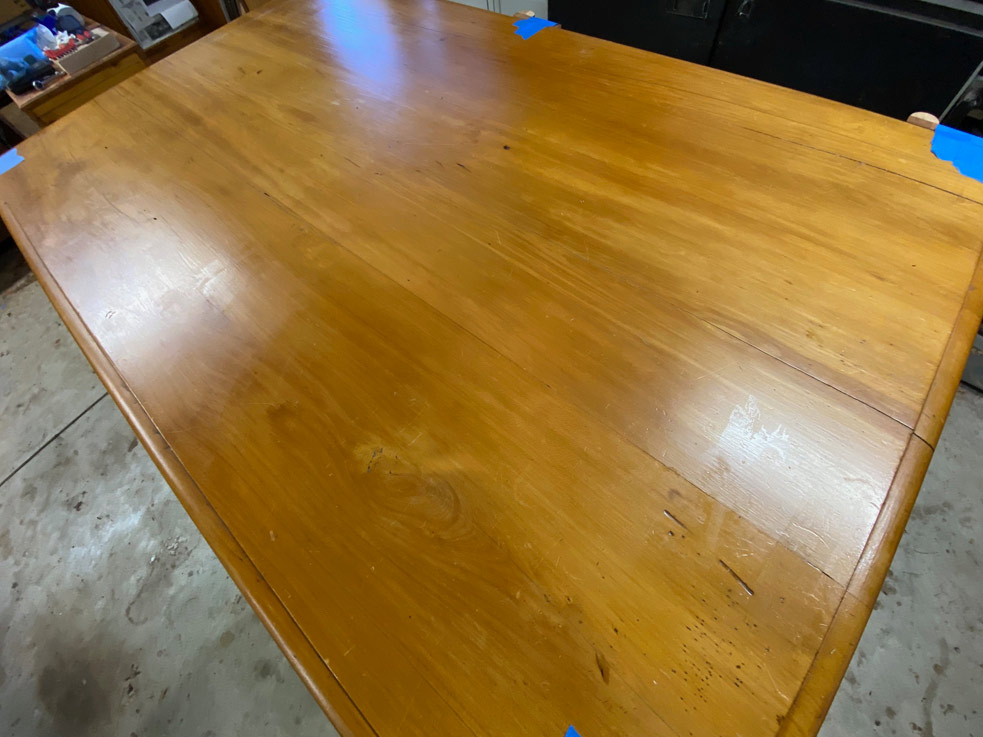
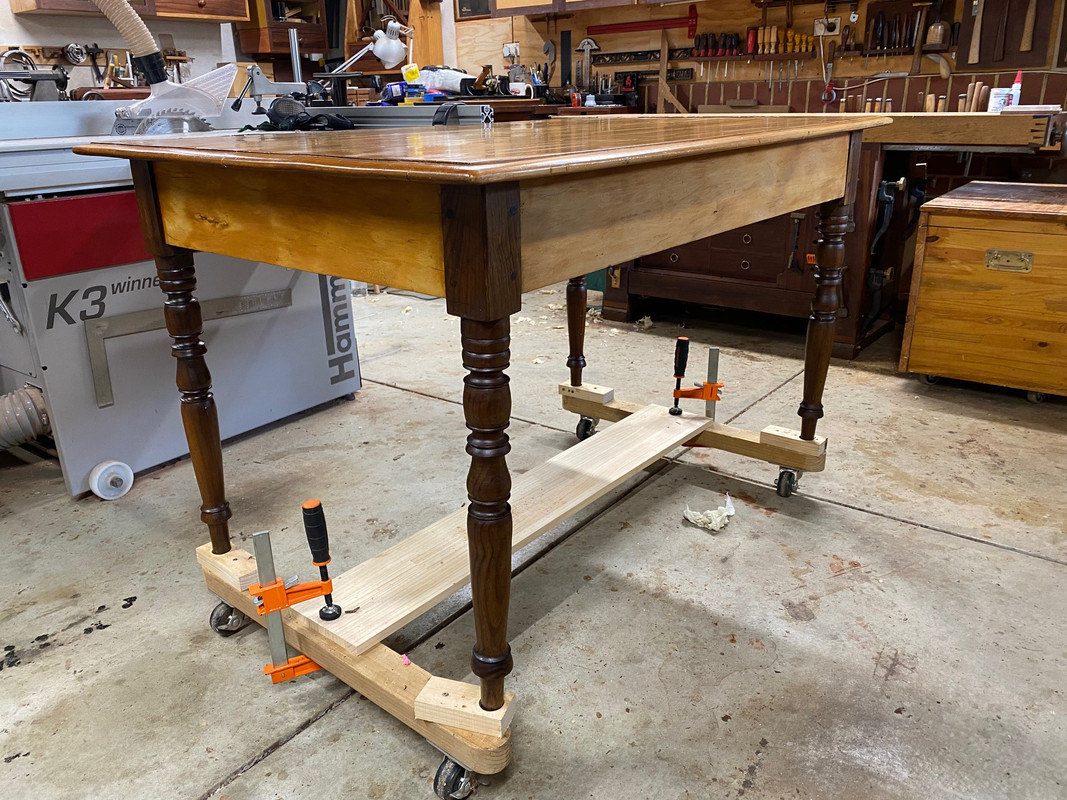
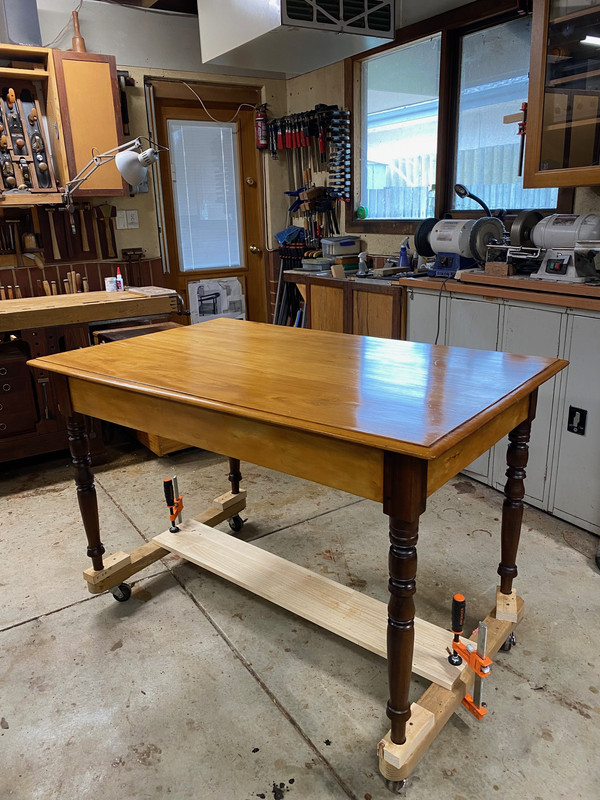
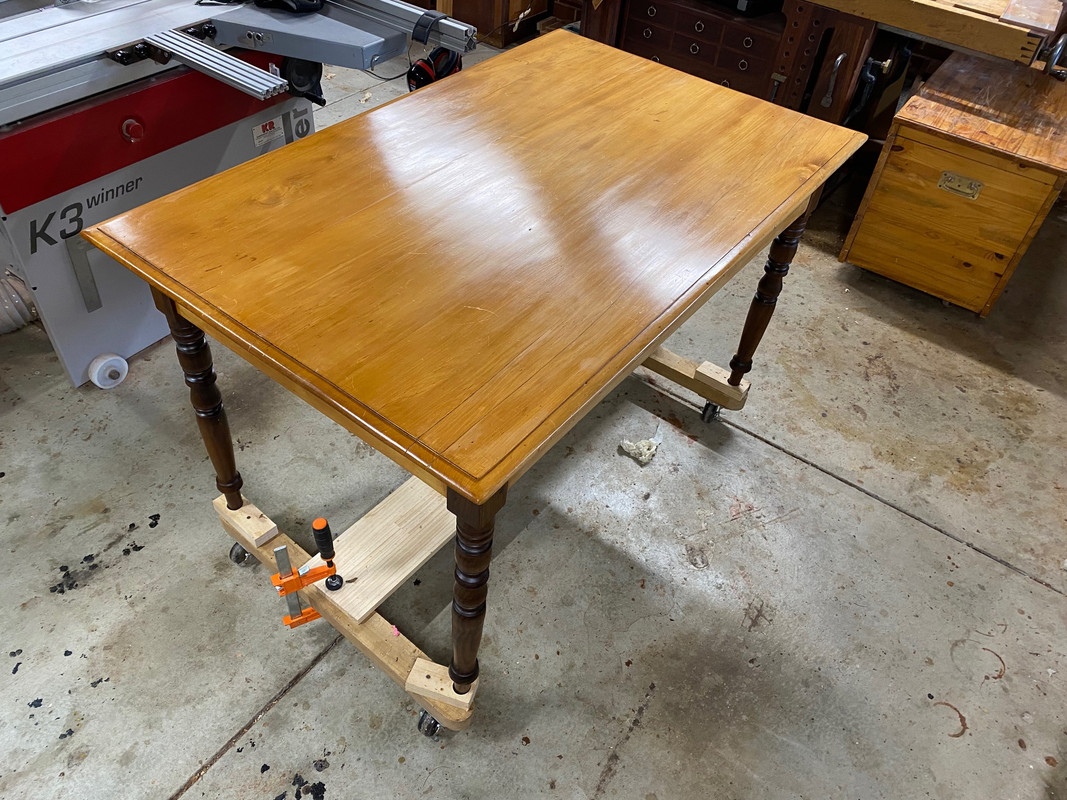
My wife and I purchased it shortly after we married, some 42 years ago now. At that time it was said to be 150 years old. The table is a kitchen table typical of those built in farming communities in the Eastern Cape area of South Africa. The timber is Yellow Wood, a much prized and now rare light softwood, found only in Southern Africa and South America, and Stinkwood, which is a hardwood similar to Teak.

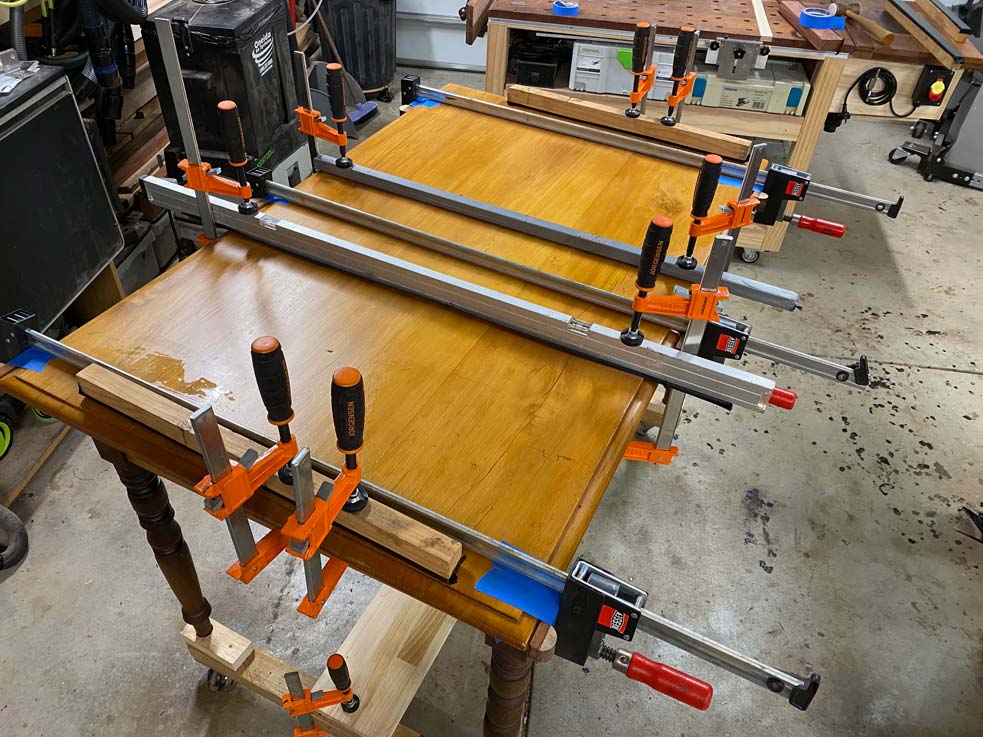
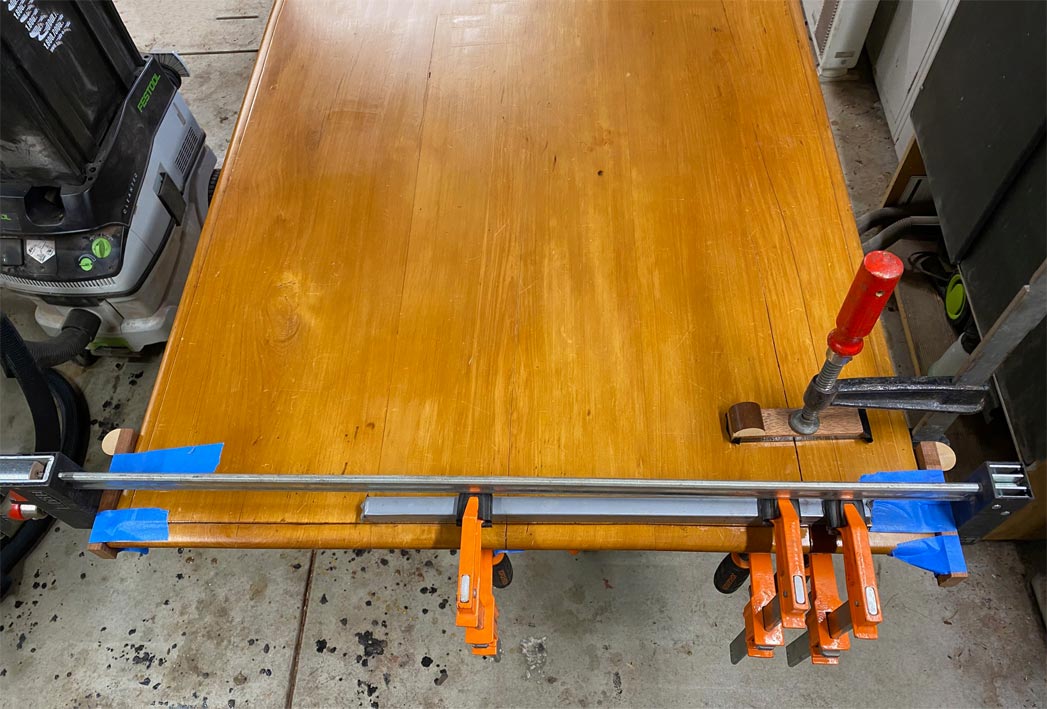
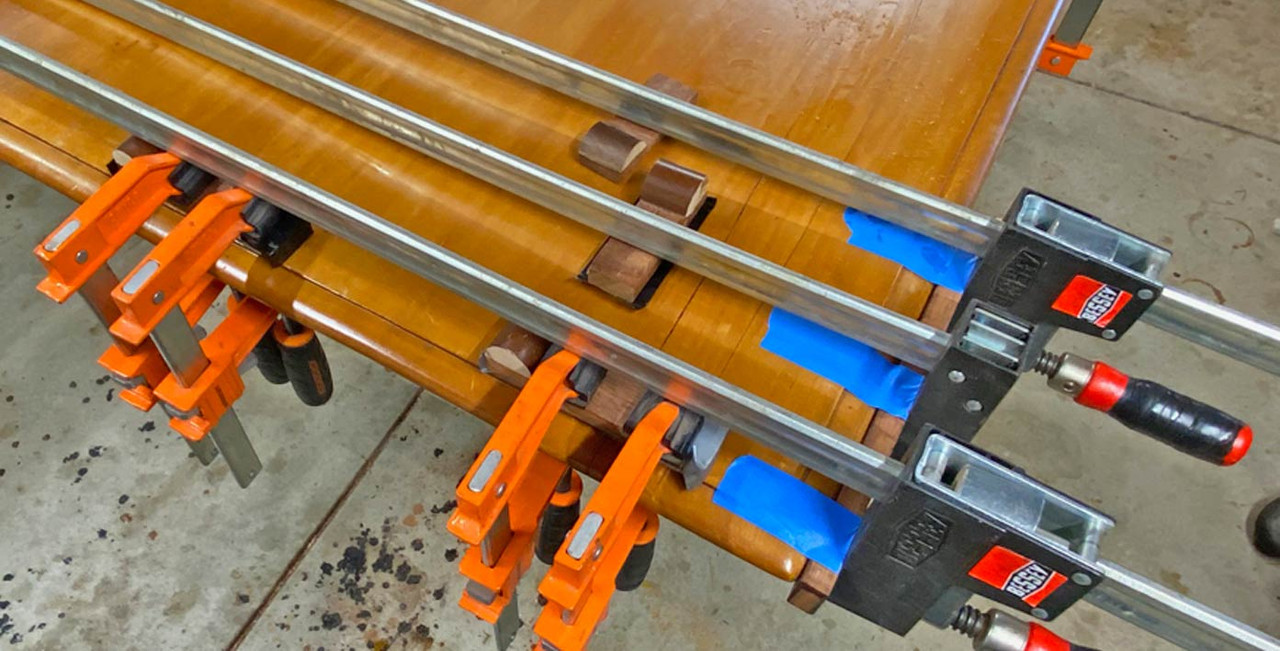
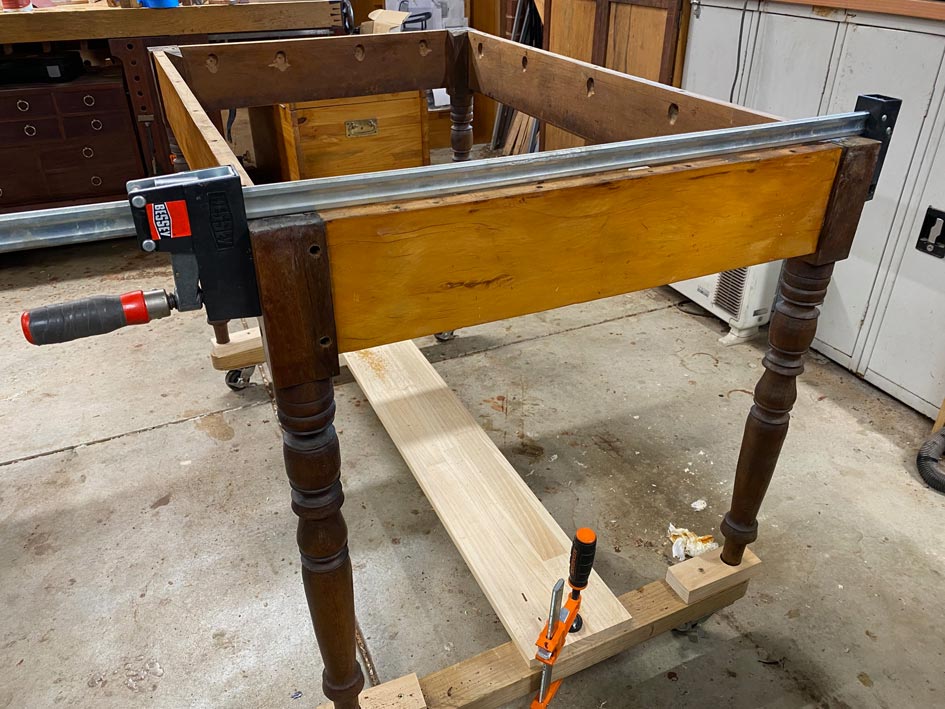
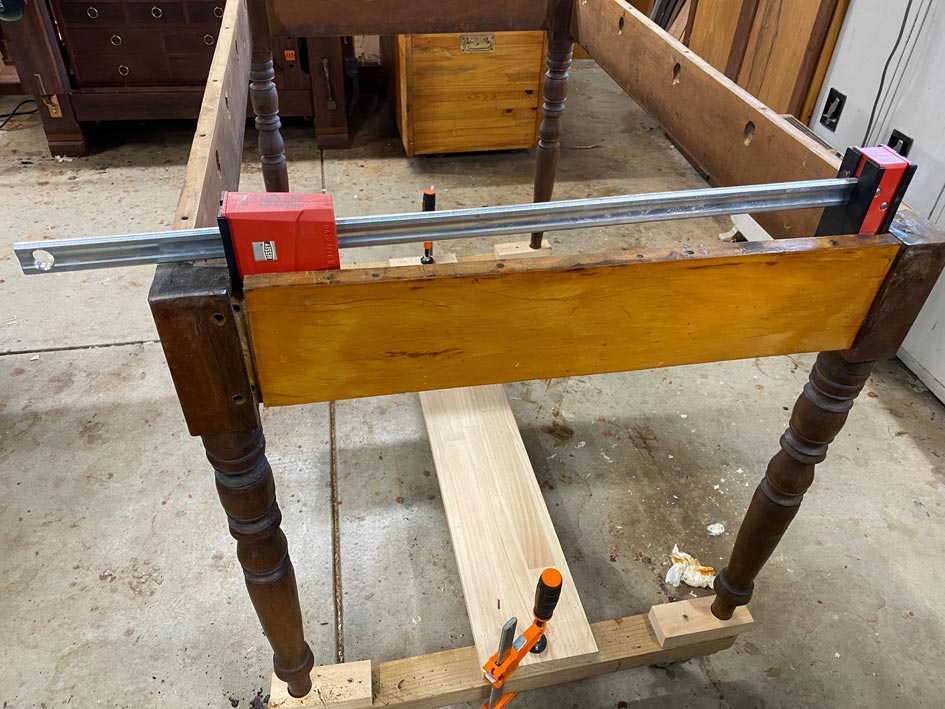
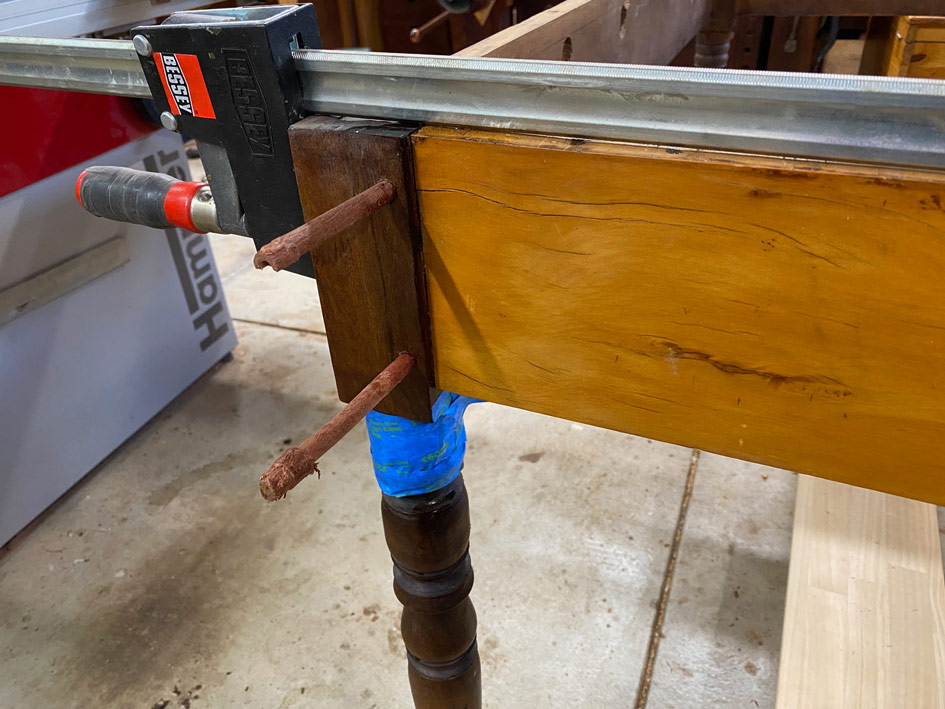
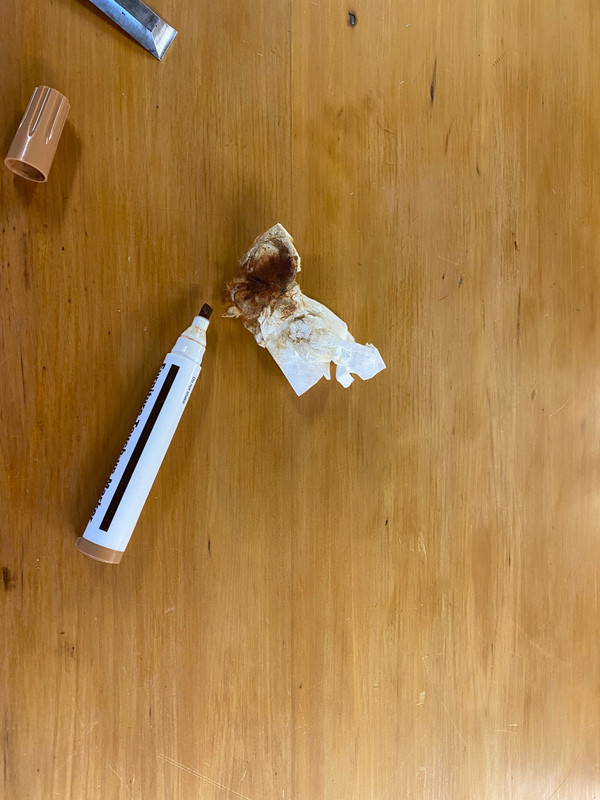
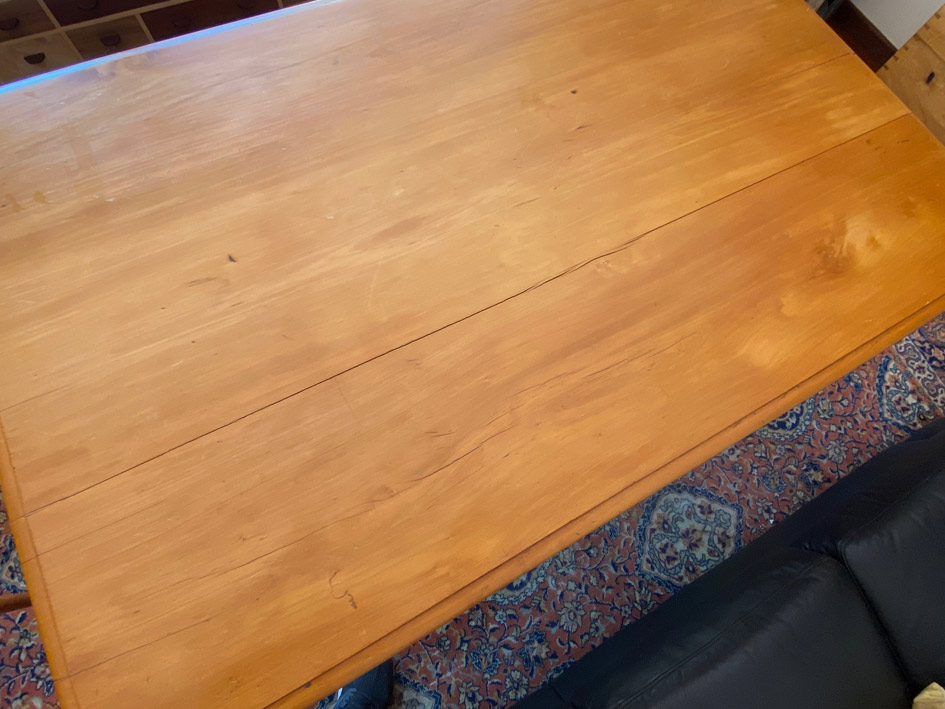
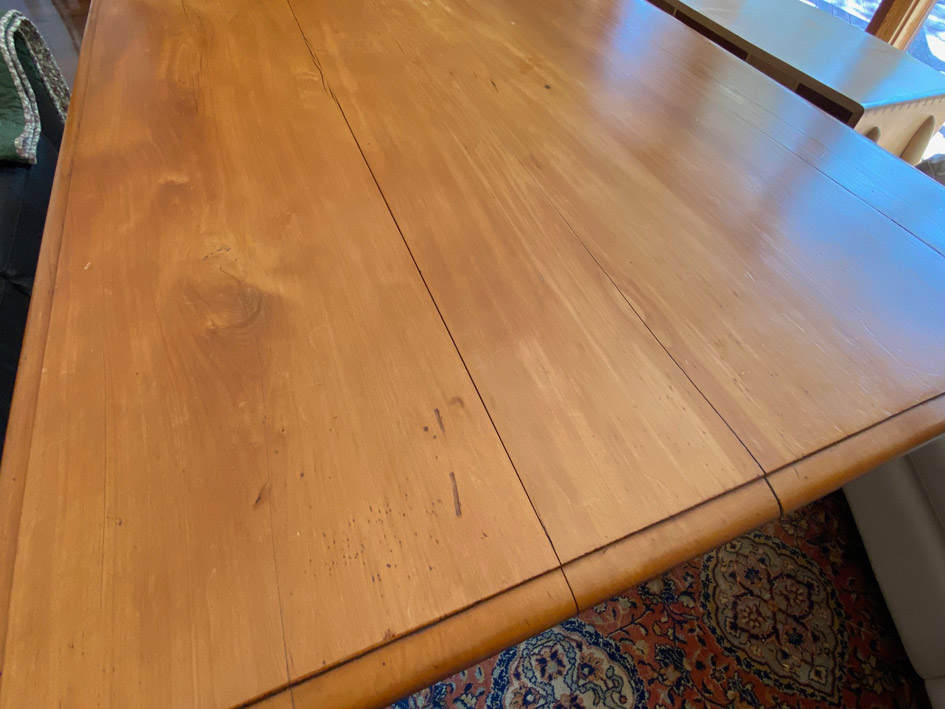
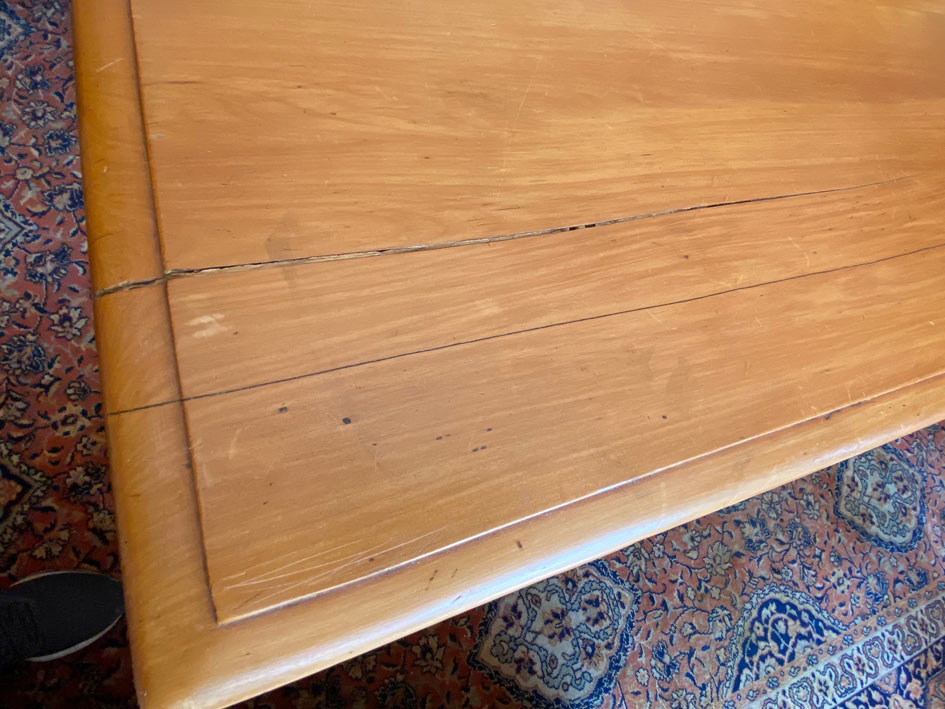
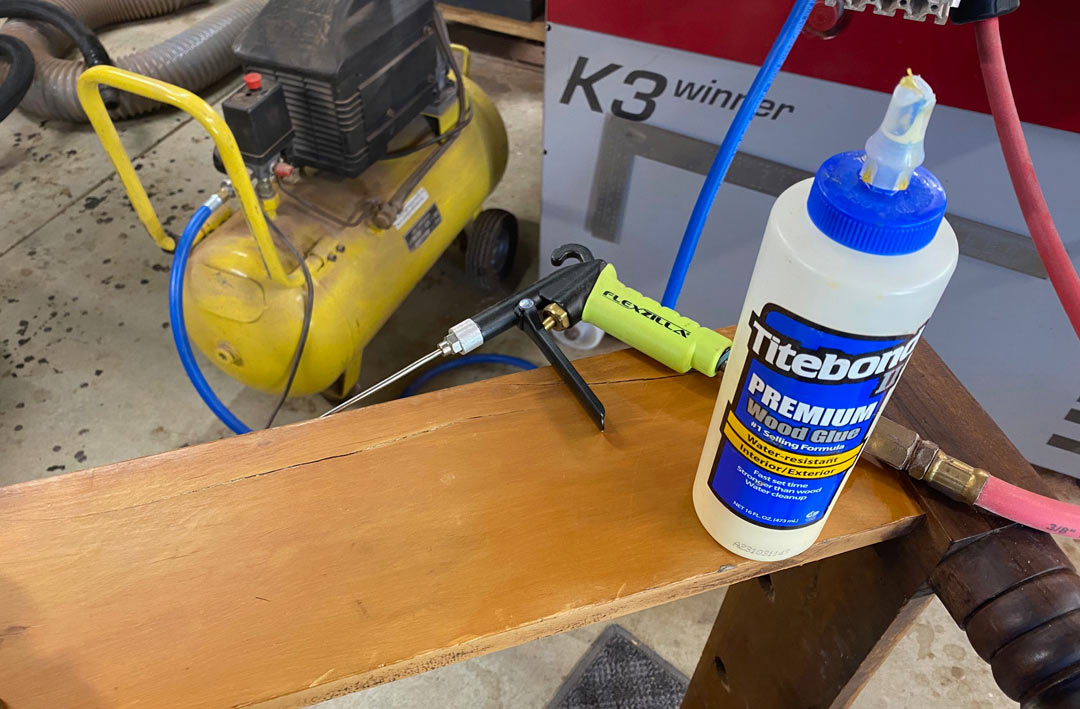
When we purchased the table, it had undergone a "restoration" by a local furniture maker, amateur I suspect. It held up well, but over the past five years began to develop cracks and splits. I aim to repair these. So for discussion is the extent of the finishing, the repair of the splits, and modifying the way the table top is attached. Glue(s) to use? Photos below ...

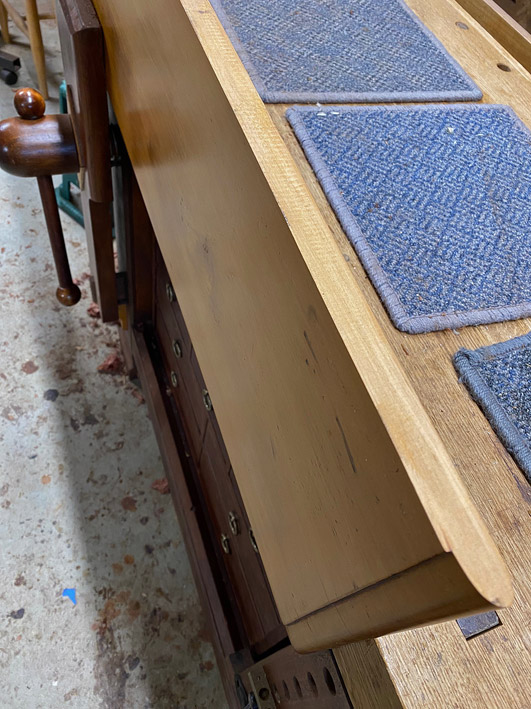
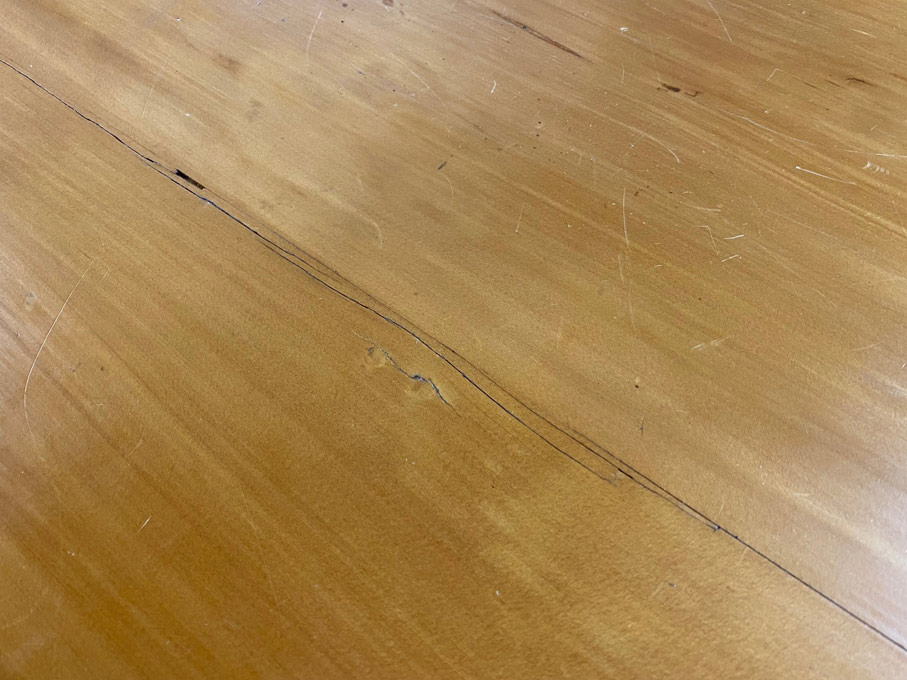
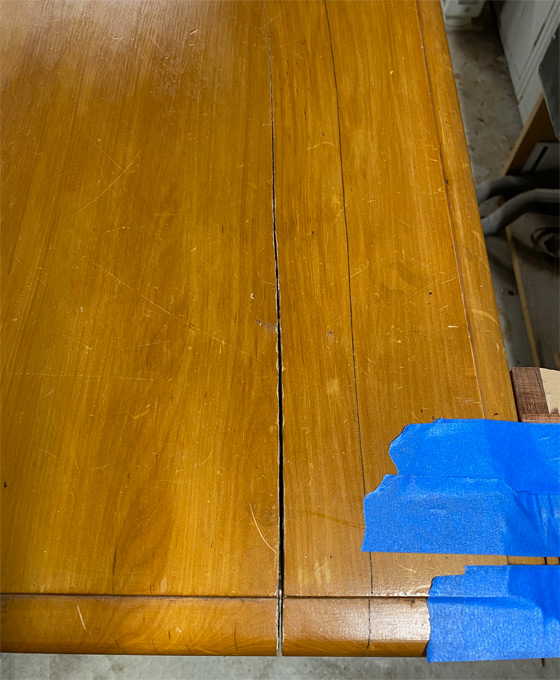
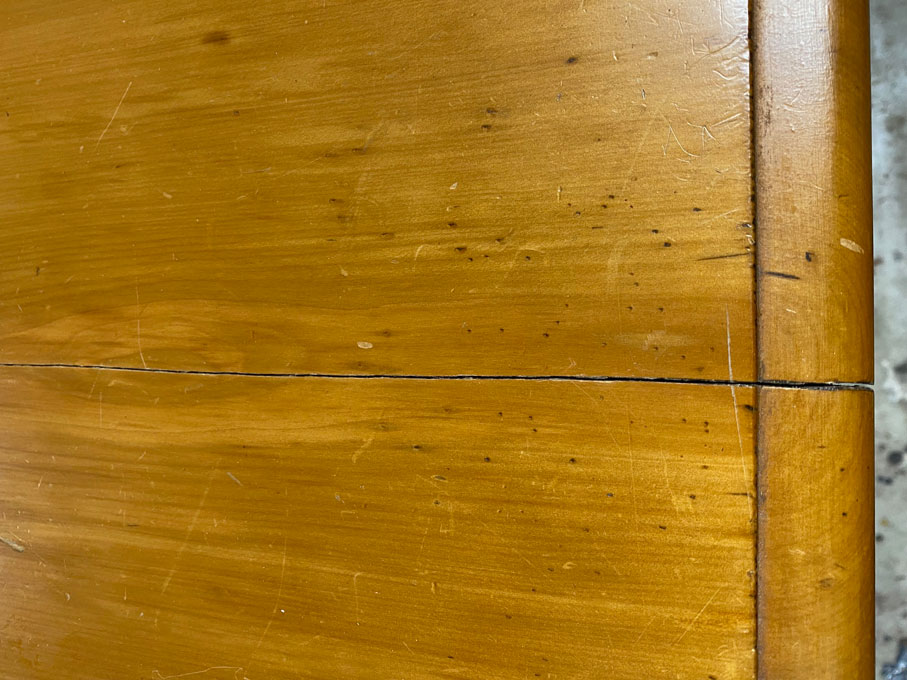
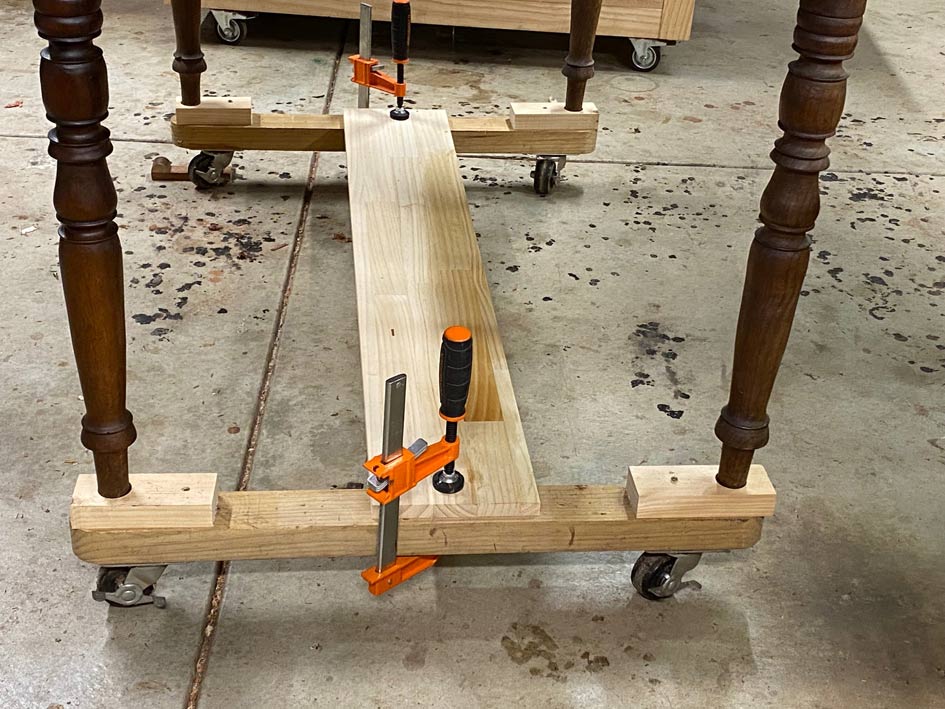
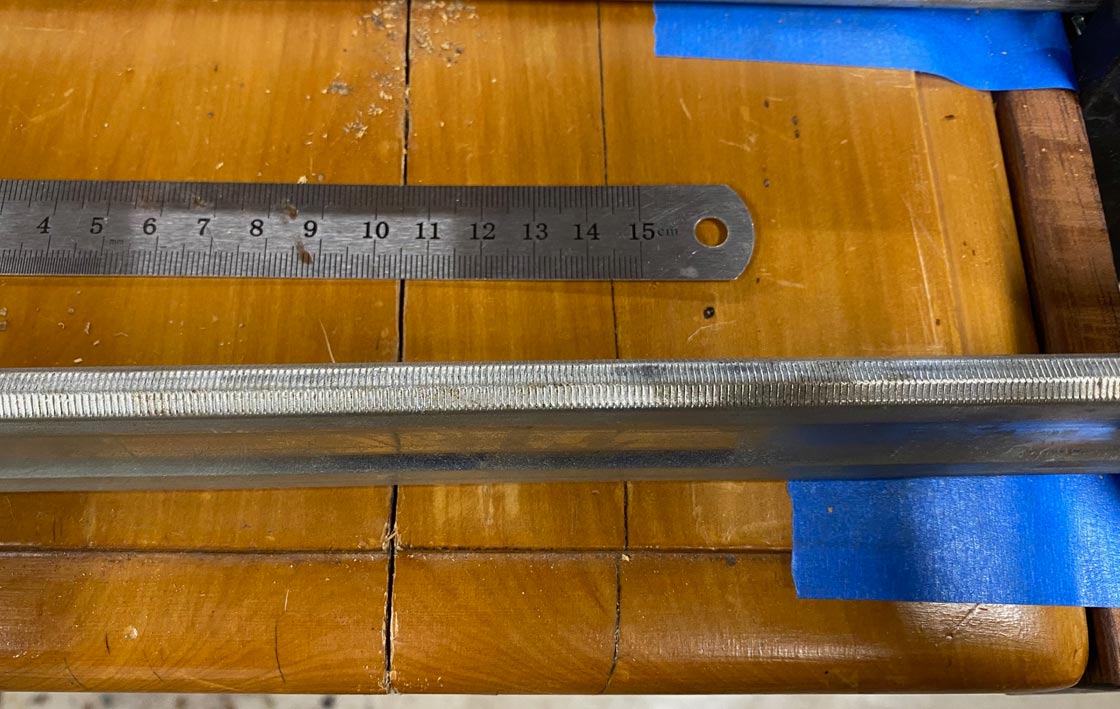
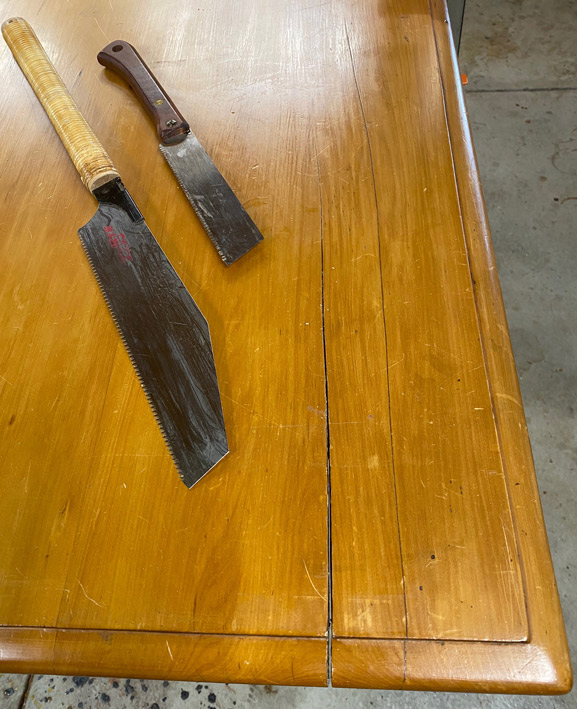
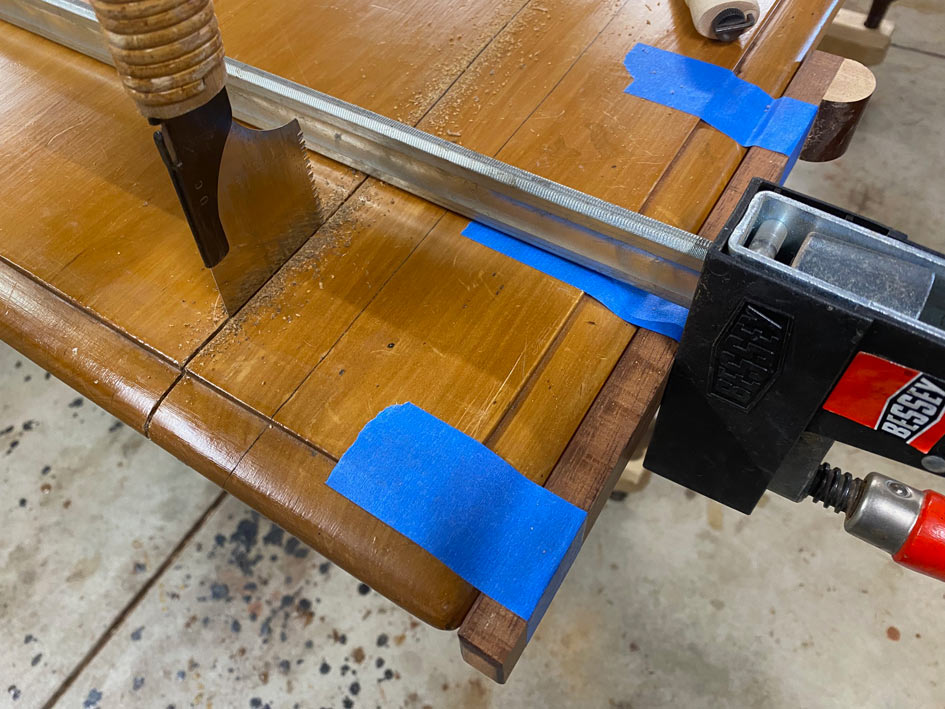
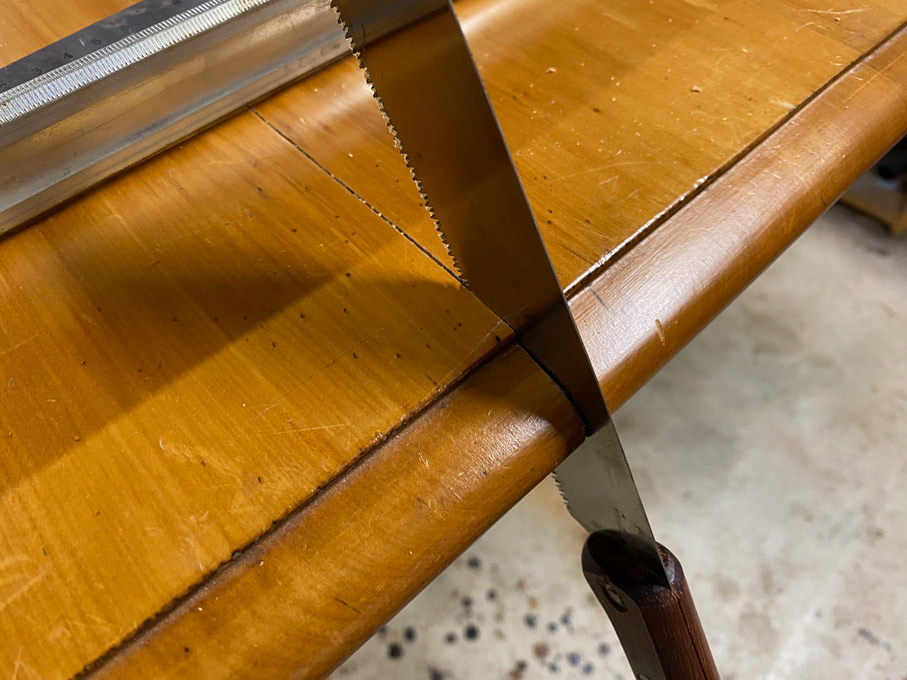
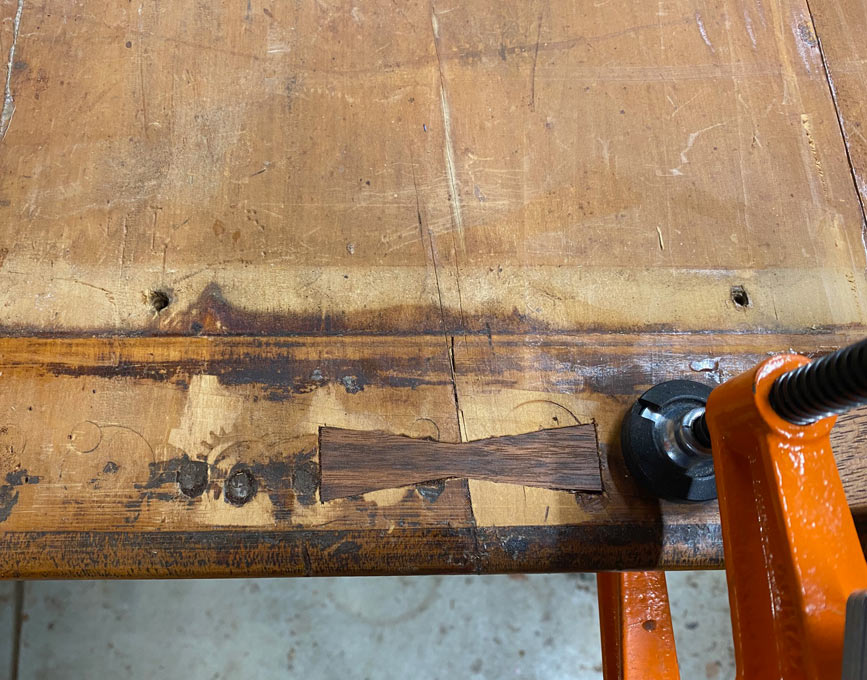
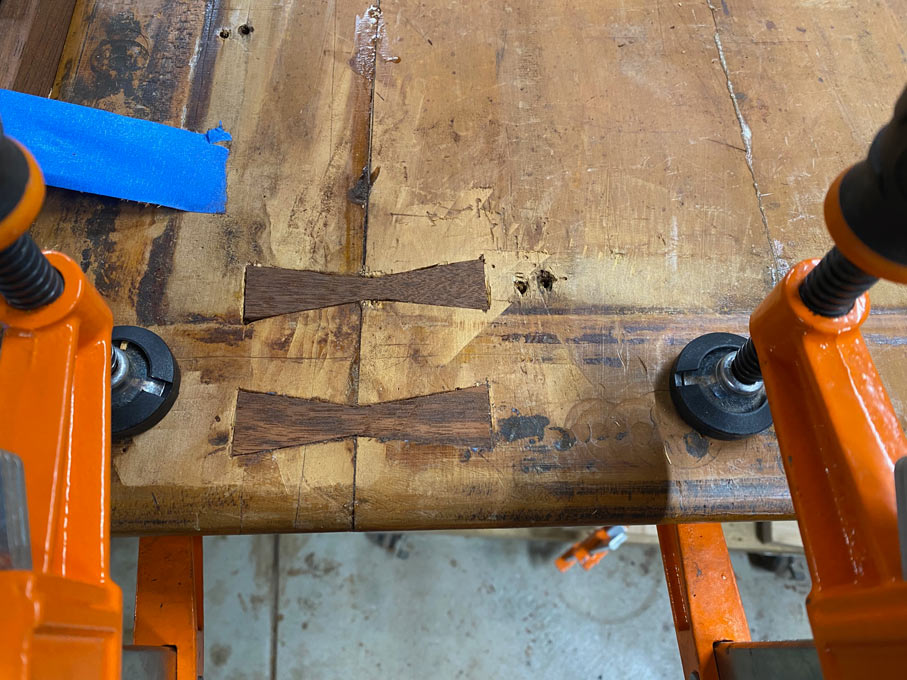
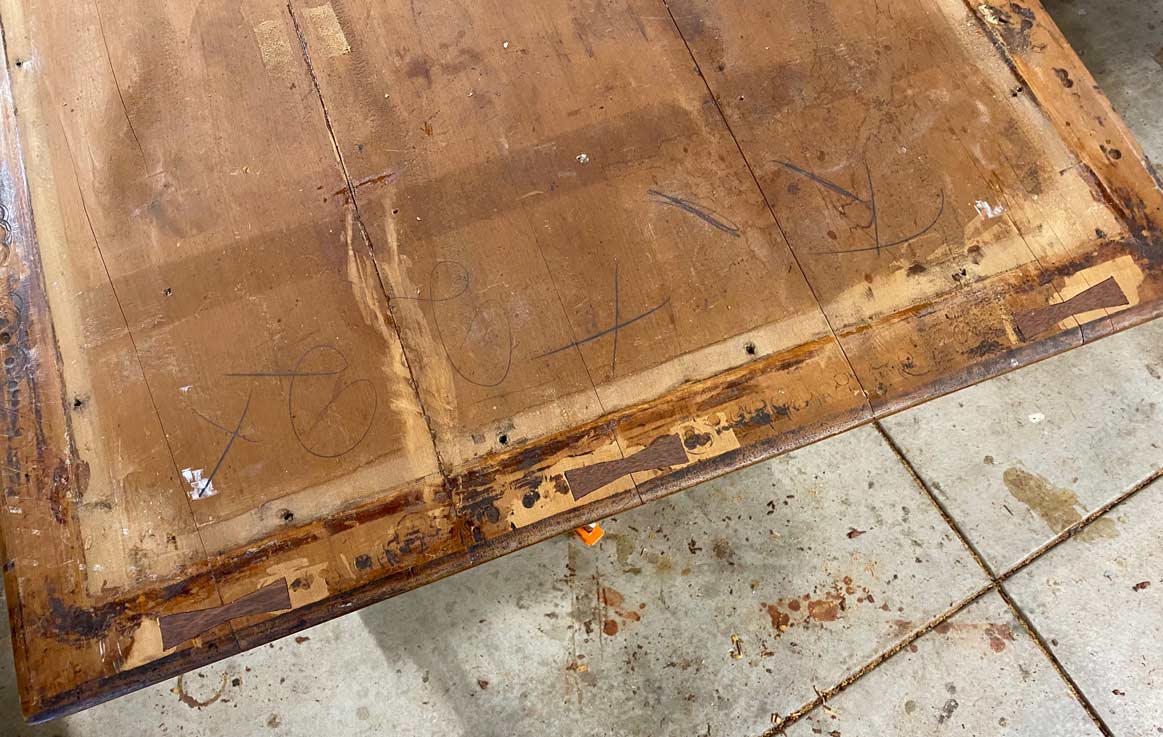
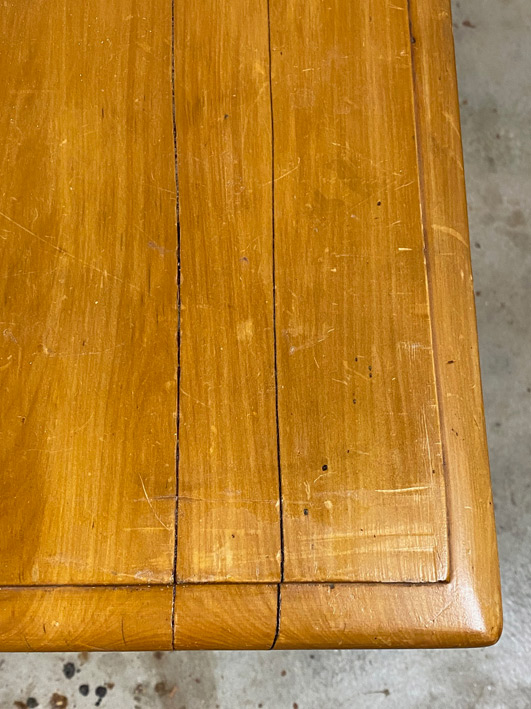
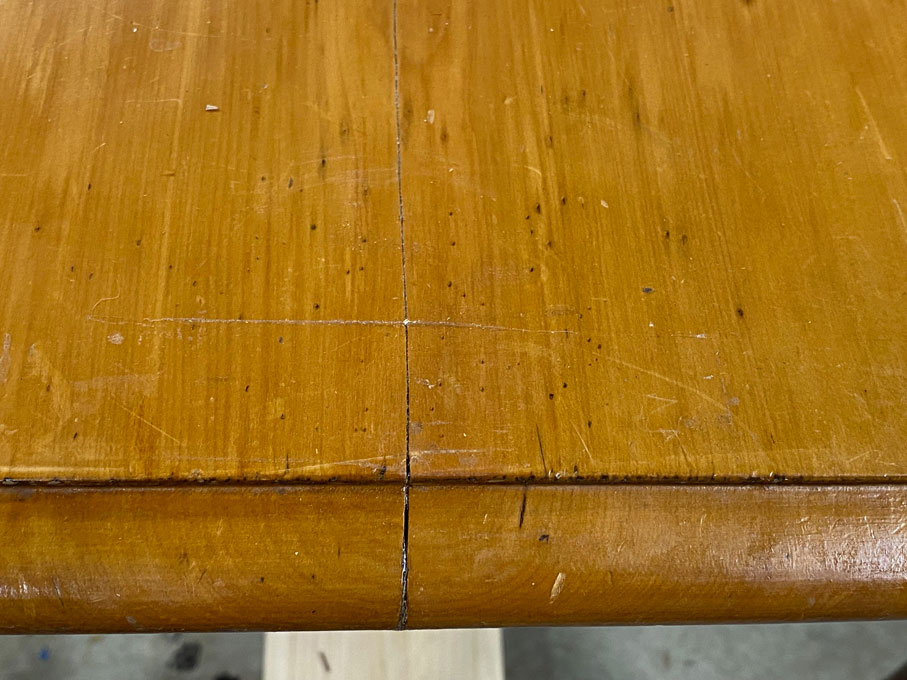
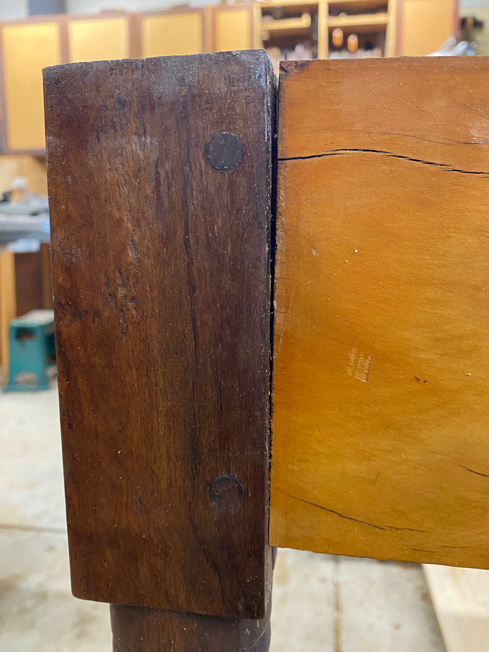
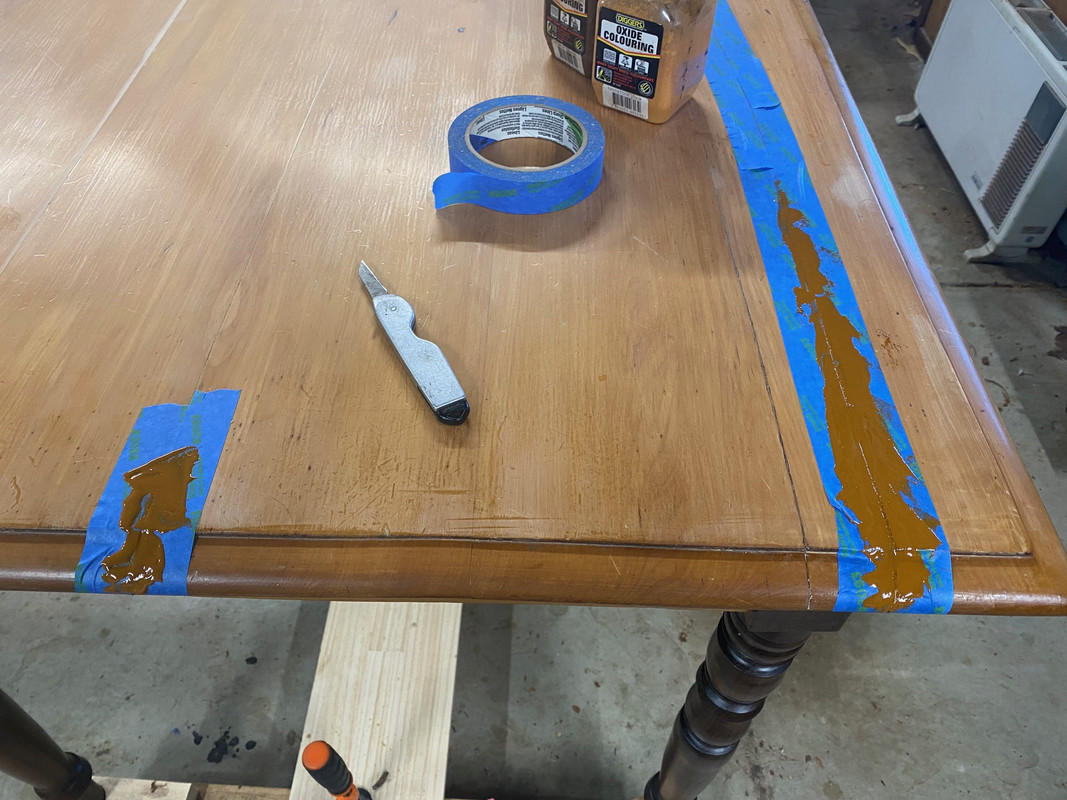
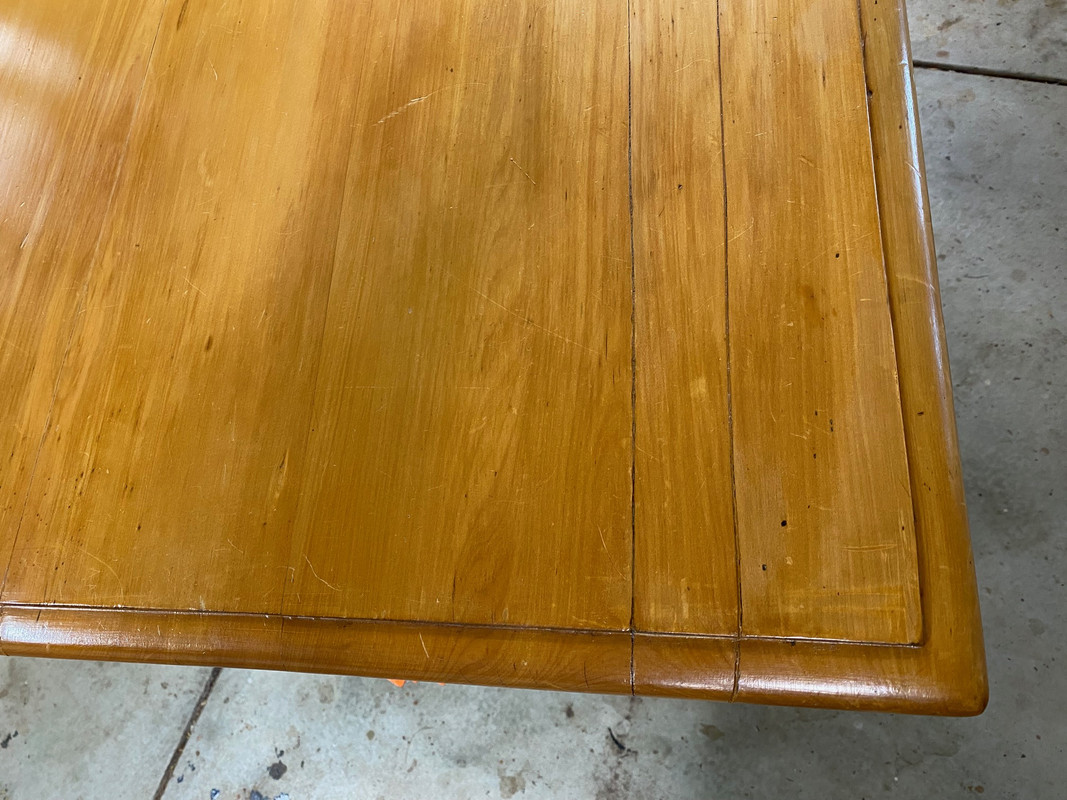
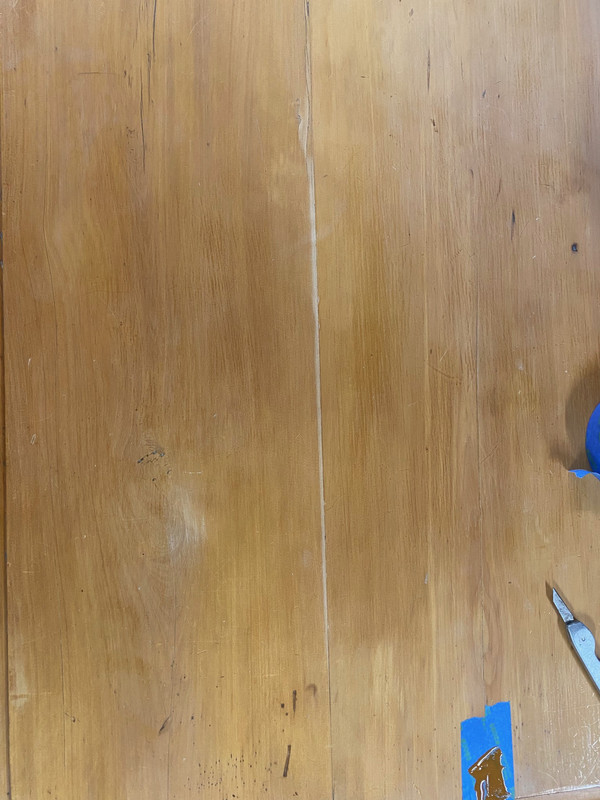
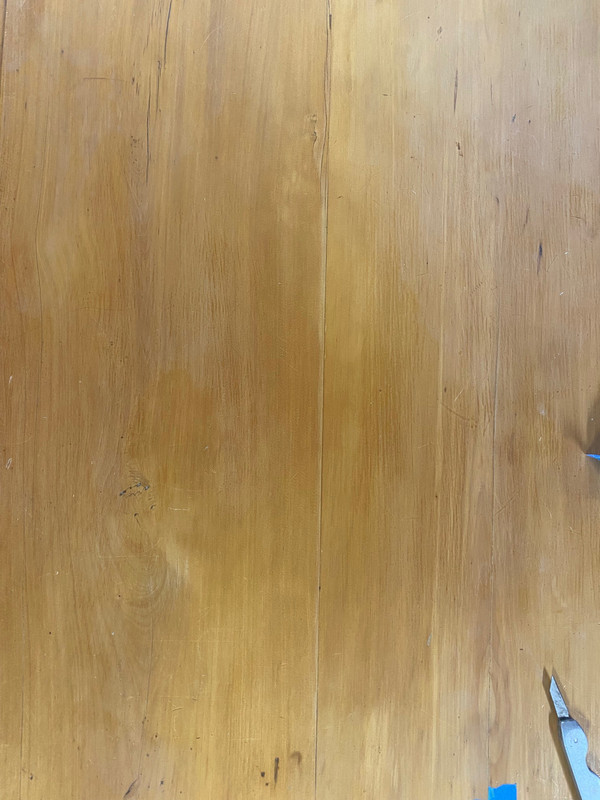
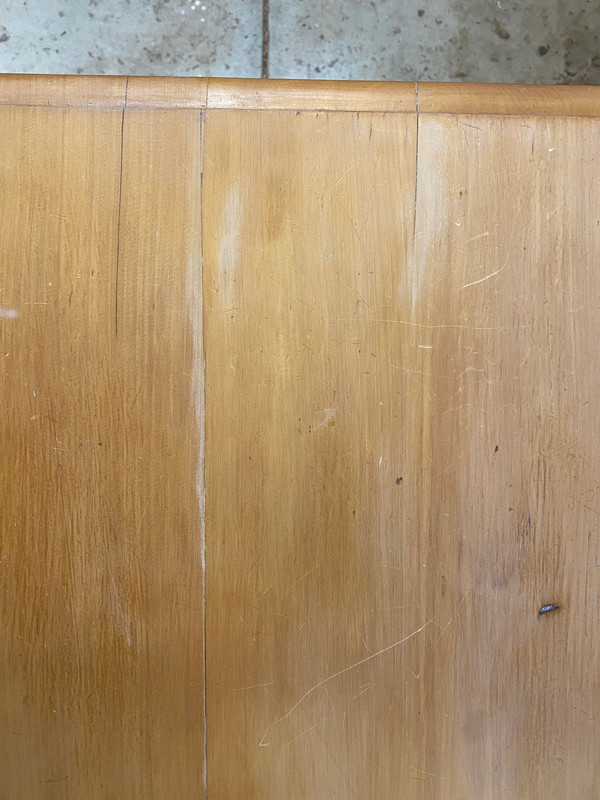
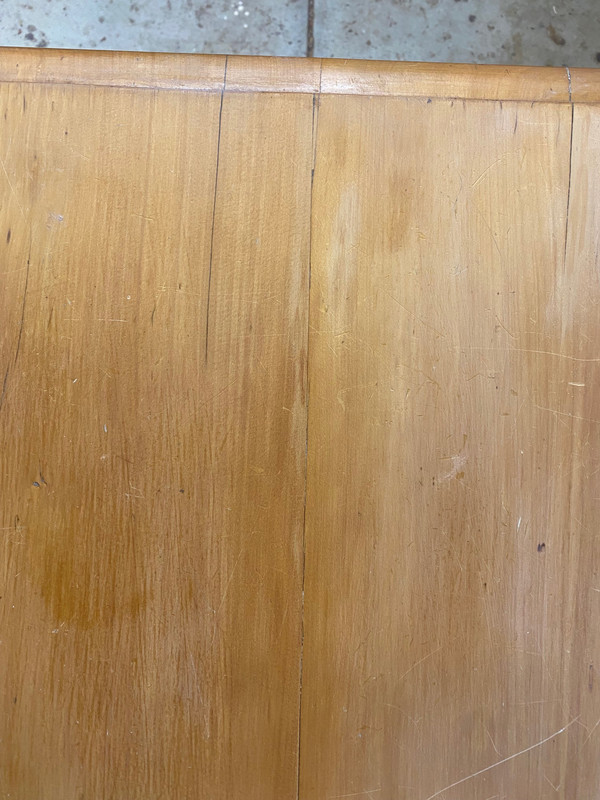
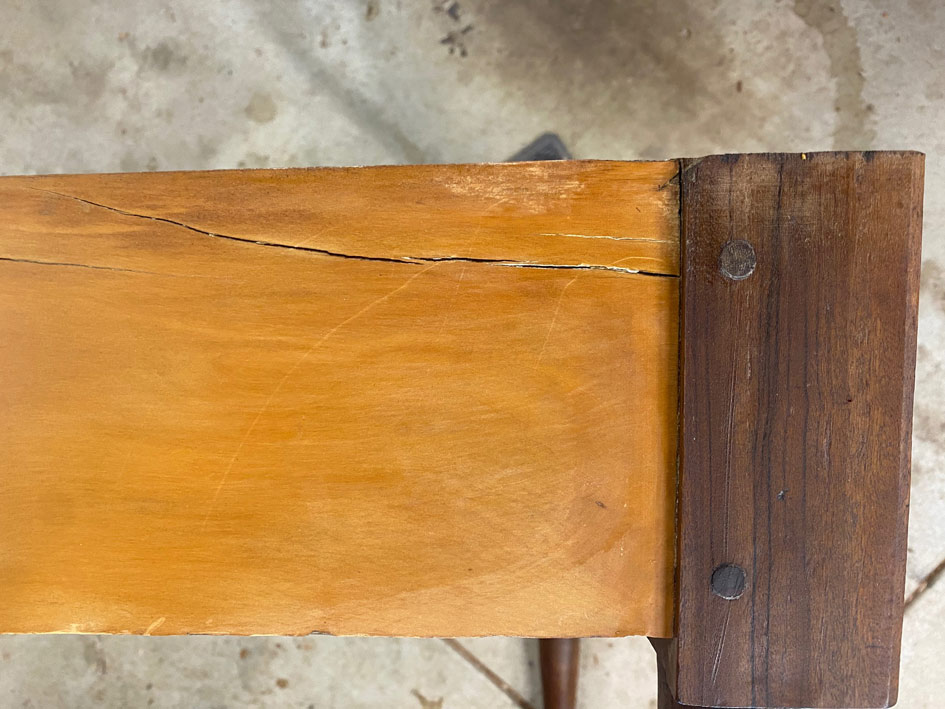
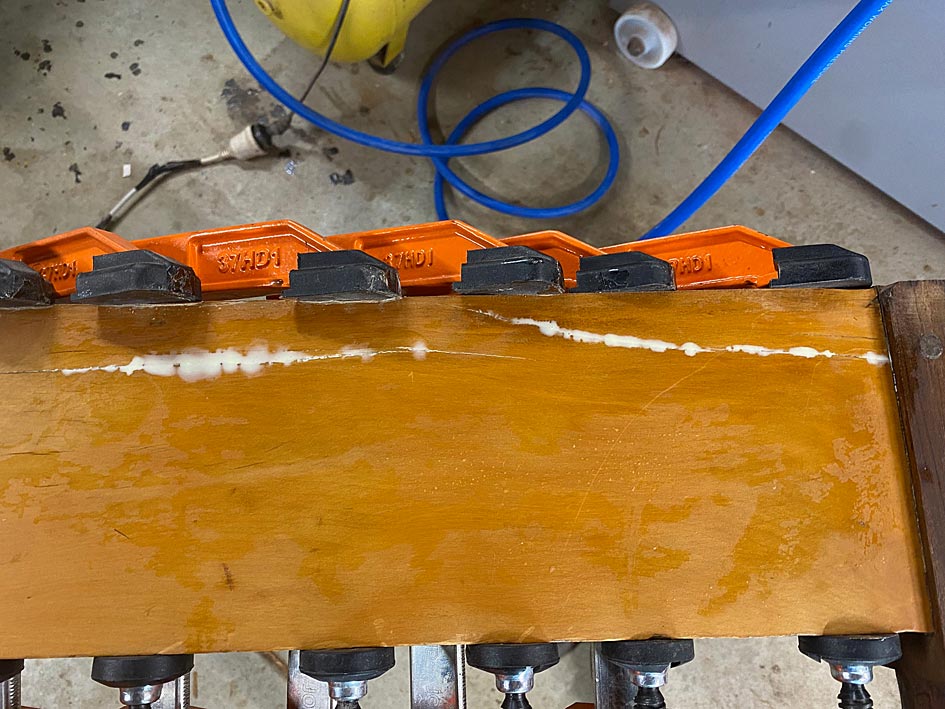
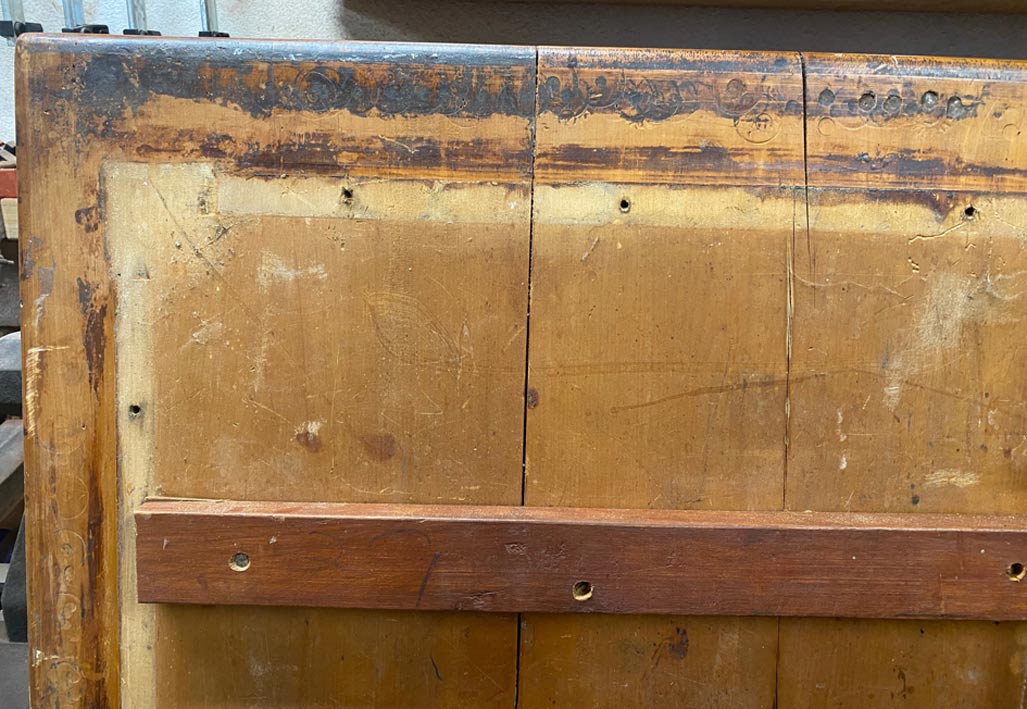
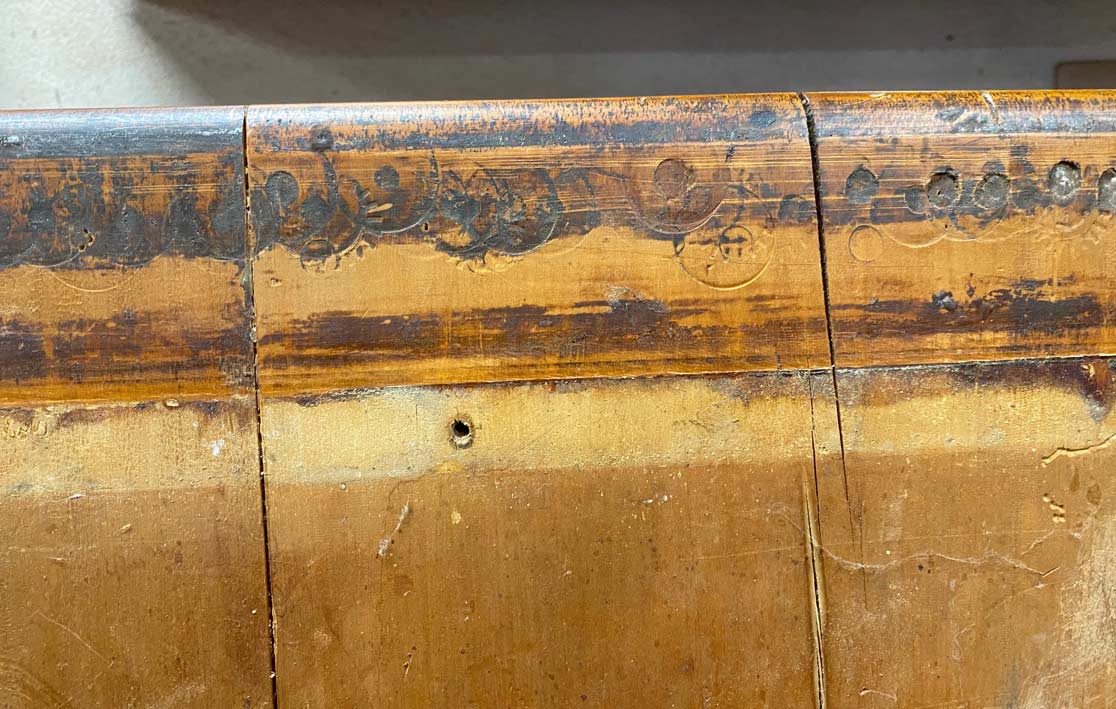
Splits in the table top ...


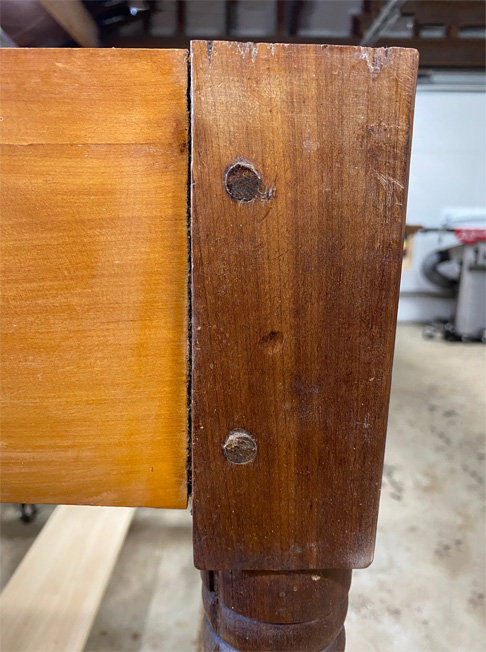
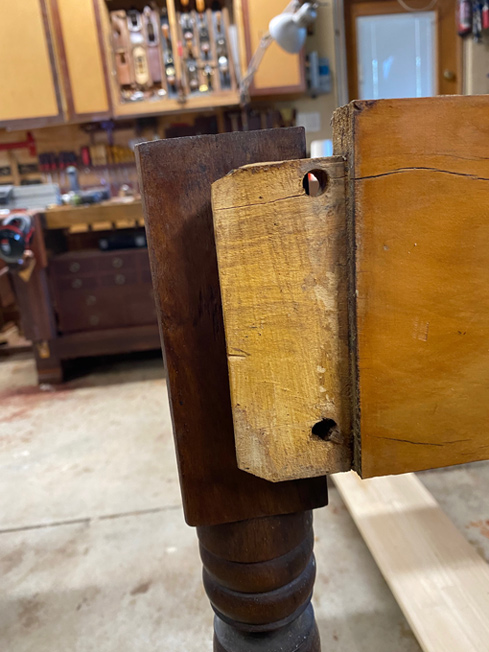
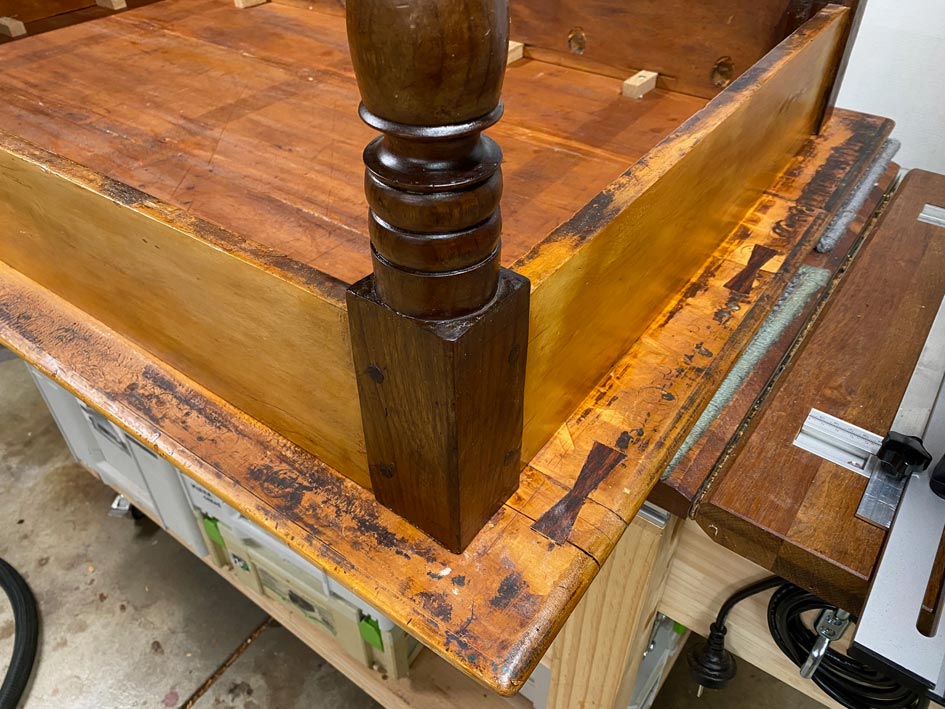
Slip at one leg joint ...


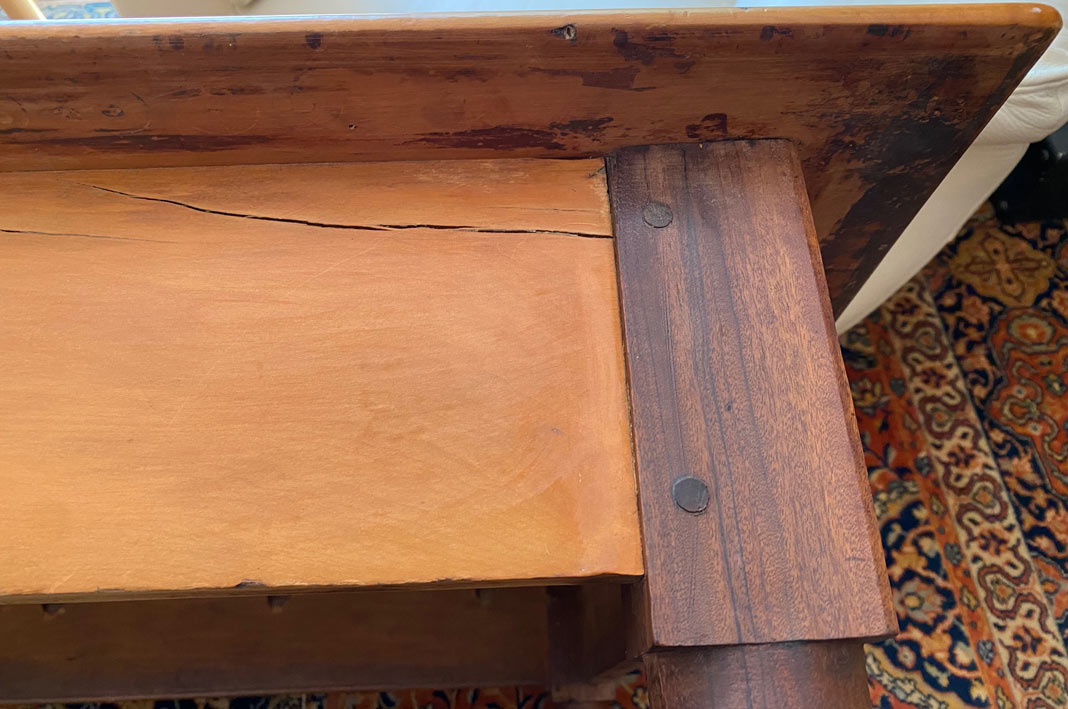
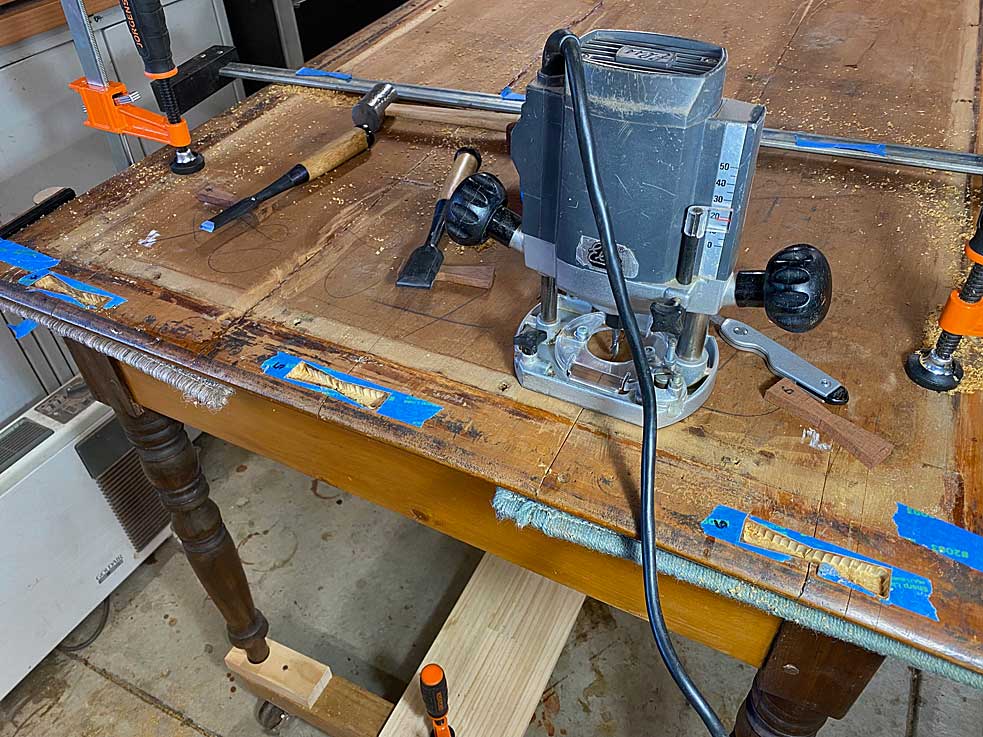
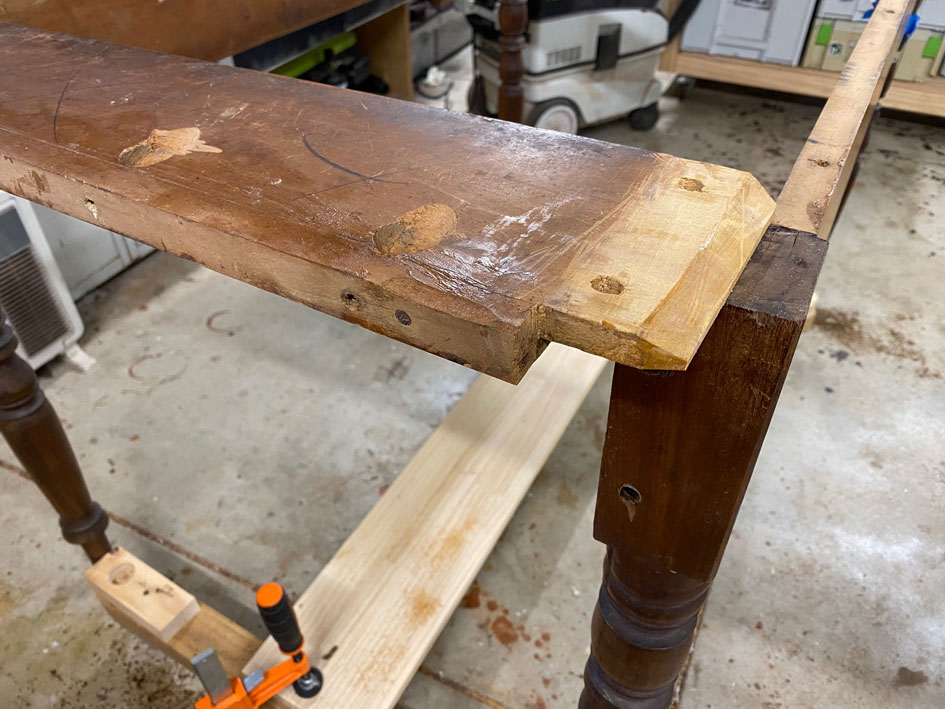
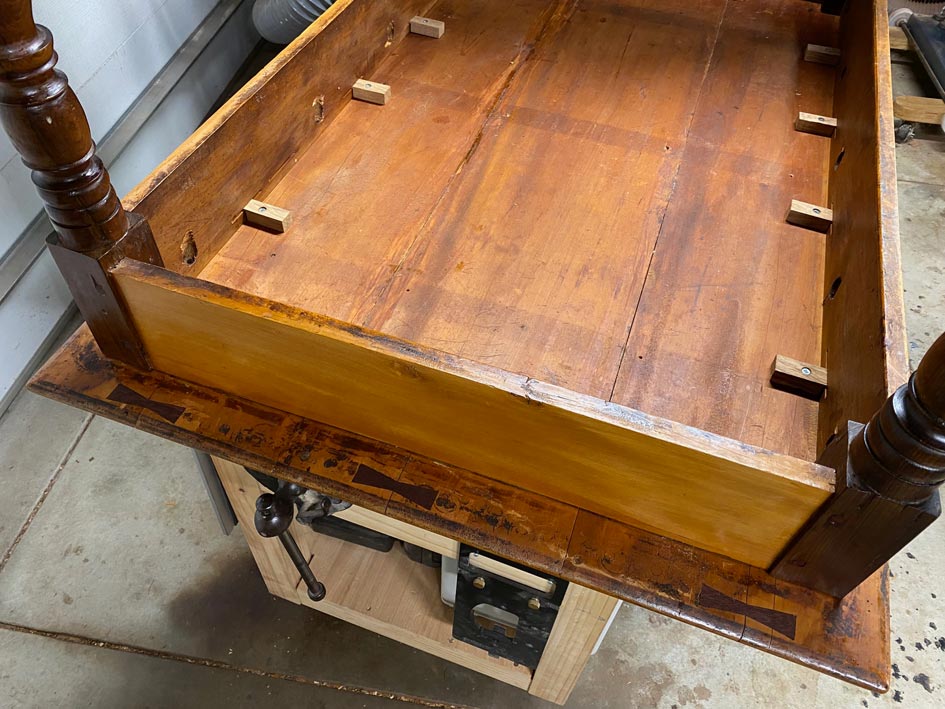
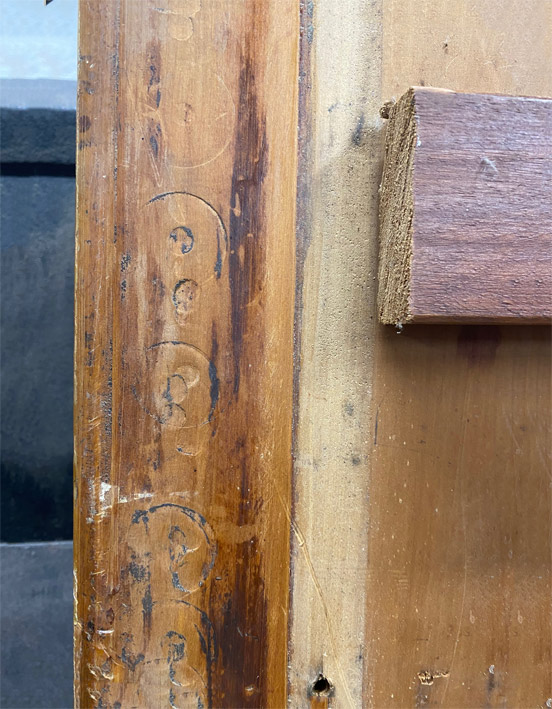
The top is attached with pocket screws (not the Kreg type!) made with a brace and bit. These do not build with wood movement in mind!


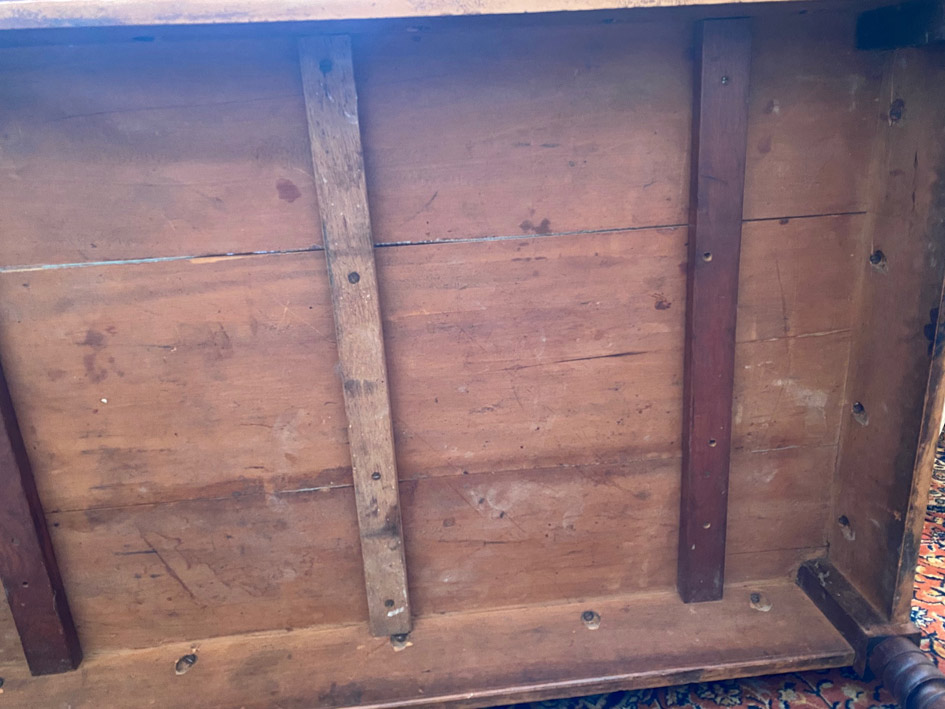
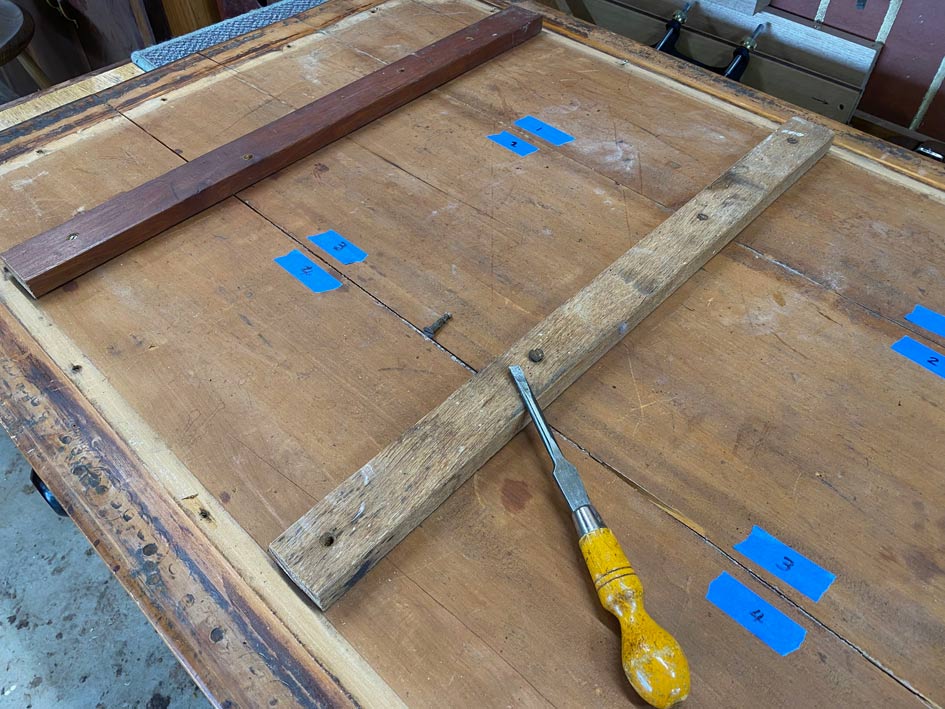
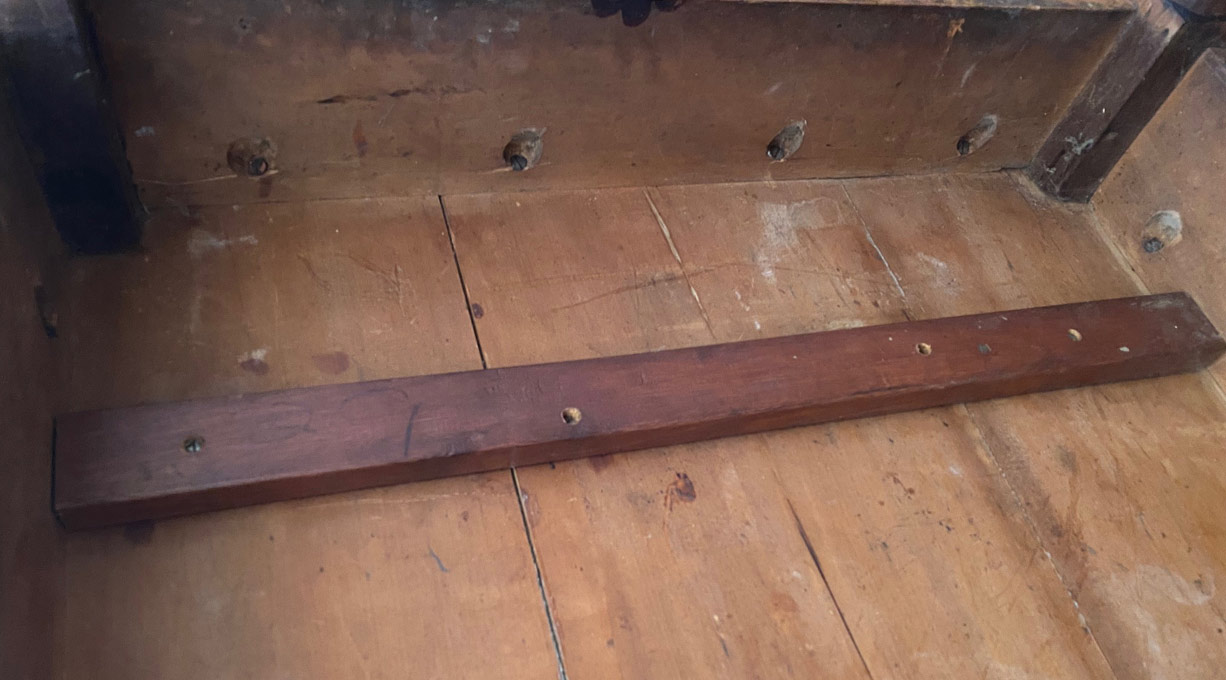
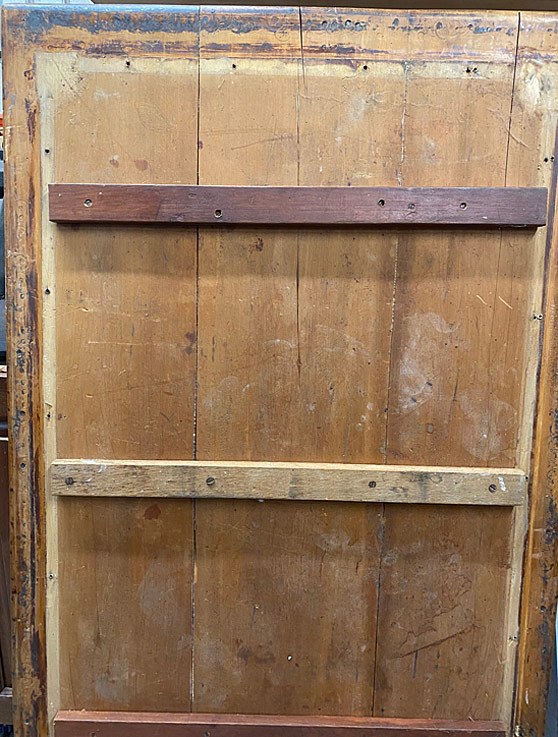
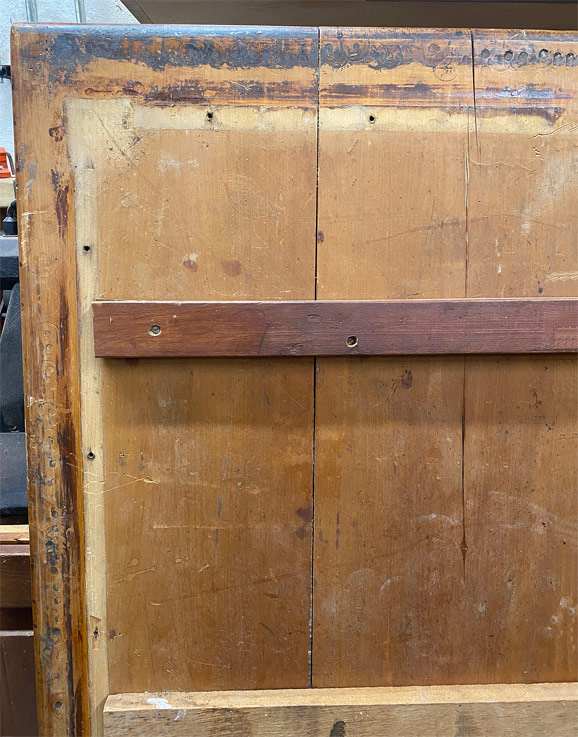
Further, the bracing of the top looks like a modern add-on and, again, prevents movement ...


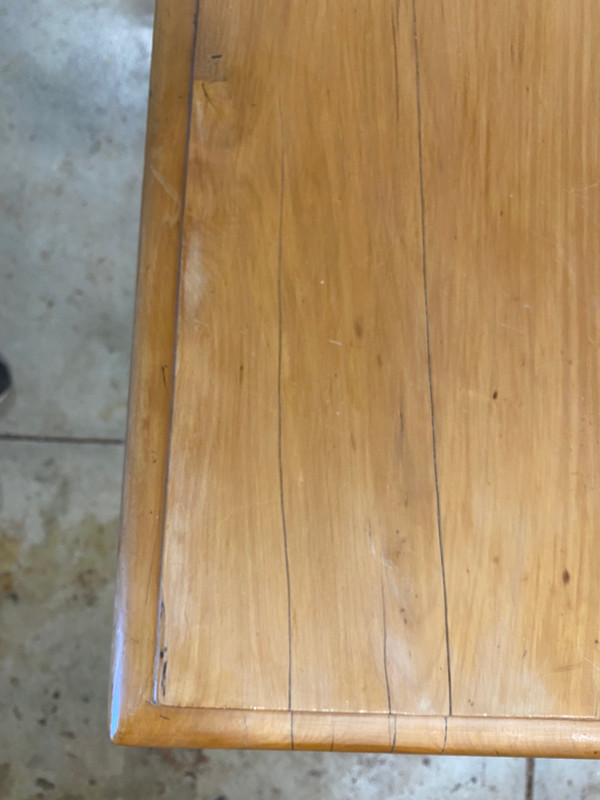
The tops of the legs are all chamfered to avoid contact with the table top ...


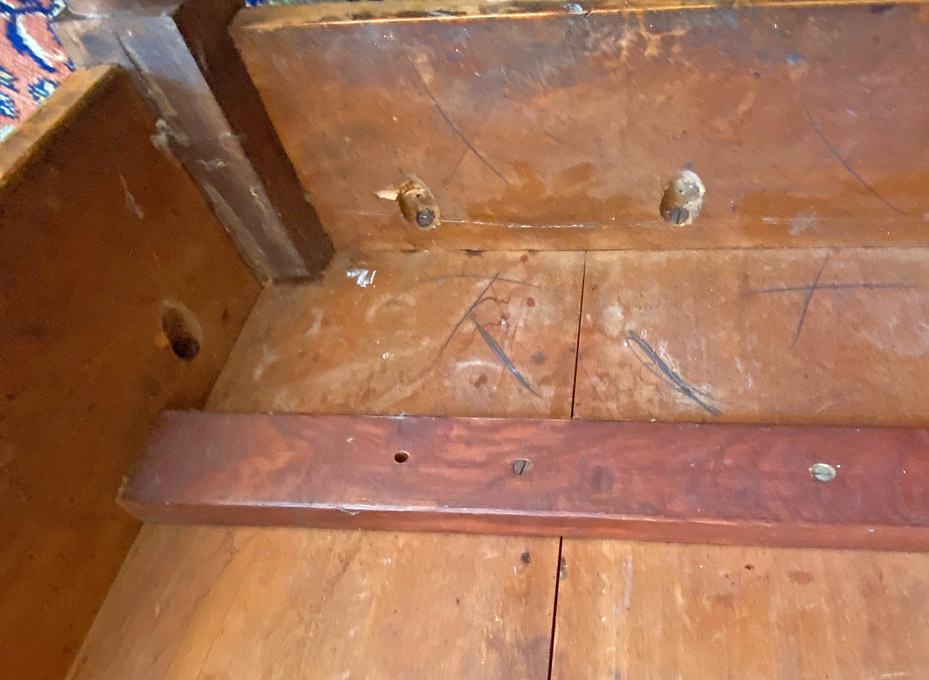
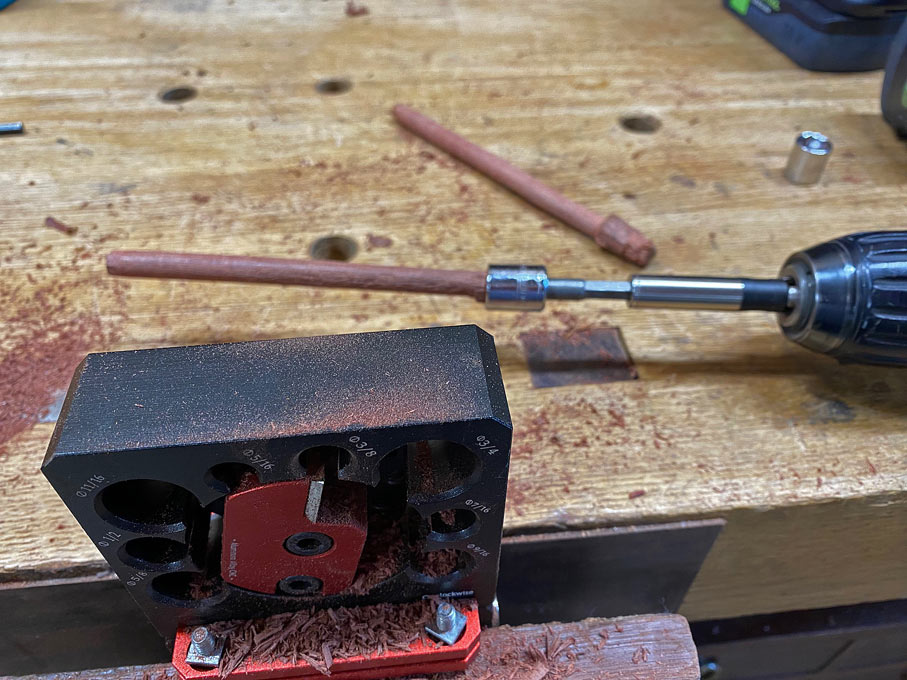
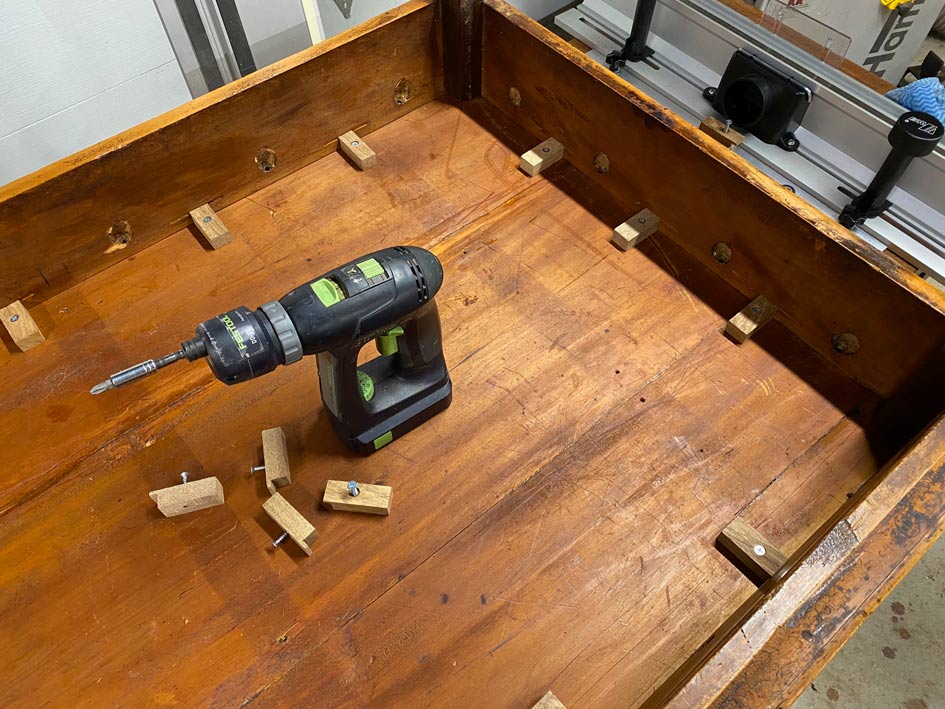
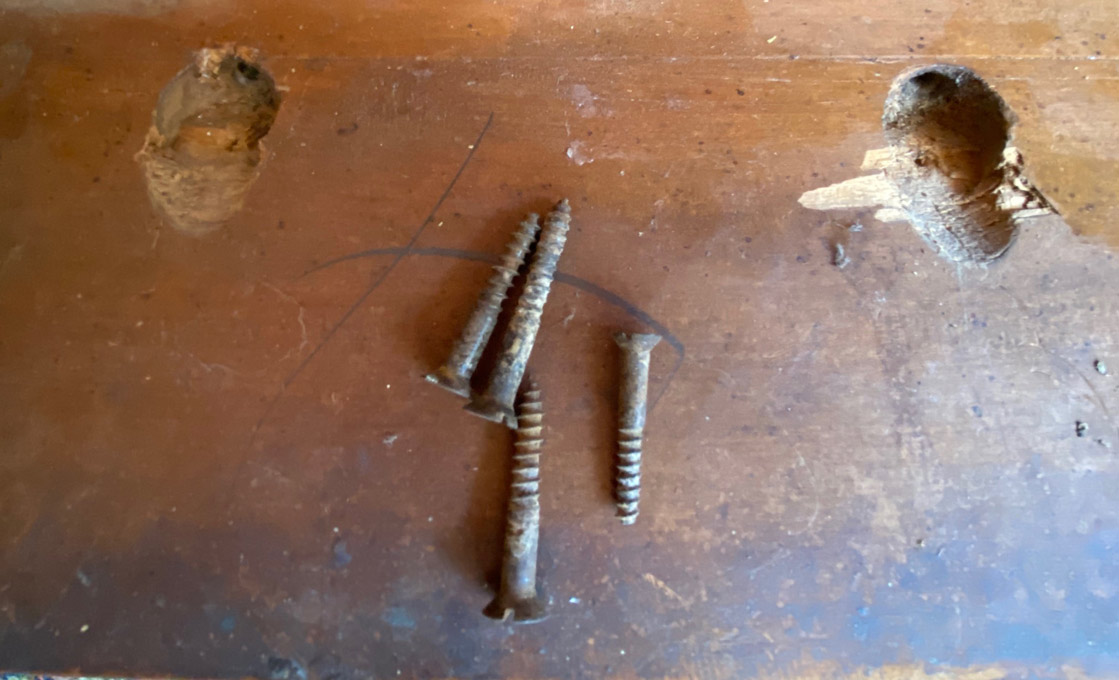
These are the screws that came out ..


Thoughts?

Regards from Perth

Derek

 
One of my favorite YouTube channels is Thomas Johnson Antique Furniture Restoration.


I think the issues with your table can be easily resolved using Tom's techniques. He uses modern hide glue for most of the restoration projects, but is not opposed to PVA or epoxy when required.
 
Last edited:
Yeah, the old-school pocketscrews were a very common thing back then. I am a bit surprised by the battens though, not that they exist, but so many. They may have been added later though?
I'd guess that your amateur restoration guy didn't do it any favors.
 
Those cracks are probably from those cross boards that were likely added well after the table was built.  Possibly the breadboard end pieces too.

Replace the cross pieces with ones that allow for expansion and contraction.  But first repair the cracks.

The original finish was likely shellac.  Not as durable as modern finishes, but more easily repaired.

 
Nice history to the table and it has many more years of use ahead!

I'd consider using a track saw to resew the splits and then glue them back together.  Should maintain the color and close to final size.

I would eliminate the under-top battens and just put a center support spanning the underside for center support.

Repairing the split in the side rail is probably the most challenging.  Might be able to disassemble and then inject some glue and a couple of hefty clamps to close the gap without complete disassembly.

For reattaching the top, I'd consider figure-8 connectors and get rid of the pocket holes which impede wood movement.

Either hide glue or wood glue would work in my view.  Just need to enable wood movement across the top.
 
But before sawing out the cracks, try vacuuming in some glue.

Tape your vacuum hose to the bottom of the tabletop where the cracks are, and apply a slow curing glue.  The vacuum should suck the glue into the crack.  Then apply a clamp to close up the crack.

The air traveling through the crack will make the glue set fast, so a slow curing glue is best.

I’ve used this technique for Formica tops that have delaminated and it works surprisingly well.
 
I spoke with my son today about the table. Interesting.

My son and his wife live in Canberra, which is the capital of Oz, and the seat of government, where he works. Think Washington. He is 31 and married 2 years. His wife is the daughter I always wanted ... a woodworker-in-the-making! She will inherit my tools. My son is a wonderful person, and I love him dearly, but he has not a whit of interest in woodwork. Economics and strategy is where his interest lies. Something of a perfectionist, would be an understatement. Minimalist to the nth degree - hates the idea of having unnecessary possessions.

So I was expecting "make it look new, dad". "Sand it and paint it white". Or something like that  [sad]

He said to me he wants to keep it as it is, warts and all. "It is old and has history". Who is this person?

Now the restoration is more along the lines of choosing what should be repaired and what should be left untouched.

Regards from Perth

Derek
 
I decided to close up the split in the one apron.


The plan was to blow and lift out any debris in the split, and then use the air gun to blow glue inside it.


However, as the split did not run through the wood, air driven at it simply pushed the glue out, not in. In the end I thinned it a little, dribbled it in, and pushed it down. Wiped down the surface with a wet rag, and then clamped all securely ...


I discovered two factors about the table top.


When I loosened the battens, the boards were revealed to be loose, that is, only held together by the battens ...


Further, the battens looked like they were added by the "farmer-restorer" 45 years ago. The ends of the battens were sawn as if with a panel saw, and no attempt made to finish the ends. The screws looked modern ...


Loose boards.

The plan is now to remove all the battens, clean the edges, and reglue the boards together.

The second feature is one I am puzzled about and wonder what you believe this is about:  along the underside of the table top, along the edges, are these round marks ...


They appear as if the round pad of a F-clamp had dug into the soft Yellow Wood. But why? Why would clamps have been used all along the under edge? The upper side is a Lamb's Tongue profile. I cannot see how that would require clamping. And there are too many marks to suggest clamping to support a glue up.

Thoughts on this?

Regards from Perth

Derek

 
derekcohen said:
They appear as if the round pad of a F-clamp had dug into the soft Yellow Wood. But why? Why would clamps have been used all along the under edge? The upper side is a Lamb's Tongue profile. I cannot see how that would require clamping. And there are too many marks to suggest clamping to support a glue up.

Thoughts on this?

I think the table was used as a work surface at some point in its life and the marks could be from clamping material to the table for processing.
 
Those round marks were made by handmachines clamped to the edge of the table, probably ones that cut vegetables before further processing, like preserving. My grandmother had one - dump green beans in the hopper, turn a handwheel and voila: sliced beans dropping into a bowl.
The fact that there are lots of marks around the table suggests that multiple machines were used simultaneously, by several people. Maybe in a 'commercial' setting?
 
Bert nailed it. Food grinders, tomato grinders for canning, etc. Lots of processing machines turned by hand cranks had those round clamp ends. Possibly not showing any marks on the top surface because they may have used a cutting board or something else to keep from marring the top surface.
 
You can replace with new or restore the older battens with the following changes.

1.  Only glue the center 3-1/2” of the batten to the top.

2.  Replace the screw holes on the batten with oblong holes and use washers to allow the boards to move.

Here is one version (but don’t over-tighten the screws).

100504591-bbffee6e0ac34be798f3d475c995eb49.jpg

 
Time to begin working on the table top.


First to come off are these horrible, not-original battens (which are likely the cause of the top splitting as they would have restricted movement) ...


Removing the battens releases one board (of this three-board top). It just comes away. We will deal with this a little later.

The immediate need is to determine what glue was used. What is left is brittle, which suggests hide glue to me. The wood is so dry that it scrapes off without much of a fight.


I want to deal with this split. It looks like it will be a challenge, and I could use some insights ...


It is possible to remove some of the old glue and filler with a awl ...


... and then dig deeper with a blade ...


We are left with a 3-4mm wide slit at the edge ...


The underside is narrower, about 2mm ...


I use a clamp to see if if can be pulled together ...


About a 2mm gap remains ...


But underneath it is tight - which means that the top is not going to close up any more than it is right now ...


What this suggests is that the split has lost some wood along the way and is now triangular internally, but more likely this is the result of inner tensions. The top is coplanar - I added a flat guide along the top when clamping - so it is not cause by a cup.

The question is how to (1) glue this, and (2) whether to fill the gap (whether it should be filled?), and if so, with what - tinted epoxy with a layer of tinted shellac stick on top, or stick to hide glue with shellack stick? Overall, I do not want this large a split to remain as food, etc will accumulate in it ivervtime.

The better repair, in my opinion, is to recognise that the split reflects tension, and it cannot be forced together with a clamp. it will split again. It looks like I may have to saw the board off (using a tracksaw), joint the edges, and then re-glue. This will lose about 4mm from the width, which would not be noticed. The main concern is damaging the finish.

Regards from Perth

Derek
 
The top is made from three boards. Removing the battens, the board on the left side was completely loose and came away.


The edges of the joining boards was dry with a little hard glue, which scraped off with little effort. I suspect hide glue (as what was there was brittle) but there was too little to test ...


This was re-glued with Old Brown hide glue (seen here warming) ...


... clamped along with cauls, and left to dry for 24 hours ...


The result looks pretty decent. A glue line is evident, but in-keeping with the rest of the table top ..


Up close, this is the worst of the join ....


There are now two splits to deal with. The first is the large one that closes up underneath but leaves a 2mm wide slit on the top ...


The plan is to add hide glue and pull it together. It will join along the lower side, and then the remaining slit will be filled with either epoxy and hard wax stick or just wax stick.

The smaller split ...


... will be glued and pulled together. It should close up almost completely. What is left will be left as is.

Hide glue was pulled through the splits with a vacuum cleaner, sealed below with tape, and clamped with a caul ...


Before I go, here is a fixture that should come in handy if, like in my case, space is a priority and pieces, such as this table, need to be moved around the workshop.

Several years ago I was asked for a tip by Megan Fitzpatrick for Popular Woodworking magazine when she took over as editor. I sent her a photo of a 4x2 with wheels at each end. Two of these joined with a board create a carrier for a table ... or a cabinet ... or anything else. Unscrew the joining board, and pack away the two 4x2's.


Regards from Perth

Derek
 
Well, after the glue dried and the clamps were removed, I was not thrilled with the result. The width of the split was too great for my liking. At around 3mm, it would need filling, and I had decided that I did not want to fill any splits. The table is old and splits happen. Just not a split this wide ...


The issue was simply that the split could not close up - no matter how much force was applied by clamps - as the lower edge closed up and prevented the top side closing.

The answer was to saw the split until it was a parallel-side split ...


A clamp was used to pull the edges together, progressively, as the split was widened ...


The smaller split was also sawn out ...


Once satisfied, the end was clamped up again .... this time with a series of clamps, to spread the load more evenly ...


Turning the table top over, the plan was to reinforce all the splits with butterfies ...


The wide splits received two ...


There were splits at other end of the table top, although these were still fine in nature. However, I did not want this to develop as a problem area in the future when the table went across the country, and therefore more butterfies were added ...


Note that the joins between boards were not touched. Only expansion splits due to expansion ...


Interestingly, I noted that the builder of the table had marked the board order when gluing up the top.

Glue up again, and out of clamps, the wide split was now under 1mm ...


The smaller split was similar ...


And these were in-line with the splits on the other end of the top ...


I am happy with this. To finish the top I plan to give it a light sanding (by hand), partly to remove any rough edges from gluing boards and splits, and also to key in a finish coat. About 20 years ago I decided that the top needed to be treated in a way to make it waterproof and tolerant of spills. Shellac and wax was not durable enough. So I rubbed on a few thin layers of poly. As sacrilegious as this sounds, it has been a blessing of sorts. The finish is thin enough to not look like poly, and durable to have withstood the years of family eating and dining with friends. The poly is thick enough to sand back a smidgeon, enough to level joins where the edges are raised, and then add a finish on top. I am thinking of a water-based poly as this will not change the colour of the current finish.

Now it is time to pull the legs apart!

Regards from Perth

Derek
 
It wasn't in the original plan, but it became apparent that some of the legs had gaps that indicated they were only held by the pegs ...


So ... to start, all the pegs were drilled out. To do this, first pull the legs in tight with a clamp to ensure that the tenon is not chewed up ...


Then reverse the clamp to push the mortise-and-tenons apart ...


Pretty dry, would you agree ...


Interesting tenons ... only shouldered on the outside ...


Made new 3/8" pegs ...


And then, after cleaning away the vestiges of the unknown glue from the joints, reglued with hide glue, fitted all together, and wacked in new pegs ...


The underside of the table top was cleaned and oiled. You will recall that the top was cracked quite significantly, with one board completely loose. In part, movement was likely to have been promoted by the imbalance of a finished outer side and an unfinished underside. This would have been exacerbated by the battens across the underside and each board screwed to the aprons - all preventing movement. Frankly, I am amazed that the table lasted as long as it did, which is 40 years since it was "renovated" before my wife and I purchased it. Over the years I could see cracks appearing. The underside no longer was dry, and the battens were not being re-installed ...


As much as possible, the markings of the table has been left to tell its history. The "circles" around the perimeter almost certainly come from the screw of a meat mincer, which was commonly attached to kitchen tables. One addition comes in the form of butterfly reinforcements where ends have split. These are only on the underside where they cannot be seen ...


There are a few other butterflies at the other end of the table. Also seen here are wooden buttons to hold the top. The screws were thrown away. The buttons were made from the old cross bracing, and the slots created with a biscuit jointer - that will confuse someone in the decades ahead!


Now the table can be flipped over and the top side finished.

There were two issues. The first was the large splits opened when the top was buttoned down. I decided to add a little coloured epoxy filler as the gaps were large (see the earlier pictures), and I did not want food to get stuck inside.


This worked well, with the epoxy being allowed to sink a little under the surface, leaving the splits visible but no longer dominant ...


The second issue was related to gluing the loose board. Although the levelling went pretty well, there was a very fine glue line and ridge. This was cleaned up using a very sharp card scraper taking the finest of shavings, however the process left a line cut through the finish ...


There were several areas like this, others also created by hand sanding the top with 240 grit to create some tooth for a new finish.

To re-colour these areas, I used a touch up pen on a pad wet with alcohol ...


The retouched area ...


Examples of sanded-through sections ...


... and ...


The legs were oiled and waxed (what a difference!) ...


And the top received three rubbed on coats of water-based poly. Keep in mind that the table will be used for family meals. This is not going into a museum.


The top has since been rubbed out with steel wool and ow has a natural matt finish.

Thanks for keeping me company.

Regards from Perth

Derek
 
Thank you for taking us on this journey, Derek!

Our kitchen table is on its fourth generation in my family (fifth if you count our toddlers) and, while not in quite the same shape overall, shares many similarities with its original assembly.  This is a very helpful story that I will likely revisit when it comes time to extend its life.
 
Nice one, mister D. What stands out re this table is the contrast between the leges and the boards. Could it be that the legs came from some (fairly limited in choice) mailorder catalogue? With the rest sourced locally?
 
Bert Vanderveen said:
Nice one, mister D. What stands out re this table is the contrast between the leges and the boards. Could it be that the legs came from some (fairly limited in choice) mailorder catalogue? With the rest sourced locally?

Hi Bert

As I recall, I did mention this at the start of the thread. The table originated in South Africa, and was built about 200 years ago. The wood is a classic combination of Yellow Wood for the top and Stinkwood for the legs. All this is original. The legs reflect the influence of the French Huguenots, who migrated to the Cape area to escape persecution in France. These legs are slimmer than those of the English furnituremakers of the times. The table was a common design used in a kitchen, where it endured all that could be thrown at it. My wife and I purchased it after our wedding 42 years ago. At the time I was completing my internship in clinical psychology and living in the Eastern Cape area of South Africa. We migrated, with the table, to Australia in the early 80s.

Regards from Perth

Derek

 
Back
Top