S
six-point socket
Guest
Hi! (Sorry for the mix up in the pictures when I first published the thread, it's sorted out now ") )
)
I'd like to share my experience with using the Festool delta sander DTS 400 EQ (230V) extensively over the last two days.
Preface:
It all started on Wednesday, the weather outlook was fine so I wanted to lightly sand/clean my shed before applying a new coat of wood protection/preservation finally. I got ready, set everything up and started sanding with an older delta sander - my Dad used it, I used it and apparently it's time was over - it quit on me after 30 minutes. There I stood - everything set up, dusty but without a working sander. I decided to call it a day, put everything back on the patio. After changing clothes I started looking through my Festool catalog for a new sander and after some reading and comparing I decided on the DTS 400 EQ. I knew of a (Fes)-tool dealer very close to where I go shopping for the finer things in the next bigger city regularly - so off I went on a shopping spree to turn a "bad" day into a good one. To cut a long story short after a couple of hours in "my" regular stores and a great lunch I went to visit the new to me (Fes)-tool dealer (only drove by his windows about a thousand times at least but never went in, stupid me...) I was really impressed, it's a relatively small store but packed to the max with Festool, Bosch Professional, Makita, Gesipa, Prebena, Fein and Fischer. Not just tools but also consumables and accessories - unbelievable. If I had only known what I've been missing out on all those years... The gentleman who served me has been behind the counter of (t)his store for more than 30 years we had a nice long talk and I left with the DTS 400 EQ and got 20 sheets of Festool 120 grit Brilliant 2 sandpaper on top for free.
"Unboxing":
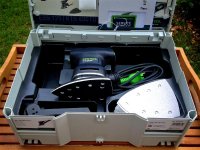
Besides the sander and power cable included items: StickFix sanding pad 100 x 150 mm, filter cartridge, Systainer SYS 2 T-LOC
Technical Data:
Dust extraction connection dia.: 27 mm
Power consumption: 200 W
Idle engine speed: 6000-14000 min⁻¹
Sanding stroke: 2 mm
Interchangeable sanding pad: 100 x 150 mm
Weight: 1,1 kg
What Festool has to say about this delta sander:
[attachimg=21]
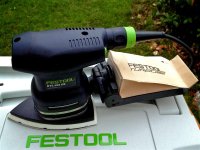
As you can see the Systainer offers quite some additional space for accessories like additional sanding pads, filters and of course consumables (sandpaper...)
[attachimg=22]
[attachimg=23]
[attachimg=24]
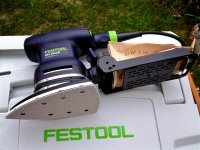
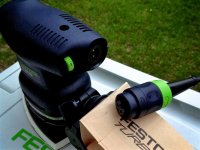
Even with installed filter still very compact and lightweight. The filter fits nice and tight on the dust extraction connector and in addition to already sitting quite a bit higher than the sanding pad it can still swivel up (and down) a bit if necessary during work.
[attachimg=25]
Power connection and speed selection.
Work (Thursday):
[attachimg=1]
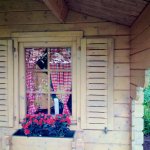
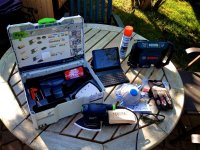
Set up.
[attachimg=2]
Safety first and "selfie" time")
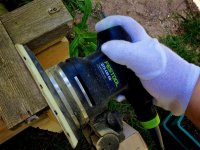
[attachimg=3]
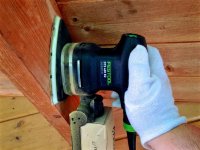
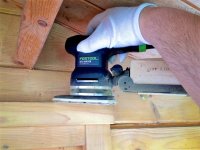
Getting acquainted. I noticed that with this type of work and equipment (Wood with prior coatings of wood protection and Festool 120 Grit Brilliant 2 sandpaper) I need to select at least speed "4" for smooth movement over the surface and good sanding results.
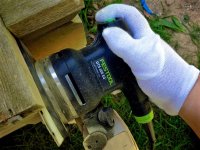
[attachimg=4]
[attachimg=5]
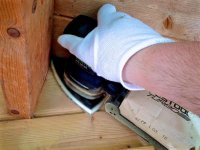
Fits perfectly into the gaps.
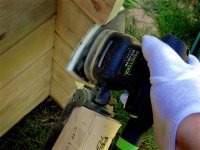
[attachimg=6]
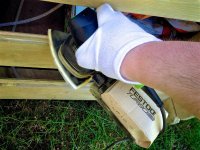
Right into the corner.
[attachimg=7]
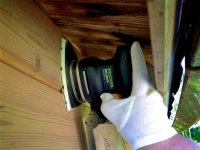
Great results and progress
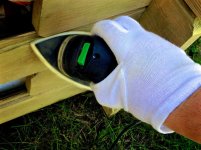
[attachimg=8]
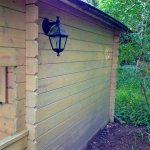
Festool said something about awkward spots, here's the first one.
[attachimg=9]
Another type of corner - no problem.
[attachimg=10]
Same corner, but beneath the handrail - no problem.
[attachimg=11]
Larger gaps.
[attachimg=12]
[attachimg=13]
Following the edge.
[attachimg=14]
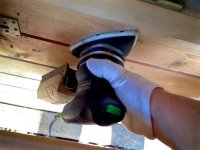
Corner on the roof. If you take a close look to the right corner of this photo you can see the filter resting on the window frame. Since it can swivel a little up there would have been no problem even if the spot had been a tad bit tighter/smaller.
[attachimg=15]
Another, tighter spot.
[attachimg=16]
Right up to the roof board.
[attachimg=17]
Last picture from Thursday, lunch break - man I love doner kebap. Fresh salad(s), tomatoes, cucumber, coleslaw, onion and some chicken stuffed into a quarter of a turkish bread loaf and a nice sauce. + Guy who makes them has his restaurant right around the corner and he knows if he hears machines running from my direction - I'll swing by sooner or later in the day to pick some up.
Work (Friday)
I didn't take as much pictures as I wanted to finish the job - so I could apply the coating of wood protection.
[attachimg=18]
[attachimg=19]
[attachimg=20]
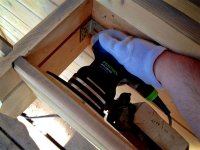
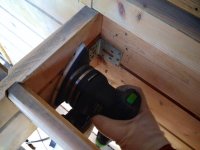
Sanding inside a flower box, try that with a different/bigger sander...
[attachimg=26]
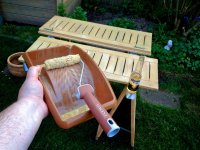
Finally, starting to apply the wood protection. (I felt safe enough with the paint roller to crack up a cold beer... )
--
What I definitely liked about the DTS 400 EQ is it's ergonomics and very light weigh, even with the filter filling up. I was able to work, work and then work some more without feeling any fatigue. Also the palm rest is extraordinarily well isolated from/against vibrations, especially in comparison to my old sander or my oscillating multitool from another brand. This alone speaks volumes to me and for the quality of Festool sanders.
During this two days of continuous use I "killed" the very tip of the sanding pad somehow and ripped through the surface of the sanding pad for a cm or two because I overlooked the tip of a screw sticking out on my shed.
Given the awkward positions I used this sander in: tip down close to concrete foundations, in very constricted spaces over head and so on I don't blame the sanding pad for any of it and at 20 bucks a piece, I honestly don't care.
I had a new one delivered to me by early morning on Friday but decided not to install it an go with the "old" one. So I do have an intact one now in my Systainer if the need should arise.
What I did not like, and I don't know if it was my gloves, the positions/ my handling of the sander but I managed to "hit" the speed selector a couple of times - obviously resulting in either higher or slower speed and I had to set it back. No big deal.
The power cord held up great, it's a great system that I wish more companies would use. I'm kinda in love with it
Sandpaper. I got 20 sheets of 120 grit Festool Brilliant 2 sandpaper for free with the tool from my dealer. I figured they would last a day, so I ordered another pack of 100 120 grit Festool Brilliant 2 and a pack of 50 120 grit Festool Rubin 2. Boy I was wrong - I mean I can't say how much I would have needed if I had wanted to really sand down the hole shed to 100% bare wood - but for what I wanted I ended up needing only 9 sheets of the Brilliant 2 - didn't even try the Rubin 2 - that's impressive. These hold up and work so well, totally amazed. And I guess someone who tries to get the most out of every sheet would have used 1 or maybe even 3 less, I can't say for sure. All I know is that I sanded about 48 square meter with 9 sheets to a for me, and for the coating satisfactory result - and that still impresses me.
Thank you for reading and I hope you like my review - If you're on the edge about buying a DTS 400 EQ - do it.
Kind regards,
Oliver
)I'd like to share my experience with using the Festool delta sander DTS 400 EQ (230V) extensively over the last two days.
Preface:
It all started on Wednesday, the weather outlook was fine so I wanted to lightly sand/clean my shed before applying a new coat of wood protection/preservation finally. I got ready, set everything up and started sanding with an older delta sander - my Dad used it, I used it and apparently it's time was over - it quit on me after 30 minutes. There I stood - everything set up, dusty but without a working sander. I decided to call it a day, put everything back on the patio. After changing clothes I started looking through my Festool catalog for a new sander and after some reading and comparing I decided on the DTS 400 EQ. I knew of a (Fes)-tool dealer very close to where I go shopping for the finer things in the next bigger city regularly - so off I went on a shopping spree to turn a "bad" day into a good one. To cut a long story short after a couple of hours in "my" regular stores and a great lunch I went to visit the new to me (Fes)-tool dealer (only drove by his windows about a thousand times at least but never went in, stupid me...) I was really impressed, it's a relatively small store but packed to the max with Festool, Bosch Professional, Makita, Gesipa, Prebena, Fein and Fischer. Not just tools but also consumables and accessories - unbelievable. If I had only known what I've been missing out on all those years... The gentleman who served me has been behind the counter of (t)his store for more than 30 years we had a nice long talk and I left with the DTS 400 EQ and got 20 sheets of Festool 120 grit Brilliant 2 sandpaper on top for free.
"Unboxing":
Besides the sander and power cable included items: StickFix sanding pad 100 x 150 mm, filter cartridge, Systainer SYS 2 T-LOC
Technical Data:
Dust extraction connection dia.: 27 mm
Power consumption: 200 W
Idle engine speed: 6000-14000 min⁻¹
Sanding stroke: 2 mm
Interchangeable sanding pad: 100 x 150 mm
Weight: 1,1 kg
What Festool has to say about this delta sander:
https://www.festool.com/Products/Pages/Product-Detail.aspx?pid=567868 said:Compact corner sander.
- Triangle-shaped sanding pad for efficient sanding of corners and other awkward spots
- Saving you time and reworking
- The enclosed dust proof bearing and high tear-resistant MPE sanding pad ensure a long service life and maximum economic efficiency
- Effective integral turbo dust extractor
- Small, lightweight and extremely handy for non-tiring work
Main areas of use
- One-handed sander for small surfaces, edges and tight corners
- Ideal for vertical surfaces or overhead work
- Sanding natural wood and veneer prior to varnishing
- Sanding close to edges on different materials
- Sanding in narrow gaps
[attachimg=21]
As you can see the Systainer offers quite some additional space for accessories like additional sanding pads, filters and of course consumables (sandpaper...)
[attachimg=22]
[attachimg=23]
[attachimg=24]
Even with installed filter still very compact and lightweight. The filter fits nice and tight on the dust extraction connector and in addition to already sitting quite a bit higher than the sanding pad it can still swivel up (and down) a bit if necessary during work.
[attachimg=25]
Power connection and speed selection.
Work (Thursday):
[attachimg=1]
Set up.
[attachimg=2]
Safety first and "selfie" time
[attachimg=3]
Getting acquainted. I noticed that with this type of work and equipment (Wood with prior coatings of wood protection and Festool 120 Grit Brilliant 2 sandpaper) I need to select at least speed "4" for smooth movement over the surface and good sanding results.
[attachimg=4]
[attachimg=5]
Fits perfectly into the gaps.
[attachimg=6]
Right into the corner.
[attachimg=7]
Great results and progress
[attachimg=8]
Festool said something about awkward spots, here's the first one.
[attachimg=9]
Another type of corner - no problem.
[attachimg=10]
Same corner, but beneath the handrail - no problem.
[attachimg=11]
Larger gaps.
[attachimg=12]
[attachimg=13]
Following the edge.
[attachimg=14]
Corner on the roof. If you take a close look to the right corner of this photo you can see the filter resting on the window frame. Since it can swivel a little up there would have been no problem even if the spot had been a tad bit tighter/smaller.
[attachimg=15]
Another, tighter spot.
[attachimg=16]
Right up to the roof board.
[attachimg=17]
Last picture from Thursday, lunch break - man I love doner kebap. Fresh salad(s), tomatoes, cucumber, coleslaw, onion and some chicken stuffed into a quarter of a turkish bread loaf and a nice sauce. + Guy who makes them has his restaurant right around the corner and he knows if he hears machines running from my direction - I'll swing by sooner or later in the day to pick some up.
Work (Friday)
I didn't take as much pictures as I wanted to finish the job - so I could apply the coating of wood protection.
[attachimg=18]
[attachimg=19]
[attachimg=20]
Sanding inside a flower box, try that with a different/bigger sander...
[attachimg=26]
Finally, starting to apply the wood protection. (I felt safe enough with the paint roller to crack up a cold beer...
)--
What I definitely liked about the DTS 400 EQ is it's ergonomics and very light weigh, even with the filter filling up. I was able to work, work and then work some more without feeling any fatigue. Also the palm rest is extraordinarily well isolated from/against vibrations, especially in comparison to my old sander or my oscillating multitool from another brand. This alone speaks volumes to me and for the quality of Festool sanders.
During this two days of continuous use I "killed" the very tip of the sanding pad somehow and ripped through the surface of the sanding pad for a cm or two because I overlooked the tip of a screw sticking out on my shed.
Given the awkward positions I used this sander in: tip down close to concrete foundations, in very constricted spaces over head and so on I don't blame the sanding pad for any of it and at 20 bucks a piece, I honestly don't care.
I had a new one delivered to me by early morning on Friday but decided not to install it an go with the "old" one. So I do have an intact one now in my Systainer if the need should arise.
What I did not like, and I don't know if it was my gloves, the positions/ my handling of the sander but I managed to "hit" the speed selector a couple of times - obviously resulting in either higher or slower speed and I had to set it back. No big deal.
The power cord held up great, it's a great system that I wish more companies would use. I'm kinda in love with it
Sandpaper. I got 20 sheets of 120 grit Festool Brilliant 2 sandpaper for free with the tool from my dealer. I figured they would last a day, so I ordered another pack of 100 120 grit Festool Brilliant 2 and a pack of 50 120 grit Festool Rubin 2. Boy I was wrong - I mean I can't say how much I would have needed if I had wanted to really sand down the hole shed to 100% bare wood - but for what I wanted I ended up needing only 9 sheets of the Brilliant 2 - didn't even try the Rubin 2 - that's impressive. These hold up and work so well, totally amazed. And I guess someone who tries to get the most out of every sheet would have used 1 or maybe even 3 less, I can't say for sure. All I know is that I sanded about 48 square meter with 9 sheets to a for me, and for the coating satisfactory result - and that still impresses me.
Thank you for reading and I hope you like my review - If you're on the edge about buying a DTS 400 EQ - do it.
Kind regards,
Oliver
Attachments
-
 IMG_9115.jpg99.6 KB · Views: 7,219
 -
 IMG_9184.jpg82 KB · Views: 7,171
 -
 IMG_9194.jpg107.1 KB · Views: 6,998
 -
 IMG_9236.jpg62.2 KB · Views: 7,030
 -
 IMG_9242.jpg54.6 KB · Views: 6,915
 -
 IMG_9245.jpg53.4 KB · Views: 6,961
 -
 IMG_9047.jpg76.2 KB · Views: 7,561
 -
 IMG_9059.jpg69.3 KB · Views: 8,259
 -
 IMG_9069.jpg71.7 KB · Views: 7,676
 -
 IMG_9076.jpg66.4 KB · Views: 7,329
 -
 IMG_9088.jpg62.8 KB · Views: 7,256
 -
 IMG_9258.jpg85.1 KB · Views: 7,035
 -
 IMG_9179.jpg71.3 KB · Views: 7,035
 -
 IMG_9177.jpg73.4 KB · Views: 6,997
 -
 IMG_9172.jpg95.2 KB · Views: 7,057
 -
 IMG_9121.jpg89.4 KB · Views: 7,087
 -
 IMG_9124.jpg71.2 KB · Views: 7,030
 -
 IMG_9125.jpg65.6 KB · Views: 7,127
 -
 IMG_9128.jpg54.4 KB · Views: 7,044
 -
 IMG_9133.jpg78 KB · Views: 7,098
 -
 IMG_9136.jpg80.2 KB · Views: 7,151
 -
 IMG_9140.jpg67.1 KB · Views: 7,121
 -
 IMG_9145.jpg99 KB · Views: 7,120
 -
 IMG_9150.jpg100.1 KB · Views: 7,040
 -
 IMG_9152.jpg76.2 KB · Views: 7,063
 -
 IMG_9158.jpg88.5 KB · Views: 6,997