Rocking Horse for Christmas

mot

Member
Joined
Feb 25, 2007
Messages
48
Festool tools used:  Domino, MFT1080, TS55, ETS150

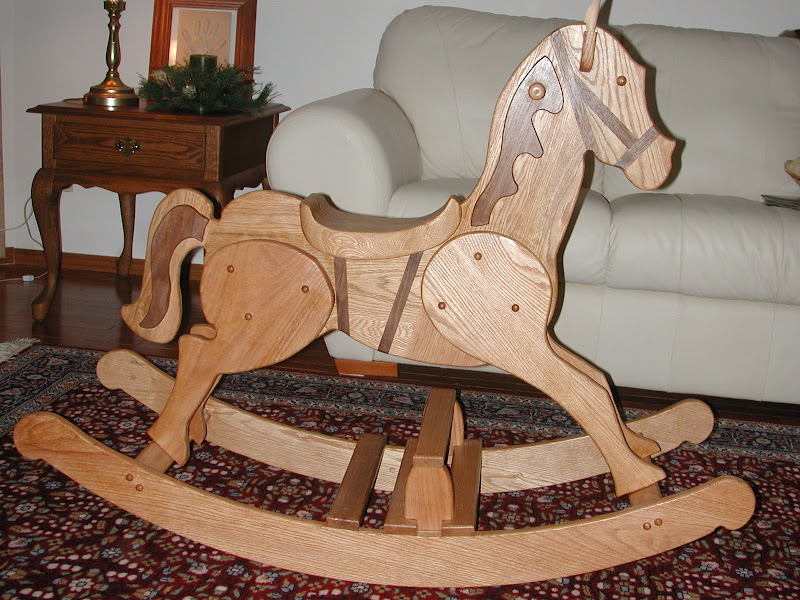
This Christmas saw a lot of small projects in the shop.  On December 13th, my wife said, "The little guy should have a rocking horse."  After she revived me, I headed down to the shop to start the build.  I chose a plan from Family Tradition Woodworking Plans and proceeded to work many late nights coming up with the little horse.

The entire process is blogged at  Mot's Blog

There is also a photo journal of the build at my  Rocking Horse Build picasaweb album.

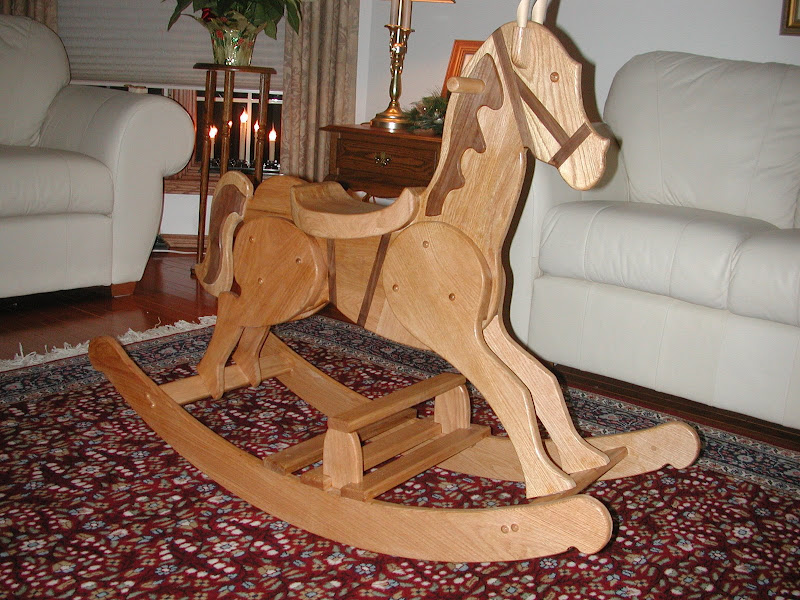
Here's the finished project.

DSCN4513.JPG


DSCN4514.JPG


Cheers!
 
mot,
Excellent work, man!  The "little guy" is going to have a lot of fun, and I am sure you'll be proud to know it was your creativity that made it possible.
You really got a lot of life-like details in there, creating a sense of pride and motion in the horse's body and head.
Thanks for sharing.
Matthew
 
Beauty, Mot!  Let's race!  My granddaughter's Domino is essentially my first project - took a "tad" longer. 
[attachimg=#]
Used MFT 1080, TS 55EQ, Domino, Rotex 150, CT 33, blood, sweat, tears
 
Hey Knothead, that came out great!  I thought about the fuzzy mane, but my son is 2 and it would get trashed.  I went with flush plugs anywhere little feet would go, but essentially these are identical.  How did you like the plan?  I found a few things to be a little vague.  I could have cut the rockers a lot faster had I not tried to figure out what he was saying.  Other than that, I'm pleased with the plan purchase. 

Thanks for the comments, Matt!  It was a fun build.  As you can see from Knothead's, we both appeared to have followed the plan pretty closely.
 
Mot, if the horse survived the ordeal, arrived under the tree on time, and the client is satisfied, the plan has to be good. 

In my mind, the fuzzy mane and tail are the weakest elements, but little girls love fuzzy stuff, and her mom has the leftover yarn and a lesson in how to tie the secret knot.

I found lots of vague - - bought the video tape which was produced in '88, and exchanged a couple emails with the guy who apparently mass manufactured and placed model ponies in ww stores around the country.  I considered flush plugs but was a little fearful of leaving too little wood behind.  As a consequence, I encountered a "design problem" when trying to mount the booster step - -the risers wanted to rest on the buttons.  Oops.  As I indicated, this was just about my first serious project, and definitely my very first with hardwood.  Who knew?  Fix implemented before Tuesday.  Happy 3 year old granddaughter had no trouble; she didn't need the operator manual. ;
 
I've been watching the construction progress over on LumberJocks, and you've inspired me that once we get moved in to the new place I need to make another one.

My first one had a fuzzy mane, and I'd like to do the next one with the wood details for all the reasons listed.
 
I was just looking at your horse, Dan.  That was brave using fir.  I thought about it, but I have a swack of red oak on the shelf and figured to use it.  I really like the way the amber shellac looks on red oak as well, so....

This plan wasn't easy to build, but it was fine.  There were a couple of things about this build that were challenging, because they were the first time I'd tried anything like it before.  Namely the seat.  It's cut out much like a cabriole leg, by making two profile cuts, then taping the block back together, rotating it 90 degrees and making the third profile cut.  Not hard or time consuming...just have never done it before so it's like hitting a new driver at the driving range....you're not quite sure where it's going to go.

Other than that, the handiest tool to use was the MFT1080 as it provided excellent clamping for the odd shaped legs to allow for sanding the wedges for the leg splay.  The ETS provided a super smooth finish.  The TS55 was fantastic at cutting the tapers on the panels...almost indispensable for that reason alone.  The Domino was an unnecessary luxury on this project, just being used to align the panels for glue up.
 
Back
Top