Hello,
I have got a small room for working with handtools in the house. For all the dusty work with machines, I use the garage.
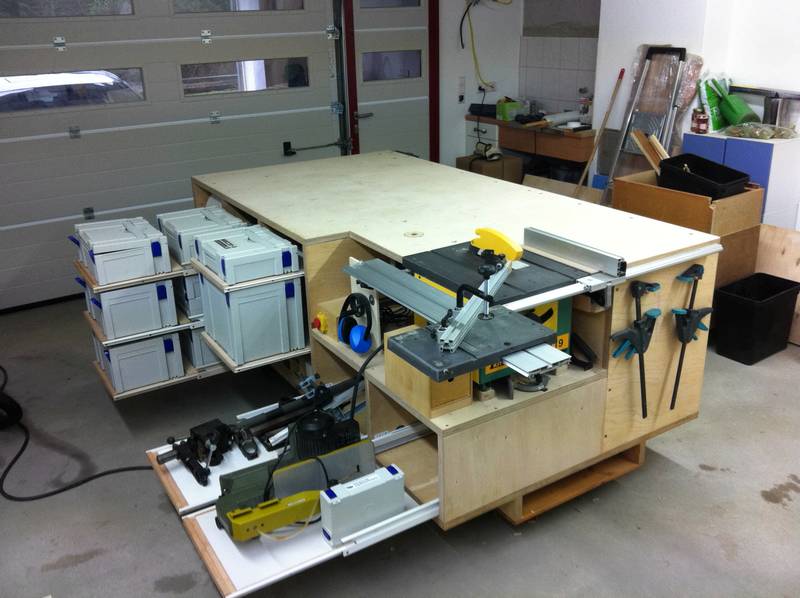
And for that garage I builded a workbench. I have incorporated a circular saw, a stationary router and a lot of storage space for Systainer. So all my machines are good accessible. The bench has got wheels so that I can push it to the sidewall. It is enough room for the car then and it looks tidy.
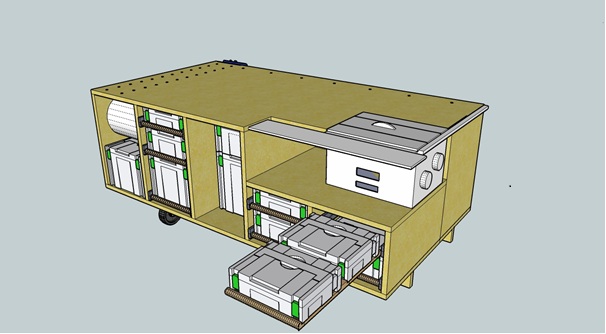
I planned the project with SkechUp.
Characteristics:
Material list:
Costs
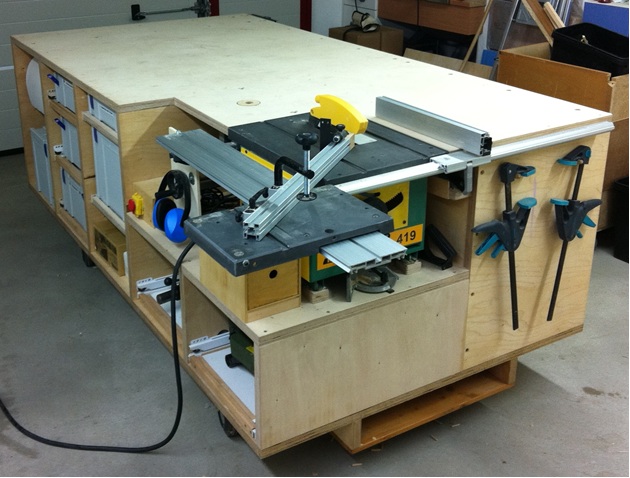
Here is the result:
The Base
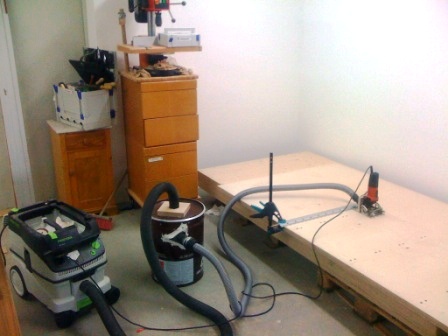
The plates I have cut with the circular saw and guide rail.
The connections are made with wooden dowels. For this I used the Mafell DuoDowel.
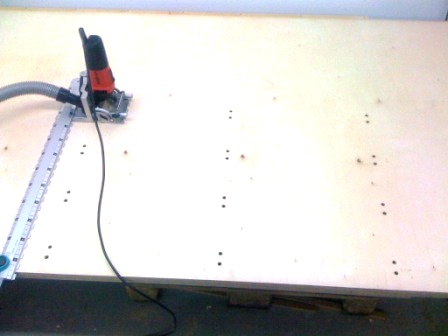
After seeing the examples by Roland Heilmann, I finally understood how to use the dowel template of DuoDowel.
90 holes in 45 minutes and with 12 measuring points on the surface.
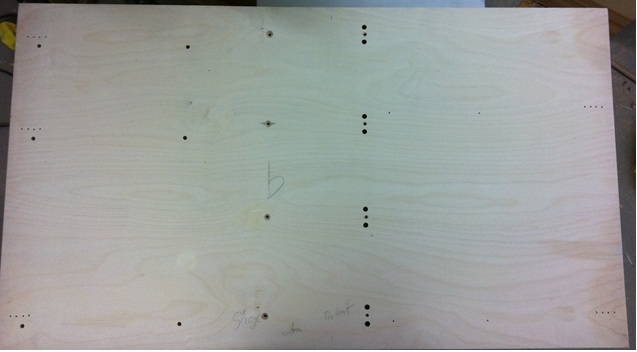
And here I start with the first intermediate wall – with no marking.
Logically, I drilled the holes for the drawer extracts before the assembly. Thus, then 46 holes in a board.
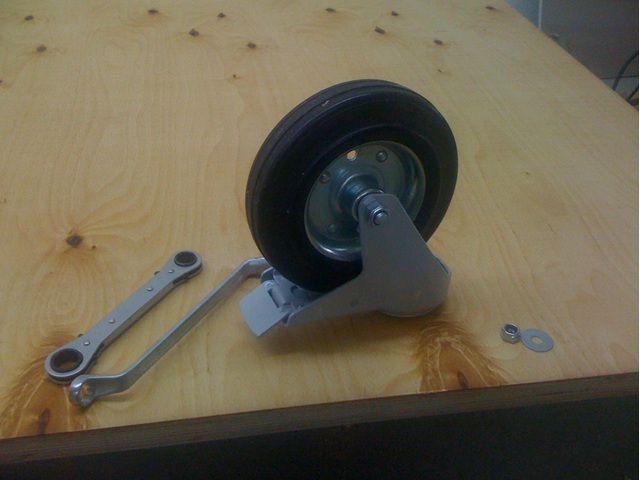
But finally I was able to start assembly. I started by mounting the wheels and the longitudinal bars under the bottom plate:
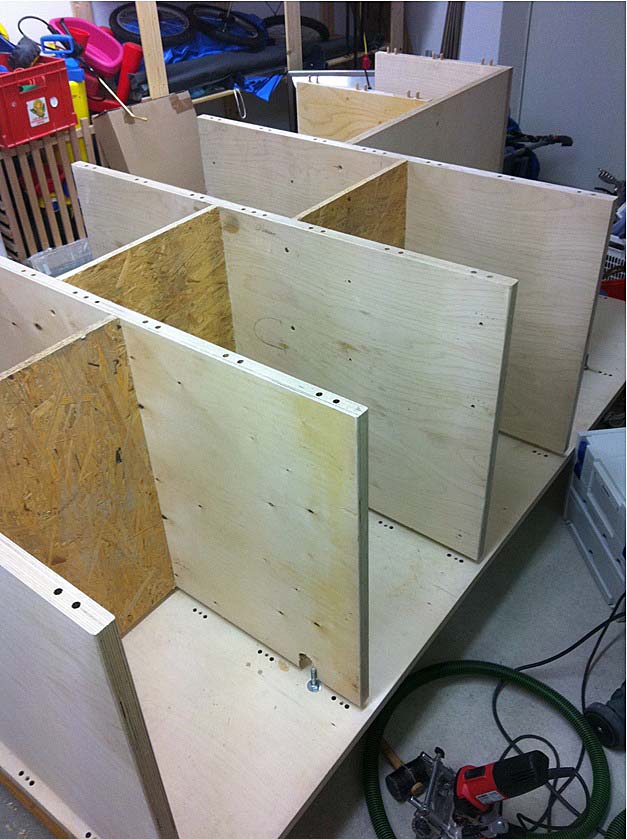
The project is taking shape:

I started to get nervous. [unsure] Will fit all? Have I not made a little too much? But then all the walls were bolted together. Phew!
But the tension wasn’t over yet! ??? OK, the walls fit. But was my work also accurate enough that the walls are exactly over the 72 dowel holes in the bottom plate?
Yes! [big grin] With a heavy hammer from above and the attractive effect of Spax screws from the bottom all the plugs went into their holes. To screw I put the bench on its side. That was probably the last time I saw the bottom.
Setting up the work surface was no longer difficult. But first I had space for the saw to cut and drill the hole for the router.
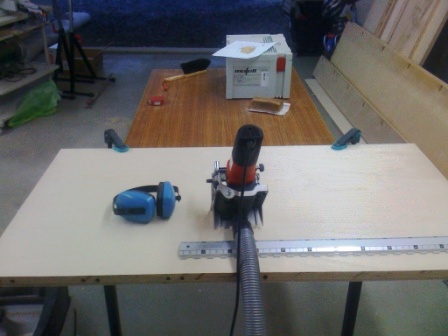
The Router
My old table saw has robbed me of my index finger tip and some nerve. Therefore, it was a pleasure for me to discard it. The height adjustment and the safety switch I wanted to use for a router table.
SYSTAINER drawers
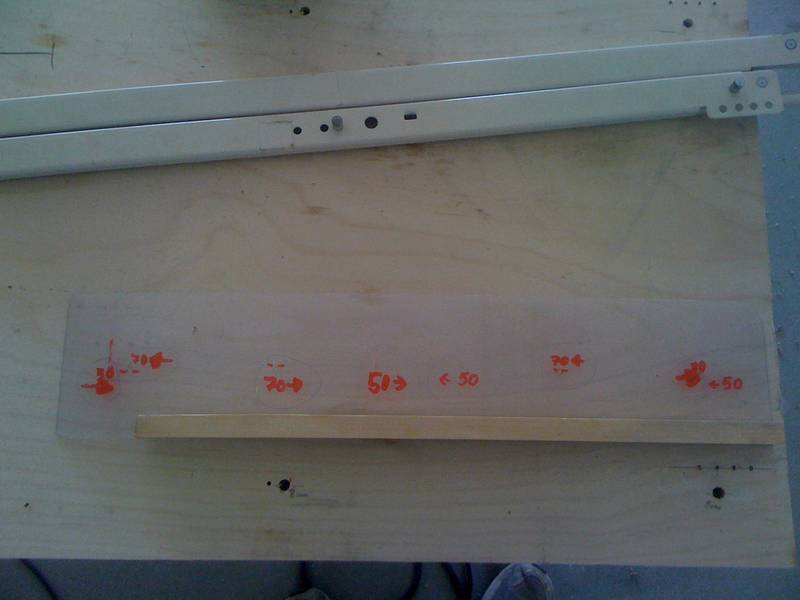
For the mark of the holes on the side walls I’ve made a template out of plexiglass:
It I was surprised how many single wood for the drawers are needed. The good thing is that now there is room in the residual wood shelf again.

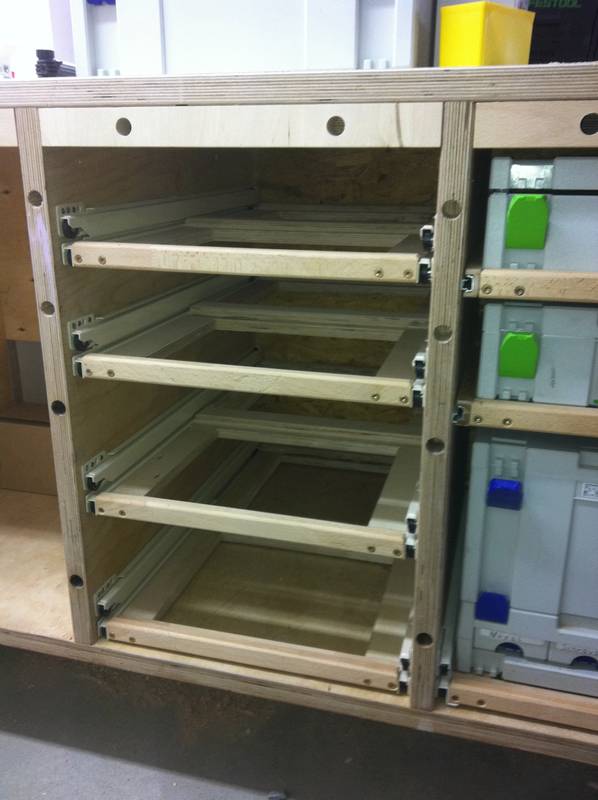
Another compartment is ready:
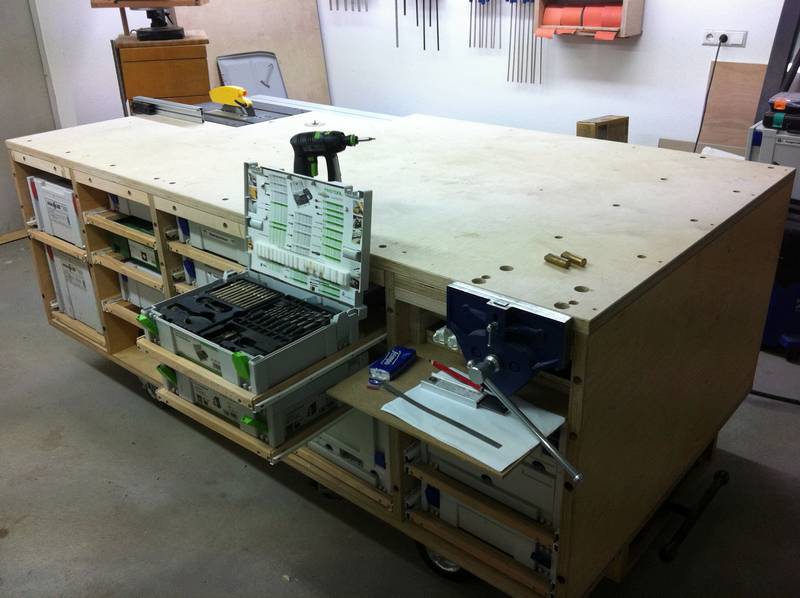
Here we see the working side moved out completely. The table does not wobble at all.
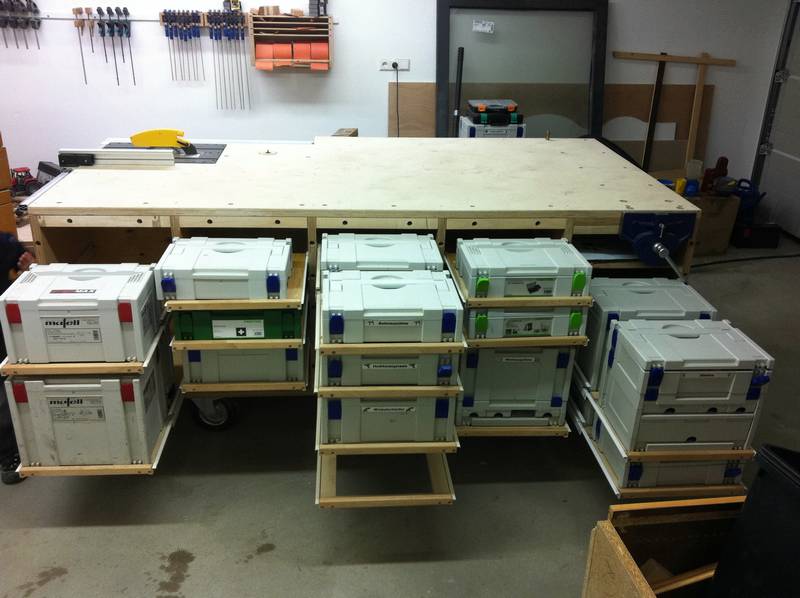
And here is the other side is extended:
Also the rear Systainer are in full access:
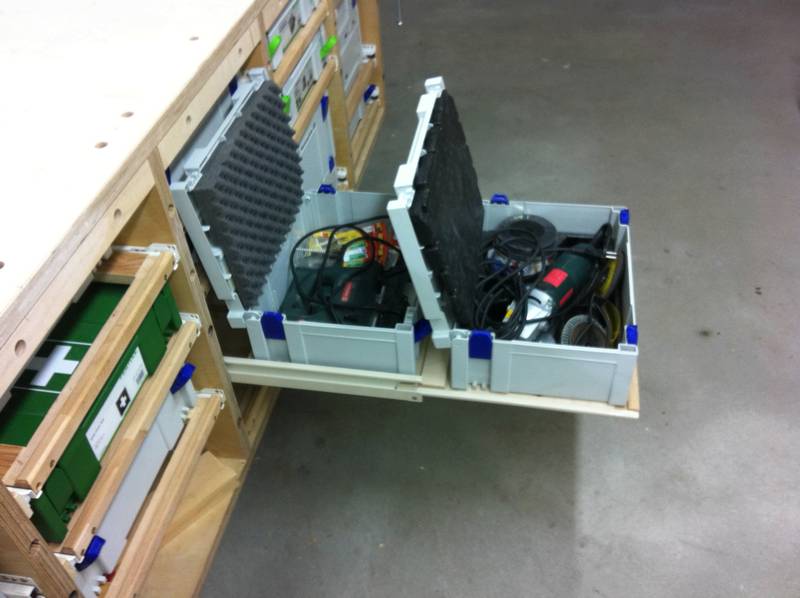
In addition to the vise handtools, cordless screwdrivers and bits are located. The drawer with the bits opens most often:
Thanks for looking. I hope someone else can learn form me as I learnd form others on the internet. [wink]
Arnd
I have got a small room for working with handtools in the house. For all the dusty work with machines, I use the garage.
And for that garage I builded a workbench. I have incorporated a circular saw, a stationary router and a lot of storage space for Systainer. So all my machines are good accessible. The bench has got wheels so that I can push it to the sidewall. It is enough room for the car then and it looks tidy.
I planned the project with SkechUp.
Characteristics:
- Size: 248 cm x 125 cm Table height: 100 cm
- 19 drawers for 29 Systainer
- Carpenters Vise No. 53ED
- 25 holes for the Veritas clamping elements
Material list:
- about 4 plywood sheets 30×250 x 125 (gross € 26.24 / m²)
- various pieces of scrap wood
- 250 screws 5×80
- several other screws
- 300 wooden dowels
- joinery vise. 53ED (134 € http://www.feinewerkzeuge.de/schraub.htm)
- 4 x heavy duty wheels (used for 75 €)
- 19 x full extension drawer (some for free from old desks (value: about 300 €), some drawer slides from ebay (50 €))
- router fence (€ 100)
Costs
- Material costs over all: 800 €
- Time: 75 h
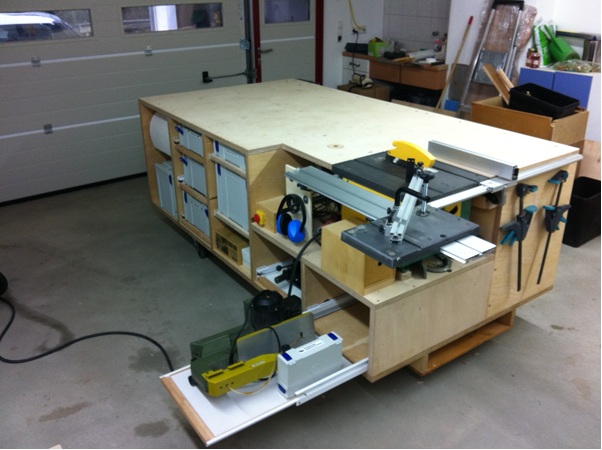
Here is the result:
The Base
The plates I have cut with the circular saw and guide rail.
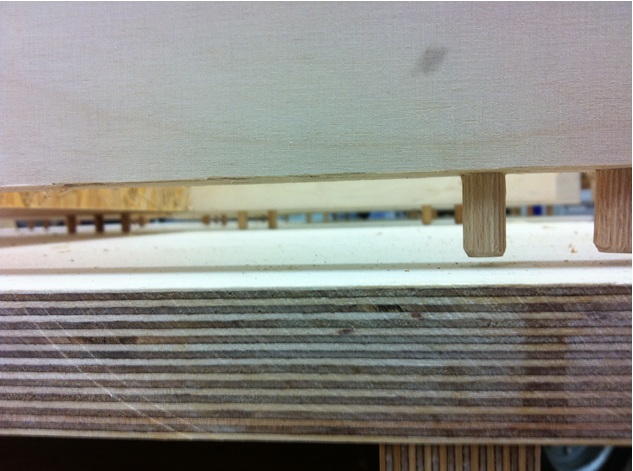
The connections are made with wooden dowels. For this I used the Mafell DuoDowel.
After seeing the examples by Roland Heilmann, I finally understood how to use the dowel template of DuoDowel.
90 holes in 45 minutes and with 12 measuring points on the surface.
And here I start with the first intermediate wall – with no marking.
Logically, I drilled the holes for the drawer extracts before the assembly. Thus, then 46 holes in a board.
But finally I was able to start assembly. I started by mounting the wheels and the longitudinal bars under the bottom plate:
The project is taking shape:
I started to get nervous. [unsure] Will fit all? Have I not made a little too much? But then all the walls were bolted together. Phew!
But the tension wasn’t over yet! ??? OK, the walls fit. But was my work also accurate enough that the walls are exactly over the 72 dowel holes in the bottom plate?
Yes! [big grin] With a heavy hammer from above and the attractive effect of Spax screws from the bottom all the plugs went into their holes. To screw I put the bench on its side. That was probably the last time I saw the bottom.
Setting up the work surface was no longer difficult. But first I had space for the saw to cut and drill the hole for the router.
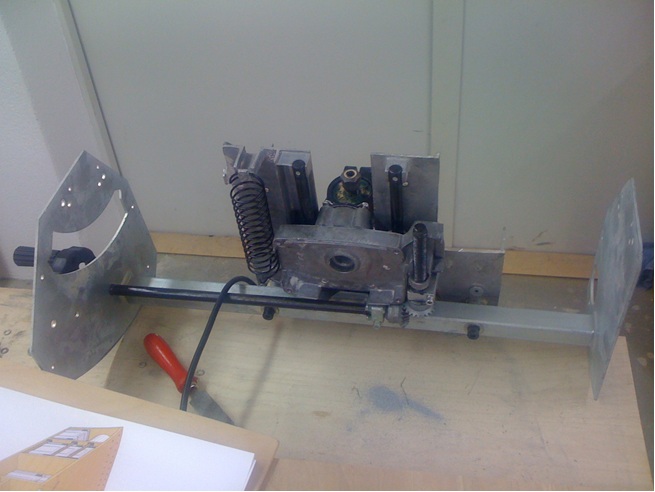
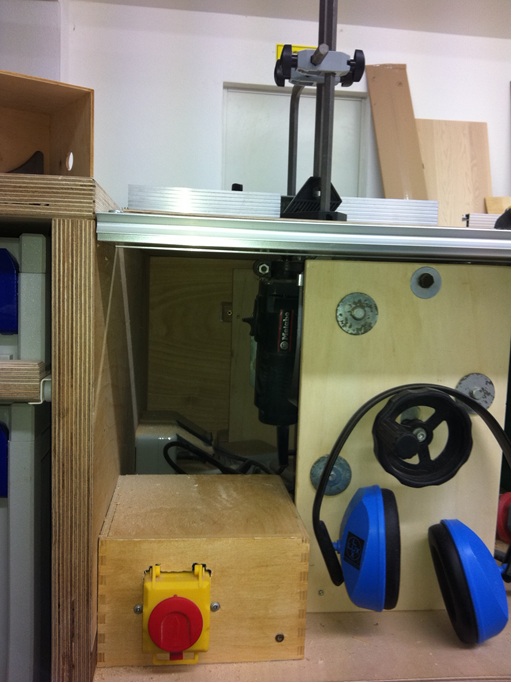
The Router
My old table saw has robbed me of my index finger tip and some nerve. Therefore, it was a pleasure for me to discard it. The height adjustment and the safety switch I wanted to use for a router table.
SYSTAINER drawers
For the mark of the holes on the side walls I’ve made a template out of plexiglass:
It I was surprised how many single wood for the drawers are needed. The good thing is that now there is room in the residual wood shelf again.
Another compartment is ready:
Here we see the working side moved out completely. The table does not wobble at all.
And here is the other side is extended:
Also the rear Systainer are in full access:
In addition to the vise handtools, cordless screwdrivers and bits are located. The drawer with the bits opens most often:
Thanks for looking. I hope someone else can learn form me as I learnd form others on the internet. [wink]
Arnd