Ron Paulk workbench for assembly and glue-ups

MetalDemigod

Member
Joined
Oct 26, 2014
Messages
29
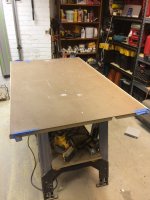
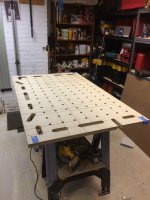
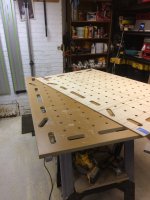
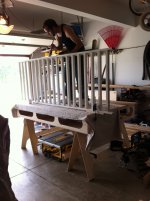
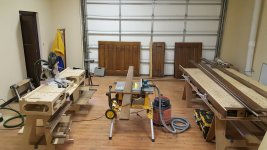
Without getting too much into my workflow, and my tool list of have an have-nots, I would like to point out the reason I ask this question but make it briefly as possible.  I feel my shop is finally closing in on the stage that I can begin to call it a shop (insert fireworks here).  Some of the next additions to the shop that I think will make the biggest difference or some of those you just can't buy, Flip carts,  chaos cabinets, MFT carf i.e.  A few on my mind for the near future.  I have determined that a  purposed location for glue ups and assembly would probably be the most beneficial.  I'm tired of bending down the garage floor, and producing substandard work as a result of not having a flat work surface to assemble.  So my question is; given the info presented would the Ron Paulk workbench be a good solution for glue ups and assembly, while also providing a great service for breaking down she be a good solution for glue ups and assembly, while also providing a great service for breaking down sheet goods.  Or is this  workbench really not designed for that and maybe I should build a dedicated assembly table?  Thanks for your experience and opinions and event experience and opinions in advance.
Ps.  I do on an MFT/3  but I can't imagine many of you are using it for glue intensive assemblies?
 
Once you glue and clamp a significant piece .. it tends to stay there. If you're assembly table is also your sheet goods cut up table you may get a bit frustrated.

I personally don't like kerfs in my assembly space.

I haven't solved this problem .. in the near future I want to start working pieces that are 4 metres (13') long, so I'm going to be interested in comments here.

I think the RP bench is a reasonable concept for a moveable bench that's light and can be transported site to site. If it's to be workshop bound I don't think you can beat the biggest rolling table you can fit.
 
I always cut my sheet good on a piece of garage door insulation. Been using the same piece for years and would stop now even if it's on bench so kerf marks should not be an issue. Additionally when feasible I would use brown butcher paper under all my glue-ups. But glue is glue... I'm sure the chosen surface will get glue on it here and there. When it comes to a non messy glue up, try-fail-clean-repair-repeat.
 
The material is called expanded polystyrene foam board insulation, comes in 4x8 sheets and run about 15 bucks for a 1.5" thick piece. Any big box home stir will have it.
 

Attachments

  • image.jpeg
    image.jpeg
    39.9 KB · Views: 1,543
I'm in the process of designing my own MFT style top and I am also thinking it will be my assembly area as I don't have much space. I just thought I'd stick a piece of ply on top of my MFT Style top and then glue etc doesn't matter. That's just my idea, happy to have it criticised! :-)
 
DiscoStu said:
I'm in the process of designing my own MFT style top and I am also thinking it will be my assembly area as I don't have much space. I just thought I'd stick a piece of ply on top of my MFT Style top and then glue etc doesn't matter. That's just my idea, happy to have it criticised! :-)

I use a roll of waxed paper... And tear off what I need. The last thing I need another piece of wood to get bonded on accidentally, may be warped, and in the way most of the time.

I also linseed oiled the the top of the MFT, and then recalled back to earlier times and give the holes some linseed via the index finger. Those holes are tight with large forepaws. [tongue]
 
I'm hoping to finish the walls in my shop this weekend.  I have all the insulation up and only one more piece of waferboard to cut to size and install.  I also need to paint the section I smeared drywall compound in and then skim coat the last 3 sheets - so I have a little more work to do.  But sometime in the next week I should be done. 

My next project will either be an extension to my RAS/CMS bench or a 3 by 7 foot rolling workbench with a Ron Paulk style top.  I am leaning towards the rolling workbench.  It will have tool storage below and a removable Paulk top.  I will probably make it of 3/4 plywood for extra strength and durability.  I will make Ron's crosscut jig for it too.  I'm using a lattice of 1x4s on sawhorses at the moment so the bench would be a nice improvement.  I don't see any issue with using the same bench for assembly and cutting up sheet goods.  I used to do it on a much simpler workbench in my old shop.  In that case I had a top of 3/4 plywood topped with 1/4 luan and rimmed by hardwood.  The idea was the luan would be replaced but I never did it.  I got glue an a lot of other things on it but it still worked fine.

A top with correctly spaced holes can have a right angle jig on top to help with assembly.  It should make a great assembly table.

Ron Paulk uses 3/4 plywood strips on top of his workbench so he doesn't cut into it.  It is screwed together so if you cut into it very far you would hit a screw - hard on blades. 
 
I have an aftermarket 3'x5' MFT Made by a local CNC equipt shop. I use a spoil board of 1/4" mdf that is machined the same as the 1" mdf 3'x5' MFT to avoid kerfs.
For glue ups, painting or other messy operations, I have a couple 1/8" hardboard 3'x5' tops to protect the MFT top.  They easily store on the rolling plywood rack or I lean them against open shelving to help keep dust from covering all my stuff.
 
There is an article I found on the web that talks about using butcher paper on his MFT when he is doing glueup.  He has a big roll and just tears off a piece.  I haven't done it yet but it seems like a good idea.  The title of the article is something like "getting the most out of your mft".  He has several good ideas, including a right angle jig. 
 
I built the Paulk workbench with a minor change to it. Instead of 8' long I made it 6' and changed the thickness to 8" to allow more space to store stuff. When I break down my ply wood I use the pink foam board too. It's still 8' long and just hangs over the length of the bench by one foot on each side. I cut the foam board sheet in half (2'x8') to make it easier to store when not in use. Also 1/2" plywood is plenty strong, I thought about making it out of 3/4" ply but so far I haven't seen any issues. I use this bench to break down ply wood, it's my assembly table and I've even used it to stain my rails. Good design and investment.
 

Attachments

  • IMG_1378.JPG
    IMG_1378.JPG
    1.5 MB · Views: 1,944
Mine is done too, 3 feet by 7 feet.  I modified and built one of Ron's crosscut jigs too.  Works great.  I put scrap plywood on top when cutting but made one minor ding anyway (cutting 5mm luan).
 

Attachments

  • Paulk inspired workbench.JPG
    Paulk inspired workbench.JPG
    242.9 KB · Views: 10,062
Here's my setup it's my portable workshop.
I am going to build a second table for just that reason but a lot of the time there isn't enough space for 2 work tables.
So I will process sheet goods and than switch over to assembly in which case I either lay cardboard down or 2" ridged foam
 

Attachments

  • 20160113_141441.jpg
    20160113_141441.jpg
    4.3 MB · Views: 4,225
Back
Top