Routing a dado in an exterior door bottom

JHZR2

Member
Joined
Oct 22, 2016
Messages
28
Basis is really both jobs shown here:
https://www.thisoldhouse.com/how-to/how-to-make-your-doors-draft-free-weatherstripping

I'd love to rout the corner to add a weather strip, but I think I need to bite the bullet for that little $360 corner router... Suggestions welcome though...

My main interest is the dado for the door bottom to install a weather strip underneath.

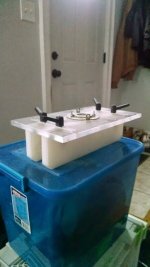
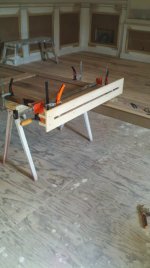
I have a Bosch 1617 router and a table. I have no guides or jigs at all.  I only have some basic bits to round over edges.

I've also wanted a domino and maybe an OF 1400 or 2200 for a while.

I often laugh at folks who say to spend money on Festool because it's a system, but this may be a case where it's true.  Is there some Festool element that would make this easily set up and foolproof?

The domino seems like a good bet actually... I've wanted one... I could set it up and just keep cutting side to side.  Slow, but definite.

Or is there a really slick way to set up a Festool router, maybe on a track or something? 

This would be done to my three exterior entry doors, all very old and of unique, large size, so there is no room for error...

Thanks for any ideas!
 
A rabbeting bit with different size bearings would probably do this best. Score your cut on the ends to minimize tearout (if it is full width of door), take the material out in a series of passes. There are ways of doing it with regular bits and an edge guide, but those involve holding your router horizontal or putting the door vertical.

At least, that's what screams out at me with my lack of sleep.
 
The article talks of using an edge guide, I don't see why that wouldn't work if you can get that for your current router.
 
The Plexiglas router guide wad made for this application. Expensive jig, but it works really well for the purpose.
 
Ron - does that accessory allow you to set the router deep enough to cut a slot in the door edge, or is it only deep enough to use as a trimmer?

The plexiglass guide mentioned above is this one: Routing Aid

It is pretty expensive but it is designed for exactly what you describe, quote 'Used, for example, for the reliable milling of automatic door seals'.

A cheaper way of routing on a narrow edge, for door hinges, locks etc, is to get a second parallel edge guide.  Paul explains it here from time 3:33
 
JHZR2 said:
This would be done to my three exterior entry doors, all very old and of unique, large size, so there is no room for error...
Why do things the hard way?  Routing a dado in the bottom of the door only opens the core of the door to the possibility of water and rot.  How many people think to pull their doors off and paint the bottom edge and seal it on a regular basis?  Or check their seals for degradation and wear?

Raven make a threshold seal like the RP78SI that will do what you need simply.  If you wanted to have the seal retract, then there is the option of RP87HSI that operates on the door jamb when you close the door.  Either option is surface mounted.  If you really want to mortise the seal into the bottom of the door, then take the door off and cut a rabbit in the bottom of the door and fit your seal in that way.  You can do that with a circular saw and a chisel.  Just remember this, the bottom of any door is the most likely place where a door will rot.  Seal it, or loose it.  If it is protected by a porch or other covering, then it will last longer.  Look at any weathered door not protected by sealing of some type, and the greatest wear and tear is always at the bottom.  Making a place for water to gather and be trapped is hastening the process.  Capillary water movement is a funny think to watch.  There are minute pressure differences on both sides of a seal and I have seen water move over a bad dado and seal installation.

BTW, the easiest way to dado the bottom of the door if that is the way you want to go is to build a jig.  You say you have three doors.  Construct a captured router base jig and make a "L" and "Z" mounting bracket to mount the jig to the bottom of your door laid on a couple of saw horses.  Sit on a chair facing the bottom edge of your door and cut your dado in progressively deeper passes until you achieve the desired depth for your track and seal assembly.  I have a jig that does doors from 700mm to 1500mm.  I mount the jig to the door with two clamps at either end of the bottom of the door and the router base guide is attached using a moveable fence bracket.  This permits me to cut the dado in any position.  If you are unsure of your stability, then you could make a "C" runner on both sides of your router base that will keep your router locked into your guide.

I am sure there are other manufacturers that would have something suitable.  BTW, I fit commercial door hardware as part of my skill set, so I do these on a regular basis.
 
The company that makes the silibead is Resource Conservation Technology and they offer a kerf in sweep for the bottom of the door that only requires a 1/8" or 4mm kerf (I don't remember which one off the top of my head). They also offer a smaller aluminum extrusion that works with this type of seal to make the kerf more durable.  I epoxy the aluminum into the door bottom so it'll be well sealed. Sleds like the one Festool offers are easily made.  I made mine for under $60 in plexi,uhmw and some knock down furniture fittings.  The can be made for any router.  Just about every carpenter I came up around had one made up for grooving and rerailing/restiling doors.

The weatherstripping router is the easiest way of groove the jamb stops but there are weatherstripping had saws designed for brass/bronze interlock that will cut the groove just with more sweat involved.  The saw is #205 in the link.http://metalstrips.accurateweatherstrip.com/viewitems/all-categories/tools?  You will like have to adjust the set on the teeth of the saw to cut a larger kerf.  I have a Pemko that I set to cut just undr a 1/8" kerf.
 

Attachments

  • sled.jpg
    sled.jpg
    46.4 KB · Views: 665
I did something similar when I replaced my front door, neither I or Mrs wanted an added sweep on the face of the door. To cut the dado I used a piloted slot cutting bit with the door horizontal on saw horses and the router running along the face of the door.
It wasn't difficult, just take shallow cuts and work carefully, there is a lot of metal spinning close to you-know-where. [wink]

 
waho6o9 said:
[attachimg=1]

^We have a winner.^

I used a table saw and the door was upright with a box section clamped to it for stability and to keep it straight.
That was for an interior door, with a fancy drop down sound seal.

I had the fence so that I was cutting the far side and if it moved away from the fence, then it would skinny rather than wide. And the door was a long ways up.

It was a bit of a mongrel, but it worked. I cleaned it out with a chisel.

The Raven stuff it not elegant, but it is easy. One needs to occasionally pull the rubber back into place every month or two.
 
Holmz said:
The Raven stuff it not elegant, but it is easy. One needs to occasionally pull the rubber back into place every month or two.
Each end of the Raven track groove can be pinched - this keeps the rubber insert in place.
 
Instead of a sled a long template can also be used. This one was for a Pemko auto bottom.  Required a 9/16" wide mortise so the pocket was 11/16" wide and I used a 1/2" straight bit with a 5/8" template guide in a plunge router.
 

Attachments

  • door dado template.jpg
    door dado template.jpg
    52.7 KB · Views: 1,343
geoffshep said:
Ron - does that accessory allow you to set the router deep enough to cut a slot in the door edge, or is it only deep enough to use as a trimmer?

The plexiglass guide mentioned above is this one: Routing Aid

It is pretty expensive but it is designed for exactly what you describe, quote 'Used, for example, for the reliable milling of automatic door seals'.

A cheaper way of routing on a narrow edge, for door hinges, locks etc, is to get a second parallel edge guide.  Paul explains it here from time 3:33


I can't say 100% but looking at mine and it should work.
 
Back
Top