mattbyington
Member
- Joined
- Mar 11, 2018
- Messages
- 796
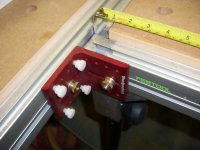
Hi team,
I've got 2 MFT/3 tables aligned as you see in the picture. I purchased 2 table connectors since I wasn't sure if I was going to go end-to-end the long way (which both would have of course worked for) or the way you see the in the picture.
I'm going to see how it works out with the way you see in the picture.
Anyone ever figure out an easy way to attach the back side of the tables where the connector won't work?
Thanks!
Matt
[attachimg=1]
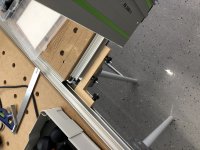