Howad
Member
- Joined
- Mar 14, 2013
- Messages
- 33
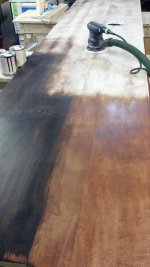
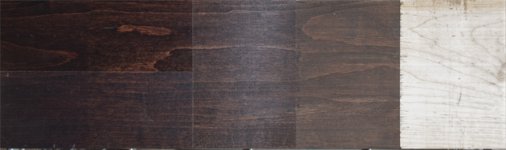
I'm reaching out for help with finishing a large (10' x 2') maple counter top. The wood is not really "pretty" - it is 1x boards pulled off the rack from HD. I'm trying to get a nice dark color using General Finishes water based dye (vintage cherry) and then stain (espresso). Then I was going to finish it off with GF poly acrylic.
My main problems have been splotchy dye (even though I used pre-stain) and inconsistent coverage of stain on the large surface. My observations so far are that the dye wipes on fine each time but may reveal problems with the prestain or insufficient sanding. Stain is always problematic to apply.
I have attempted the finishing schedule 4 times but have never got as far as the clear coat yet. Here is what I've done so far:
First attempt:
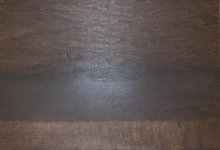
did not use pre-stain, Splotchy dye, uneven stain plus too dark/thick (see attached pic)
Second attempt:
wiped on General Finishes pre-stain. Working with a friend we sprayed then wiped dye. uneven results that I attribute to uneven pre-stain application. Sanded back to bare wood.
Third attempt:
sprayed pre-stain then wiped off. Sprayed, then wiped dye. At this point it was looking really good. Working with a friend we applied and frantically wiped down the stain using a spray bottle of water to keep the stain liquid long enough to get a pretty consistent layer. Except, one spot near the center of the counter was too light and we attempted to touch it up but couldn't get it right. In desperation (after my friend left) I attempted to wet down the whole counter and re-wipe but either because of lack of technique or because there was only one person and I couldn't wet and wipe fast enough, could not improve the finish - going downhill. I even tried again the next day after a good nights sleep but to no avail. Back to bare wood :-(
Fourth attempt:
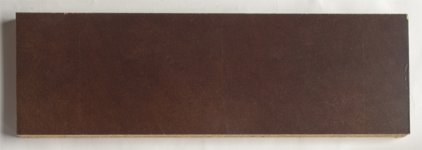
Applied (not sprayed) pre-stain. Sprayed/wiped dye. This time I got uneven spots with the dye coat. not sure if it was poor application of pre-stain or artifacts from previous attempts and not sanding deep enough. Applied oil-based stain anyway. the oil-based seems to be more forgiving to apply but I don't seem to get nearly as dark a staining.
sorry but I don't have pics of any except the first go at this.
I am now questioning the entire process and don't know where to make adjustments or to just blindly try again. Any suggestions would be appreciated.
My main problems have been splotchy dye (even though I used pre-stain) and inconsistent coverage of stain on the large surface. My observations so far are that the dye wipes on fine each time but may reveal problems with the prestain or insufficient sanding. Stain is always problematic to apply.
I have attempted the finishing schedule 4 times but have never got as far as the clear coat yet. Here is what I've done so far:
First attempt:
did not use pre-stain, Splotchy dye, uneven stain plus too dark/thick (see attached pic)
Second attempt:
wiped on General Finishes pre-stain. Working with a friend we sprayed then wiped dye. uneven results that I attribute to uneven pre-stain application. Sanded back to bare wood.
Third attempt:
sprayed pre-stain then wiped off. Sprayed, then wiped dye. At this point it was looking really good. Working with a friend we applied and frantically wiped down the stain using a spray bottle of water to keep the stain liquid long enough to get a pretty consistent layer. Except, one spot near the center of the counter was too light and we attempted to touch it up but couldn't get it right. In desperation (after my friend left) I attempted to wet down the whole counter and re-wipe but either because of lack of technique or because there was only one person and I couldn't wet and wipe fast enough, could not improve the finish - going downhill. I even tried again the next day after a good nights sleep but to no avail. Back to bare wood :-(
Fourth attempt:
Applied (not sprayed) pre-stain. Sprayed/wiped dye. This time I got uneven spots with the dye coat. not sure if it was poor application of pre-stain or artifacts from previous attempts and not sanding deep enough. Applied oil-based stain anyway. the oil-based seems to be more forgiving to apply but I don't seem to get nearly as dark a staining.
sorry but I don't have pics of any except the first go at this.
I am now questioning the entire process and don't know where to make adjustments or to just blindly try again. Any suggestions would be appreciated.