Cheese said:
Crazyraceguy said:
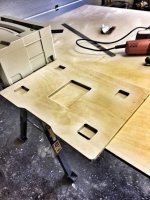
I finally got around to cutting the foot pockets for my Systainer pull-outs. This project has been in the back of my mind since I got the Origin, just never got around to actually doing it.
Nice...I like that. [big grin] What size router bit did you use and I would also be interested in the .SVG file.
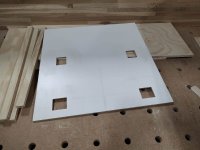
I did, at least partly, use a file from the Shaper hub. I searched "Systainer feet" and found a pattern, done by a user named Nelson. It also included a rectangular pocket, in the front, to use as a pull. Since I have the Oak front edges for a pull, I just didn't cut that section. Curiously though, the SVG shows all of the lines as "guide lines", so you need to change them to get cutting.
The pattern is a nice fit, but you would have to use Origin for every one of them, to do it this way.
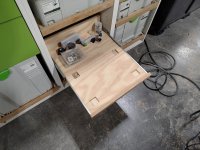
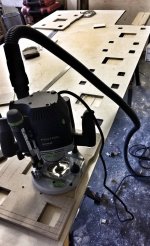
For one or two, ok go for it. For over 20, that's silly, thus the template. One of my semi-permanent router set-ups has a 1/4" up cut bit with a 7/16" bushing. This gives a .093 off-set, so for templates I usually just give it .1 and it works just fine. There is no need for this to be watertight.
It is much faster and so much less wear and tear happens to the Origin this way too.
Richard/RMW said:
CRG this is where Origin really shines in the workshop IMO. It's not necessarily that you use it to DO all the work, it's used to make the thing you need to then easily do the job. I run into this constantly, needing to make the thing needed to make the thing...
Just my dos pesos on the common question of where Origin fits into the shop. And, I'm guessing, you probably didn't need to do any 3rd party software design, just used on-tool design.
RMW
Yes, Richard that is often the case for me. Except for engravings, I have probably made more templates that I have original parts with mine. Maybe not? I have done quite a few box joints with it too.
As I said above, it was a hub project, but if I did do it myself, I would have used Studio. It could be done "on tool" too though, it's not a complex pattern.
One of the guys I worked with years ago often made to comment that I was "in my element" when I "needed a jig to make a jig." I don't think he was aware that
technically something as simple as the rip fence on the table saw would qualify, since jig and fixture are generally used interchangeably. He was right though, either way [big grin]
[member=75780]woodbutcherbower[/member] that's a nice set-up for van shelves. It would keep them from moving around, still be easy to remove, and they would be totally interchangeable too.
I am curious about the rectangular pocket in the middle. What is that for?